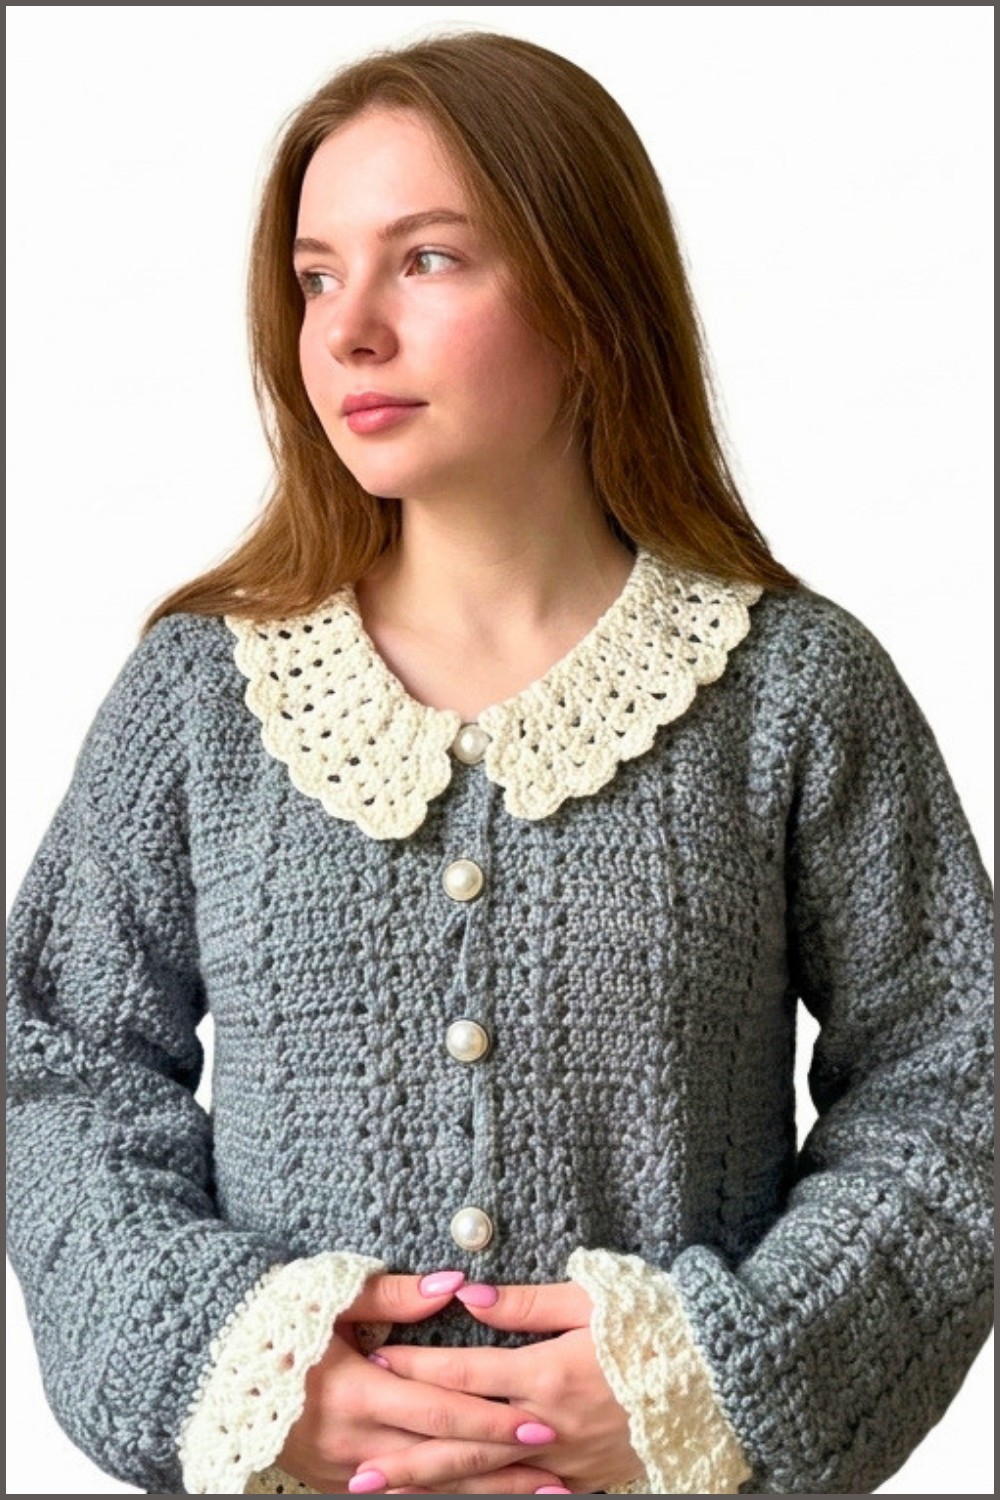
Stitch timeless charm into every loop with a crochet vintage sweater pattern, combining creativity and nostalgia for a cozy, stylish, handmade wardrobe.
Nothing beats the feeling of slipping into a handmade sweater that looks like it stepped out of a vintage photograph yet fits perfectly into today’s wardrobe. A crochet vintage sweater pattern is a playful excuse to mix nostalgic charm with fresh, personal style, turning simple yarn into a cozy, textured statement piece. This project keeps your hands busy and your creativity buzzing as you experiment with classic stitches, delicate details, and maybe even a romantic V-neck or Peter Pan collar.
Crochet Vintage Sweater Free Pattern That’s Sure to Turn Heads
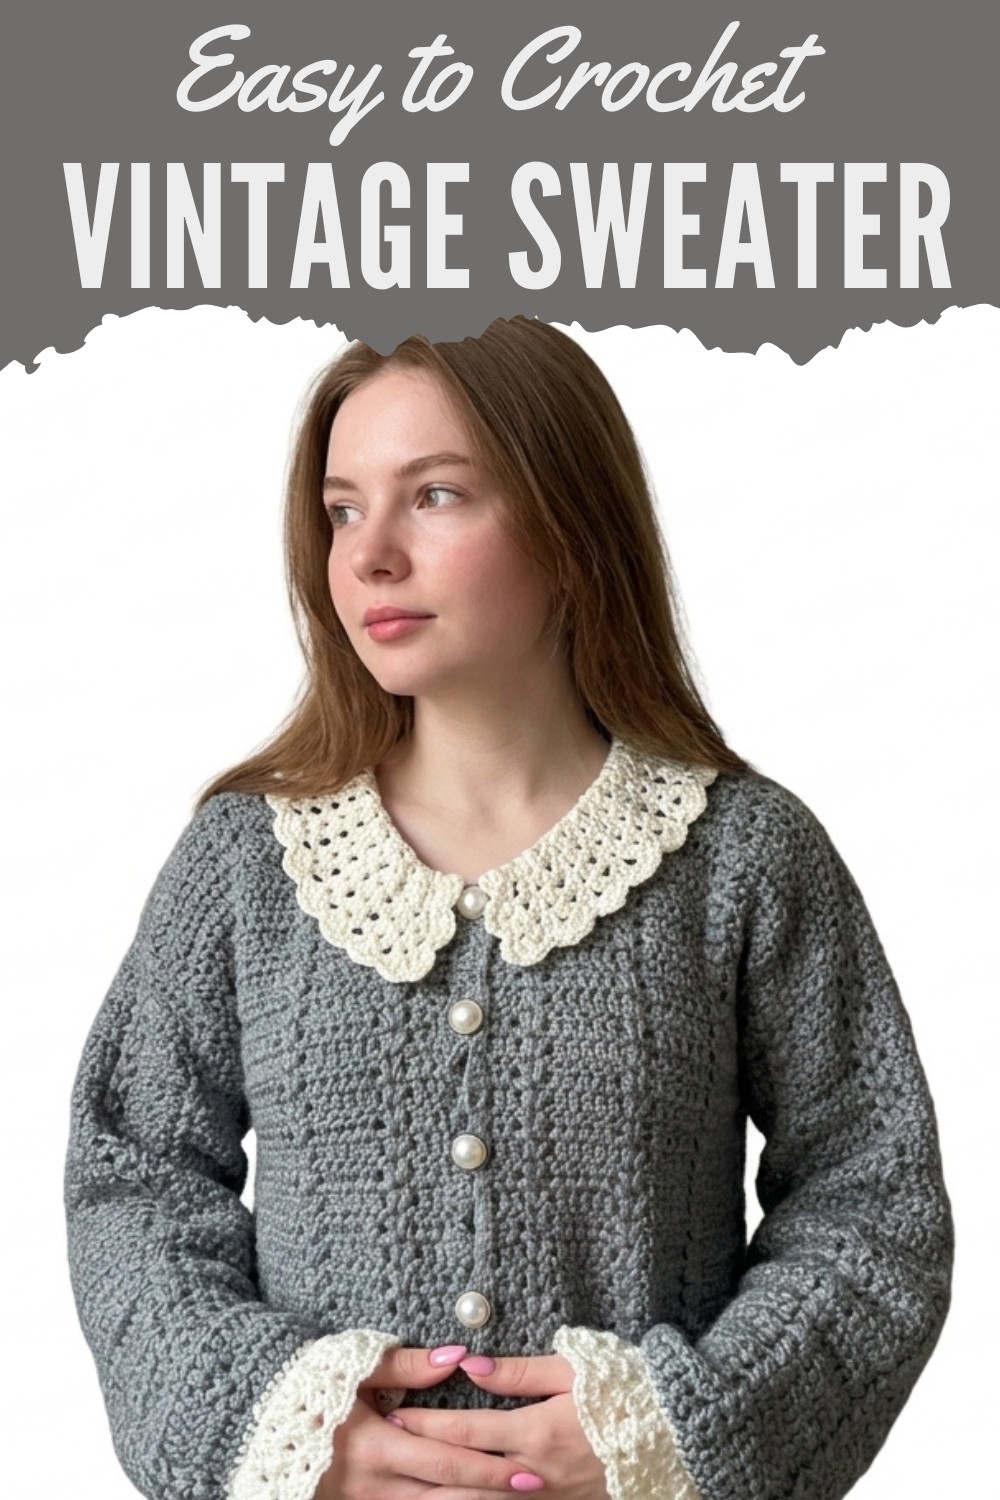
It’s a fun and useful make: warm enough for chilly days, stylish enough to wear on coffee dates, and satisfying enough to become your new favorite “I made this!” piece. You can lean into soft, muted tones for a true old-soul vibe or flip the script with bold, modern colors for a retro-meets-contemporary look. Interesting fact: handmade vintage-style garments often become heirlooms, treasured and worn for years instead of seasons. With every row, you are not only shaping a sweater but crocheting a little slice of history you can actually wear.
Vintage-Inspired Crochet Cardigan Pattern
Materials Needed
- Yarn: Medium-weight acrylic yarn (stretchable recommended, example: Weight 4).
- Hook Sizes:
- Body & Sleeves: 4.5 mm crochet hook.
- Collar: 4 mm crochet hook for sharper details.
- Other Tools:
- Stitch markers.
- Darning needle (for weaving in ends).
- Scissors.
- Measuring tape.
- Buttons (optional, for closure).
Gauge
Ensure gauge is checked before beginning: 66 chains = ~16 inches unstretched, stretches to ~18 inches when worked.
Pattern Sections:
- Back Panel.
- Front Panels.
- Sleeves.
- Collar.
- Button Edging & Finishing.
Step 1: Back Panel
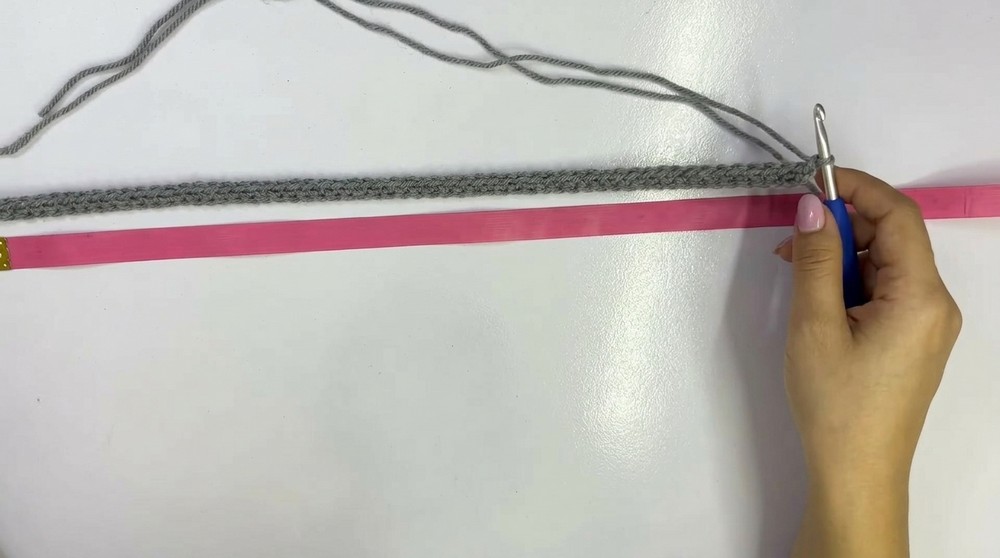
1. Foundation Row
- Begin with a slip knot.
- Crochet 66 chains (or an odd number of chains adjusted to your desired width).
- To account for acrylic yarn stretch, make chains slightly shorter than the final measurement. For example, unstretched chains reach ~16 inches for a desired width of ~18 inches.
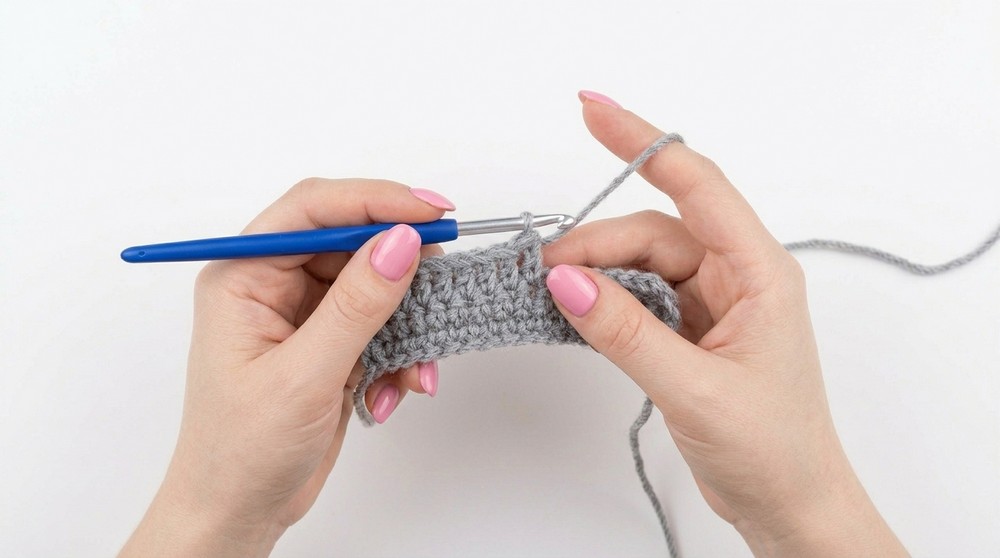
2. Row 1: Double Crochet + Heart Stitch Pattern
- Skip first 2 chains.
- Insert hook into the 3rd chain from the hook and make a double crochet.
- Crochet 4 more double crochets into the next 4 chains for a total of 5 double crochets.
- Chain 1, skip 1 chain, and begin the heart stitch:
- Yarn over, insert hook into the next chain, pull through (leave 3 loops on the hook).
- Yarn over, insert into the same chain, pull through again (leave 5 loops on the hook).
- Pull through all loops on the hook, chain 1.
- Repeat once more in the same chain for the heart stitch.
- Chain 1, skip 1 chain, and make 5 more double crochets.
- Continue this sequence (5 double crochets, chain 1, heart stitch) across the row.
End of Row:
At the last stitch, chain 1, skip 1, and make the final double crochet in the last chain.
3. Rows 2–37: Repeating Rows
- Chain 3 (counts as the first double crochet and chain 1), turn your work.
- Begin the heart stitch in the center of the previous row’s heart stitch.
- Continue alternating 5 double crochet sets and heart stitches for the row.
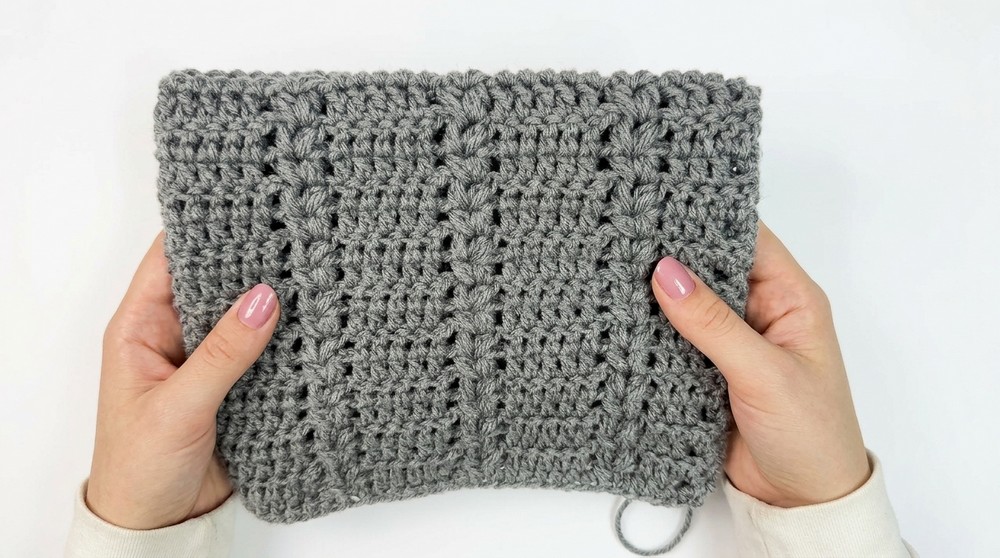
Tip: Repeat until the back panel reaches your desired length (example: 18 inches = 37 rows).
Step 2: Front Panels
1. Left Panel
- Begin with 35 chains.
- Follow the same stitch pattern as the back panel (5 double crochets + heart stitch sequence).
- Work enough rows to match the back panel’s length but leave space for V-neck shaping.
2. Right Panel
- Crochet another 35 chains and repeat the same stitch patterns and rows as the left panel.
3. Creating V-Neck Shaping
Start decreasing in Row 25:
- At the end of the row, leave 2 stitches unworked.
- Use the decrease method:
- Yarn over, insert hook into one stitch, pull through (leave loops on the hook).
- Yarn over again and insert into the next stitch. Pull through all loops on the hook.
- Continue this decrease at the same edge of each row to form the slanted V-neckline.
- Repeat the decrease for the remaining rows until the front panels are complete.
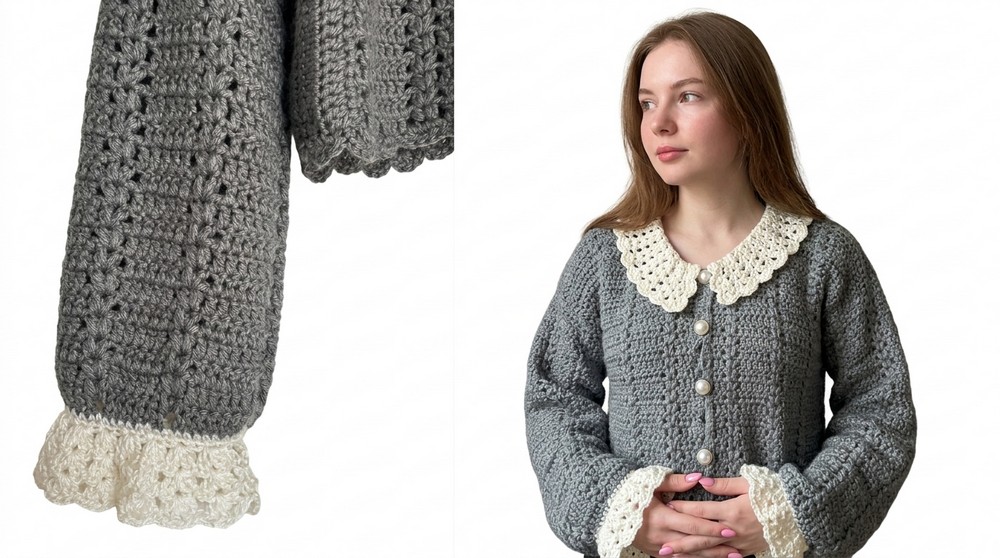
Step 3: Sleeves
1. Measure Arms
Determine sleeve circumference and length. Example: 21 inches in total length, which includes the cuff detail.
2. Foundation Row
- Make chains based on desired circumference (example: ~40 chains).
- Work the double crochet + heart stitch pattern as described in the back panel for the foundation row.
3. Gathered Cuffs
Decreasing stitches near the wrist creates gathers:
- Switch to a contrasting yarn for decoration.
- In the last few rows, decrease stitches evenly.
- Example: Skip every 3rd stitch while working double crochets to create tighter gathers.
- Make 3 rows of V stitch for a soft ruffled edge.
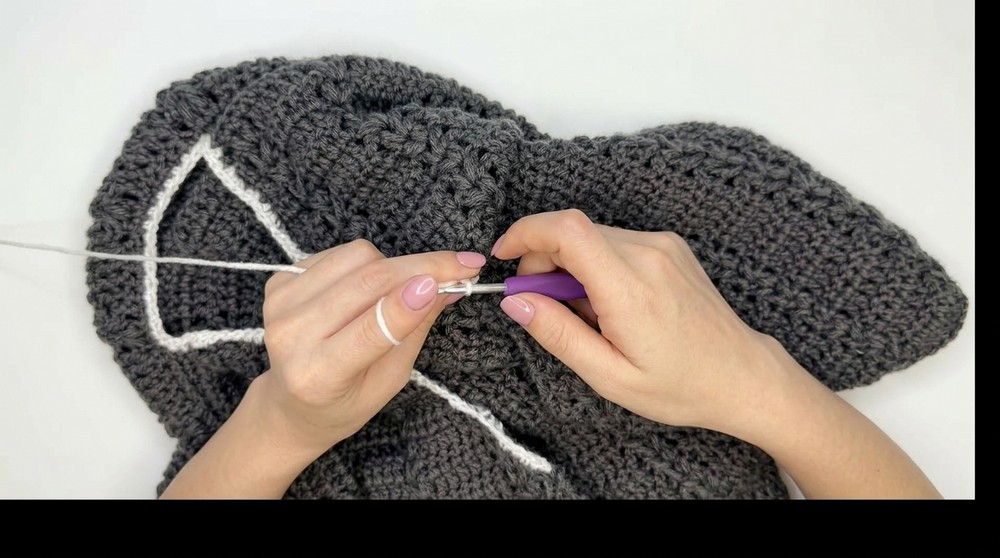
Step 4: Collar
1. Set Up
- Use a 4 mm hook for sharper collar stitches.
- Place stitch markers 2 rows before the V-neck shaping begins to mark the collar’s starting points.
2. Single Crochet Base
Work one row of single crochet across the neckline edge to create structure for the collar.
3. V Stitch Pattern
- Chain 3 (counts as a double crochet and chain 1).
- Skip one stitch, make a double crochet, chain 1, double crochet in the next stitch (V stitch).
- Continue across the row, working V stitches until the end.
4. Increasing Rows
- Chain 3, turn your work, and continue working V stitches.
- At the start and end of each row, increase by adding an extra double crochet, which helps the collar expand and give it shape.
- Repeat rows until you achieve the desired collar size. The video suggests 5 rows.
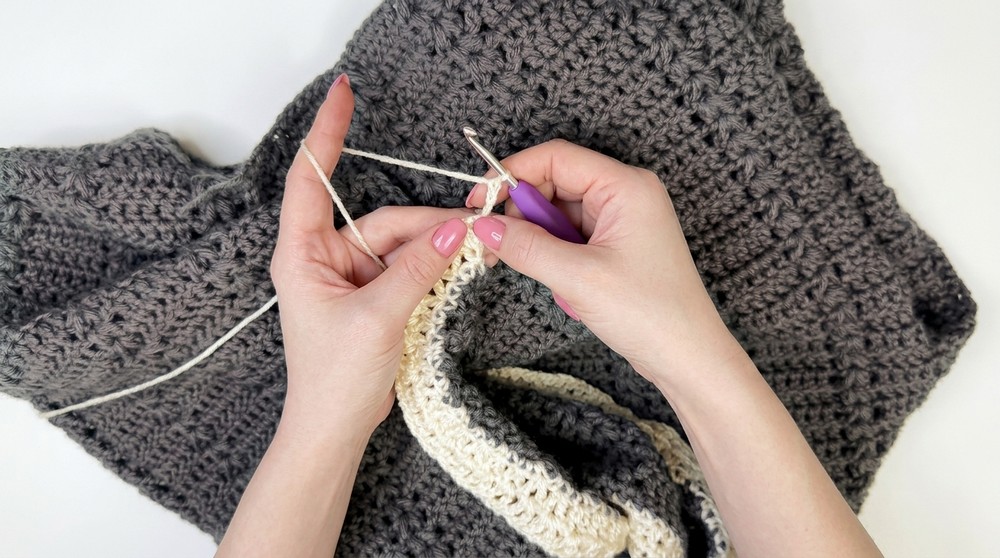
Step 5: Button Edging
- Use the scallop stitch (shell stitch) along the front opening edges to create buttonholes and decorative flair.
- Shell Stitch: Crochet 5 double crochets into one stitch, skip 2 stitches, and repeat.
- Sew buttons onto the scalloped edge as desired.
Finishing Steps
- Sew the panels and sleeves together using a darning needle and the whipstitch or mattress stitch method.
- Weave in all loose ends with a yarn needle.
- Block the cardigan for a professional finish (optional).
Important Notes
- Customization Ideas: Adjust stitch counts and lengths for different sizes or create additional details (like flared sleeves or dramatic collars).
- Client Measurements: Always verify measurements when making garments for others.
Conclusion
You now have a vintage-inspired cardigan with a classic stitch design, decorative details, and a timeless silhouette. Happy crocheting, and enjoy creating this beautiful piece.