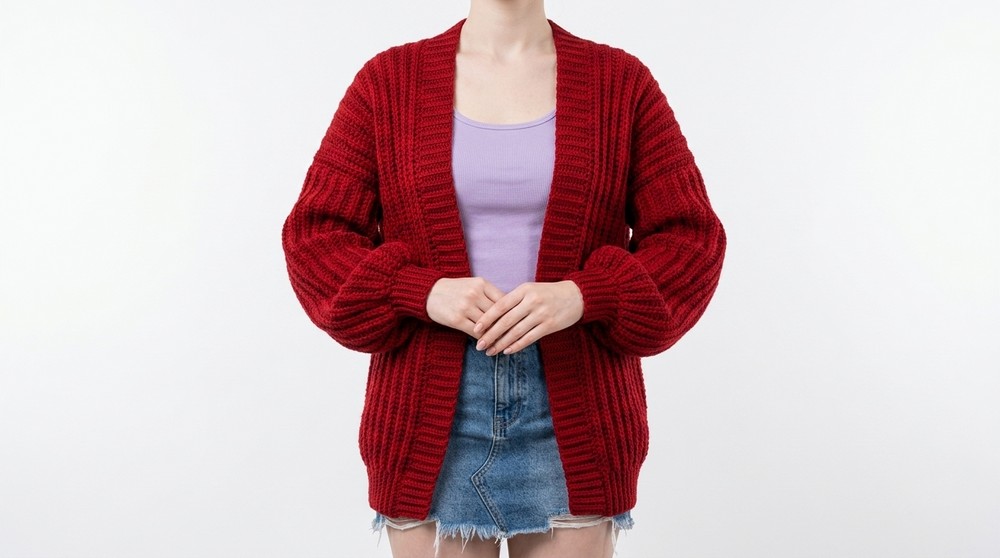
Start stitching your own cozy and chic crochet cardigan with this detailed free guide; customize its fit, length, and colors to suit your wardrobe perfectly.
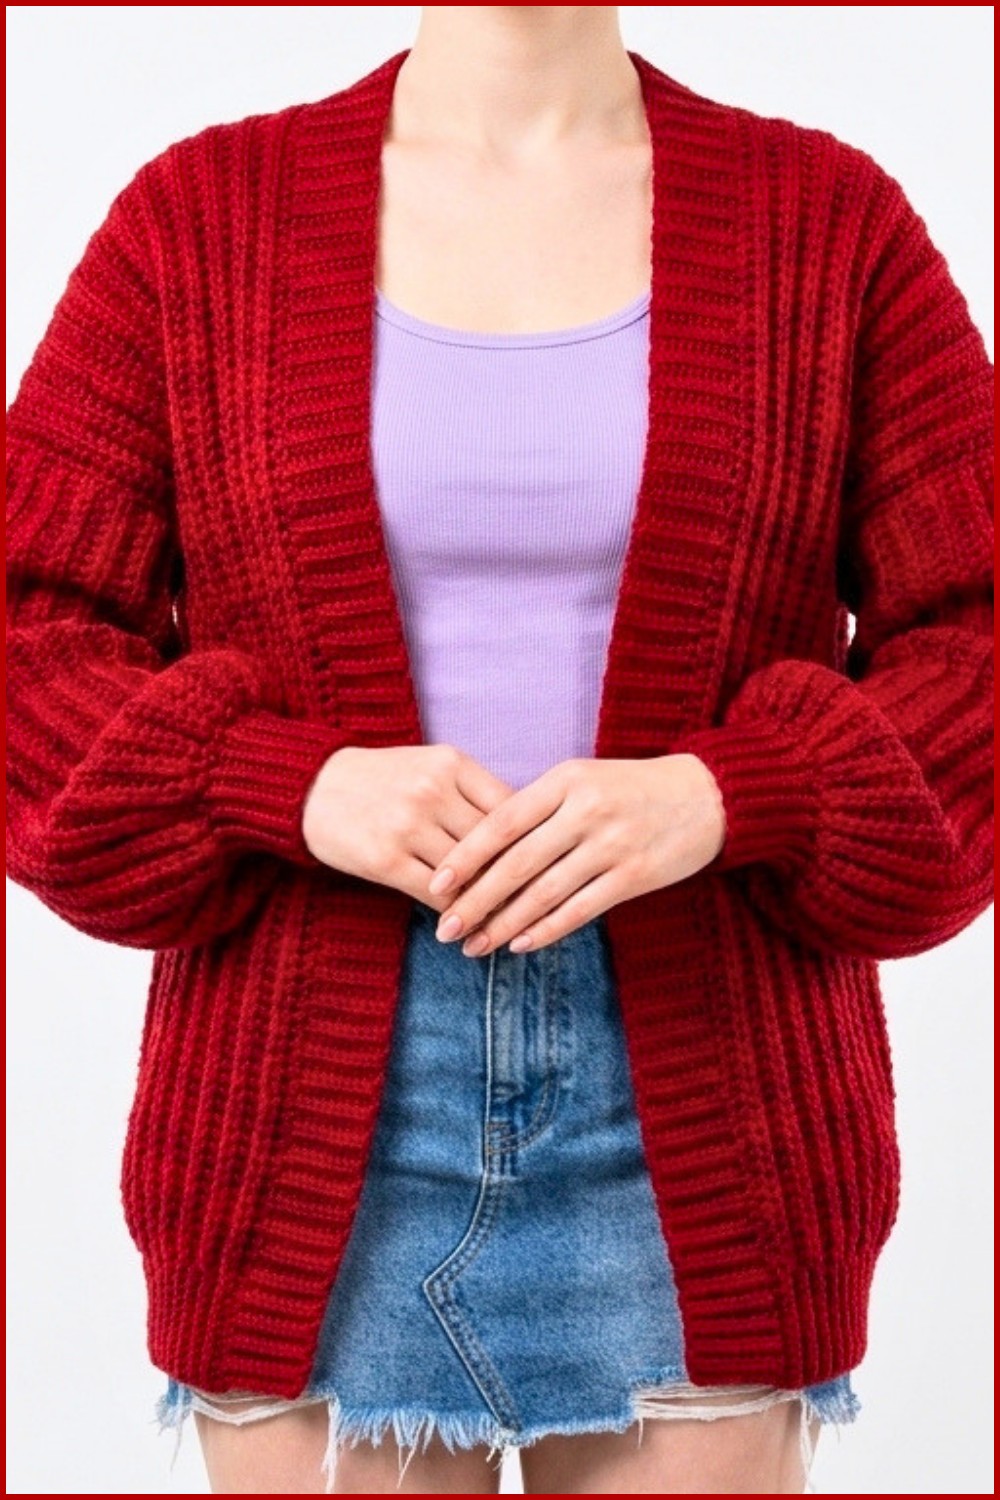
There’s something special about creating your own cozy cardigan from scratch, it’s simple, customizable, and perfect for anyone looking to craft a functional yet stylish piece. This free crochet cardigan pattern offers a beginner-friendly approach while still being sophisticated enough for more experienced crocheters. Starting with the back panel, the design progresses to two front panels, sleeves, and a ribbed edge, giving the final piece a polished, seamless look. Made with medium-weight yarn and a 3mm hook, the cardigan can easily be adjusted in both length and width to suit personal preferences, whether you prefer a shorter jacket-style look or a long, flowing piece.
Crochet Cardigan Pattern for Cozy Comfort - Step-by-Step
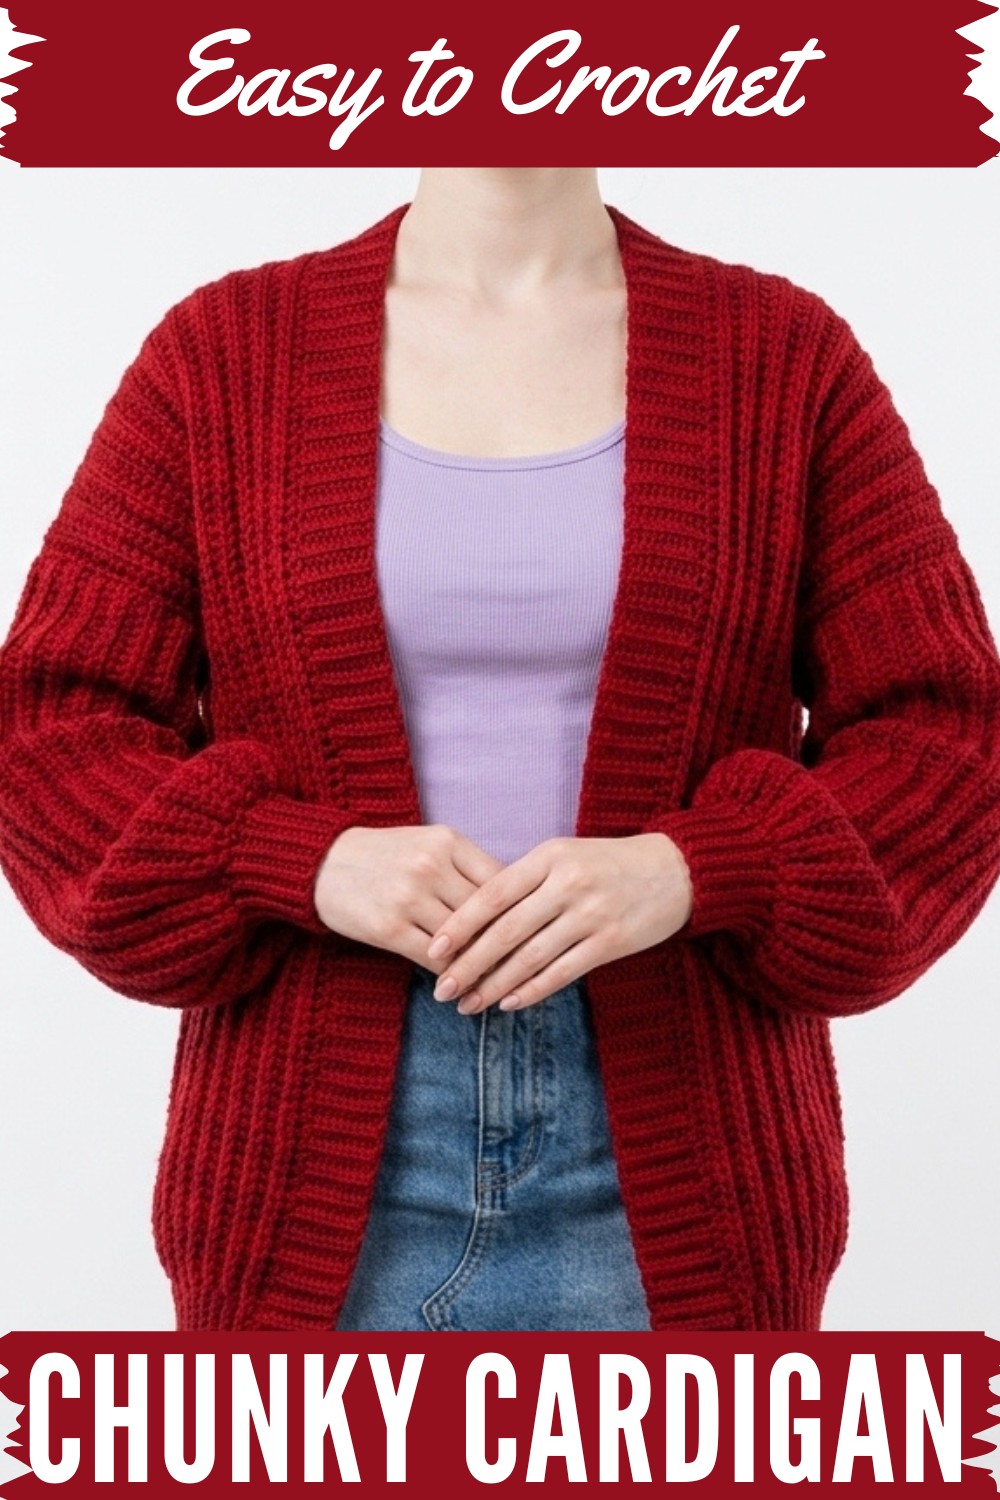
The cardigan stands out with its neat ribbing, delicate back-loop crochet details, and a flattering structure that fits comfortably. It’s versatile enough to wear on a chilly day or dress up for a casual outing. Practical and stylish, this project also allows for colorful customizations—you can choose to go bold or opt for soft, neutral tones.
Whether it’s the perfectly aligned seams or the comfortable fit of the sleeves, this cardigan is designed to be both beautiful and useful. With step-by-step instructions and a patient approach, even beginners can enjoy crafting this timeless design.
Crochet Pink Sweater Pattern
Skill Level
Intermediate
Materials List
- Yarn: 5 balls of Red Heart Super Saver yarn (200g, 400m per ball, size 4 medium-weight yarn)
- Hook: 3 mm crochet hook
- Measuring Tape
- Stitch Markers (Optional, for tracking rows and joins)
- Scissors
- Yarn Needle (for sewing and weaving in ends)
Key Abbreviations
- ch: Chain
- sl st: Slip Stitch
- sc: Single Crochet
- hdc: Half Double Crochet
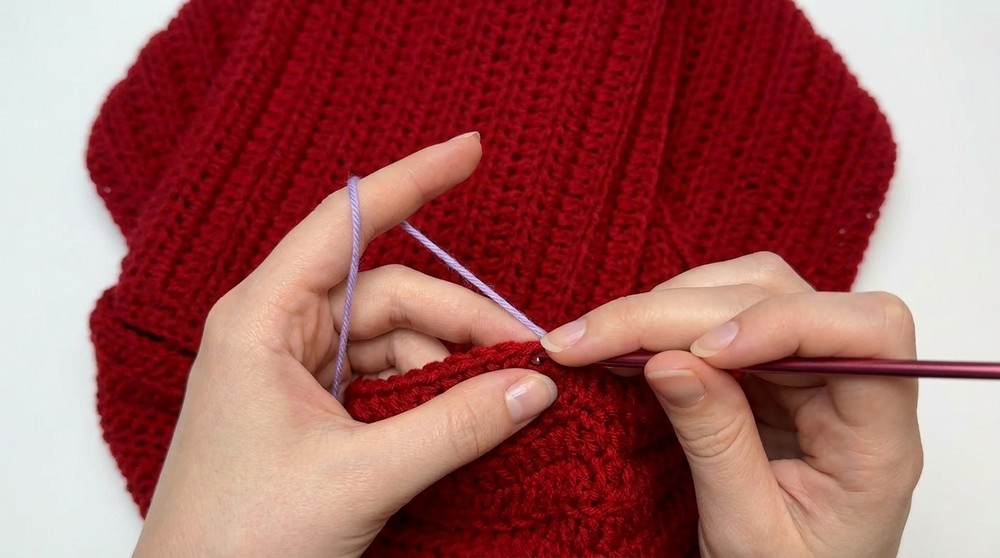
- back loop: Work in the back loop of the stitch only
Special Notes
- The pattern is worked in separate panels (back, front, and sleeves), then seamed together seamlessly.
- Ribbing is attached last for a polished edge.
- For sizing adjustments, increase or decrease the number of rows and stitches.
Step-by-Step Instructions
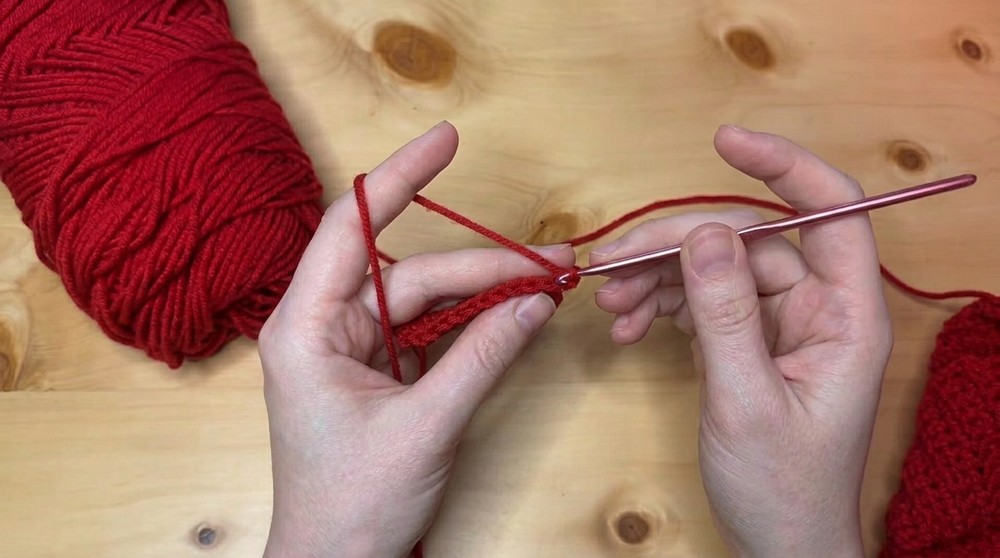
1. Back Panel
- Make a slip knot and chain (ch) 124 stitches, or approximately 29 inches (adjust this to the desired length).
- Row 1:
- Make sc into the second stitch from the hook. Continue working sc for the first 16 stitches.
- For the remaining stitches, work hdc until you reach the end of the row.
- Chain 2, turn your work.
- Row 2:
- Work hdc in the back loops only across all hdc stitches from the previous row.
- Switch to back loop sc for the last 16 stitches.
- Chain 1, turn your work.
- Row 3:
- Repeat Row 2, keeping the pattern consistent (sc for the first 16 stitches and hdc for the remaining stitches in the back loops only).
- Repeat this pattern until you complete 56 rows (adjust for larger or smaller sizes).
2. Front Panels
- Make the same chain (ch 124) and work the same stitch pattern as the back panel. Instead of 56 rows, complete 24 rows for each front panel.
- Ensure each front panel measures approximately 10 inches wide.
- Make two identical front panels.
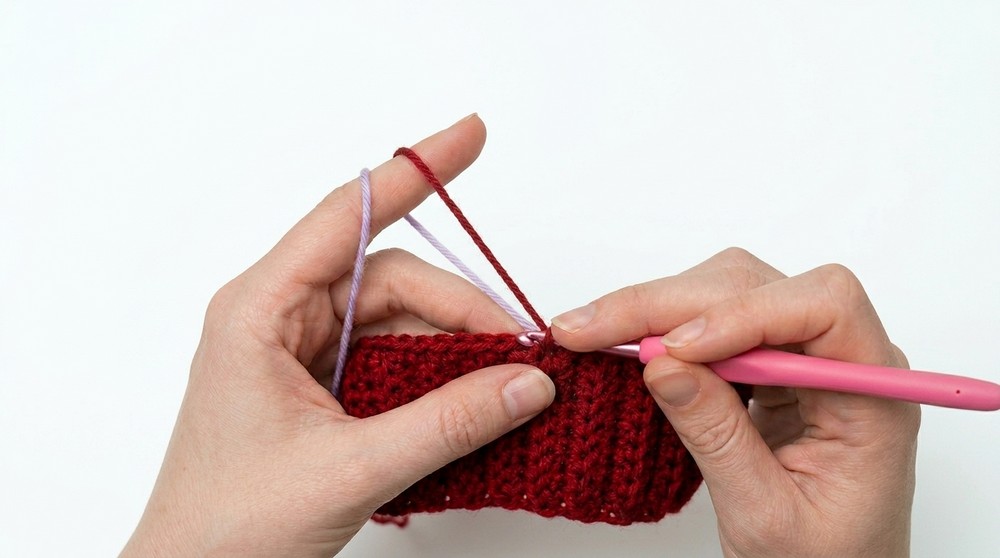
3. Joining Front and Back Panels
- Place the panels flat with the edges aligned.
- Count 24 rows from the top of the back panel on each side and mark these rows with stitch markers.
- Attach a front panel to each marked edge using sc.
- Insert your hook through both stitches at the shoulder area. Work 2 sc into each stitch in the joining row to ensure a seamless look.
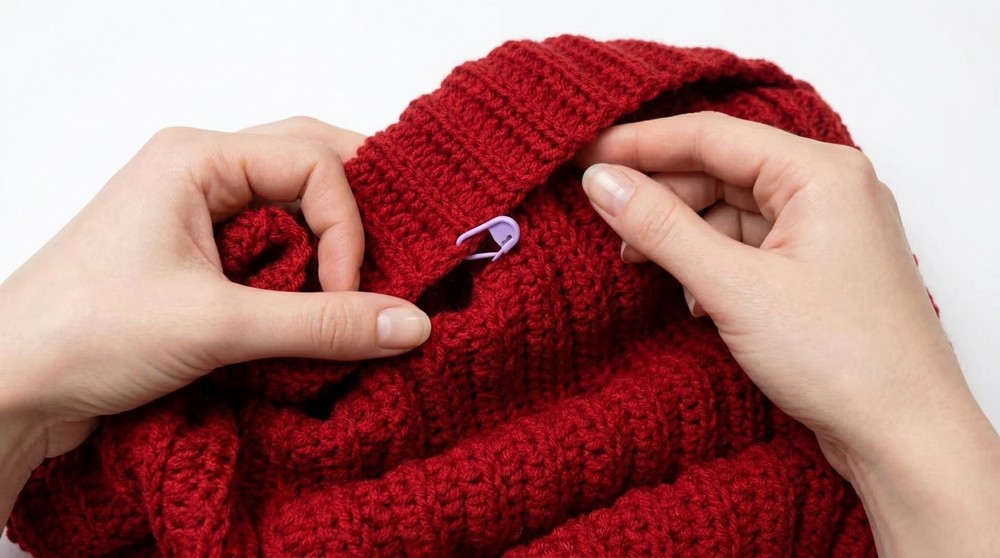
4. Joining the Sides
- Count 40 stitches from the bottom edge of the panels on each side and mark this point with stitch markers.
- Turn your work to the wrong side to begin seaming.
- Attach the front and back by working:
- sc through both loops on the front side.
- sc through the back loop only on the back side.
- Continue seaming up until you reach the marked stitches (for the armholes).
5. Sleeves
- Begin with a chain of 80 stitches, measuring approximately 19 inches in length.
- Row 1:
- Make sl st in the first 14 stitches. Switch to hdc for the remaining stitches across the row.
- Chain 2, turn your work.
- Row 2:
- Work back loop slip stitches (sl st) for the first 14 stitches.
- Switch to back loop hdc for the rest of the row.
- Repeat this pattern for 40 rows, ensuring the slip-stitch section will form the curve for the sleeve cap.
- Top Edge of Sleeve:
- Make sc into the top edge of the sleeve, adding 2 sc for every row—this will total 80 sc.
- Attach each sleeve to the armhole area of the body of the sweater using single crochet. Ensure all stitches align and join seamlessly.
6. Ribbing
Bottom Edge Ribbing:
- Make a foundation chain of 10 stitches.
- Work back loop sc for 256 rows (the calculated number of stitches: 124 back panel stitches + 124 front panel stitches + 8 neckline stitches).
- Turn the sweater onto its wrong side and attach the ribbing using sc, ensuring each section aligns.
Front Ribbing:
- You will create ribbing for the vertical edges of the front panels using the same technique. Count stitches, chain, and attach ribbing with sc for a clean finish.
Conclusion
This pink sweater combines style and simplicity, making it ideal for customizations. The textured back loops and seamless joins result in a polished, elegant finish. With patience, even beginners who are advancing can complete this project successfully.
Pattern Correction
- Ensure stitch counts remain consistent through all rows (especially for slip stitches and sc increases).
- If yarn tension causes warping, block the panels before joining them.
Tips for Success
- Measurements: Adjust length and width by increasing chains or rows, but maintain the stitched proportions for seamless joining.
- Blocking: Block your sweater after assembly to even out stitches and ensure smooth edges.
- Ribbing Alignment: Attach ribbing evenly to prevent puckering or uneven tension.
- Care Instructions: Wash gently in cold water and lay flat to dry to preserve stitch texture and elasticity.