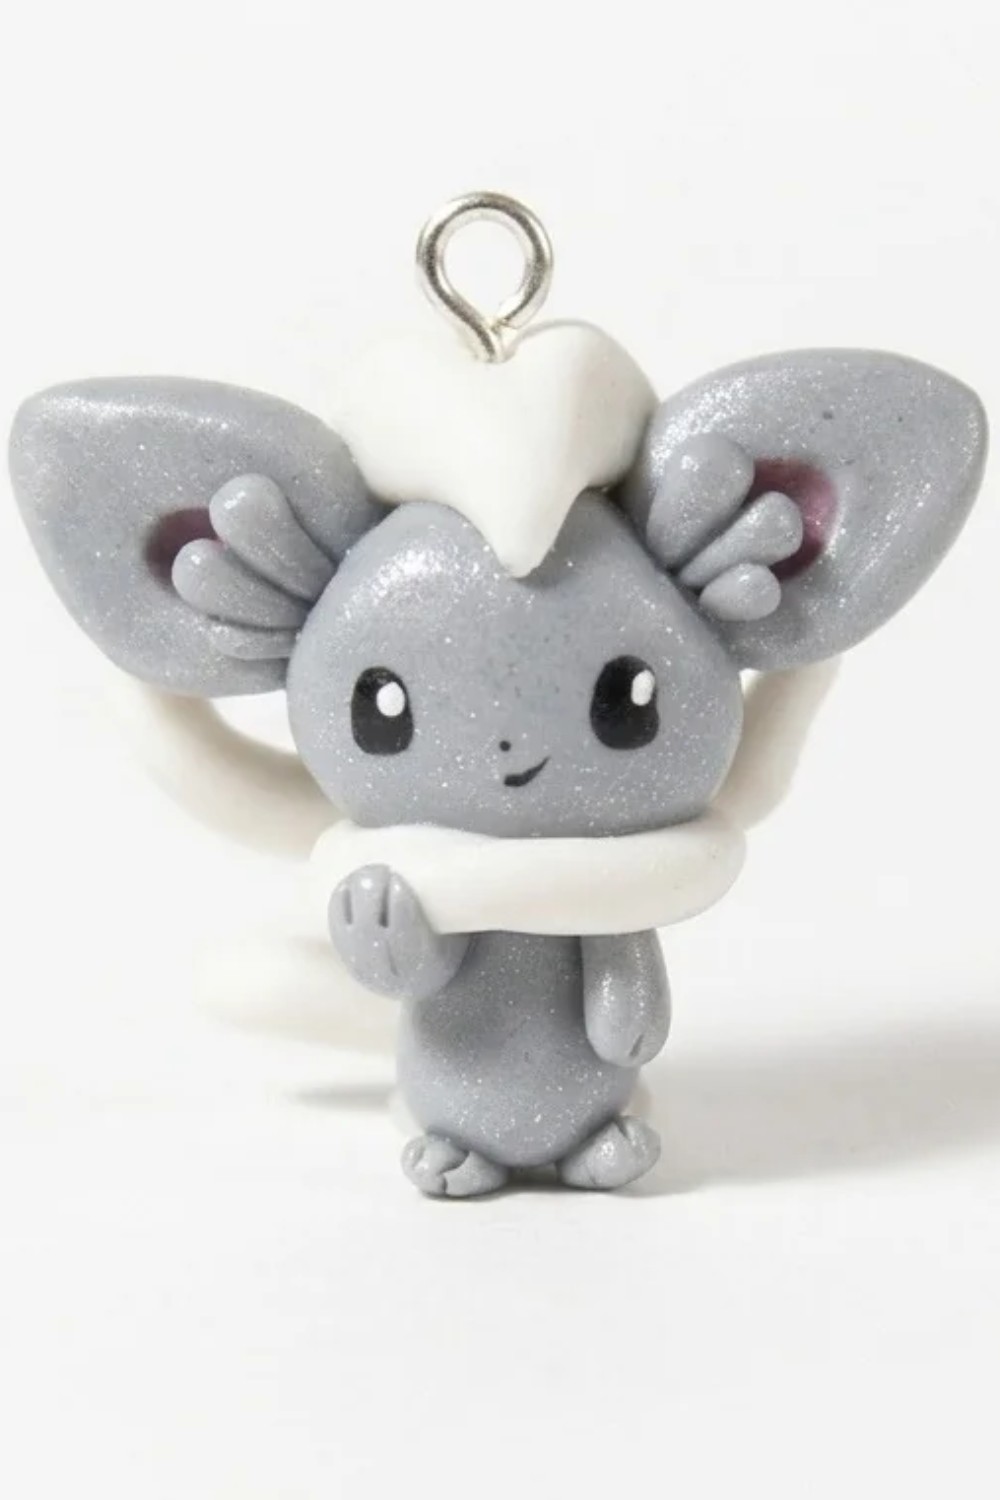
Shape your own DIY Minccino With Polymer Clay and give this gray Pokémon with oversized ears and a fluffy tail a spot beside your favorite figures or cards.
Gray can be surprisingly expressive when you’re working with a character that has ears nearly as big as its face. DIY Minccino With Polymer Clay focuses on the Chinchilla Pokémon, whose rounded ears and long, fluffy tail are the first features you’ll want to capture. Soft pink inside the ears gives the gray body a bit of warmth, while a pale muzzle keeps the little face easy to see.
Tiny DIY Minccino With Polymer Clay Free Project
Start with the outline before deciding how much fur texture to include. Two wide ears will give the head its familiar shape, especially when the pink centers leave a clear gray border. Give the tail enough volume to show from the side, then curve it toward the body so it feels connected to the figure. A few marks on the tail can suggest soft fur while leaving the cheeks smooth. Turn the figure as you work, since ears that look even from the front can sit at noticeably different angles from above.
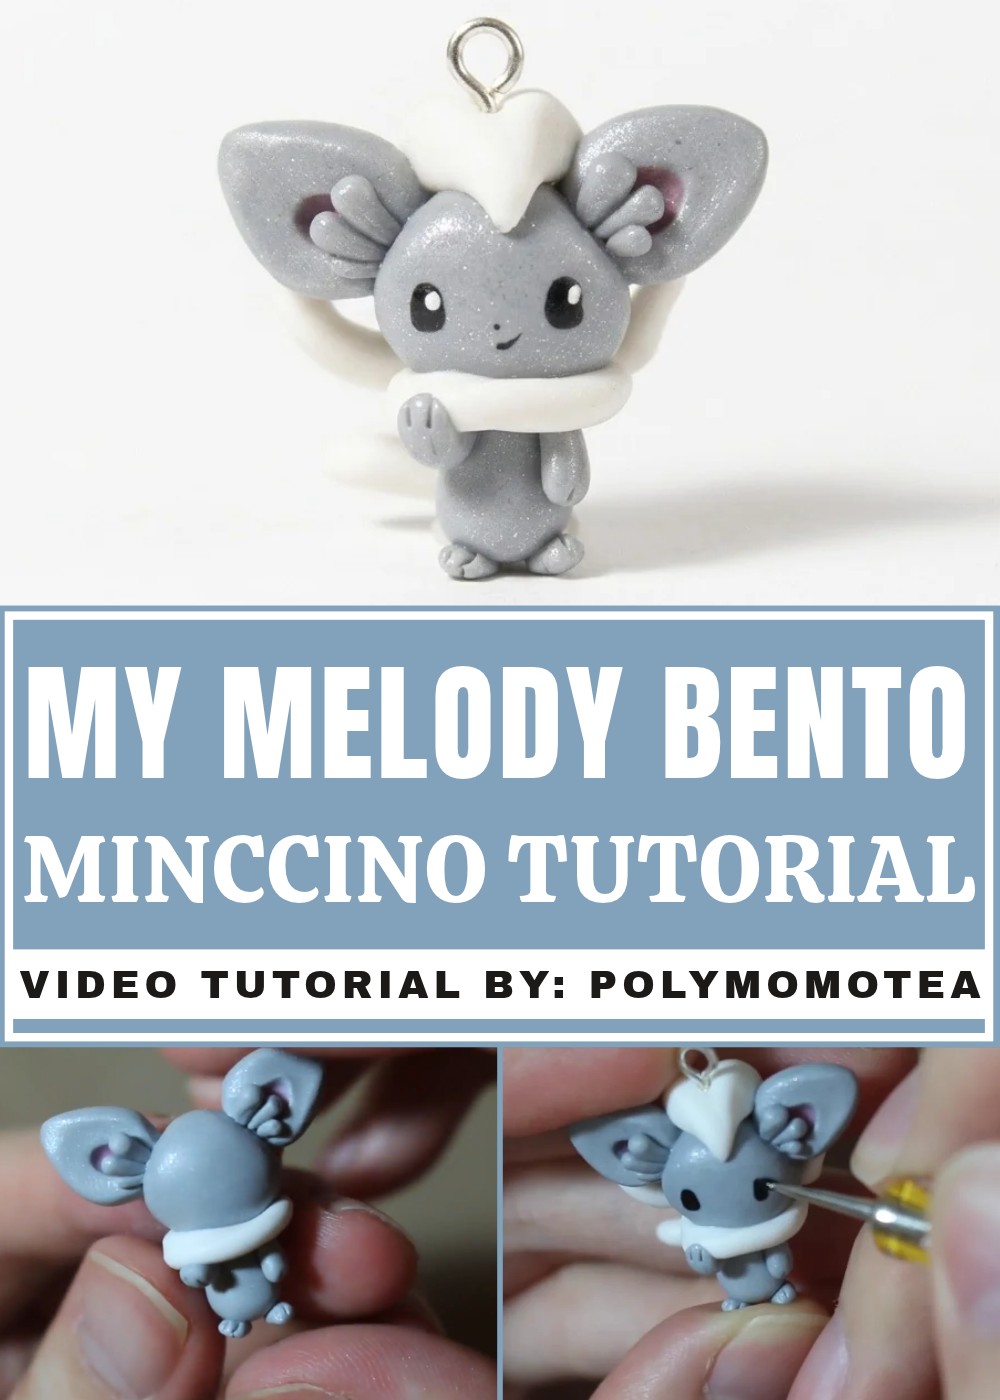
Minccino is a nice choice for a collector who already has plenty of familiar Pokémon on display. Set the gray figure beside a favorite trading card so the ears and tail stay visible, or tuck it into a birthday box for a friend who always chooses the smaller Pokémon. Paired with Cinccino, it can also show how the same Pokémon changes as it evolves.
About the Clay Artist
In a collaboration, Alex Lee sculpted Cinccino for PolymomoTea, while PinkSugarCotton’s Sofi chose Minccino. The two projects pair the chinchilla character with its evolved form. Lee’s version gives fans a companion piece to display next to Sofi’s design, and each creator points viewers toward the other half of the collaboration.
How to Make a Cincinno (Encino) Pokémon Polymer Clay Charm
This tutorial will guide you through making an Encino/Cincinno-inspired Pokémon charm using polymer clay. The design is based on the Black-and-White generation Pokémon and focuses on recreating its fluffy fur, big ears, and elegant tail. The instructions are written in simple, beginner-friendly language, with clear steps and explanations so you can follow along easily even if you’re new to clay crafting.
Materials & Tools
Polymer Clay Colors
You can use any brand you prefer (Fimo, Sculpey, Premo, etc.):
- Gray clay – for the head, body, ears, limbs, and tail
- Pink clay – for the inner ears
- White clay – for the neck fur (scarf) and head fur
Additional Materials
- Eye pin – so you can turn your figure into a charm (for a necklace, bracelet, or keychain)
- Black acrylic paint – for the eyes and nose
- White acrylic paint – for the eye highlights
Tools
- Roller (or something cylindrical like a marker) – to flatten clay
- Blade or craft knife – for cutting and shaping clay
- Dotting tools – one large and one small (or the back of a brush and a toothpick as substitutes)
- Toothpick or needle tool – for details and blending small areas
- Paintbrushes – thin brushes for painting facial details
- Oven – for baking and curing the polymer clay (follow your clay brand’s instructions)
- Clean work surface – to keep your clay dust-free and clean
Step-by-Step Instructions
Step 1: Sculpting the Head
- Shape the base of the head
- Start with a ball of gray clay.
- Gently press and pinch it into a soft, rounded triangle shape.
- The triangle should not have sharp corners; think of a very rounded triangle or a “soft” wedge.
- This will be the head shape, with the wider part as the top and the slightly narrower part as the bottom where it will connect to the body.
- Smooth the surface
- Use your fingers to smooth out any lines, cracks, or fingerprints.
- Make sure the head looks symmetrical when viewed from the front.
Step 2: Making and Attaching the Ears
- Form the ear bases
- Take two small pieces of gray clay.
- Pinch each piece into a diamond shape.
- These diamonds will become the outer ear shapes.
- Flatten the ears
- Use a roller (or a smooth cylindrical object) to gently flatten each diamond.
- They should stay fairly thick, not paper-thin, to remain sturdy.
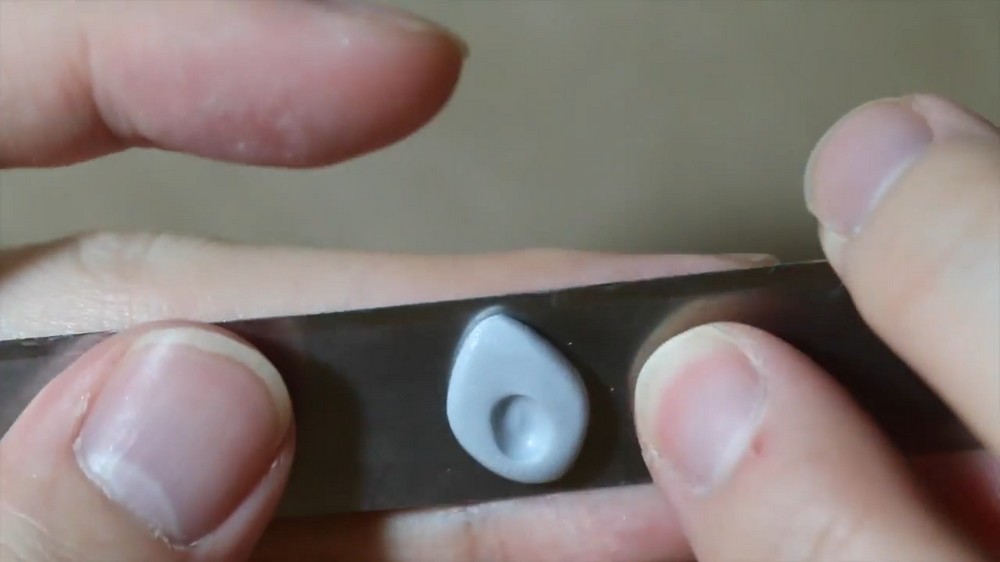
- Create the inner ear space
- Using a large dotting tool or the rounded end of a brush, press a deep indentation into each ear.
- This indentation will later be filled with pink clay for the inner ear.
- Add the pink inner ears
- Flatten some pink clay into a thin sheet.
- Cut or tear small pieces and place them into the indented areas of the ears.
- Gently press the pink clay so it fills the hole and becomes flush with the edges.
- Prepare ear edges for attachment
- Use your blade to cut the bottom edge of each ear at a slight slant.
- This slanted cut helps the ears sit more naturally on the head.
- Attach the ears to the head
- Position each ear on the top sides of the triangular head.
- Blend the base of each ear into the head using your fingers or a tool.
- Make sure both ears are even and symmetrical.
Step 3: Adding Ear Fur Details
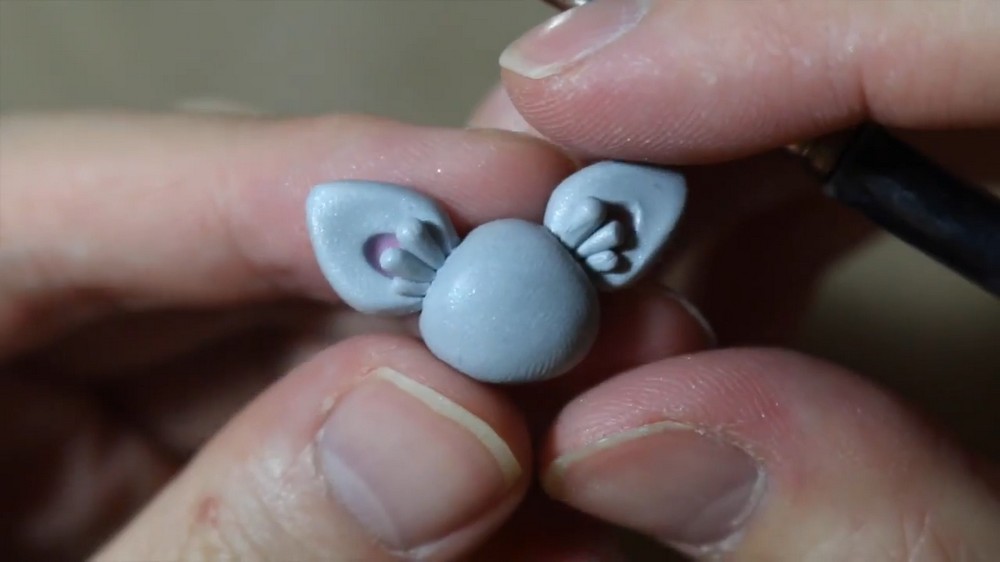
- Form ear fur pieces
- Take three small balls of gray clay for each ear, each one slightly smaller than the last.
- For each ball, roll it into a teardrop shape (rounded on one end, pointed on the other).
- Attach the fur to the ears
- On each ear, place the largest teardrop at the top of the outer edge.
- Below that, attach the medium teardrop.
- At the bottom, attach the smallest teardrop.
- Arrange them so they look like layered tufts of fur sticking out of the ears.
- Blend gently if needed
- You can press lightly so the base of each teardrop sticks firmly to the ear, but keep the pointed ends visible for a fluffy look.
Step 4: Building the Body and Limbs
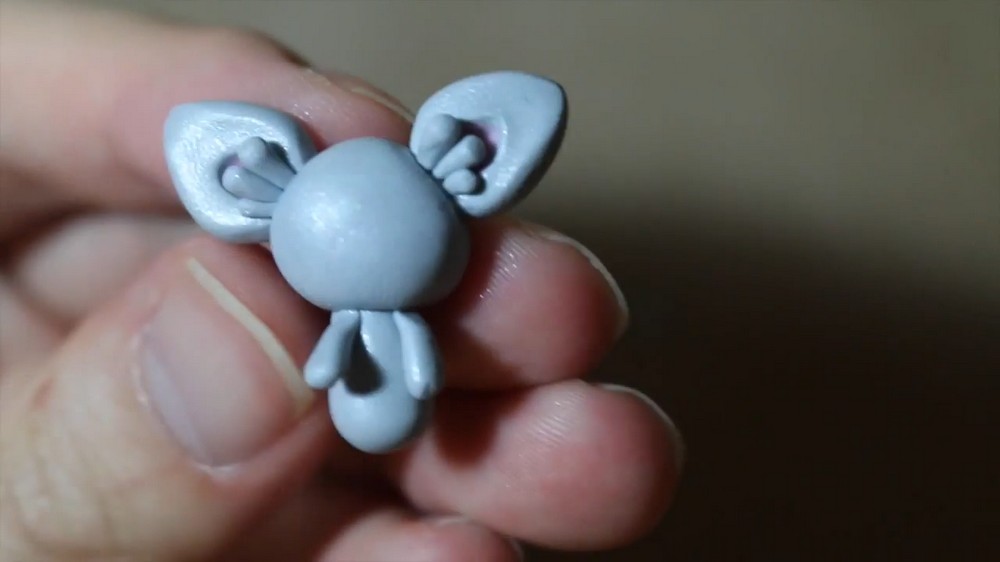
- Shape the body
- Roll a piece of gray clay into a cylinder.
- Cut off one end to give it a flat surface.
- Attach the flat end to the bottom of the head and blend the connection so the neck area is smooth.
- Make the arms
- Roll two long, thin snakes of gray clay for the arms.
- Use your blade to lightly cut small lines at one end of each snake to suggest fingers.
- Make the feet
- Roll two small, stubby cylinders for the feet.
- Again, use your blade to add short cuts to indicate toes or paws at one end of each cylinder.
- Attach the limbs
- For the first arm, attach it to the side of the body with the fingers facing outward and visible.
- For the second arm, attach it so that the fingers face downward. This one will later be bent up to look like it’s holding the neck fur.
- Attach the feet to the bottom of the body so they support the figure. Keep them evenly spaced so it stands or sits well.
Step 5: Creating the Neck Fur (Scarf)
- Shape the neck fur strip
- Take some white clay and roll it into a snake.
- Make one side of the snake slightly thicker and the other side slightly thinner, so it looks organic and uneven.
- Flatten the strip
- Gently flatten the white snake with your fingers or roller while keeping some thickness.
- This will become the fluffy scarf-like fur around the neck.
- Wrap it around the neck
- Place the white strip around the neck area, just where the head and body meet.
- Twist it slightly as you wrap to give it a natural, flowing look.
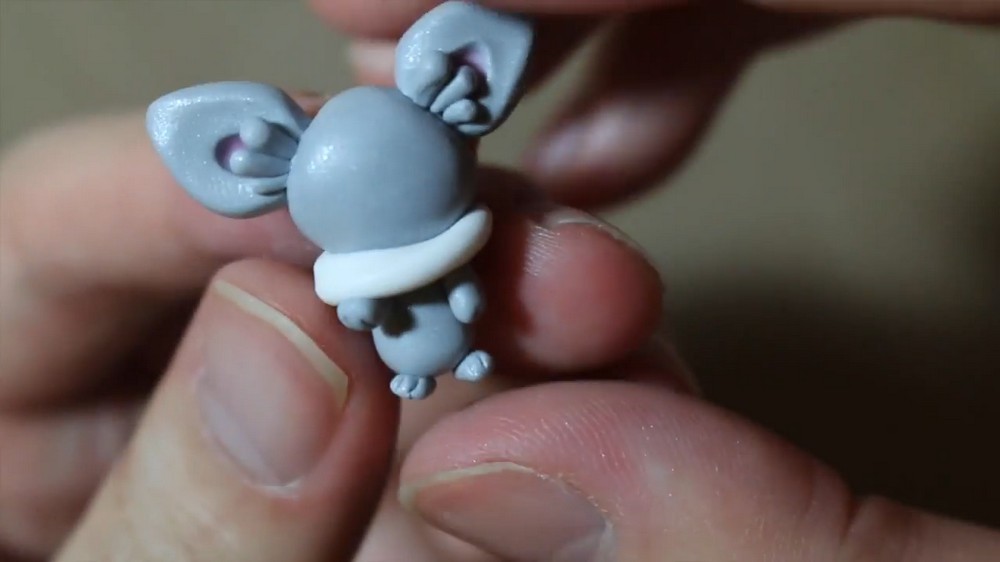
- Pose the arm to hold the fur
- Take the arm with the fingers facing down and bend it upwards so it appears to be holding the neck fur.
- Position the hand at the top of the scarf area and press gently to secure it.
Step 6: Adding Head Fur
- Shape the head fur pieces
- Roll two uneven white snakes for the fur on the head.
- Cut the ends of each snake into triangle shapes with your blade.
- Pinch the triangles slightly to sharpen the tips and give them a defined, tufted look.
- Attach to the head
- Place the two fur pieces between the ears at the top of the head.
- Blend the base slightly into the head, but leave the lengths free.
- Arrange the fur into a W shape
- Gently bend the fur pieces downward toward the front of the face.
- Cross them at the ends to form a “W” shape.
- This gives the character that distinctive fluffy head fur look.
Step 7: Sculpting and Attaching the Tail
- Form the tail
- Roll a long snake of gray clay for the tail.
- Make it thicker at the base and slightly thinner towards the tip.
- Add flowing movement
- Lightly roll or twist the ends (similar to how you might shape a curl in hair).
- Bend the tail into a smooth, curved “toothpaste” shape – flowing and slightly wavy.
- Attach to the body
- Place the base of the tail at the back of the body (the “butt” area).
- Blend the base into the body securely so it doesn’t break off easily.
Step 8: Adding the Eye Pin
- Insert the eye pin
- Decide where you want your charm to hang from. In this tutorial, the eye pin is placed at the top of the fur/head area.
- Insert the eye pin straight down into the clay, making sure it goes deep enough to be secure but doesn’t poke through.
Step 9: Baking the Charm
- Prepare for baking
- Place the finished clay figure on a baking tray lined with parchment paper or foil.
- Make sure it’s stable and not leaning on anything that could warp it.
- Bake according to instructions
- Follow your clay brand’s baking instructions.
- A common guideline is about 110–130°C (230–275°F) for 15–30 minutes, depending on thickness.
- Cool completely
- Let the figure cool fully before moving to the painting step. This prevents dents and damage.
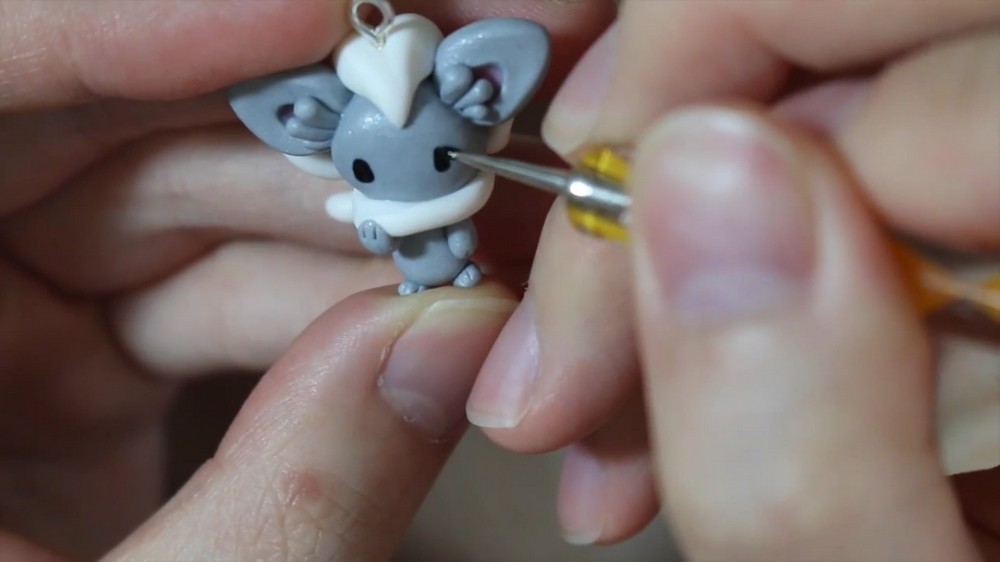
Step 10: Painting the Face
- Paint the eyes
- Using black acrylic paint and a fine brush, paint two almond-shaped eyes on the face.
- Place them evenly spaced and slightly angled for a cute expression.
- Add the nose and mouth
- Paint a tiny black dot for the nose, centered between and slightly below the eyes.
- Below the nose, paint a small curved line to create a gentle smile.
- Add eye highlights
- Using white acrylic paint, add small oval shapes at the right corners of each eye.
- These highlights make the eyes look shiny and lively.
- Let the paint dry
- Leave the charm undisturbed until all paint is completely dry.
- Optionally, you can seal the charm with a clear gloss varnish to protect the paint and give it a shiny finish.
Final Thoughts
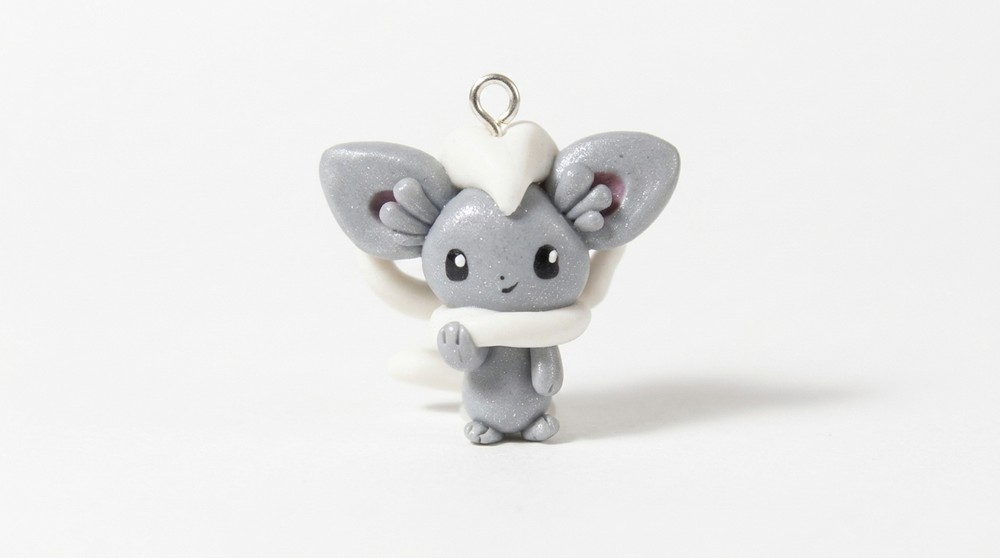
You now have your very own Encino/Cincinno Pokémon polymer clay charm, complete with big ears, fluffy neck fur, and a flowing tail. This project combines simple shapes—cylinders, snakes, triangles—with careful assembly and a few painted details to bring the character to life.