Build a cute DIY Polymer Clay Funtime Freddy FNAF figure with fun character features, a friendly look, and plenty of personality for horror game fans.
Horror game characters do not always need to look frightening. DIY Polymer Clay Funtime Freddy FNAF takes a recognizable figure from Five Nights at Freddy's: Sister Location and gives it a smaller, cuter look that feels right for a fan collection.
Spooky DIY Polymer Clay Funtime Freddy FNAF Figure
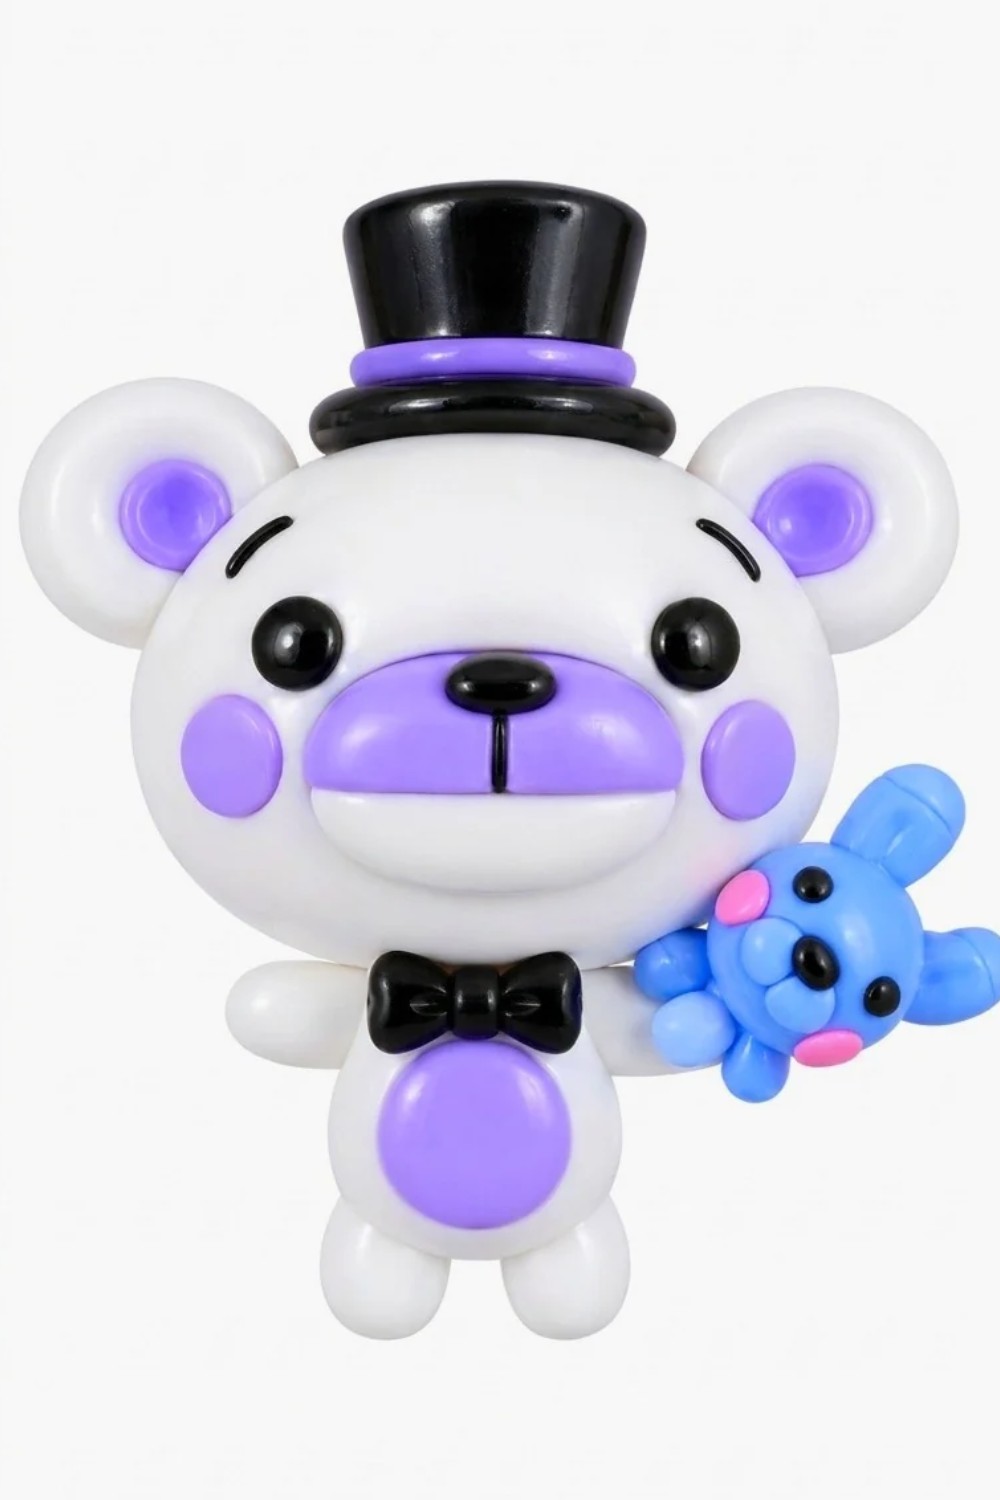
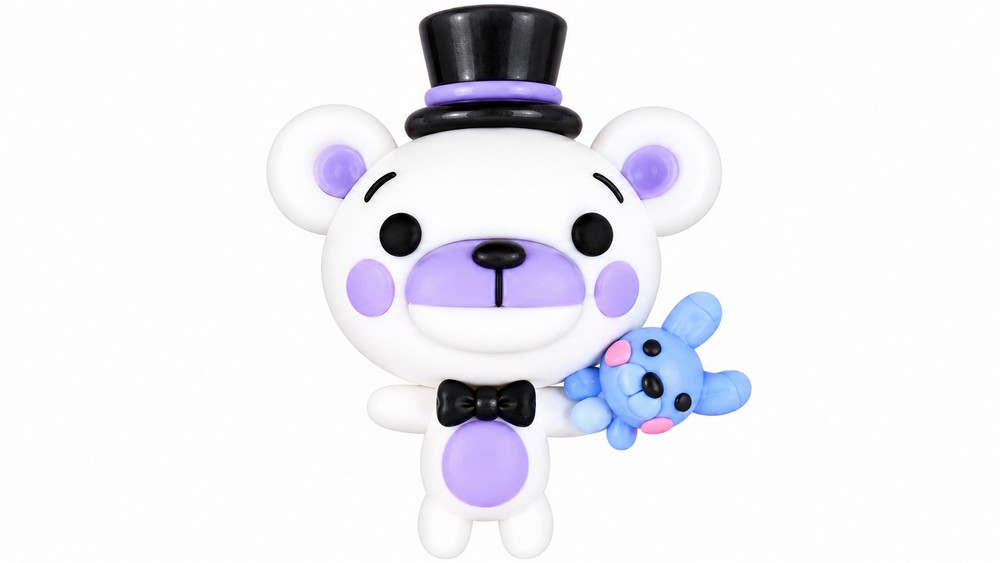
Funtime Freddy is known for his bear-like head, performance theme, and Bonnie hand puppet. Those details help set the character apart from an ordinary toy bear. In a clay version, the face, ears, and puppet are especially important because they give the figure its identity. A balanced body shape can keep the finished miniature sturdy-looking, while a playful expression makes it more friendly than scary.
A Little About the Creator
Tiny faces, gentle expressions, and unusual characters give PolymomoTea its recognizable appeal. Creator Alex Lee focuses on small projects that look cheerful without needing a large display space. His YouTube videos feature polymer clay and resin, so visitors can find examples of both colorful figures and glossy detailed miniature scenes.
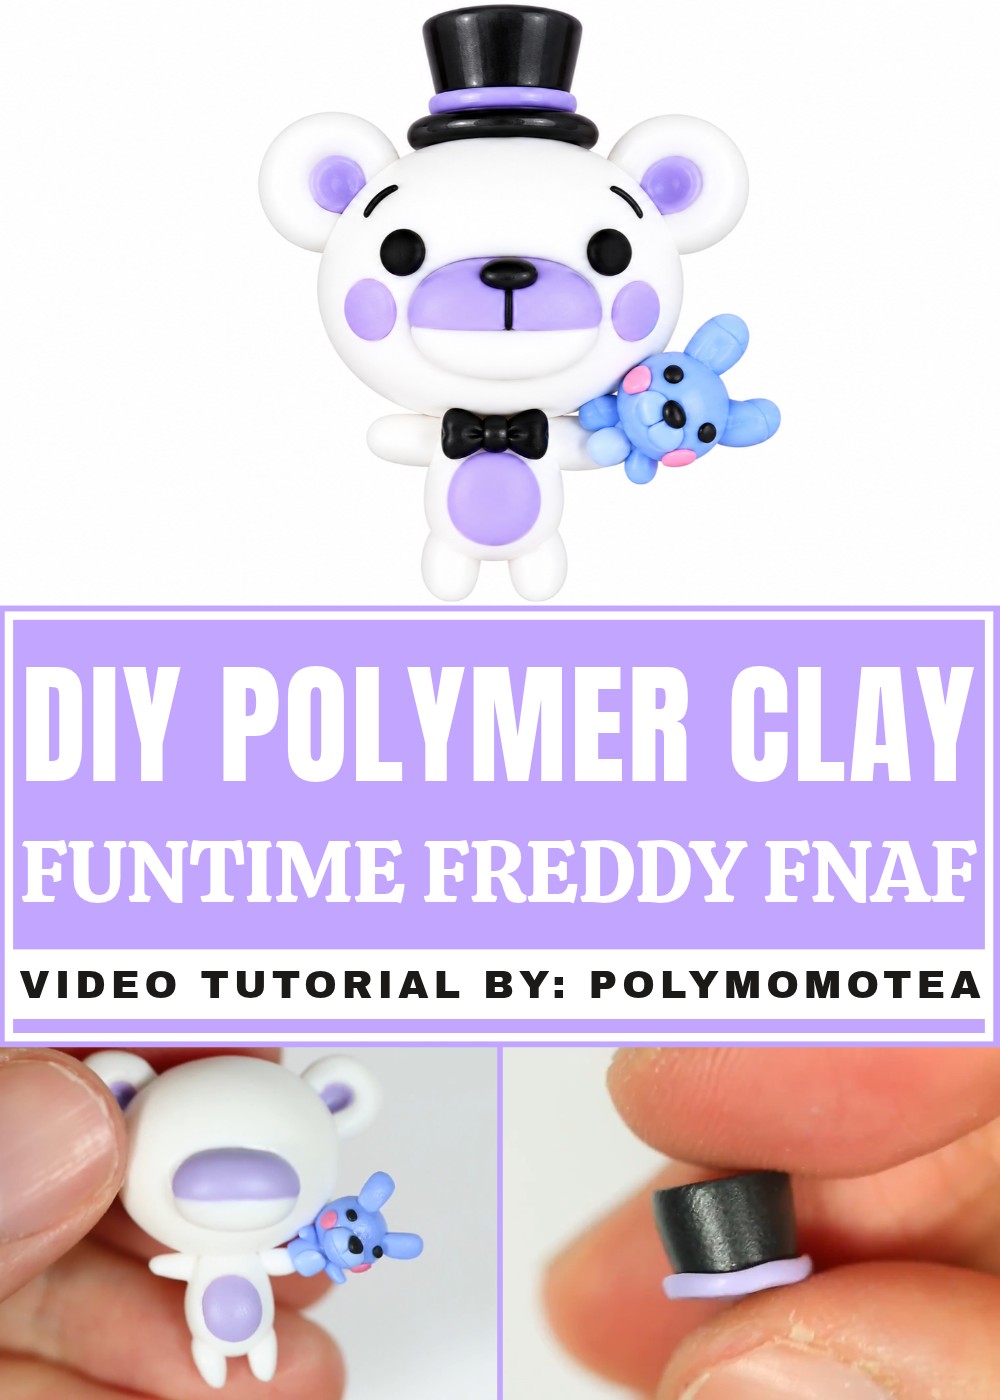
The character also offers plenty of interesting areas to notice. Contrasting sections can suggest the familiar costume, and simple lines can help define the face without overcrowding it. People who like video game figures may enjoy seeing these details represented in a small handmade piece rather than a large collectible.
This idea works as a display item near a gaming desk, on a bedroom shelf, or beside other FNAF characters. It can also be a personal gift for a friend who follows the series. Careful attention to the face and puppet helps the figure look recognizable at a glance. The result mixes a spooky game theme with a cheerful miniature style.
DIY Funtime Freddy Polymer Clay Tutorial
If you’re a fan of “Five Nights at Freddy’s: Sister Location,” you’ll love learning how to create your own adorable Funtime Freddy miniature using polymer clay. This project takes you step by step, from sculpting the recognizable head and body to making his puppet companion and signature accessories. The instructions are written in simple and easy-to-follow language, so whether you’re a beginner or experienced crafter, you’ll be able to make your very own cute Funtime Freddy character. Set aside some creative time and let’s get started transforming a few handfuls of clay into this video game favorite!
Essential Materials & Tools
Gather these supplies before you start:
Materials
- Polymer clay:
- White (main body/face/limbs)
- Purple (snout, belly, ear details, cheeks, bow tie, hat band)
- Blue (for the puppet)
- Black (hat, pupils, mouth details)
- Pink or reddish-pink (rosy cheeks, optional)
- Acrylic craft paint (optional, for details)
- Glaze/varnish (optional, for shiny finishing)
Tools
- Clay blade or craft knife
- Dotting tool or ball stylus
- Clay roller or smooth pen
- Sculpting/blending tool (or just your fingers)
- Baking tray and parchment paper
- Oven (follow clay package directions)
- Tweezers (optional, for small details)
Step-by-Step Instructions
Step 1: Make the Head
- Shape the Head:
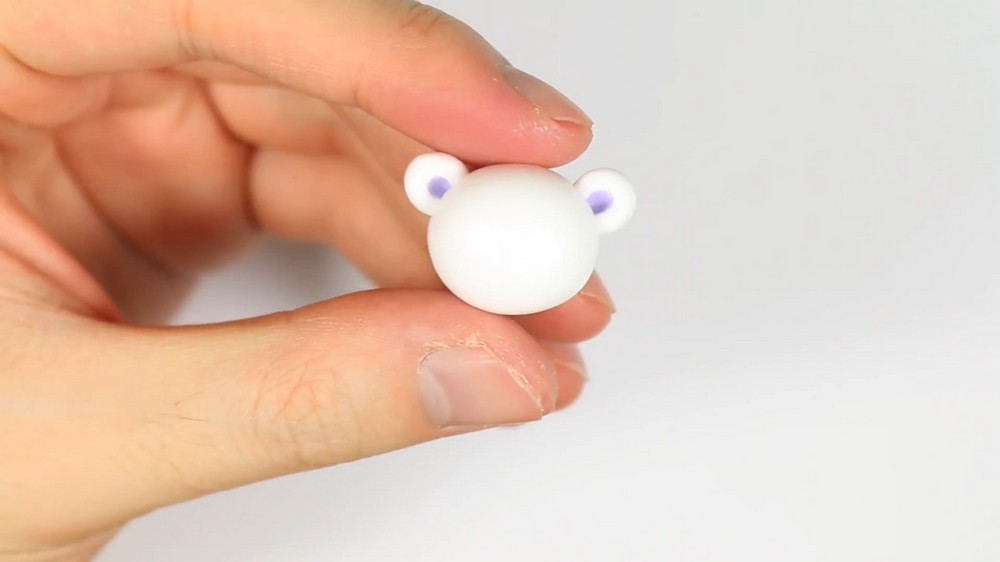
Take a ball of white clay and roll it into a large oval. This will be the base for Freddy’s head.
Step 2: Craft the Ears
- Form Base of the Ears:
Roll two small balls of white clay and pinch each into an oval shape. - Indent for Ear Centers:
Use a dotting tool to make a big indent in the center of each ear. - Add Ear Color:
Fill the indents with purple clay, flattening it to fit the cavity with your dotting tool. - Cut and Attach the Ears:
Use your blade to cut each ear in half for the inner ear effect, and press both ears onto the top sides of Freddy’s head.
Step 3: Make the Snout
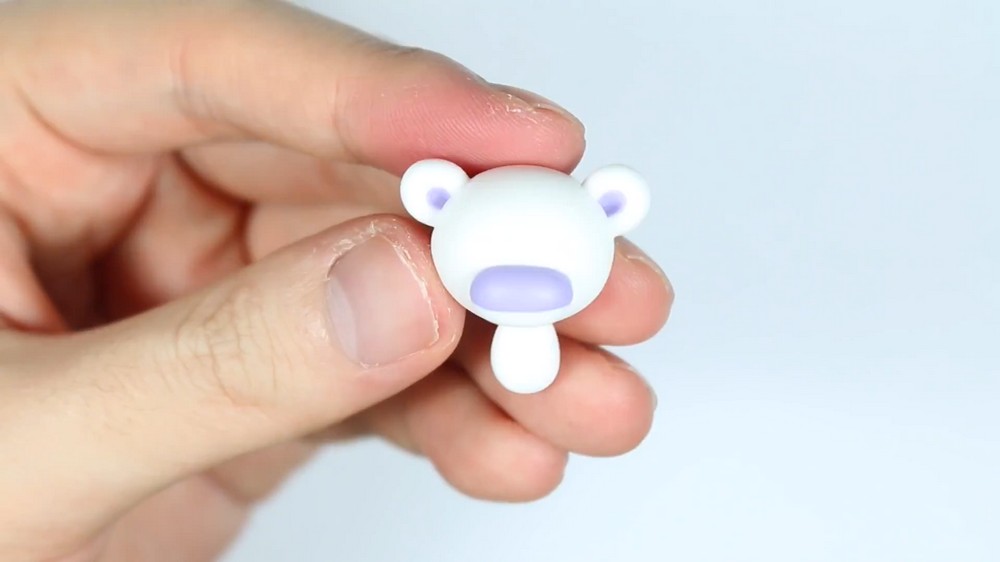
- Create Purple Portion:
Roll a small piece of purple clay into an oval. Use your blade to cut it in half, then cut one half again so you have two quarters. - Repeat with White Clay:
Do the same thing with white clay—roll, cut in half, then cut one half again. - Put Together:
Combine a purple quarter and a white quarter side by side so it resembles Funtime Freddy’s iconic two-tone snout. - Attach the Snout:
Blend the assembled snout carefully onto the lower front of the head.
Step 4: Build the Body
- Shape the Torso:
Pinch and roll white clay into a rounded rectangle form (a pill shape). - Trim and Attach:
Cut off one end to flatten it, then blend that end to the bottom of the head so they join smoothly.
Step 5: Make the Arms and Legs
- Form Limb Cones:
Roll four pieces of white clay into cone shapes (arms and legs). - Cut and Attach:
Cut each cone at a diagonal angle on one end. Attach the arms and legs to the sides and bottom of the body, blending in well for security and cuteness.
Step 6: Add the Stomach Patch
- Flatten Purple Belly:
Roll out some purple clay, flatten it into a round “pancake,” and place this onto the center of Freddy’s belly.
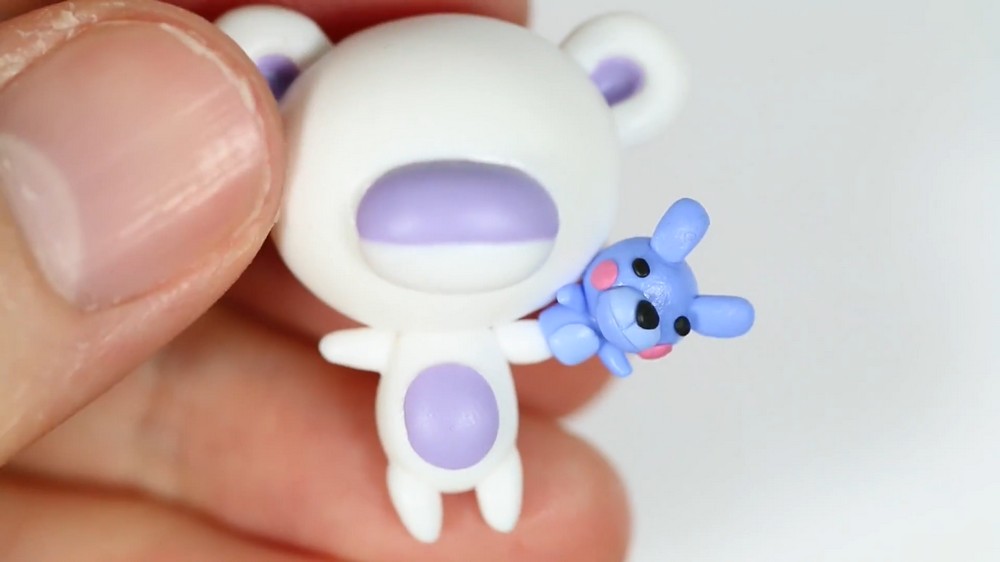
Step 7: Create and Attach the Puppet (Bon-Bon)
- Modify Freddy's Arm:
For the arm holding the puppet, cut the arm into two sections:- One cut at the end
- Another at the very tip (where Freddy will hold the puppet)
- Make the Puppet Body:
Roll a cylinder of blue clay for Bon-Bon’s body and add it onto the cut end of the arm. - Make the Puppet Head:
Roll a ball of blue clay and attach it on top of the body. - Details for the Puppet:
- Add a small circle for the muzzle, similar to Freddy’s snout.
- Attach tiny arms made with blue clay in the same way as Freddy’s arms.
- Roll out thin blue snakes, flatten and cut them for the ears and blend onto the puppet head.
- Add a nose, rosy cheeks, and two small dot eyes using scraps of clay or a dotting tool.
- Affix Bon-Bon:
Once finished, carefully attach the puppet to Freddy’s arm, blending the join.
Step 8: Make the Face Details
- Snout Dividing Line:
Use your blade to make a light, straight indent on the purple side of the snout. - Fill the Indent:
Roll a thin snake of black clay and press it into the indent (this becomes the mouth line). - Nose:
Make a small oval with black clay and attach it just above the snout. - Cheeks & Eyes:
- Roll two small purple or pink balls for the rosy cheeks and attach firmly.
- Place two tiny balls of black clay for eyes.
- Above the eyes, add small, thin slices of black clay for eyebrows, curving them to make Freddy look joyful.
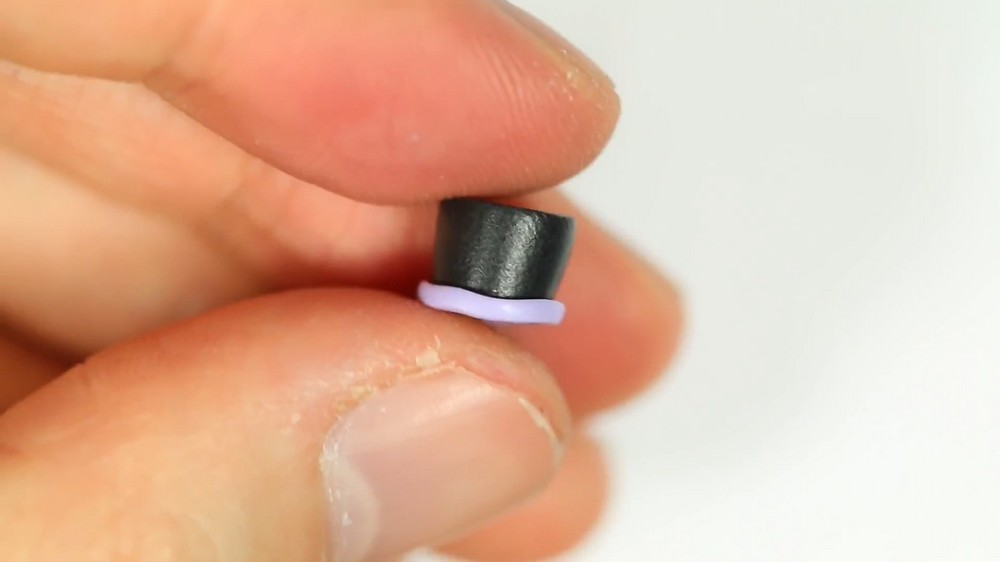
Step 9: Make the Hat
- Form Hat Cylinder:
Roll some black clay into a short cylinder and cut off both ends so they’re flat. - Make Hat Band:
Roll out a thin strip of purple clay and wrap it around the base of your hat cylinder. - Create Hat Brim:
Flatten a small disc of black clay for the brim and set the cylinder on top.
Step 10: Add the Bow Tie
- Bow Tie:
Roll out a purple ball, flatten it, and pinch the middle to form a bow tie. Attach beneath the head.
Step 11: Assemble, Bake & Optional Glazing
- Final Assembly:
Make sure all parts are firmly blended and the character stands securely. - Bake:
Carefully transfer your finished Funtime Freddy creation to a baking tray lined with parchment paper. Bake according to your clay’s instructions (usually 265–275°F/130°C for 20–30 minutes). - Cool:
Let your Freddy cool completely before handling. - Glaze (Optional):
If desired, apply a thin coat of glaze for a smooth, shiny finish. Let it dry fully.
Tips for Success
- Work in sections: If you’re a beginner, complete one part (like the head) before moving onto the next.
- Use reference images: Keep Funtime Freddy artwork on hand to match features correctly.
- Keep tools and hands clean to prevent color smudges.
- Secure attachments: Blend clay seams well so small parts (hat, ears, arms, puppet) don’t fall off after baking.
- Customize: Experiment with expressions, add more details, or try different poses to make your Freddy unique!
Conclusion
And there you have it—a cute, detailed Funtime Freddy polymer clay figure, complete with his cuddly puppet sidekick, bow tie, hat, rosy cheeks, and signature colors. This project teaches you important clay sculpting basics such as rolling, flattening, texturing, and blending, plus miniature accessory making. Whether you display him, gift him to a Five Nights at Freddy’s fan, or make an entire set, this Freddy will bring playful character to your collection.