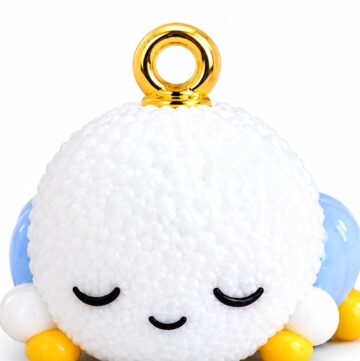
Little corners feel more cheerful with DIY Clam Totoro made from Polymer Clay, a tiny character with a gentle expression that suits a playful room display.
Fans of gentle forest characters often want a small reminder of their favorite stories. DIY Clam Totoro offers a cute way to work with that idea through a tiny figure inspired by Totoro's familiar shape. Its peaceful face and compact size can feel especially appealing beside other small decorations.
Whimsical DIY Clam Totoro Miniature in Polymer Clay
Unlike a large sculpture, this idea puts attention on the outline and expression. Totoro is known for a rounded body, pointed ears, and simple facial markings. Those features give the figure an identity even when the overall design stays small. Polymer Clay lets each part be formed in manageable pieces, making it easier to think about balance and placement.
Where Small Ideas Come to Life
For viewers who like small details, PolymomoTea offers plenty of interesting inspiration. The designer explores characters, miniature objects, and decorative pieces in different styles. Rather than focusing on large displays, many projects celebrate the appeal of little things, giving fans fresh ways to appreciate handmade figures and wonderfully playful designs.
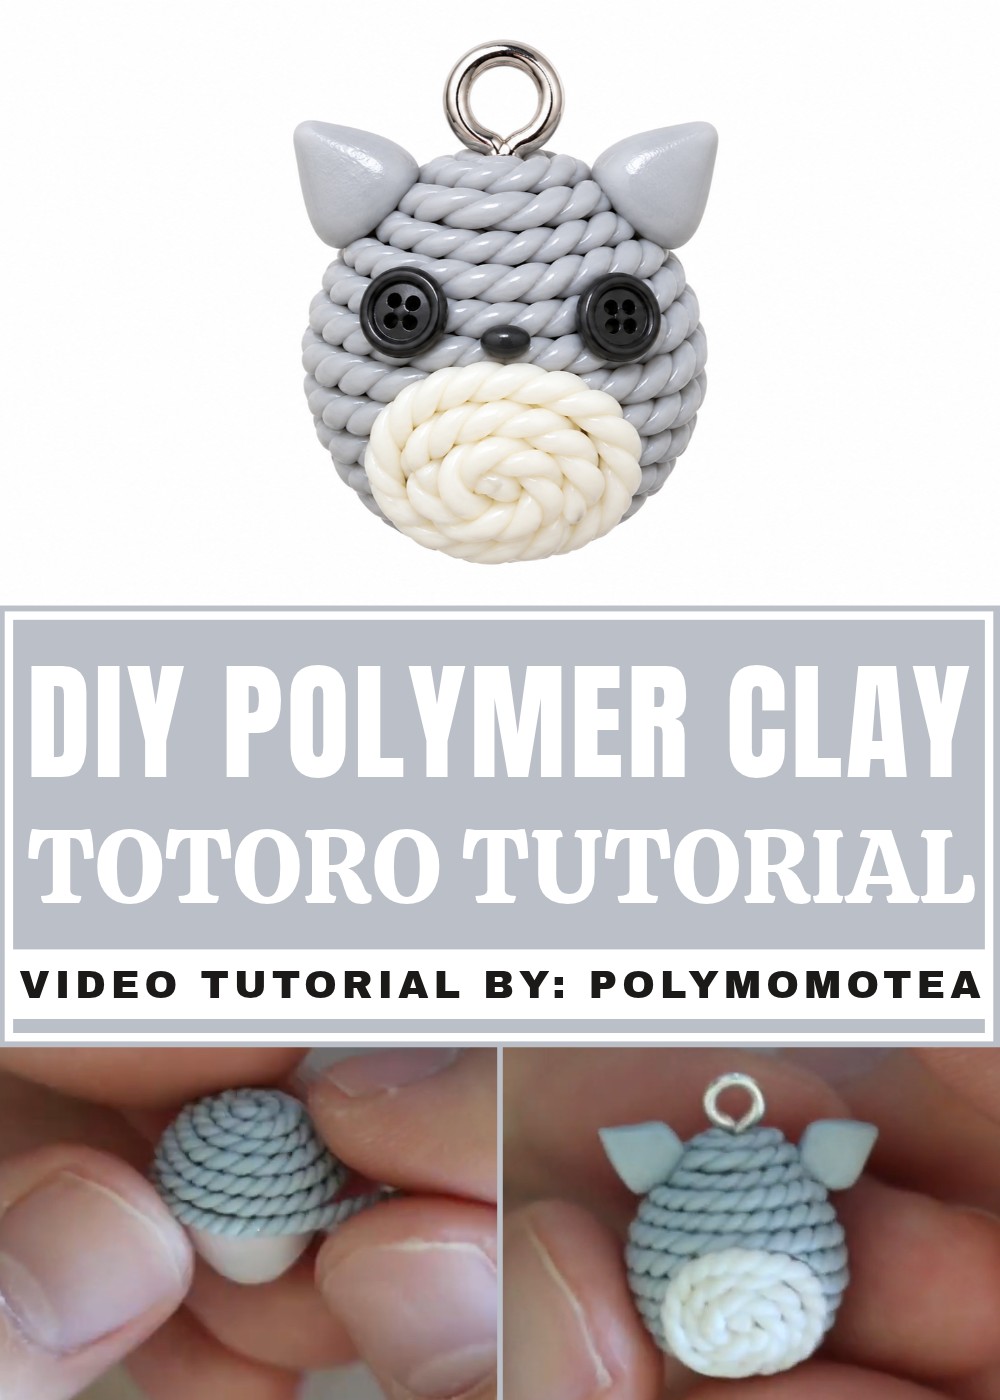
Facial details deserve extra care on a figure this size. Set the ears in place, then decide where the eyes and belly markings belong. Even a slight change can make the character look surprised, sleepy, or quietly happy. For a shell-inspired version that fits the Clam name, the outside shape could be a little wider and rounder. The recognizable Totoro features should still stay clear.
Once finished, this small figure can rest on a desk near a pencil holder or sit among favorite character figures. It is also a sweet little present for someone who enjoys animated stories. The appeal comes from simple shapes and the warm, familiar mood they suggest, rather than from lots of decoration.
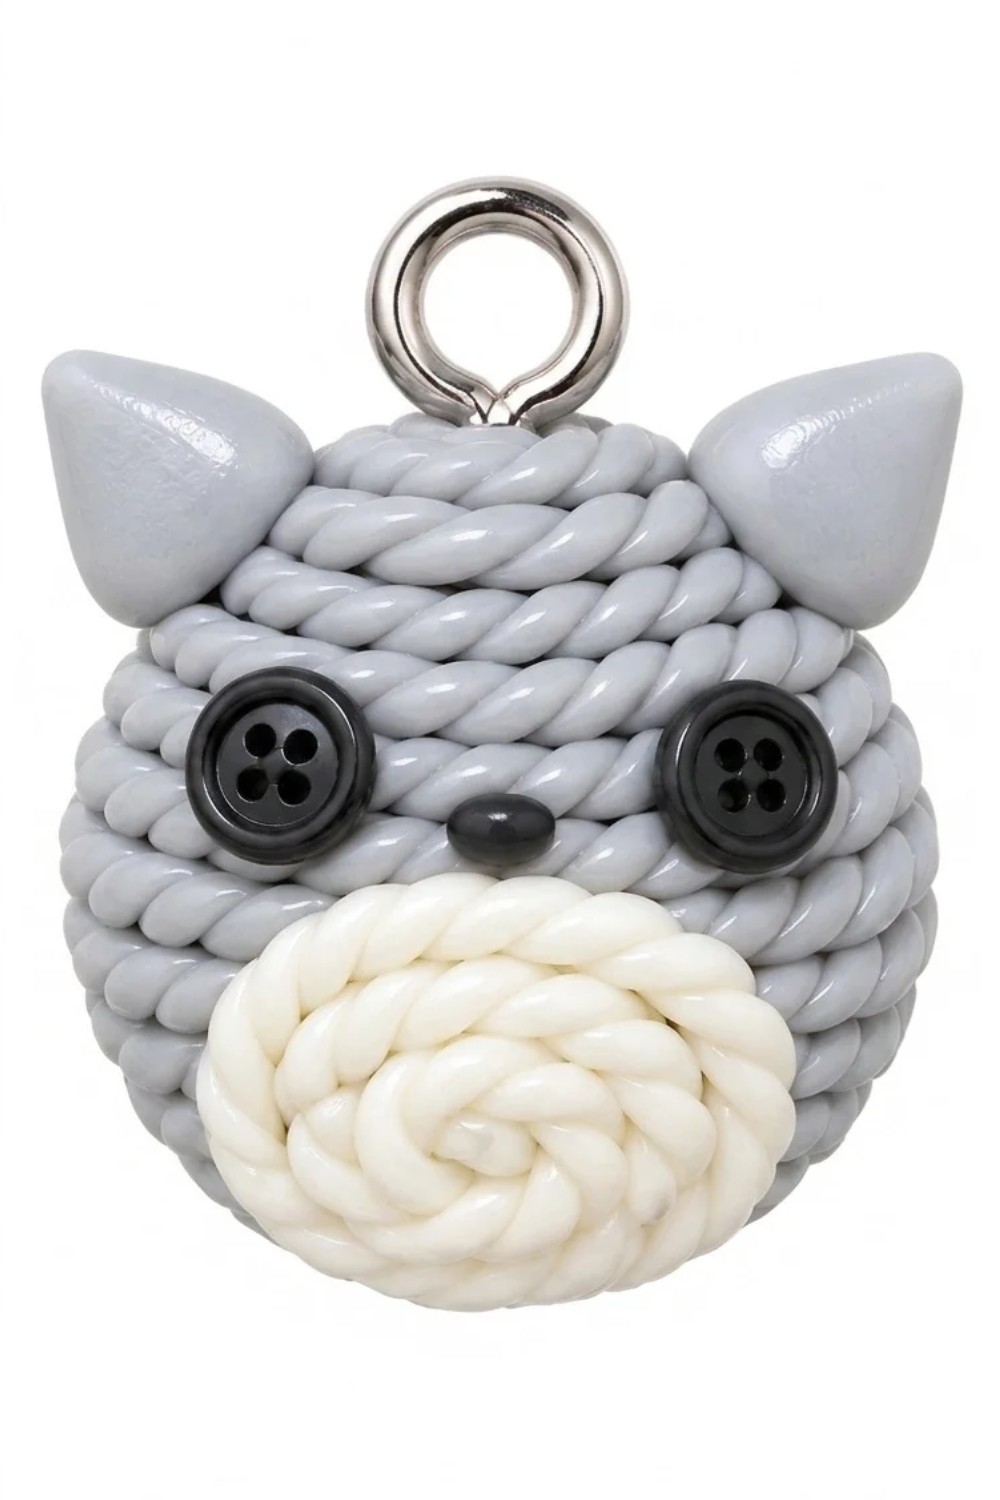
How to Make a Moomintroll (Moomin) Polymer Clay Charm
In this tutorial, we’ll go step by step to create your very own adorable Moomintroll-inspired charm using polymer clay. This super cute and easy project is perfect for beginners and experienced crafters alike.
Materials & Tools
Materials:
- Scrap Clay (for the charm base)
- Gray or Silver Polymer Clay (Fimo silver is used in the tutorial)
- White Polymer Clay
- Black Polymer Clay
- Eye Pin (to transform your creation into a charm)
Tools:
- Needle Tool or Toothpick
- Dotting Tool (large and small)
- Blade or Craft Knife
- Clean Work Surface
- Baking Tray and Oven (for curing the polymer clay)
Step-by-Step Instructions
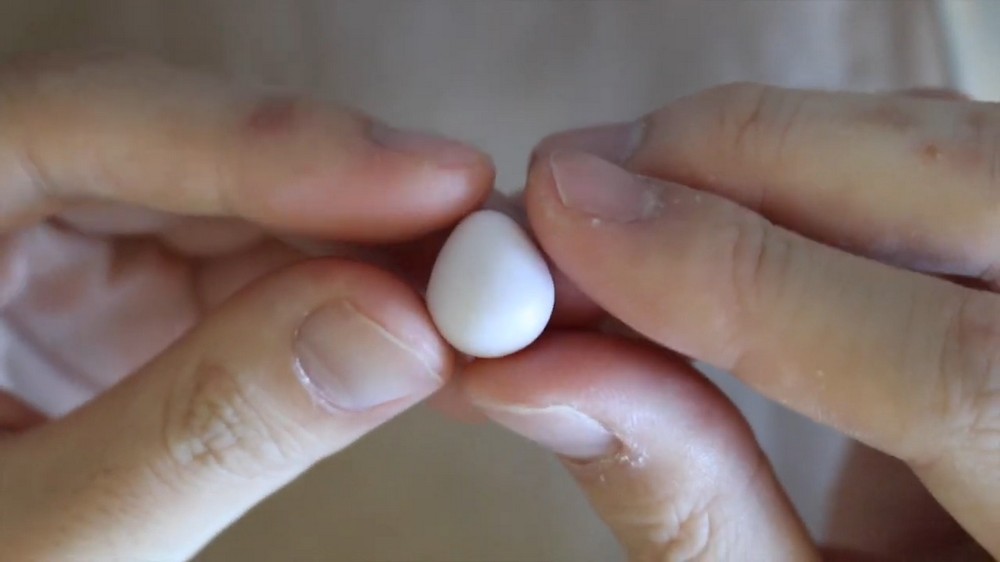
Step 1: Create the Base Shape
- Form a base with scrap clay:
- Take a ball of scrap clay and roll it into a well-rounded ball.
- Gently pinch the top of the ball to create a teardrop or egg-like shape. This will form the base structure for the Moomintroll body.
- Refine the teardrop shape:
- Smooth out any fingerprints or uneven edges using your fingers.
- Set the teardrop shape aside for now.
Step 2: Roll the Gray (Silver) Clay
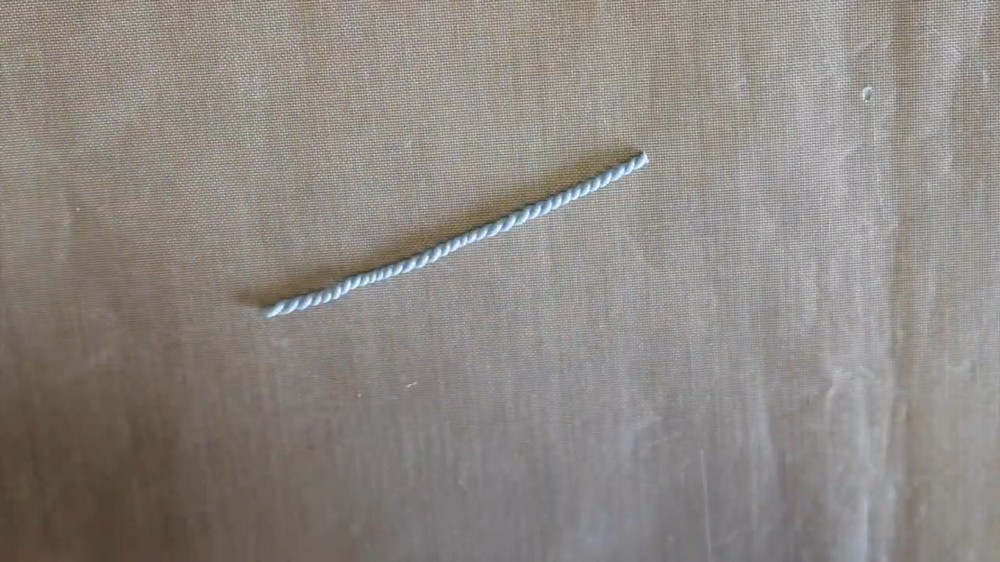
- Shape the gray clay:
Take a portion of gray (or silver) clay, knead it until it’s soft, and roll it into a long, thin "snake." - Twist the clay:
- Fold the snake in half, bringing both ends together.
- Hold the ends and gently twist the snake in one direction, creating a soft, spiral texture.
Step 3: Wrapping the Base Shape
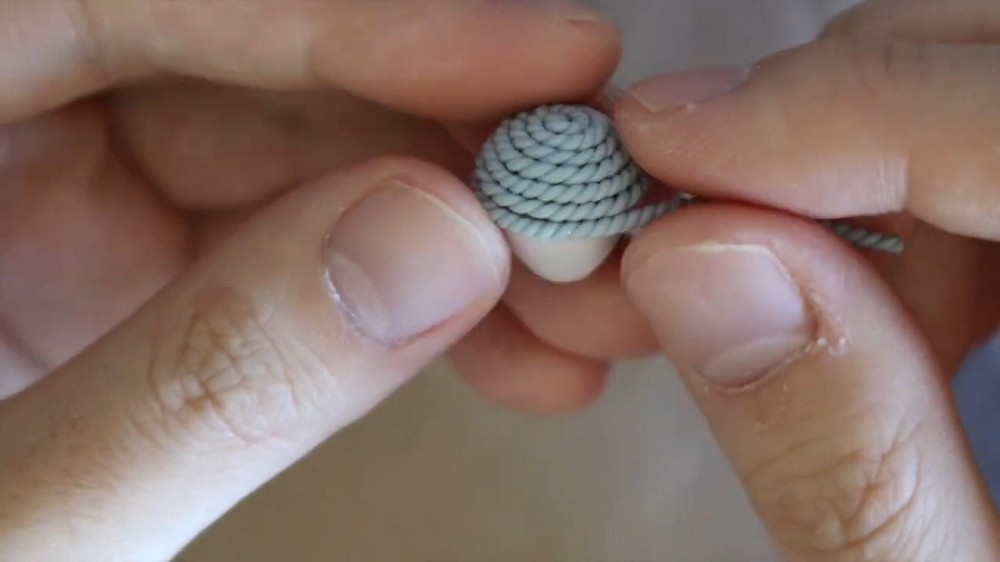
- Wrap the twisted clay:
- Starting from the bottom of the teardrop-shaped base, begin wrapping the twisted clay around it in a spiral pattern.
- Continue wrapping upward until the entire base is covered.
- Smoothen the edges:
- Use your fingers or a small tool to blend the ends of the clay into the body gently, ensuring a seamless look.
Step 4: Create the Belly Area
- Carve out the belly:
- Using a blade or craft knife, gently carve out a circular area for the belly on the body.
- Make sure you carve only the surface of the clay and do not cut through to the scrap clay underneath.
- Prepare the belly design:
- Using white clay, roll it into a thin snake.
- Twist the snake together just like you did with the silver clay in Step 2.
- Fill the belly:
- Place the twisted white snake into the circular area you carved out.
- Start from the edge and spiral it inward, completely covering the belly space.
- Cut off any excess clay at the end and secure it gently using your fingers or tool.
Step 5: Create the Head Details
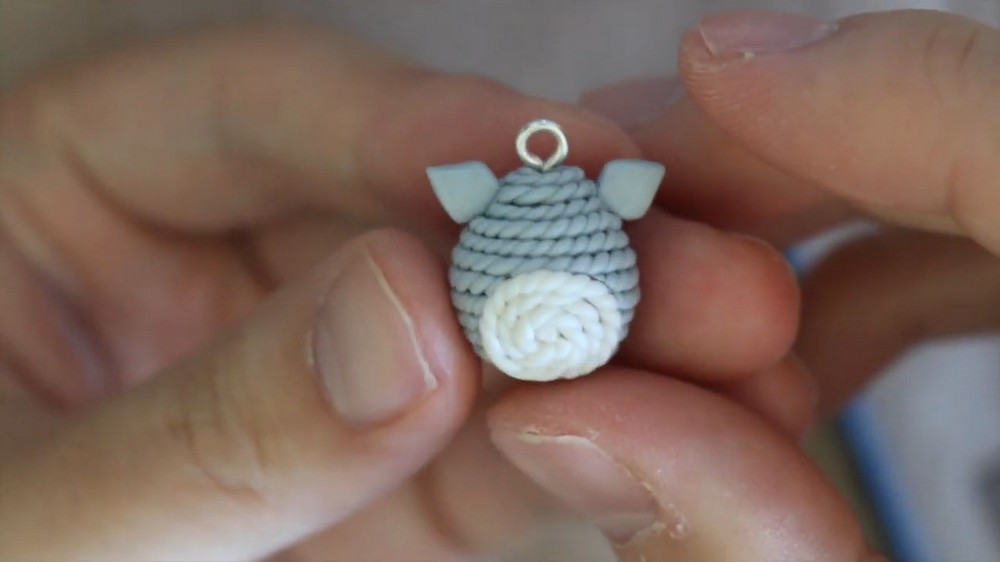
- Make the diamond-shaped detail:
- Take some silver clay and pinch a small portion into a diamond shape.
- Gently place and blend this diamond onto the top of the teardrop-shaped head to create the iconic forehead detail of the Moomintroll.
- Insert the eye pin:
- At this stage, insert an eye pin into the top of the head, making sure it’s secure.
Step 6: Sculpt the Button Eyes
- Make black button eyes:
- Roll two small black balls of clay for the eyes.
- Take a large dotting tool and press it lightly into the center of each black ball to create an indented "button" effect.
- Add button details:
- Using a toothpick, small dotting tool, or eye pin, create four tiny circles inside the indent of each black button to mimic sewn buttons.
- Attach the eyes:
Press the button eyes onto the face in their proper position. Gently press to secure.
Step 7: Add the Nose and Belly Details
- Add a nose:
- Roll a small oval shape out of black clay for the nose.
- Place it in the middle of the head below the eyes.
- Create the belly pattern:
- Roll small thin snakes of silver clay.
- Form each snake into an upside-down "V" or chevron shape.
- Attach these “V” shapes onto the white belly area to create the iconic tummy pattern for Moomintroll.
Step 8: Bake the Charm
- Prepare for baking:
Place your completed Moomintroll charm on a baking tray lined with parchment paper or aluminum foil. - Bake the clay:
Follow the brand-specific instructions for your polymer clay. Typically, bake at a temperature of 110–130°C (230–275°F) for 15–30 minutes. - Cool completely:
Allow the charm to cool fully before handling it to ensure it hardens properly.
Final Tips & Suggestions
- Using scrap clay: Starting with a ball of scrap clay for the base saves your “main” clay from being used unnecessarily. Make sure the scrap clay is well-covered by your main clay so it doesn’t show through.
- Twisting the clay: Be gentle when twisting snakes so they don’t break apart. Knead your clay well beforehand to make it more pliable.
- Fine details: Pay attention to the little features, like the eyes and belly. These details give your Moomintroll its personality and charm!
- Experiment with colors: While the classic Moomintroll is gray or silver, don’t hesitate to play around with different colors for a fun and unique version!
Conclusion
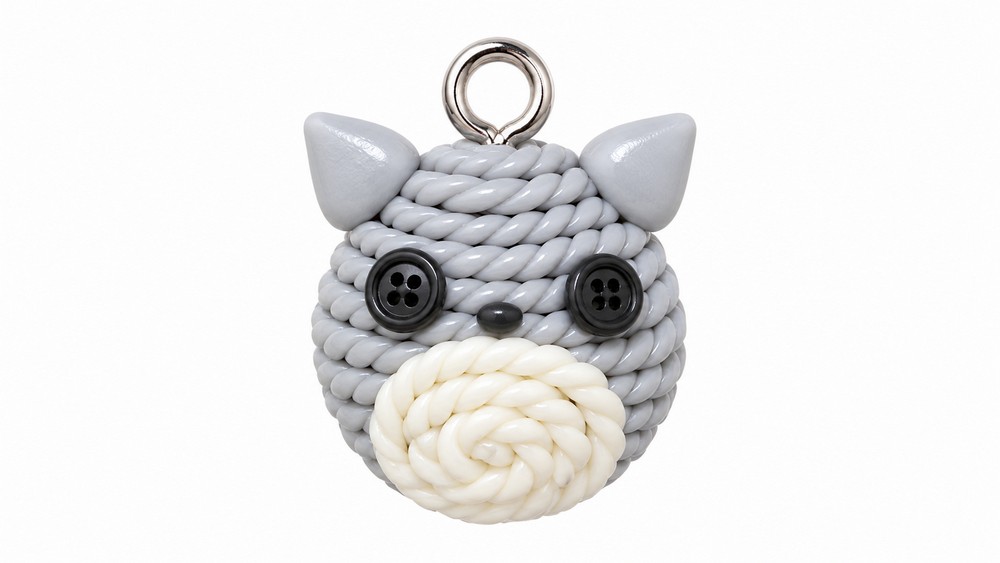
Congratulations! You’ve just made your very own Moomintroll polymer clay charm. This cute and easy project is perfect for crafting enthusiasts and makes a delightful gift for fans of the iconic character.