Choose a tiny prop for your DIY Baymax Chibi and turn the rounded robot from Big Hero 6 into a personal clay gift for a friend who loves the film too.
Sometimes a small gift feels more personal when it includes an inside joke or something the recipient sees every day. DIY Baymax Chibi leaves room for that detail by giving the little robot an object to hold. Until you choose what goes in those arms, the same figure could suit a birthday, a movie night, or a simple thank-you.
DIY Baymax Chibi With a Tiny Clay Prop
Baymax is the friendly robot from Big Hero 6, and his puffy white body lends itself to a chibi version. Two dark dots linked by a thin line are enough to give him that quiet, familiar expression. With so little detail on the face, your attention goes straight to what he’s holding. A clay heart would fit someone who loves the film for its friendship story, while a tiny book would suit the person who always has a novel in their bag.
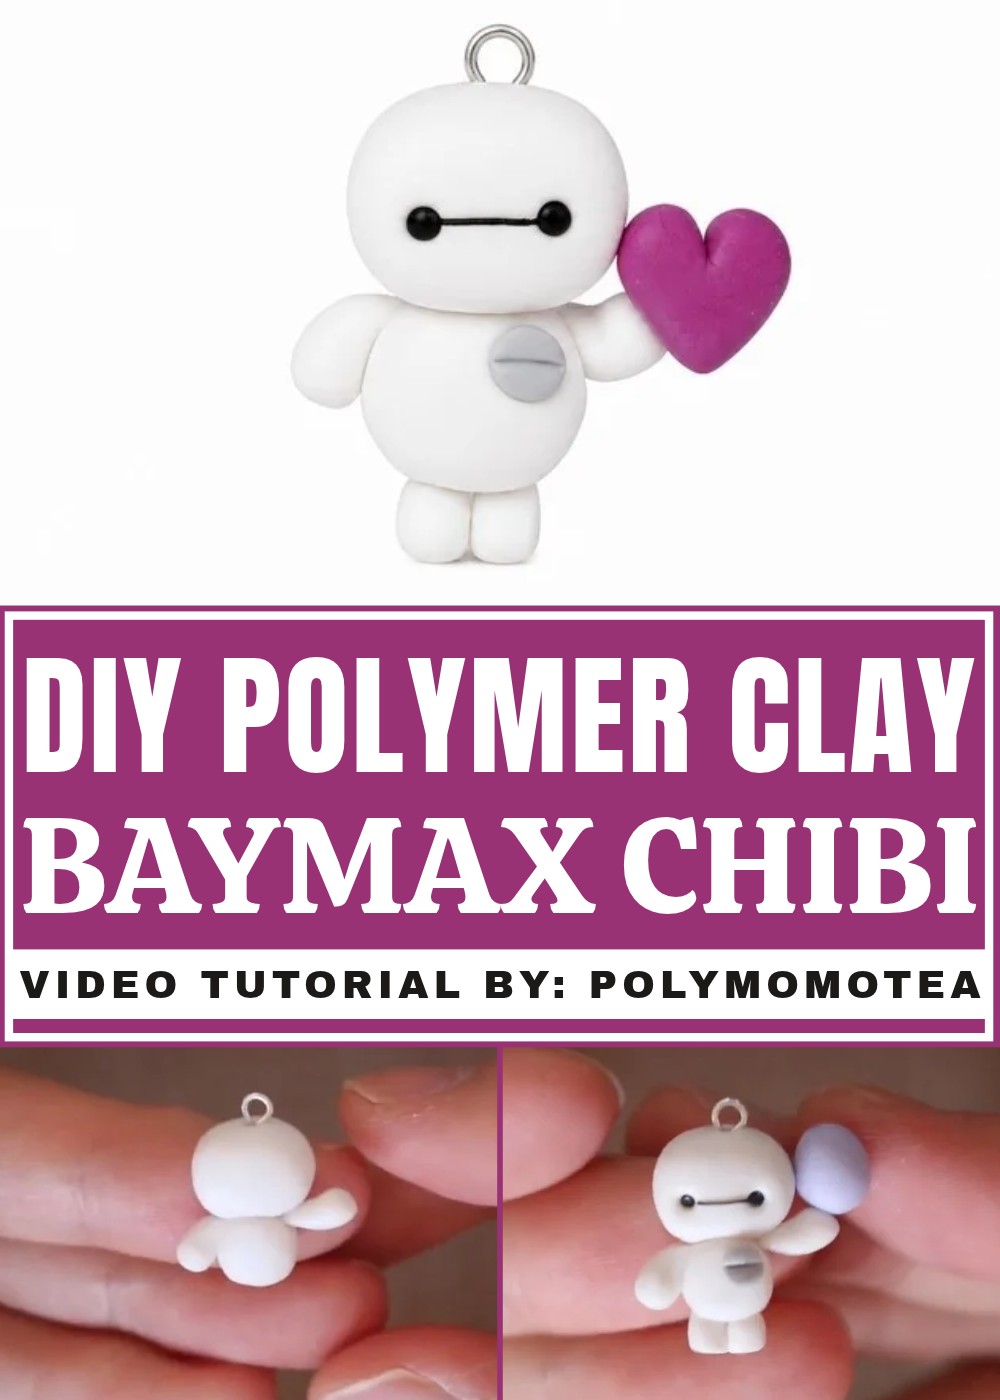
Decide on the object before shaping the arms. A book and a heart take up space in different ways, and knowing the width helps you plan where the hands will sit. You could also choose one strong color for the prop so it shows up clearly against the white body. Afterward, set the finished version near a stack of movies or tuck it into a gift box with a short note about why you chose that particular object.
Behind the Clay Figure
This Baymax appeared on PolymomoTea during a clay collaboration with Ally from ChubbyChipmunkCrafts. Alex Lee invited viewers to change the item the robot holds, so the same figure could suit different occasions. The project shows how he leaves room for personal choices while keeping a character’s recognizable features in place.

1234
Customizable Holiday Baymax Charm Pattern
This customizable Baymax charm is perfect for celebrating holidays in a fun and creative way. Inspired by the lovable robot from Big Hero 6, this design features Baymax holding a festive egg for Easter. The charm can be easily modified to suit different holidays or occasions by swapping the item in his hand, making it versatile and personalizable. The following step-by-step guide will walk you through creating this adorable Baymax charm using polymer clay.
Materials & Tools
Materials
- Polymer Clay:
- White clay: For Baymax's body, arms, and head.
- Black clay: For Baymax's eyes and face line.
- Silver clay: For Baymax’s chest detail.
- Colored clay: For the customizable item (e.g., pastel colors for an Easter egg).
- Fimo Aqua Gel:
- For stronger attachment between pieces.
- Eye Pin:
- For stacking pieces together (optional for charms).
Tools
- Knife/Blade:
- For carving and slicing clay.
- Dotting Tool:
- To create eye sockets.
- Sculpting Tools:
- For blending clay pieces together.
- Non-stick Work Surface:
- Protects your table and keeps clay from sticking during sculpting.
- Oven:
- For baking and curing polymer clay.
Step-by-Step Instructions
Chapter 1: Making Baymax’s Head and Body
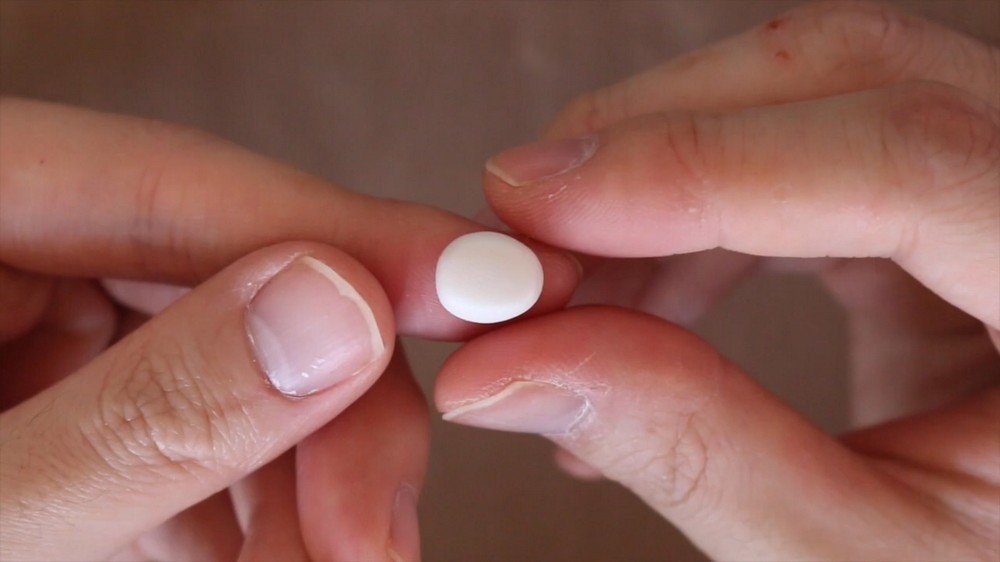
- Shape the Head:
- Roll a piece of white polymer clay into a ball. Flatten the ball into a smooth oval shape that will make up Baymax’s head.
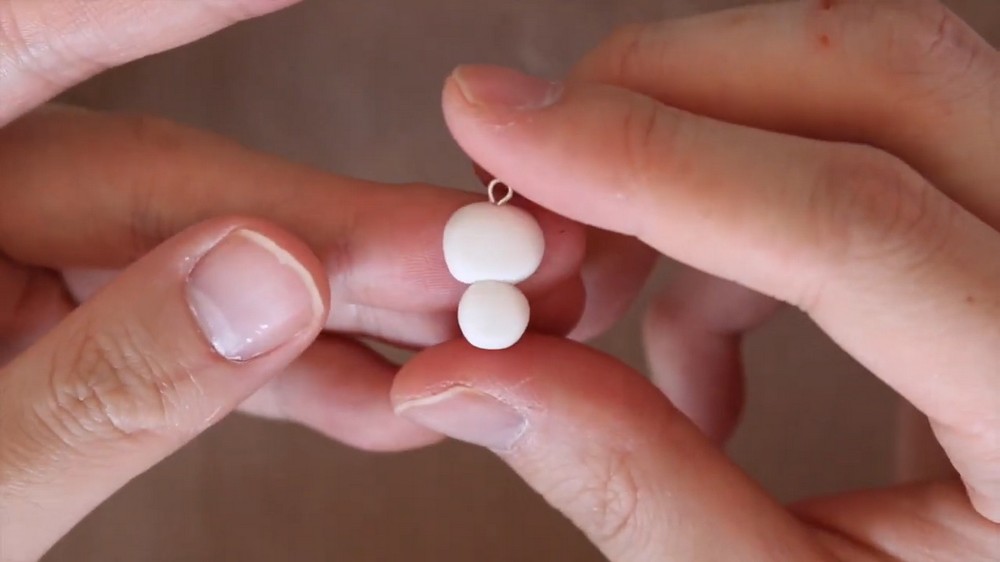
- Add the Eye Pin:
- Before attaching the body, stick an eye pin halfway into the top of the oval-shaped head. Apply some Fimo Aqua Gel around the pin to help secure it better. Leave part of the eye pin sticking out so you can easily connect the body later.
- Form the Body:
- Take another piece of white polymer clay and roll it into a teardrop shape. Flatten the clay slightly to give it a rounded base, ensuring it looks chubby like Baymax.
- Attach the Body to the Head:
- Apply Fimo Aqua Gel to the extended portion of the eye pin sticking out from Baymax’s head. Gently press the body onto the head, ensuring they are securely joined together.
Chapter 2: Adding Arms and Legs
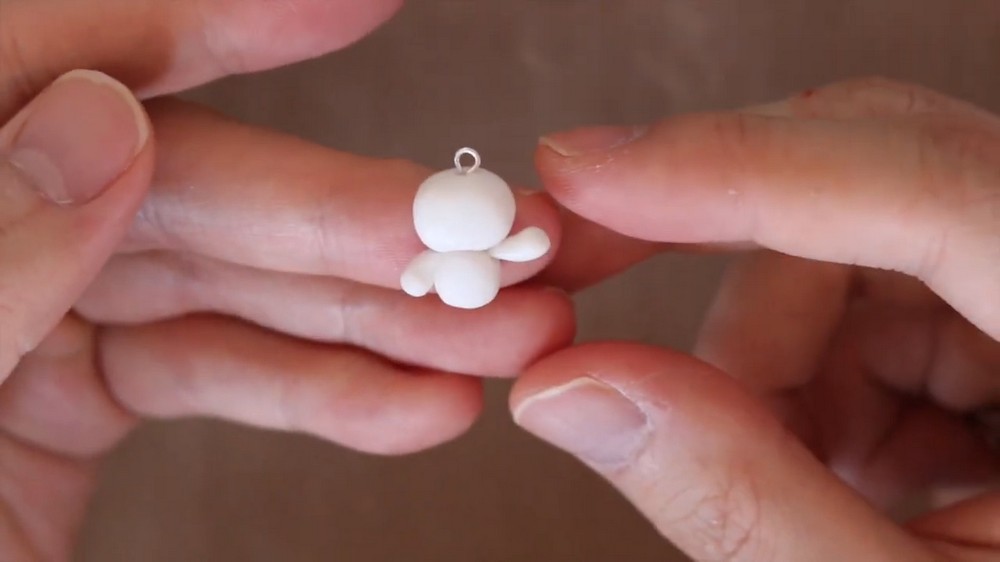
- Shape the Arms:
- Roll two small balls of white clay into elongated, teardrop-shaped snakes. One side should be slightly pointed, while the other side remains rounded.
- Attach the Arms to the Body:
- Blend the broader ends of the teardrop-shaped arms onto Baymax’s body, placing one arm pointing downward and one arm pointing upward. Adjust and smooth the clay to ensure the arms appear seamless.
- Create the Legs:
- Roll out a thick snake of white clay and cut it into two equal-sized pieces. These pieces will form Baymax’s legs.
- Attach the Legs:
- Position the legs at the bottom of Baymax’s body, spaced slightly apart. Blend the edges into the body for a smooth finish.
Chapter 3: Adding Face Details
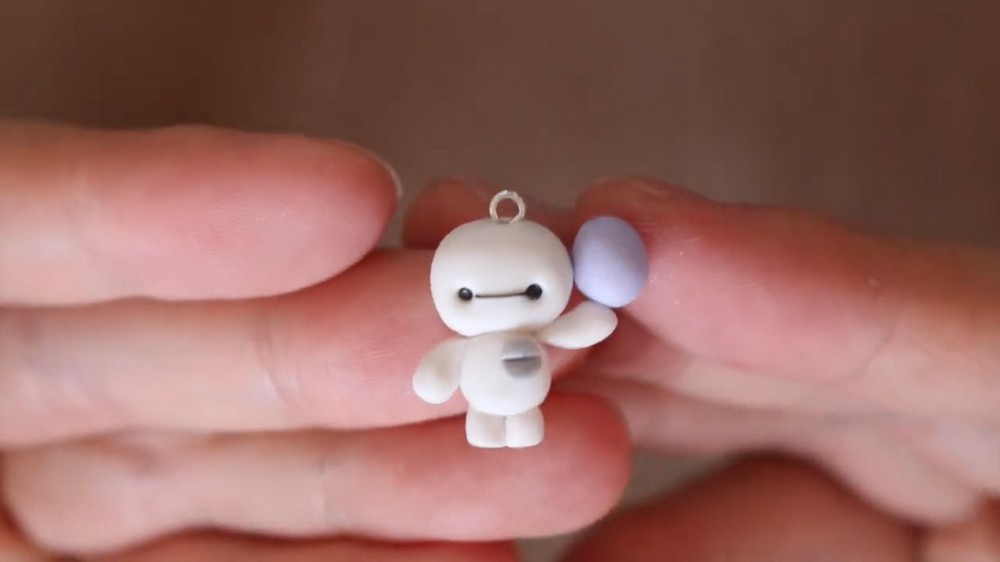
- Create Eye Sockets:
- Use a dotting tool to poke two small indentations into Baymax’s head where the eyes will go.
- Add the Face Line:
- Roll a very thin snake of black clay and position it horizontally between the two eye sockets to form the connecting "line" of Baymax’s simple face.
- Add the Eyes:
- Use two tiny balls of black clay, one for each eye socket. Gently press them into the indentations, completing Baymax’s iconic minimalist expression.
Chapter 4: Customizing Baymax for Easter
- Create a Chest Pocket:
- Roll out a small piece of silver clay and flatten it to form Baymax’s chest plate detail. Position the plate onto his body and use a craft knife to draw a straight horizontal line through the middle of the pocket. This detail represents the compartment for his chips from the movie.
- Sculpt the Easter Egg:
- Roll a piece of colored polymer clay (e.g., pastel pink, blue, or yellow) into an egg shape. This can be easily created by rolling a ball between your hands and tapering the top slightly to form the oval shape.
- Attach the Egg:
- Place the egg in Baymax’s hand by pressing it gently onto the upward-facing arm. You can use Fimo Aqua Gel to ensure the egg stays in place.
- Adjust Size if Needed:
- If the first egg feels too large, roll a smaller egg from clay and repeat the process for better proportions.
Chapter 5: Baking and Final Details
- Bake Baymax:
- Place the completed figure on a baking tray lined with parchment paper or a non-stick surface. Bake the charm according to polymer clay instructions (typically 260°F - 275°F for 15–30 minutes).
- Optional: Prepare for Stacking:
- If you want Baymax to remain stackable like a figurine instead of a charm, poke a small hole at the bottom before baking. If it’s not being stacked, insert an eye pin before baking to make it into a standard charm.
- Finish with Glaze:
- Once cooled, use clear glaze to seal the charm and give Baymax a shiny, polished finish. A glaze can also make the clay more durable over time. Allow the glaze to dry completely before handling the charm.

Chapter 6: Expanding Customization Options
- Seasonal Items:
- A key aspect of this charm is its customizability for different holidays or occasions. You can easily swap Baymax’s egg for any other seasonal symbol, such as:
- Christmas: Candy cane or gift box.
- Valentine’s Day: Heart.
- Halloween: Pumpkin.
- St. Patrick’s Day: Four-leaf clover or pot of gold.
- A key aspect of this charm is its customizability for different holidays or occasions. You can easily swap Baymax’s egg for any other seasonal symbol, such as:
- Personal Touch:
- Instead of holiday themes, you could make Baymax hold a mini version of your favorite object, character, or food!
Conclusion
This fun and versatile Baymax charm is perfect for fans of Big Hero 6 and anyone who loves holiday-themed crafts. By following the easy sculpting steps, you’ll be able to make your very own Baymax charm in any size you like! Its simple design and customizable options open the door for endless creativity. Change Baymax’s accessory based on your favorite holidays, or make multiple versions to celebrate throughout the year. Perfect as a gift or decorative piece, Baymax brings joy, charm, and a personal touch to your creations.