Shape a DIY Polymer Clay Chubby Raichu with round cheeks and a lightning tail for a cheerful Pokémon figure that fits right beside your favorite game cases.
Game cases take up most of the space on a gaming shelf, but there’s usually room for one little detail that feels like yours. DIY Polymer Clay Chubby Raichu gives Pokémon fans something they can shape by hand and set right next to their favorite games. This version plays up the character’s rounded form, so the belly and cheeks have as much personality as the ears.
Pokémon Shelf Idea With DIY Polymer Clay Chubby Raichu
About the Designer
Alex Lee shared this Raichu on PolymomoTea as part of a Pokémon collaboration with PinkSugarCotton. He handled Raichu while his guest worked on Pikachu, giving fans two different clay projects to pair together. His half of the collaboration focuses on shaping a familiar character with especially full and rounded proportions.
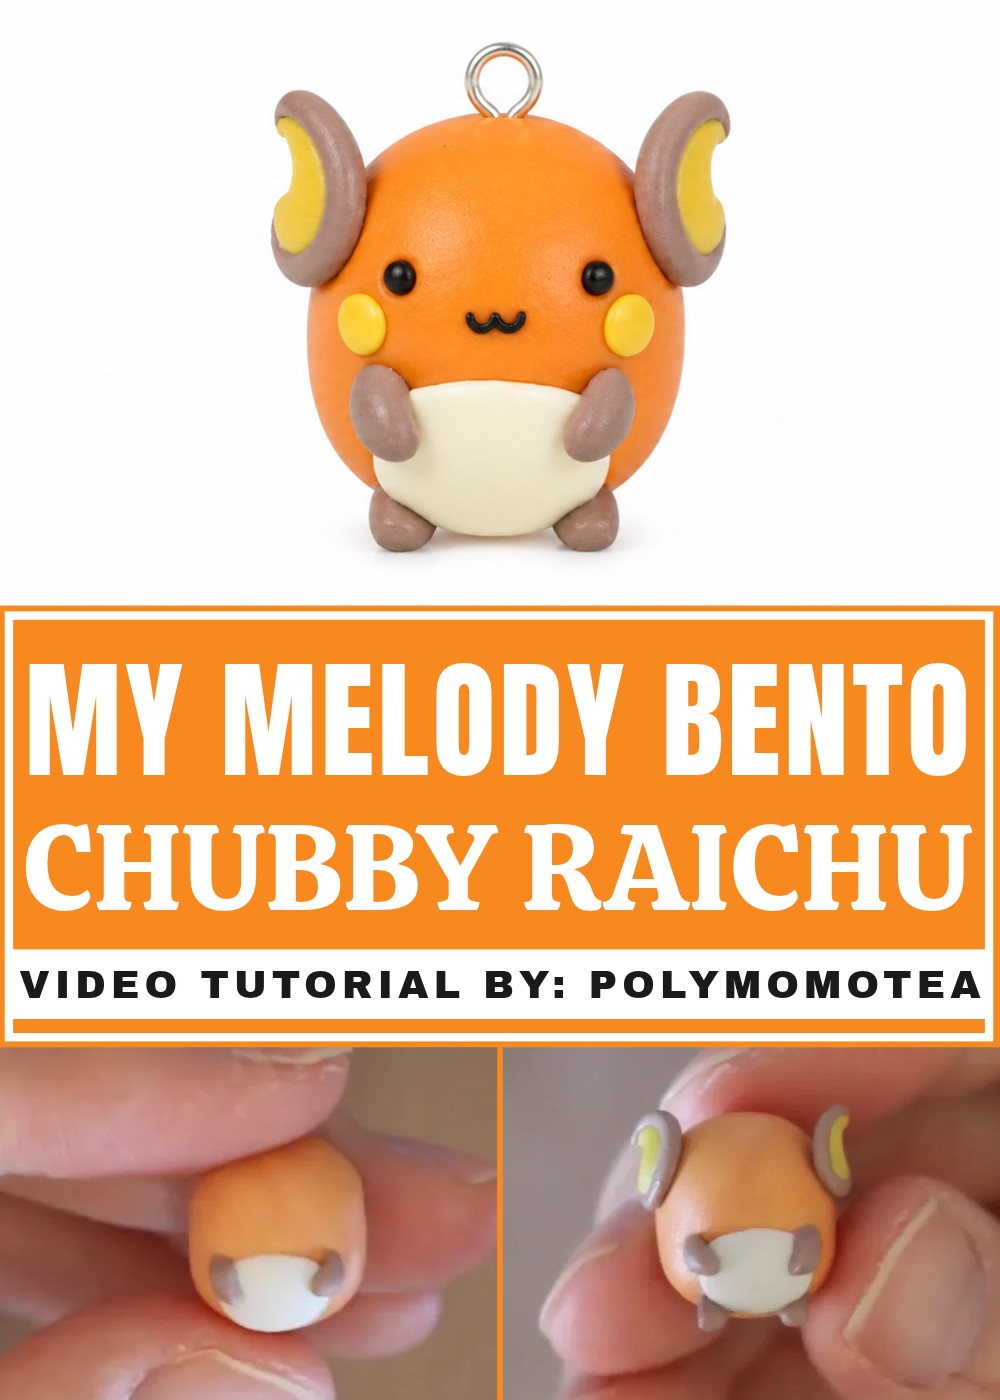
Raichu has a warm orange body, yellow cheek spots, and a pale patch across its tummy. Those colors help define the face and body even when you work at a small scale. The lightning bolt at the end of the tail gives the silhouette one sharp angle among all the curves. That mix of shapes is what makes the figure fun to turn around in your hand.
Start with the main body shape and look at it from the front before settling on the size of the ears and feet. Working from the largest part to the smallest gives you a chance to see how the pieces look together while the shape is still easy to adjust. Once finished, the figure can stand beside a row of game cases, a favorite Pokémon card, or another character from your collection. It also works as a small birthday surprise for someone who always picks Electric types.
Chubby Raichu Clay Charm Pattern
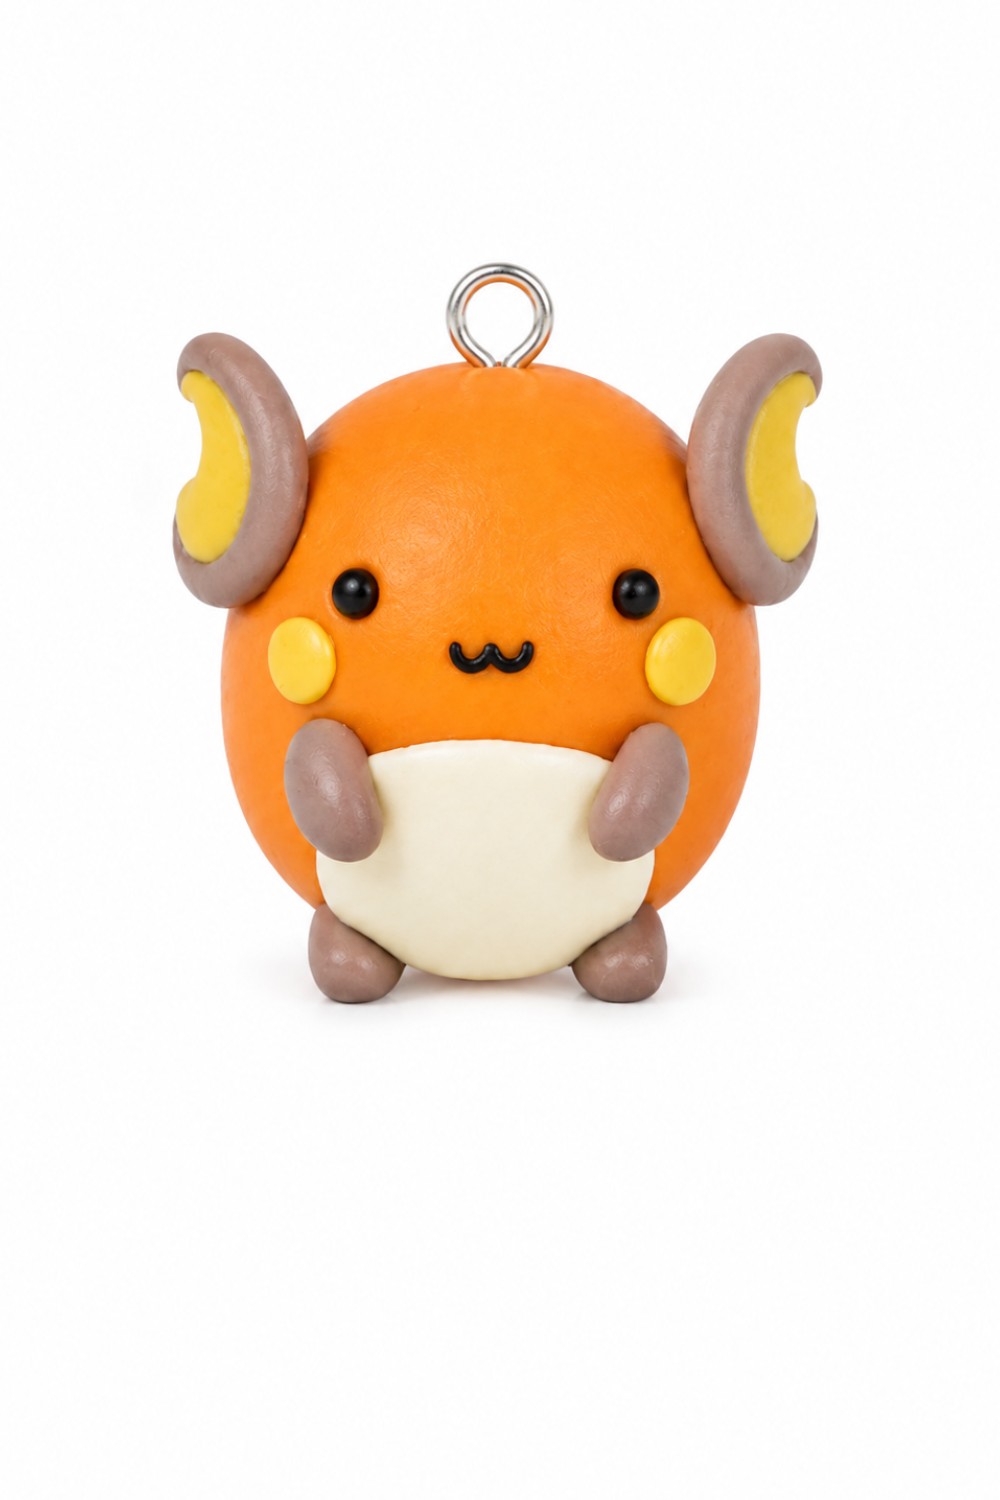
Create your own adorable chibi-style Raichu charm using polymer clay. Inspired by a whimsical image of a chubby Raichu enjoying mochi, this craft captures the charm of everyone's favorite electric Pokémon in a simple and fun design. This charm is perfect for Pokémon fans and makes a great keychain, gift, or decorative trinket.
Materials & Tools
Materials
- Polymer Clay:
- Orange clay: For the body.
- White clay: For the belly.
- Yellow clay: For the ears, cheeks, and tail.
- Brown clay: For the back stripes and part of the tail.
- Black clay: For the eyes, mouth, and details.
- Eye Pin:
- For creating the crescent moon shape on the ears.
Tools
- Blade or Craft Knife:
- For shaping and cutting clay.
- Needle Tool:
- For carving, adding details, and creating eye sockets.
- Sculpting Tools or Fingers:
- To smooth and shape the clay.
- Non-stick Work Surface:
- Protects your surface and prevents clay from sticking.
- Oven:
- For baking the clay (follow the polymer clay package instructions).
Step-by-Step Instructions
Chapter 1: Making the Body and Belly
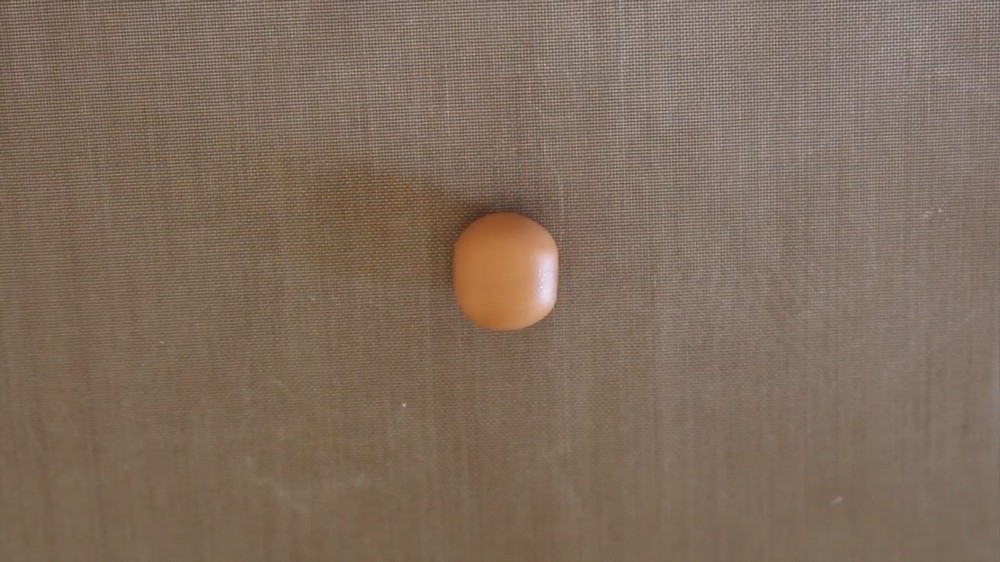
- Shape the Body:
- Take a piece of orange clay and roll it into a ball.
- Shape the ball into a cylinder by rolling it gently.
- Flatten one side of the cylinder slightly to create a rounded, chubby appearance, with one side more prominent than the rest.
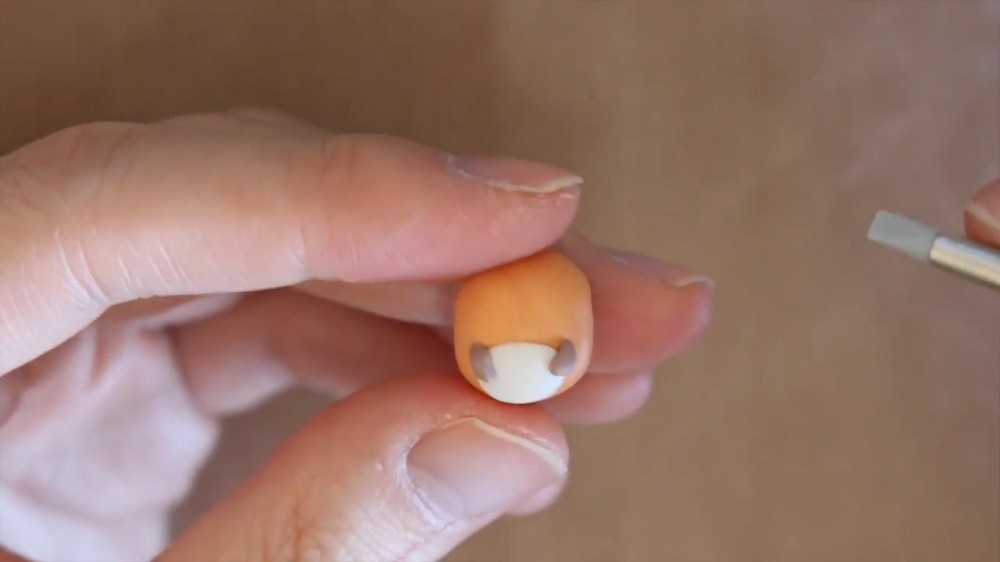
- Attach the Belly:
- Roll out a small piece of white clay into a flat circle.
- Flatten it further to make a thin disc, ensuring it's proportionate to the body.
- Attach this white disc to the rounded front side of the orange body and press down gently to secure it.
Chapter 2: Adding Arms and Legs
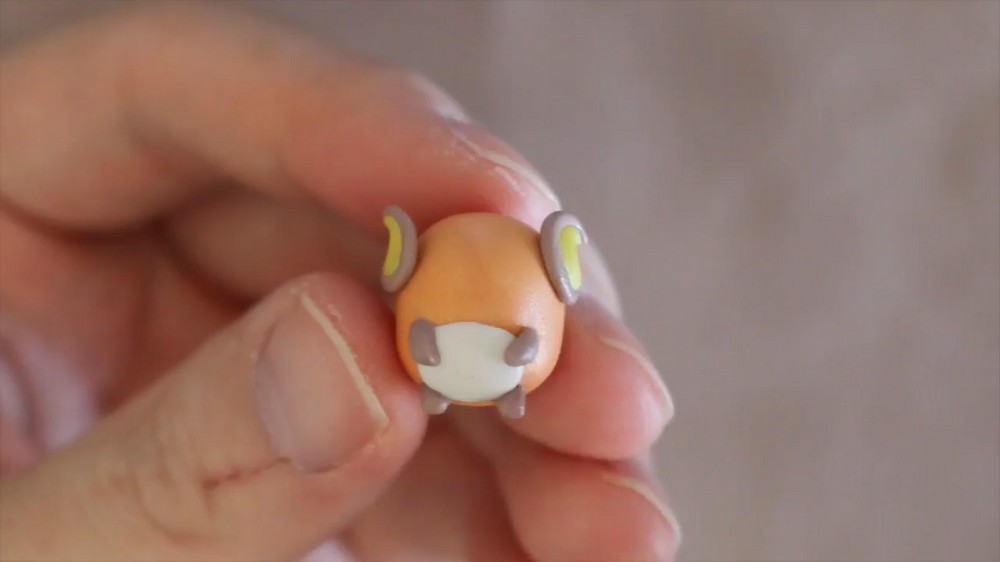
- Roll and Shape:
- Roll out small pieces of orange clay into thin cylindrical shapes for the arms and legs.
- Taper one end of each piece by rolling only one corner of the clay lightly. This creates a pointed end on one side while the other side remains rounded.
- Attach to the Body:
- Position the arms and legs around the white belly, ensuring they are evenly placed.
- Press gently to secure them to the body, blending the edges with sculpting tools or your fingers for a smooth finish.
Chapter 3: Making Ears and Back Stripes
- Create the Ears:
- Roll out two small balls of yellow clay and flatten them into circles.
- Use an eye pin or sculpting tool to carve each circle into a crescent moon shape.
- Roll out brown clay into a thin snake and attach it along the edges of the crescent moon to outline the ears.
- Add the Back Stripes:
- Roll brown clay into very thin snakes.
- Cut small strips from the clay snakes and position them as stripes on the back side of Raichu’s body.
- Press gently to attach and smooth the edges if needed.
Chapter 4: Crafting the Facial Features
- Attach the Ears:
- Place the completed crescent moon-shaped ears on either side of the head at the top of the body. Adjust the angle slightly to give them a playful position.
- Add Eye Sockets:
- Use a needle tool or sculpting tool to poke small holes where the eye sockets will be placed.
- Roll small balls of black clay and insert them into the sockets for the eyes.
- Form the Mouth:
- Roll a very thin snake of black clay and shape it into a W for Raichu’s happy little mouth. Carefully attach this beneath the eyes, adjusting the position to match the charm’s expression.
- Add Cheeks:
- Flatten two small circles of yellow clay and attach them under the eyes as Raichu’s cheeks. Slightly press them against the surface to secure.
Chapter 5: Building the Tail
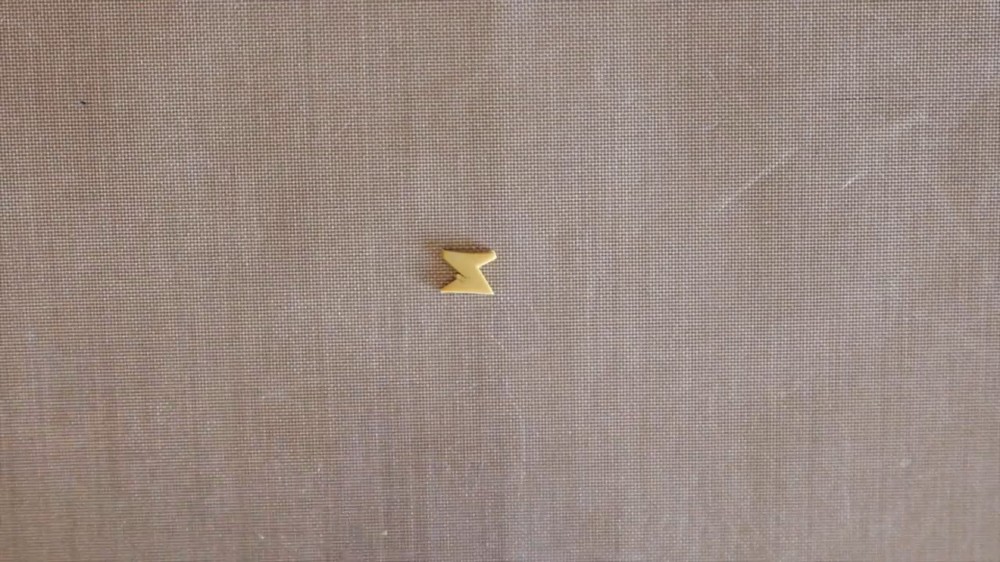
- Shape the Thunderbolt:
- Roll out a piece of yellow clay into a thin, flat rectangle.
- Carve two triangles on opposite sides of the rectangle, pointing in alternate directions. The result should look like a fancy zig-zag lightning bolt.
- Form the Tail Base:
- Roll out a thin snake of brown clay for the base of the tail.
- Attach the zig-zag thunderbolt tip to one end of the brown tail base and press gently to secure.
- Attach the Tail:
- Secure the completed tail to the back of the body, ensuring it connects to Raichu’s lower back. Adjust the angle for a dynamic and playful look.
Chapter 6: Baking and Final Assembly
- Bake the Clay Charm:
- Place your completed Raichu charm onto a baking tray lined with parchment paper or a non-stick surface.
- Bake according to the polymer clay instructions (typically 260°F - 275°F for 15–30 minutes).
- Finish the Charm:
- Once baked and completely cooled, inspect your charm for any uneven edges. Trim them lightly with a blade or sand as needed.
Conclusion
This chibi-style Raichu charm combines playful features and a nostalgic Pokémon theme, making it an ideal craft for fans of the franchise. With its chunky, adorable design, it captures the essence of Raichu in a fun, whimsical way. The attention to details like the crescent-shaped ears, cheeks, and tiny thunderbolt tail brings the charm to life, making this a delightful addition to any collection.