Save a spot beside your favorite Sanrio pieces for DIY Chibi Hello Kitty with its classic bow and fine whiskers on a little figure shaped from polymer clay.
Red is often the first color you notice on this familiar face. In DIY Chibi Hello Kitty, that bow sits high on an oversized head, and the short whiskers help keep the face easy to recognize. The smaller body leaves plenty of room for those details to catch your eye.
Classic Bow Details in DIY Chibi Hello Kitty
More From the Creator
PolymomoTea features several takes on Sanrio characters, from individual clay figures to a colorful series of playful candy-inspired designs. Alex Lee treats this Hello Kitty as a small figure, with the familiar face as the focus. It sits alongside later projects that use the same characters in very different forms.
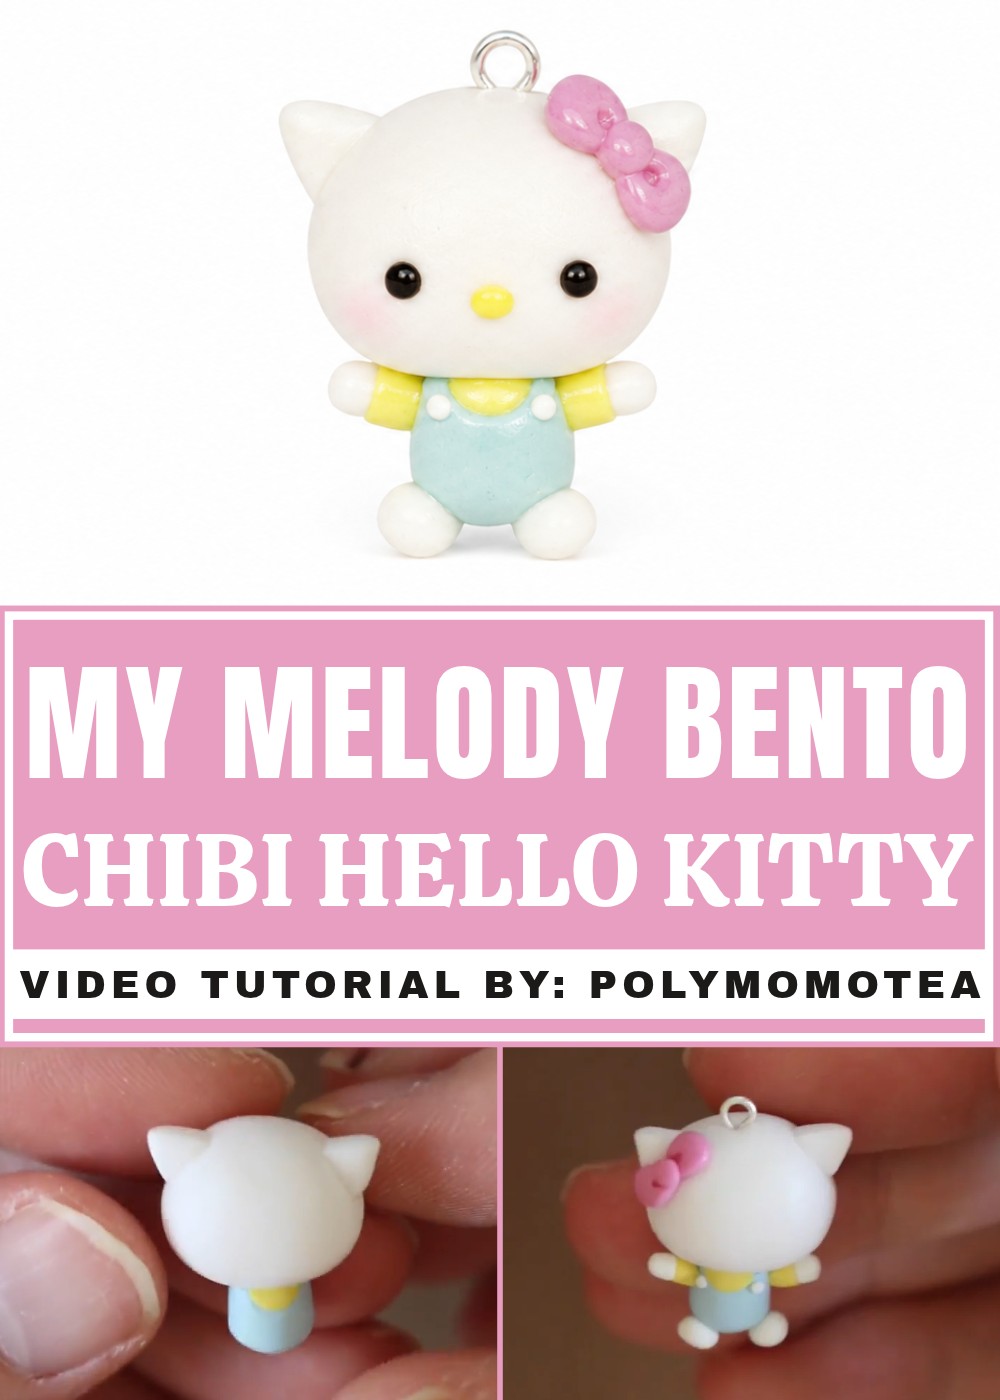
When you look at the face closely, the placement of each piece matters more than how much detail you fit in. The eyes sit apart, with a small oval nose between them and whiskers spreading out at both sides. The bow shifts the balance toward one ear, which gives your eye somewhere to go first. You can stick with the classic red for that detail or choose a shade that matches the stationery or collection you plan to display it with.
This is a good project to look at straight on as you work, since it’s easier to judge the spacing that way. Leave room around the whiskers so they stay distinct when the figure is finished. On a bookshelf, the piece would look at home next to a row of Sanrio notebooks. For a handmade present, place it in a box with tissue paper that matches the bow. The two colors can tie the wrapping and the figure together without extra decoration.
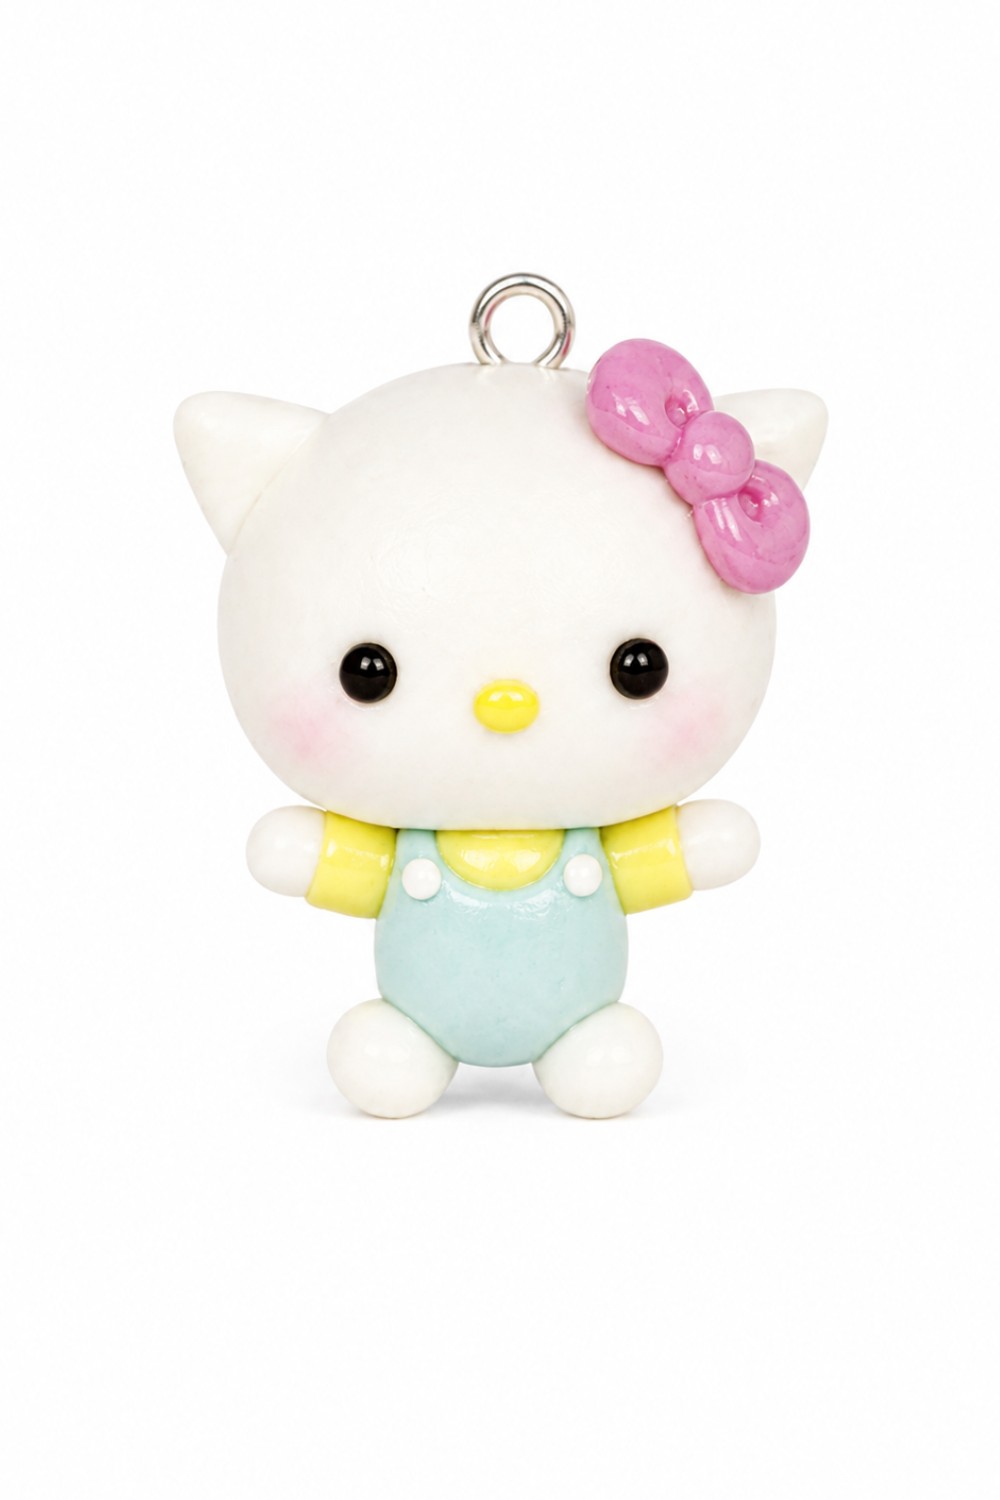
Chubby Hello Kitty Clay Charm Pattern
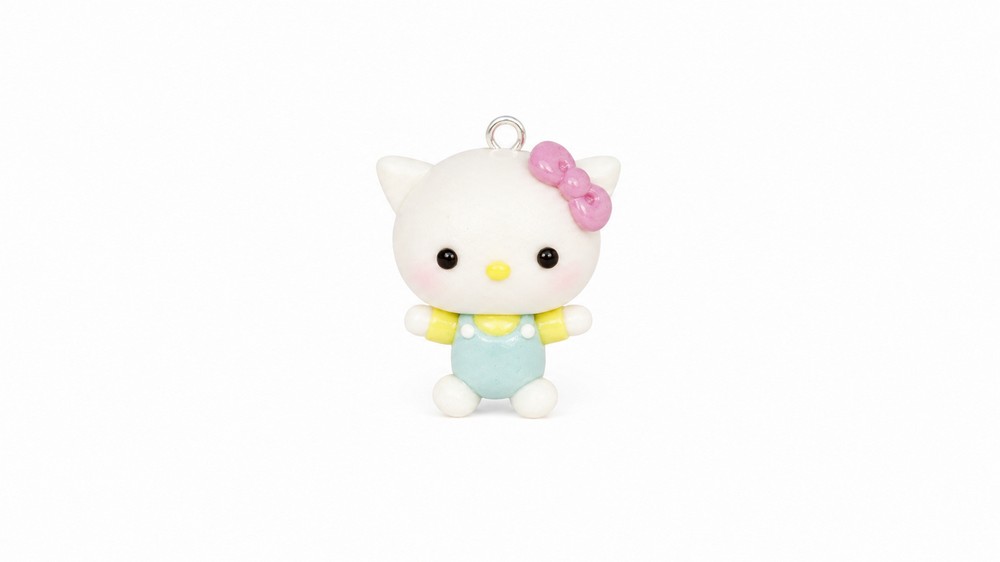
This pattern shows how to make a cute, chubby Hello Kitty charm using polymer clay. The design focuses on simple shapes: an oval head, a cylindrical body, teardrop bow pieces, and small balls for arms, legs, and facial details. The style is soft and rounded, making it perfect for beginners who want to create a recognizable character in a simple, stylized form.
Materials & Tools
Materials
- White polymer clay
- For Hello Kitty’s head, ears, arms, legs, and overall base details.
- Yellow polymer clay
- For the body accent (overall top) and the nose.
- Pink polymer clay
- For the bow.
- Fimo Aqua Gel or liquid polymer clay
- Used here as a blending medium and to help pieces adhere securely, especially where clay joins clay.
- Chalk pastels (pink or light red)
- For adding blush to Hello Kitty’s cheeks.
- Eye pin
- For turning the piece into a charm (optional if you just want a figurine).
Tools
- Craft knife or blade
- For cutting clay into cylinders, semicircles, and trimming edges.
- Needle tool or eye pin
- For making small indents (especially in the bow).
- Dotting tool or small rounded tool
- Optional, to help place or flatten small dots of clay.
- Paintbrush
- For applying chalk pastel blush to the face.
- Non-stick work surface
- Keeps clay clean and prevents sticking while shaping.
- Oven
- For baking polymer clay according to package instructions.
Step-by-Step Instructions
Chapter 1: Head and Ears
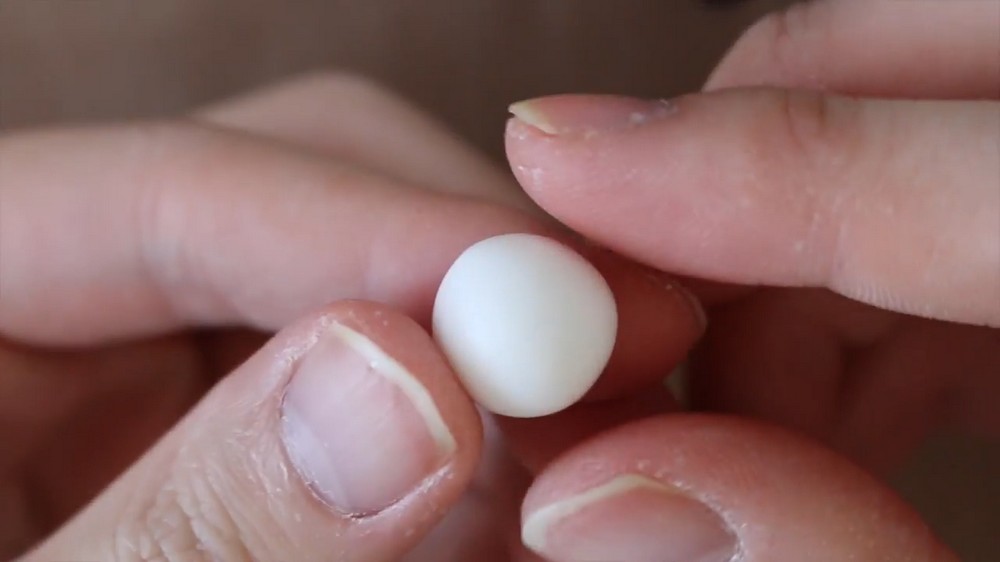
- Shape the Head
- Start with a ball of white clay.
- Roll it gently between your hands into an oval shape.
- Keep the surface smooth and rounded; this will be Hello Kitty’s head.
- The oval should not be too long; think of a slightly stretched circle that still looks cute and chubby.
- Create the Ears
- Take two small pieces of white clay.
- Pinch each piece into a triangle shape.
- These should be small and rounded, not sharp, to match the soft look of the character.
- Place one triangle on each side of the top of the head.
- Blend the base of each triangle into the head using your fingers or a sculpting tool so they look like part of the head rather than separate pieces.
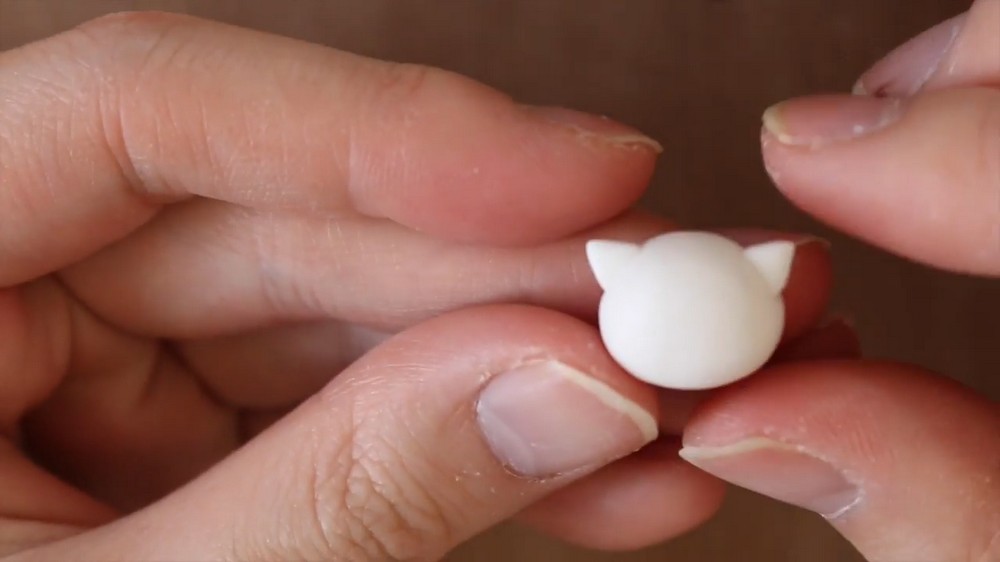
The head now has its basic shape: an oval face with two rounded triangle ears.
Chapter 2: Body Construction
- Form the Cylinder Body
- Take some yellow clay for the accent part of the body.
- The transcription mentions “Fimo aqua,” which is likely the specific brand of clay, but the important part is the color and form. Roll the yellow clay into a cylinder.
- Cut off the ends with a blade to make the cylinder neat and even.
- Scrape the Top Edge
- At the top of the yellow cylinder, lightly scrape off a small edge of clay using your blade.
- This scraped area will be where white clay is added to create a combined look of Hello Kitty’s white body and yellow overall top.
- Add White Semicircle Accent
- Take a piece of white clay and cut out a semicircle shape.
- Place this semicircle onto the scraped area at the top of the yellow cylinder.
- Blend the edges so the white semicircle looks like a part of the body, forming the top portion of her clothing and connecting visually to the white head.
- Attach Body to Head
- Align the top of the body with the bottom of the head.
- Gently press them together and blend the seam.
- If desired, use a small amount of liquid polymer clay (like Fimo Aqua Gel) at the joint to strengthen the connection.
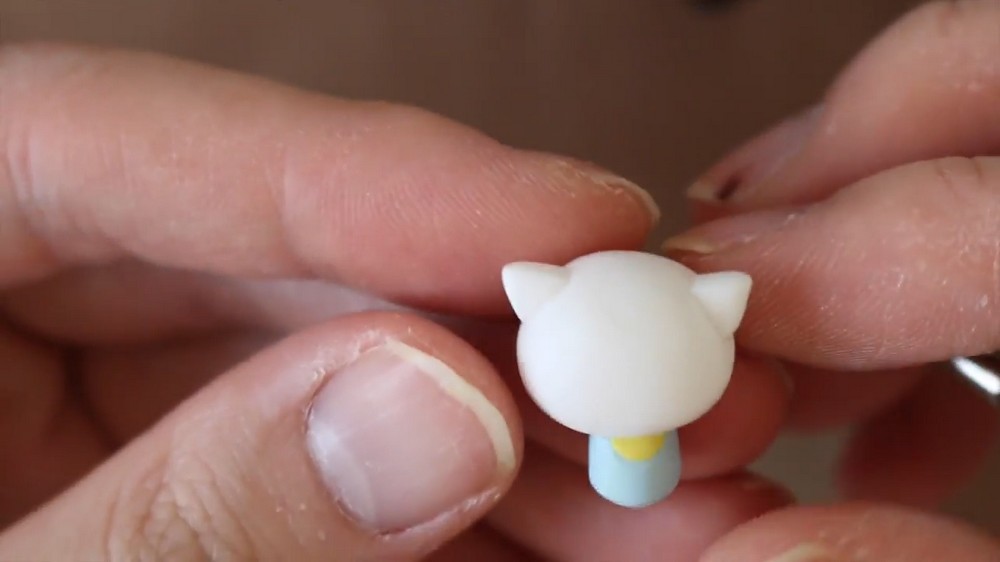
Now the basic figure has a white oval head and a cylindrical body with white at the top and yellow forming the rest of the clothing.
Chapter 3: Arms and Legs
- Make Blended Arms
- Roll a small cylinder of yellow clay (for the clothing part of the arm).
- Cut off the rounded ends to get clean, flat edges.
- Take two small balls of white clay and place them on opposite sides of the yellow cylinder.
- Roll the yellow cylinder and the white balls together very gently so they partially blend into each other, forming a neat transition from yellow (sleeve) to white (paw).
- When the blending looks clean and balanced, cut this blended piece into two equal sections; these become the two arms.
- Attach the Arms
- Place one arm on each side of the body, near the upper area, where arms would naturally sit.
- Blend the yellow portion into the body slightly so they look attached securely.
- Make sure the white end (paw) faces slightly forward for a cute pose.
- Create the Legs
- Take two small pieces of white clay.
- Roll each into a ball, then flatten them slightly to form small, rounded discs.
- Attach these discs to the bottom front of the cylinder body to serve as legs/feet.
- They should help stabilize the figure if you place it upright.
- Add the Buttons
- Roll two tiny white dots of clay.
- Place one on each side of the front of the yellow clothing area on the body.
- These dots act as buttons for Hello Kitty’s overalls. Press gently to secure them.
Now the body is complete with arms, legs, and clothing details.
Chapter 4: Bow
- Shape the Bow Pieces
- Take two equal pieces of pink clay.
- Shape each into a teardrop: rounded on one end and pointed on the other.
- Slightly flatten them to resemble bow loops.
- Add Indents for Detail
- Use a needle tool or an eye pin to press a small indent into the middle of each teardrop.
- This gives a more realistic bow texture, as if the fabric is gathered.
- Assemble the Bow
- Place the two teardrops side by side, with the pointed ends facing each other, forming a classic bow shape.
- Roll a tiny ball of pink clay and press it in the center where the two teardrops meet.
- This ball acts as the center knot of the bow.
- Attach the Bow to the Head
- Place the bow on one side of Hello Kitty’s head, typically above the ear.
- Press gently and blend the back slightly so it holds securely.
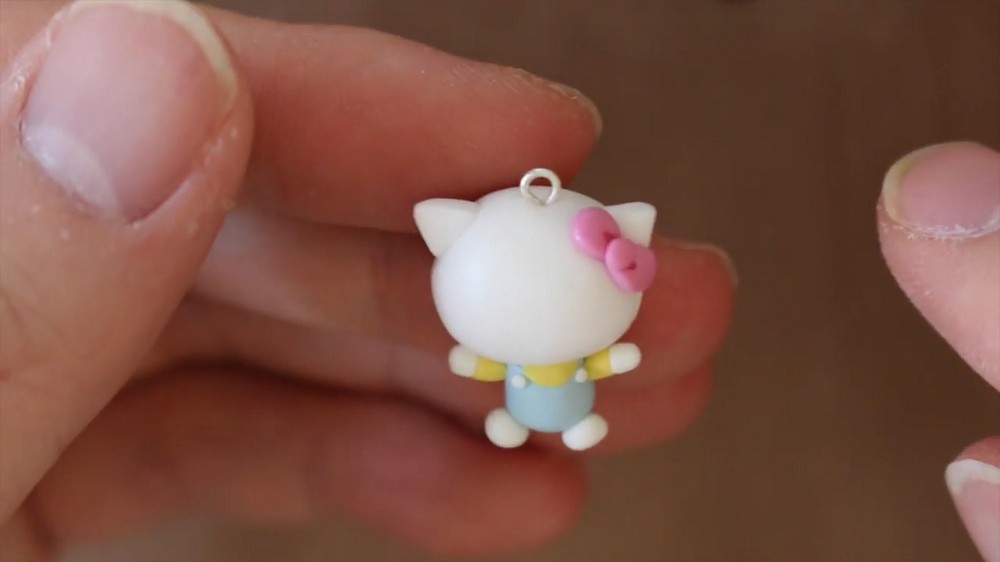
Chapter 5: Face and Blush
- Eyes
- Roll two very small balls of black clay.
- Flatten them just a little to make dots.
- Place them on the front of the head, spaced evenly apart horizontally.
- These form Hello Kitty’s simple eyes.
- Nose
- Roll a small ball of yellow clay.
- Shape it into a tiny oval.
- Press this oval between the eyes, slightly lower, to make the nose.
- Keep it small and centered for a balanced face.
- Blush
- Use a paintbrush to gently pick up some pink chalk pastel.
- Lightly brush the color onto the cheeks, beneath each eye, creating a soft blush effect.
- Apply gradually; it’s easier to build up color than remove it.
- Add Eye Pin (Optional)
- If you want the chubby Hello Kitty to be a charm, insert an eye pin into the top of the head before baking.
- Make sure it is straight and secure, but do not distort the clay around it.
Baking and Finishing
- Bake the Charm
- Place your finished Hello Kitty on a baking tray lined with parchment paper or a tile.
- Bake according to the instructions on your polymer clay package (commonly around 110–130°C / 230–265°F for 15–30 minutes, but always follow the brand’s directions).
- Cool and Inspect
- Allow the piece to cool completely before handling it.
- Once cooled, check for any rough edges or dust and carefully clean if needed.
- Optional Glaze
- If desired, add a clear glaze to protect the surface and give a slight shine.
- Let the glaze dry fully before using or wearing the charm.
Conclusion
This chubby Hello Kitty clay pattern focuses on simple, rounded shapes and basic color blocking to create an instantly recognizable character. The combination of an oval head, cylinder body, blended arms, and small facial details keeps the project beginner-friendly while still offering a polished result. The added bow, overalls buttons, and blush bring personality and charm to the design, making it a sweet figurine or wearable charm that can be displayed, gifted, or paired with other chubby characters for a themed collection.