Watch the light move across a DIY Glitter Scale Fish as tiny hexagon pieces give its polymer clay body a shiny coat for an ocean display on your shelf.
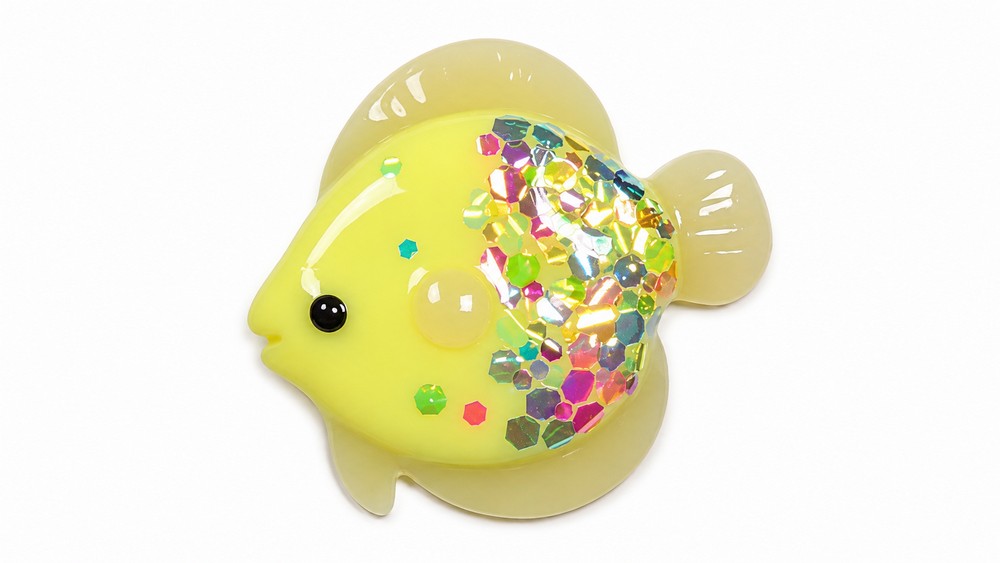
Light slides across the scales as you turn the miniature in your hand. In DIY Glitter Scale Fish, that effect comes from hexagon glitter laid over a polymer clay body. Each flat piece has room to reflect light, and the repeated six-sided shape gives the fish a neat pattern even when you see it up close.
DIY Glitter Scale Fish Project - step by step tutorial
Behind the Fish Design
In the fish project notes, Alex Lee names the shop that supplied the hexagon glitter and points viewers to the PolymomoTea FAQ playlist for tool tips. Those details help when shopping for the effect, since finding glitter with a broad, flat face matters more here than picking a particular color.
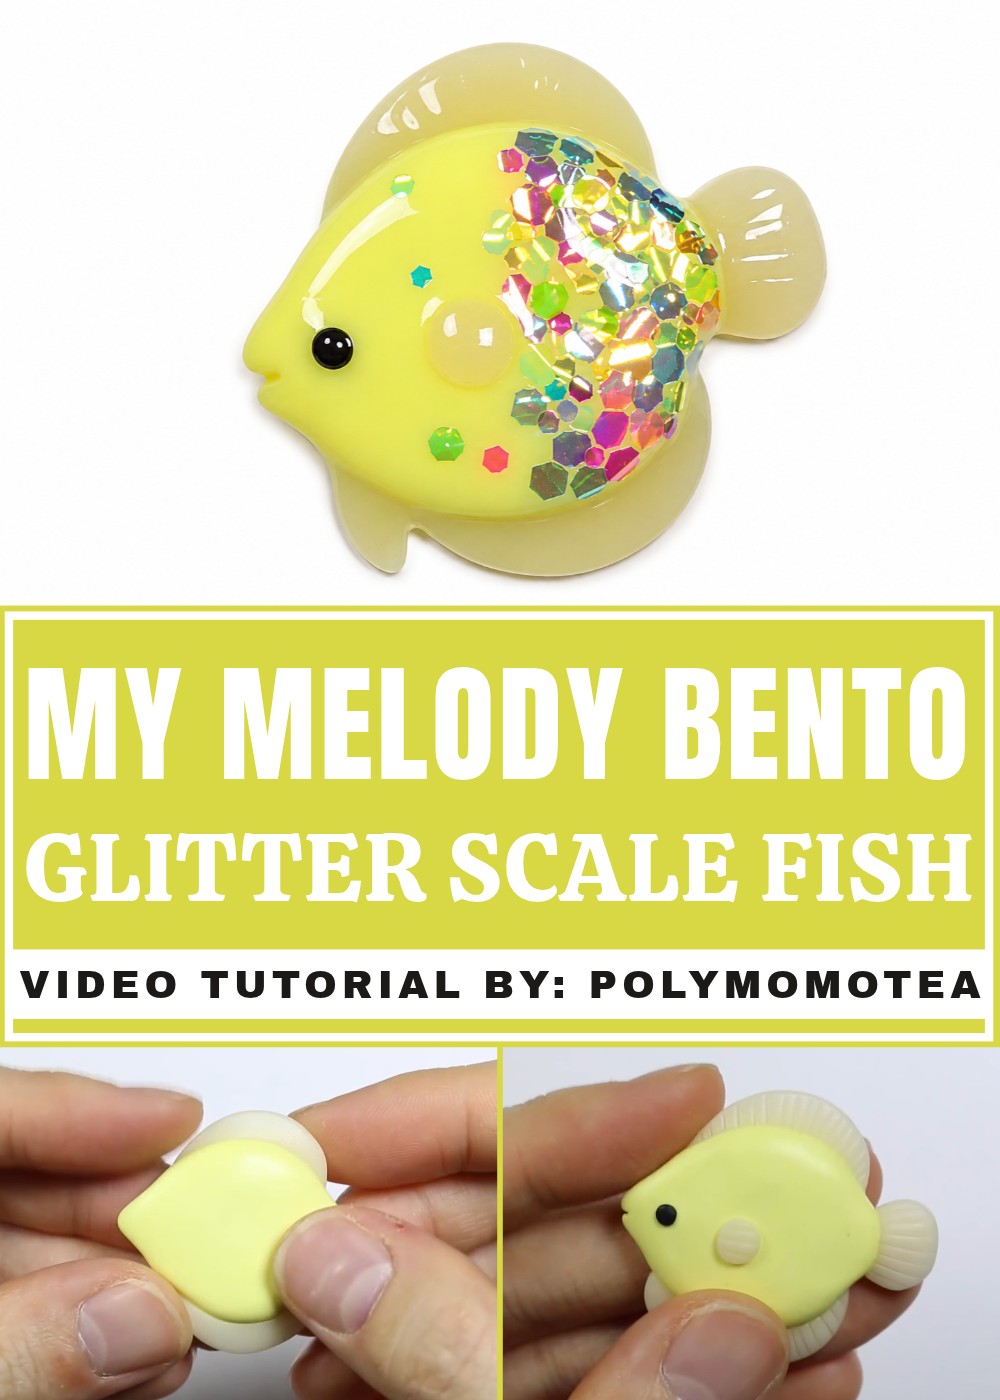
Plan the outline before placing any glitter. A smooth oval gives you a broad side to work on, while a tail that spreads outward makes the shape clear in profile. Mark where the head ends and leave the eye and mouth free of glitter. Once the body has hardened, arrange the glitter in rows, shifting each row slightly so the scales sit between the ones above it. Keep the fins smooth or mark them with a few fine grooves to echo the lines you see on a real fish.
Whichever finish you use, check how the scales look under a lamp before coating them. One piece sticking up can cast a shadow across the row. When the fish is done, try displaying it upright against a dark blue card. Side lighting will show off the shimmer, and the plain backing will leave the shape of the tail easy to see.
Butterfly Fish Pattern
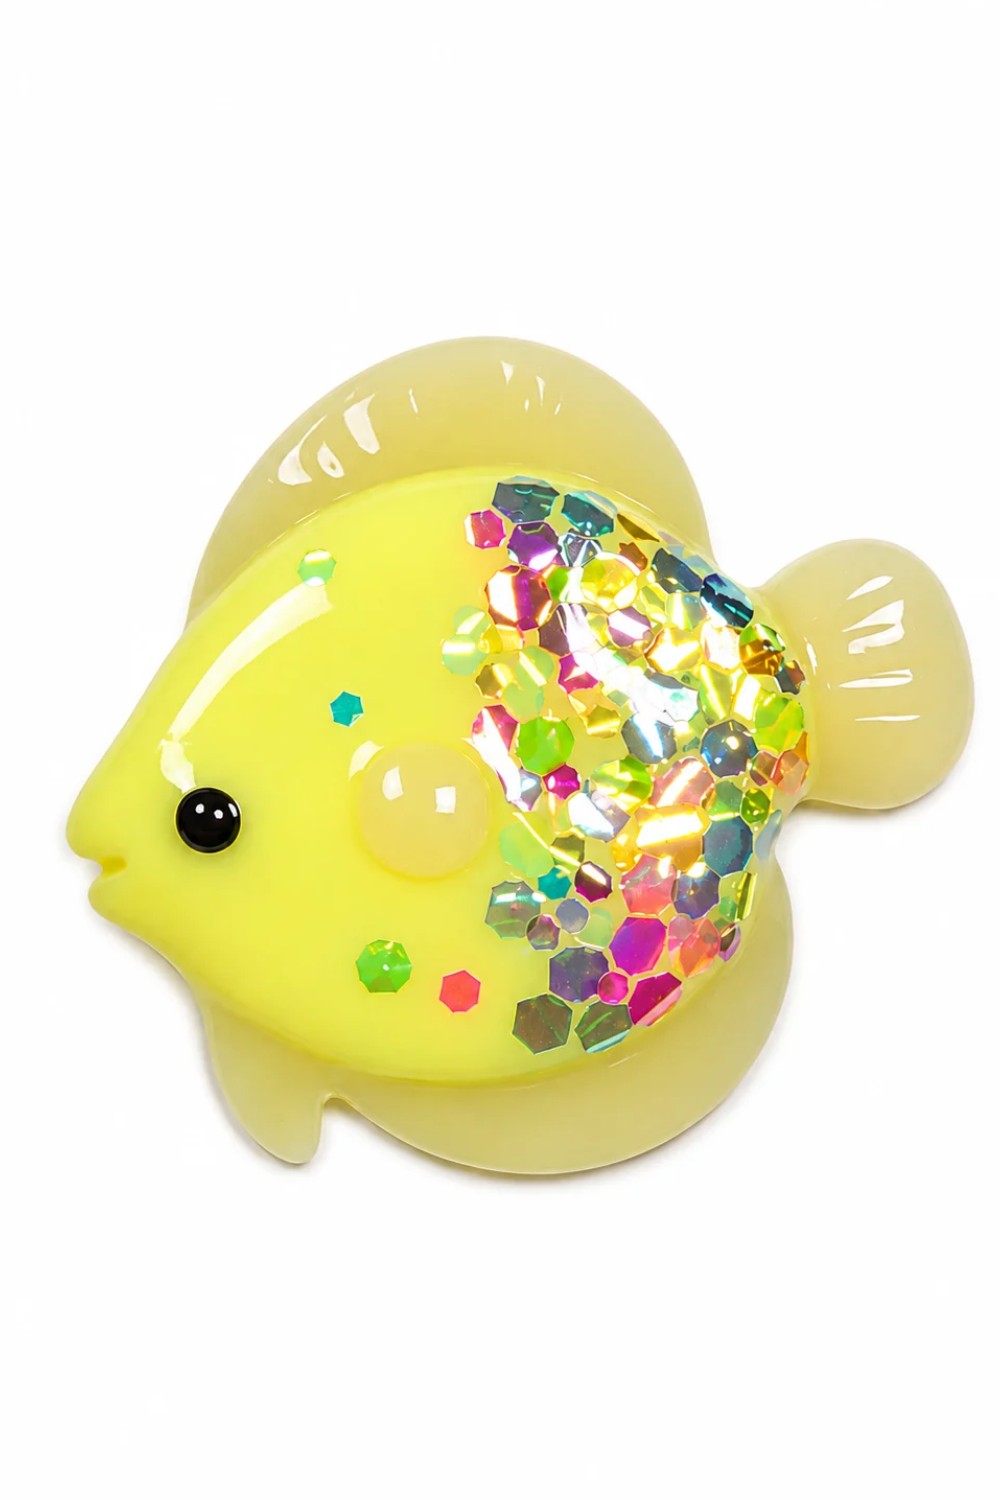
These adorable butterfly fish made from polymer clay make perfect decorations or small gifts. With their translucent fins and glittery scales, they are both elegant and fun to create. This project combines simple clay sculpting techniques with optional resin or glaze for decorating. You can make these tiny fish in various colors and styles, making it a creative and customizable project.
Materials & Tools
Materials
- Polymer Clay:
- Light yellow clay: For the body.
- Primo translucent clay: For the fins and tail.
- Pink or red clay (optional): For creating fish in additional colors.
- Black clay: To make small dot eyes.
- Resin or glaze:
- UV resin or clear glaze for sealing and decorating.
- Hexagon glitter:
- Glitters to mimic scales on the fish’s body.
Tools
- Clay Roller or Fingers:
- For flattening clay into desired shapes.
- Clay Blade or Craft Knife:
- To cut and shape clay precisely.
- Dotting Tool or Ball Tool:
- For adding indentations and marks on clay features.
- UV Lamp (optional):
- To cure UV resin (if used).
- Non-stick Work Surface:
- Prevents clay and decorations from sticking while sculpting.
- Baking Tray and Oven:
- For baking polymer clay according to the package instructions.
Step-by-Step Instructions
Chapter 1: Sculpting the Fish Body
- Create the base body shape:
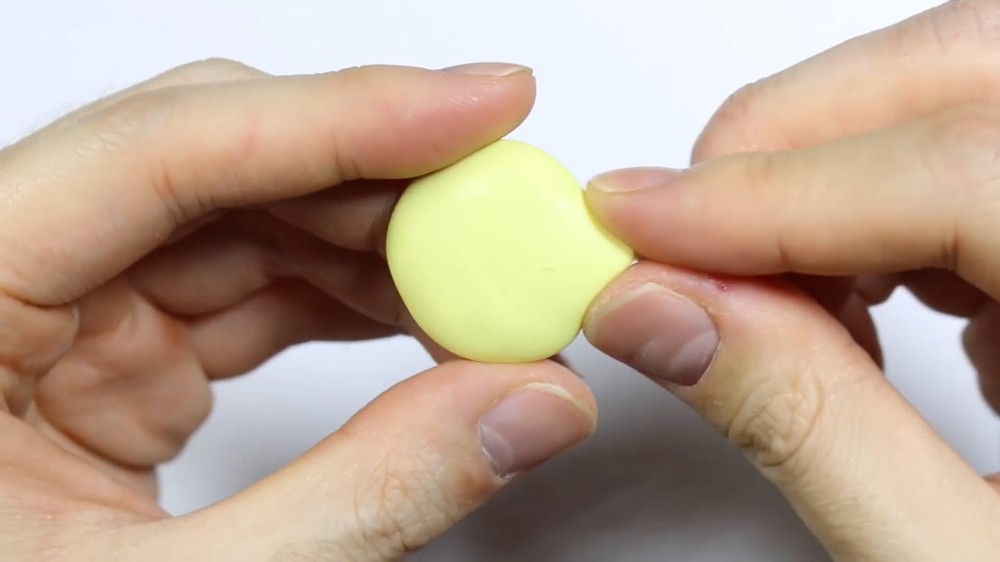
- Take a piece of light yellow clay and roll it into a circular mound using your fingers.
- Flatten the mound slightly while maintaining its rounded shape.
- Form the fish’s mouth:
- Pinch one side of the circular mound to form a point for the fish’s mouth.
- Smooth and blend the edges of the pinch to make the transition seamless with the rest of the body.
- Sculpt the tail area:
- On the opposite side of the fish’s mouth, pinch a section of the mound outward to form the base of the tail. This protrusion will serve as the attachment point for the tail fin later.
Chapter 2: Creating the Fins
- Make the side fins:
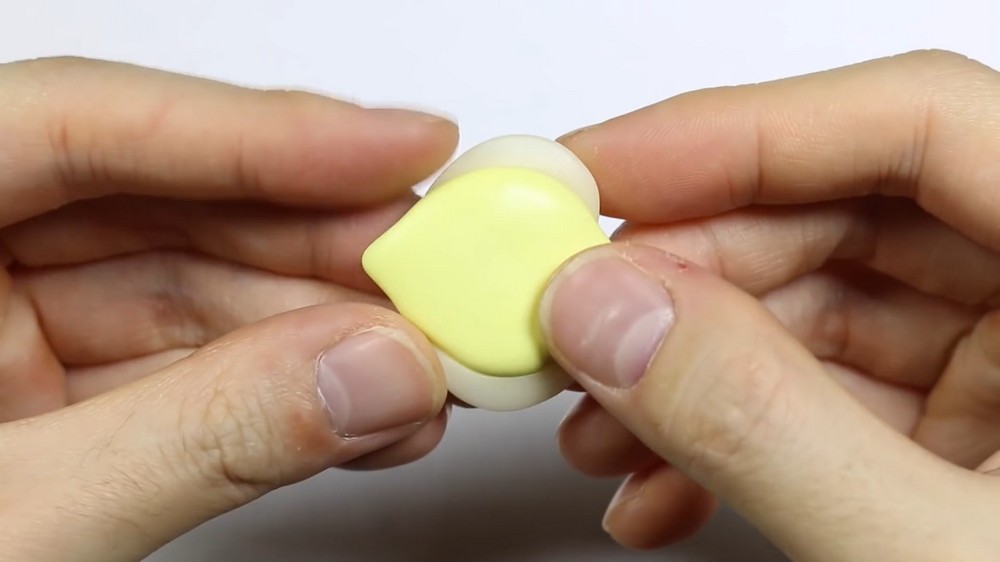
- Take small pieces of translucent clay, pinch them into triangular strips, and flatten them slightly.
- Using your blade or craft knife, trim the top edges of the triangular fins for a clean finish.
- Attach the side fins:
- Position the fins on either side of the body, extending from the bottom of the tail base to the middle of the body.
- Blend the edges into the body to secure the fins in place.
- Make the tail fin:
- Roll another piece of translucent clay into a rectangular shape and flatten it slightly.
- Use your blade to cut one end of the rectangle neatly.
- Attach the rectangle to the mound-shaped tail base, blending carefully to make the tail fin look continuous with the body.
- Refine fin details:
- Use a blade or dotting tool to create small edge marks on the fins and tail. These marks mimic natural fin patterns and add texture to the design.
Chapter 3: Adding Final Details
- Create the front fin:
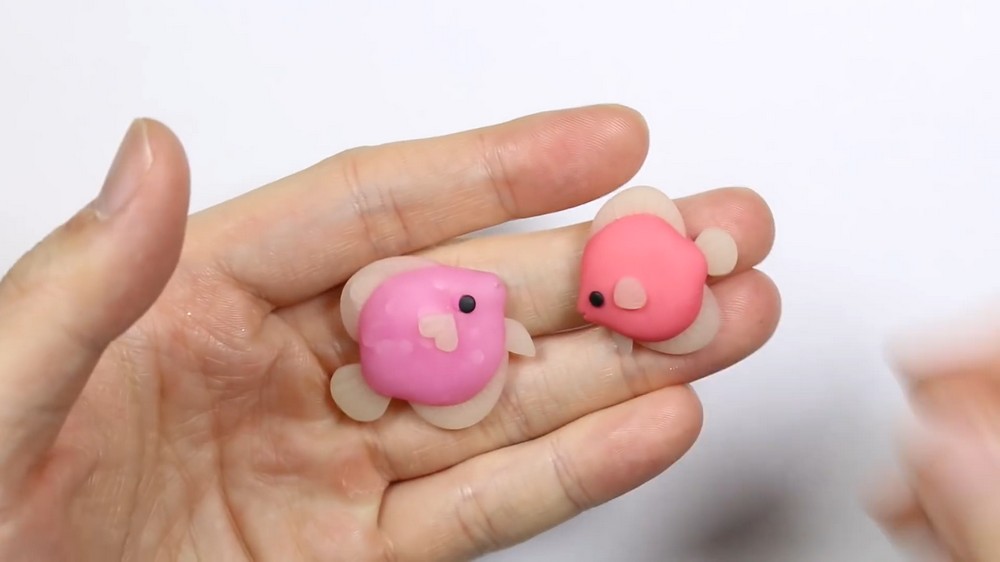
- Cut a small triangle shape from translucent clay and attach it near the fish’s mouth for the front fin.
- Blend the attachment edge to secure it.
- Add the side fin:
- Roll a tiny ball of translucent clay and flatten it into a circular shape.
- Attach this circular piece to the fish’s body on the side opposite the front fin.
- Use a ball tool to add edge marks for additional detail.
- Add facial features:
- Position a small black clay dot as an eye on each side of the fish’s head.
- For the mouth, use a blade to make a slight imprint where the pinch formation is located, creating a clean and uniform appearance.
Chapter 4: Baking the Fish
- Bake the clay fish:
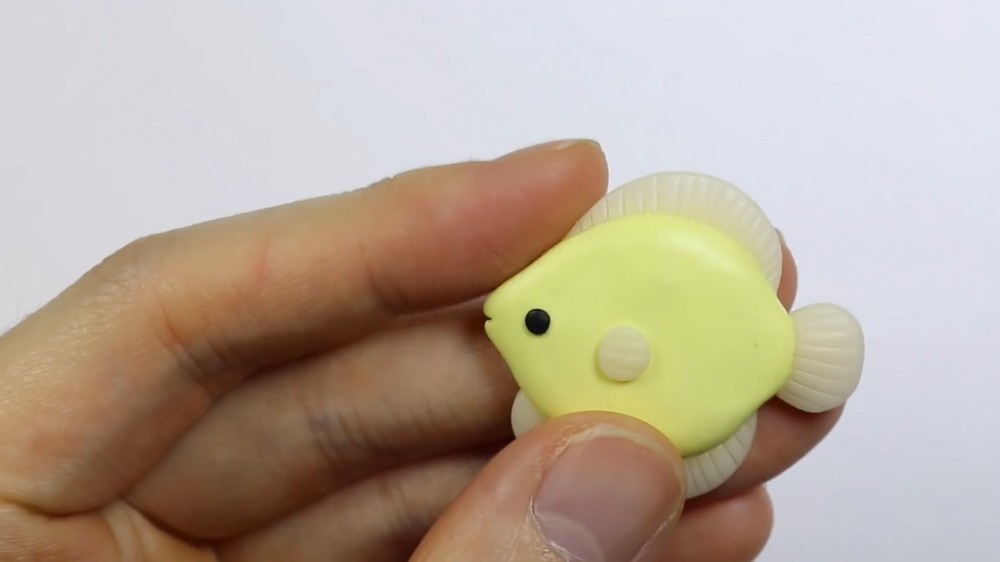
- Preheat your oven according to the instructions for your polymer clay. Typically, bake at 265°F–275°F (129°C–135°C) for 15–30 minutes, depending on the size of the fish.
- Place the fish on a non-stick baking tray and bake until hardened.
- Allow cooling and prepare other fish:
- Create additional fish in different colors, such as pink or red, using the same techniques. Bake them all together or in batches, and let them cool completely before moving on to decorating.
Chapter 5: Decorating the Fish
- Apply resin or glaze:
- Coat the body and fins of the fish with a thin layer of UV resin or clear glaze. Use a soft brush or small tool to ensure even coverage.
- Add glitter scales:
- Sprinkle hexagon glitters onto the resin or glaze while it is still wet. These glitters mimic shiny fish scales and can be added sparingly or completely over the fish’s body, depending on your desired look.
- Cure and dry:
- If using UV resin, cure the fish under a UV lamp until hardened.
- If using a clear glaze, allow it to dry completely before proceeding.
- Optional second layer:
- Apply an additional layer of glaze or resin on top of the glitter to seal and secure the scales, providing a polished and durable finish.
Chapter 6: Variations and Final Touches
- Experiment with designs:
- Customize your fish by using various glitter colors, patterns, and different shapes for fins. For example, you can use circular or overlapping glitter placements for unique effects.
- Finish your fish:
- After adding the final layer of glaze or resin, allow everything to dry or cure completely.
Conclusion
These butterfly fish charms are creative and versatile, allowing you to experiment with colors, textures, and glitter designs to create unique pieces. The combination of translucent fins and colorful, sparkling scales gives these fish an elegant and playful appearance. You don’t even need resin to replicate this project—clear glues or simple craft glaze work as excellent alternatives. These small fish make lovely gifts, decorations, or collectible items, and their simplicity means that creating multiple fish in varied color schemes is fun and effortless.