Fold a DIY Cute Chick into a mini farm scene and see how a round polymer clay body, little wings, and a tiny beak give this baby bird its cheerful look.
Rolling a soft ball is a good starting point when you want to sculpt a baby bird. With DIY Cute Chick, most of the shape can come from that first piece of polymer clay. Give the ball a slight tilt toward the front, flatten its underside, and you have a plump little body that can sit upright while you work on the face.
Learn To DIY Cute Chick Project for a Mini Farm Scene
Use a small orange wedge for the beak, then decide where the eyes should sit. Close-set dots give the bird a focused expression, while a wider gap makes it look curious. Soft ovals work for the wings. Press one onto either side and keep their edges rounded so they follow the body. Two shallow marks near the tips can suggest feathers without taking attention away from the face.
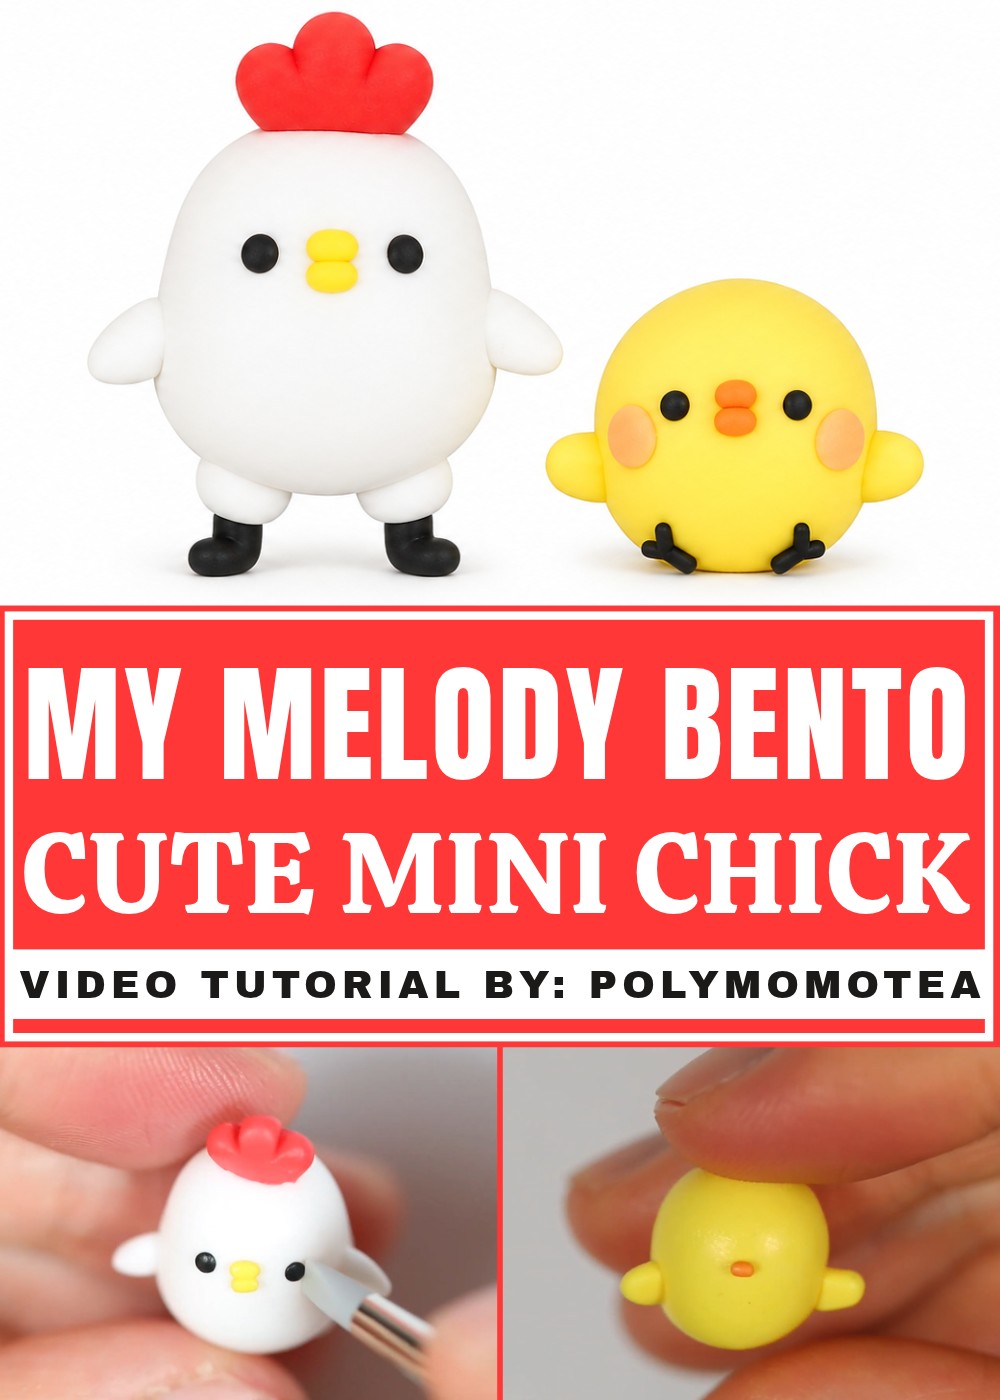
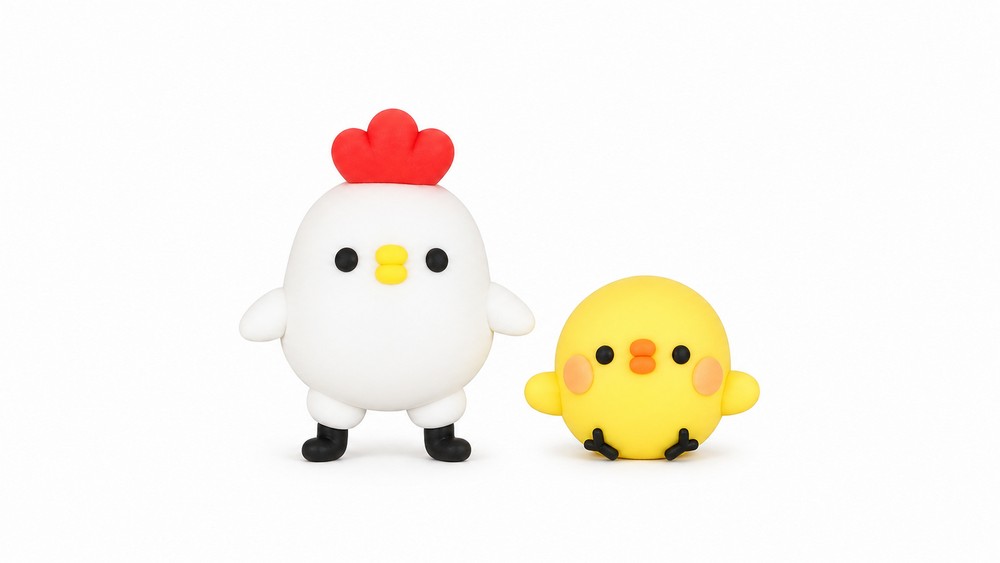
PolymomoTea’s original project pairs a chick with an adult rooster to mark the 2017 Year of the Rooster. You can show the difference in age through simple shapes. Keep the younger bird low and round, then give the adult a higher head, a comb, and a fuller tail. Display the pair beside a miniature fence, or line up several chicks with their beaks pointing in different directions. Placing one a little behind the others makes the group look like a brood moving across a yard.
About the Channel
For the Year of the Rooster, PolymomoTea shared a polymer clay pair featuring an adult bird and its chick. Alex Lee lists a blade, color blending tools, and dotting tools in the project notes. That short list also gives viewers a place to start when choosing tools for small figures.
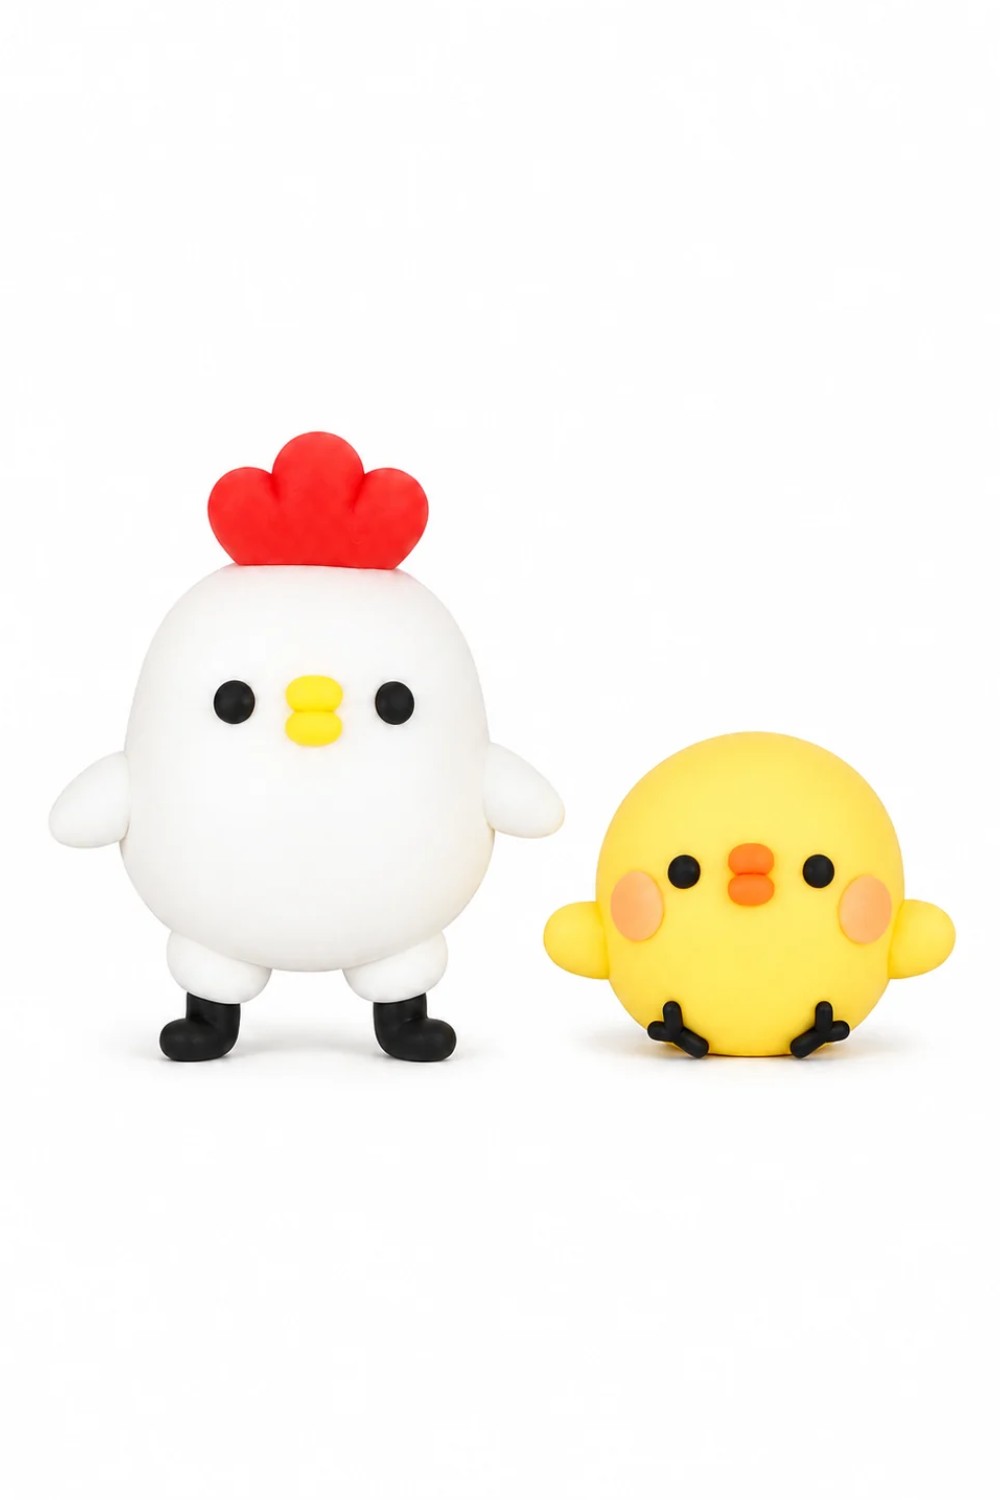
Chicken and Chick Pattern
Celebrate the year of the rooster by crafting this adorable chicken and chick duo out of polymer clay. These charming creations are fun to make and can be used as decorations, keychains, or even small gifts for loved ones. This project is beginner-friendly and allows room for creativity in personalizing the details and colors.
Materials & Tools
Materials
- Polymer Clay:
- White clay: For the chicken and chick's main body and limbs.
- Red clay: For the chicken’s head feathers.
- Yellow clay: For the chicken’s beak and chick’s body.
- Orange clay: For the chick’s beak.
- Black clay: For the feet and eyes of both the chicken and chick.
- Pink clay (optional): For the blush dots on the chick.
Tools
- Clay Roller or Rolling Pin:
- For flattening and shaping clay evenly.
- Clay Blade or Craft Knife:
- For cutting precise shapes and trimming clay.
- Dotting Tool or Ball Tool:
- For creating indentations and adding details.
- Pointed Tool:
- For refining shapes, like defining the head feathers.
- Non-Stick Work Surface:
- To prevent the clay pieces from sticking while sculpting.
- Baking Tray and Oven:
- For baking polymer clay as per the package instructions.
Step-by-Step Instructions
Chapter 1: Making the Chicken Body
- Create the chicken base:
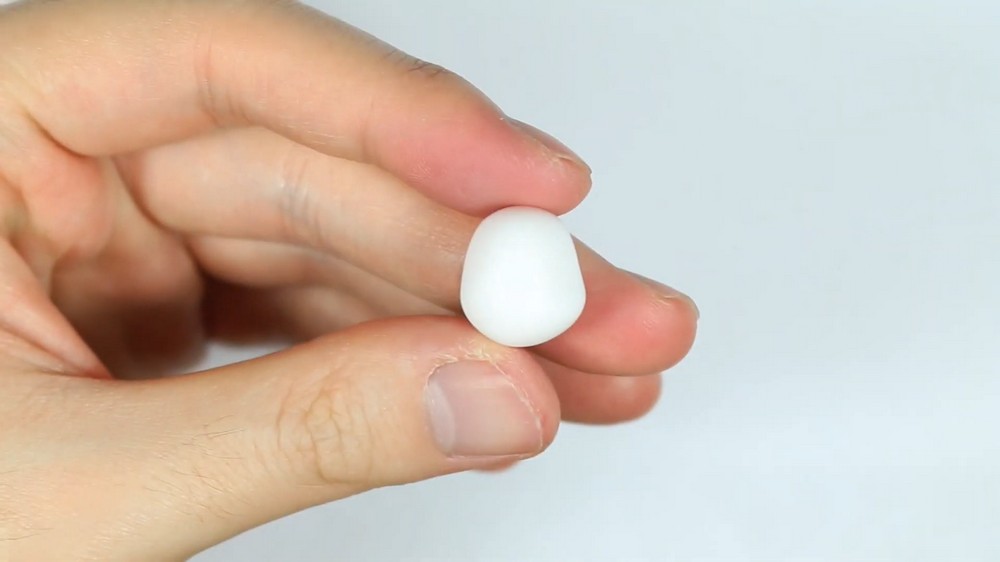
- Take a medium-sized piece of white clay and roll it into an elongated oblong shape, similar to a gumdrop.
- Position it vertically as the main body of the chicken.
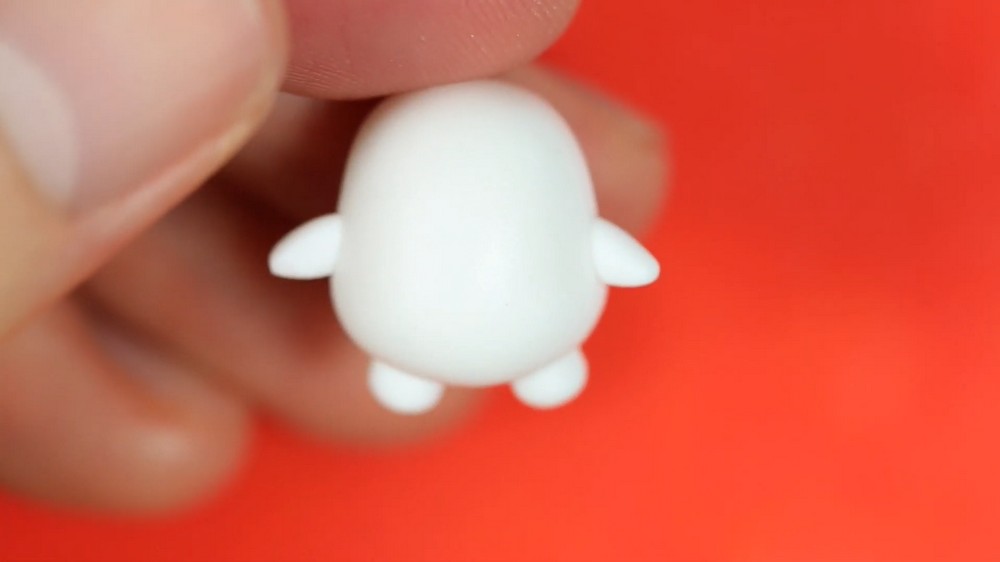
- Add the legs and thighs:
- Roll two small pieces of white clay into short, fat cylinders.
- Cut the ends of the cylinders to create a flat attachment point, then place them at the base of the chicken’s body to form the legs and thighs.
- Create and attach the arms:
- Roll out two small pieces of white clay into teardrop shapes.
- Cut the ends of each teardrop diagonally to make attachment points and blend them onto the sides of the chicken body.
Chapter 2: Adding the Chicken’s Head Feathers and Beak
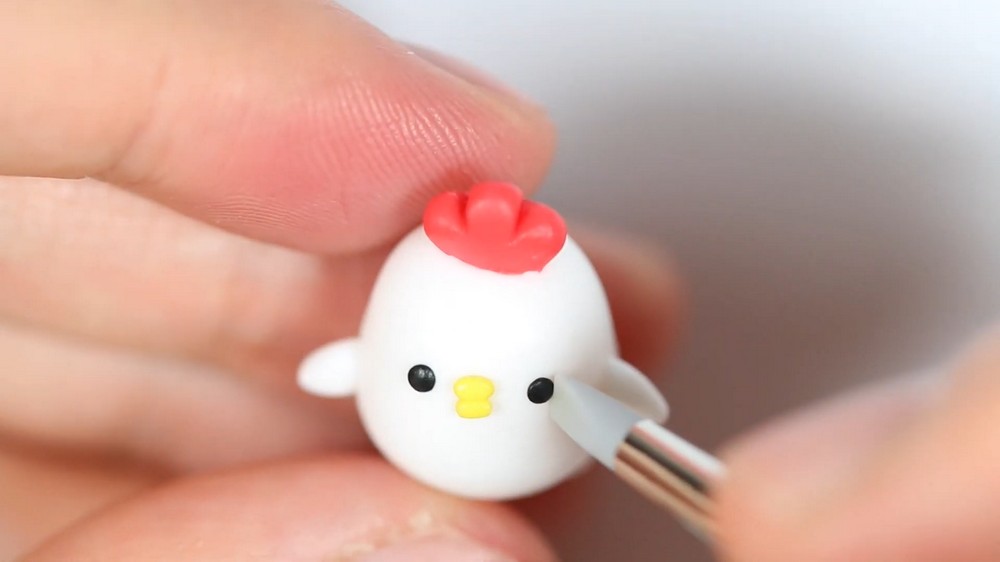
- Craft the head feathers:
- Take a small piece of red clay and shape it into a teardrop.
- Flatten the base slightly and use a dotting tool or pointed tool to add two indents in the middle of the base to create a feathered look.
- Trim the pointed tip of the teardrop for a clean attachment edge.
- Position the feathers onto the top of the chicken’s head and blend the base into the head for stability.
- Make and attach the beak:
- Roll yellow clay into two small oval shapes.
- Flatten the ovals slightly and position them on the chicken’s face in the center to form the upper and lower part of the beak.
- Add the eyes:
- Affix two small black clay dots on the face for the chicken’s eyes. Place them just above the beak on either side.
Chapter 3: Crafting the Chicken’s Feet
- Add the feet details:
- Use a dotting tool to create small indents at the bottom of the chicken’s legs.
- Roll tiny black clay snakes and bend them into a 90° angle.
- Place these bent pieces into the indentations to replicate the chicken’s feet.
Chapter 4: Creating the Chick
- Make the chick’s body:
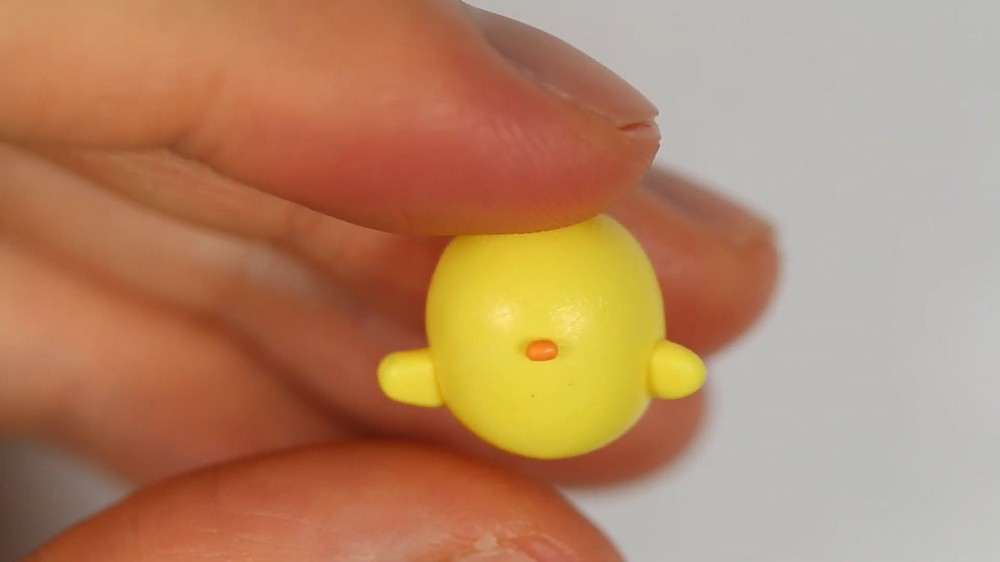
- Roll a piece of yellow clay into a smooth sphere. This will serve as the circular base for the chick’s body.
- Add the chick’s arms:
- Roll two small pieces of yellow clay into teardrop shapes for the arms.
- Attach the thinner end of the teardrops to the sides of the chick’s body and blend the edges for a seamless look.
- Craft and attach the chick’s beak:
- Roll a small piece of orange clay into a tiny oval and flatten it slightly.
- Position the orange oval in the center of the chick’s face as its beak.
- Add the chick’s facial features:
- Place two small dots of black clay above the beak for the chick’s eyes.
- Roll two extremely small dots of pink clay and position them on each cheek for a blush effect.
Chapter 5: Adding the Chick’s Feet
- Craft the feet:
- Roll out thin black snakes of clay, then cut them into short pieces.
- Arrange three black pieces together to form a footprint-like shape under the chick’s body.
- Repeat the process for two feet, and ensure they are symmetrically placed at the bottom.
Chapter 6: Baking and Finishing Touches
- Bake the figures:
- Preheat your oven according to the instructions on your polymer clay packaging (usually 265°F–275°F or 129°C–135°C).
- Place the chicken and chick figures on a non-stick baking tray and bake for 15–30 minutes based on their size and clay type.
- Allow the figures to cool completely before handling them.
Conclusion
These whimsical chicken and chick figurines are a perfect craft for celebrating the Year of the Rooster or simply for adding charming animal-themed decor to your space. The design is easy to follow, with room for personalization in terms of colors and styles. The chicken’s oblong body and the chick’s rounded design give the pair a playful, cartoon-like appearance. Whether you make these characters as standalone decorations or incorporate them into jewelry and keychains, they’re sure to be an adorable highlight in your creative projects.