Create a standout look with this DIY Polymer Clay Creepy Snowman Mask tutorial, perfect for crafting a spooky yet unique accessory for any occasion.
Transform your crafting skills into something truly unique with this fun and spooky project. Making a creepy snowman mask is a creative way to combine the festivity of winter themes with the thrill of eerie designs. It’s a perfect craft for anyone who loves mixing holiday cheer with a touch of the unexpected. Whether it’s for a costume party, home decor, or simply as a creative challenge, this project lets your imagination run wild.
Fun and Easy DIY Polymer Clay Creepy Snowman Mask Guide

With polymer clay, you can sculpt a hauntingly fun mask that looks like a snowman straight out of a spooky fairy tale. Start by forming the base of the mask to fit your face, then add expressive details such as cracks, sharp teeth, or eerie textures. Bake the clay to set the shape, then paint it with colors that bring your creepy snowman to life. The great thing about this project is how much you can customize the features to match your personal style.
Not only is this handmade mask a cool addition to your craft collection, but it’s also an impressive piece to show off or wear. It can make for a unique holiday decoration or an unforgettable costume accessory. This project is a mix of fun and creativity that will help you learn new crafting techniques while creating something truly one-of-a-kind. Dive into this exciting project and let your imagination shape your own chilling masterpiece!
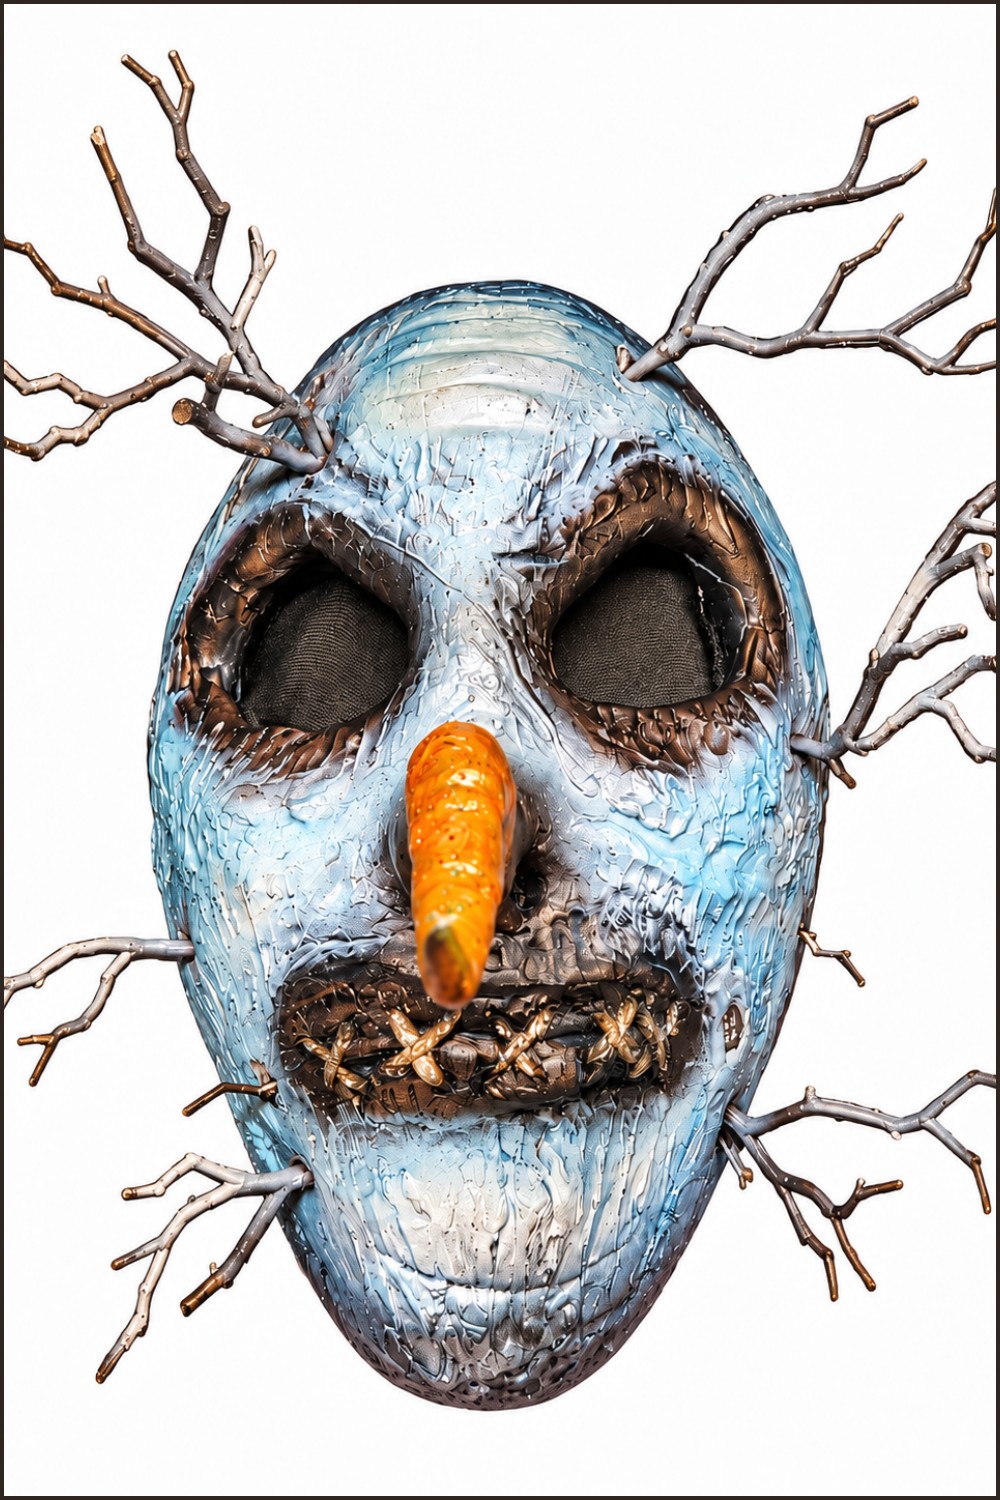
Foam‑Clay Evil Snowman Mask
Create a wearable, lightweight foam‑clay mask that fits just below the hairline and under the jaw. The mask uses a wire and foil armature, air‑drying foam clay for surface detail, sealed with Plasti‑Dip, and finished with paint, stitched lips, and interior padding. Designed for durability and removability after several refinement attempts.

What You’ll Need
- Thick and thin armature wire (for frame and eye bridges)
- Aluminum foil (for bulking out the form)
- Foam clay (air‑drying foam clay suitable for masks)
- Baskin/tape or masking tape for temporary holds
- Toothpicks / sculpting picks for fine detail
- Jute cord (for stitched lips) and a sharp needle or sculpting tool to inset it
- Plasti‑Dip (spray) for flexible sealing (use respirator)
- Acrylic spray paints & markers (tinted gray, black, white, flame orange, chrome marker)
- Felt/nylon for interior lining, elastic strap(s) for wearability
- Glue (fast‑drying, foam safe) and small artificial twigs for decoration
- Sandpaper, drill / awl for making holes, clamps or clips
- Respirator, gloves, ventilation for safety
Prepare the Materials
Initial setup
- Measure head and cut thick armature wire to fit snugly just below hairline and under jaw.
- Gather tools: sculpting picks, water spray, scissors, tape, bowls of water.
- Pretest foam clay: open package, note working time (air‑drying clay is time‑sensitive).
- Set up ventilation and respirator for later Plasti‑Dip spraying.
Tools And Equipment
Essentials
- Drill or awl (for breathing holes and stitching holes)
- Sculpting tools or toothpicks for scoring and detailing
- Spray booth or well‑ventilated outdoor area for Plasti‑Dip and spray paint
- Oven is not required (foam clay air dries)
Project Details
Key specifications
- Fit: sits below hairline, covers sides of face and jaw.
- Thickness: keep initial foam layers thin to avoid cracking; add detail layers incrementally.
- Time: allow overnight curing for clay; multiple hours for Plasti‑Dip and paint cure.
- Weight: lightweight — suitable for wearing with elastic strap.
Preparation
Design and safety
- Sketch desired mask silhouette and facial features (nose, lips, button details).
- Plan holes for breathability and eye alignment; mark these on armature before clay application.
- Keep water spray and paper towels ready to prevent premature drying during sculpting.
Construction Sequence (step‑by‑step build)
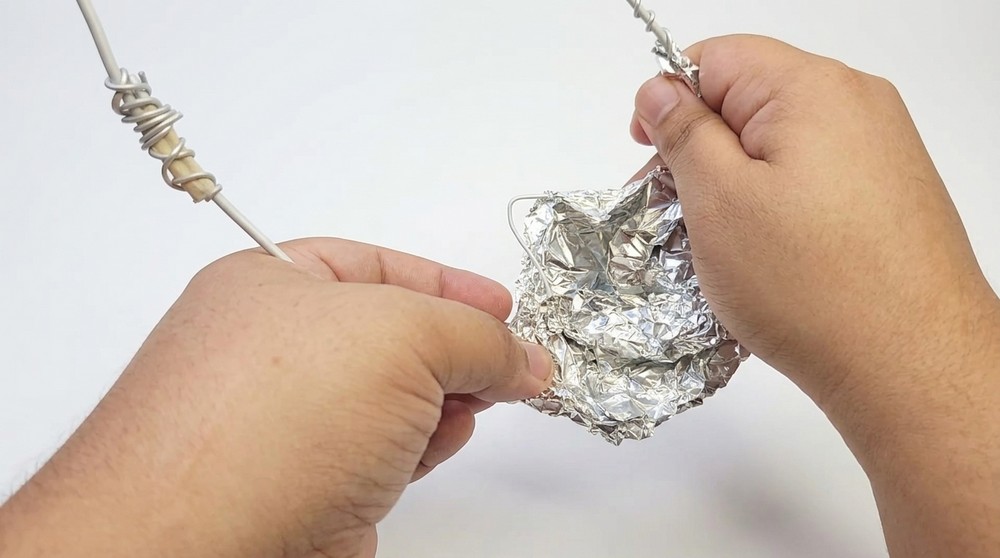
1) Form the armature
- Create a helmet‑fit frame with thick armature wire:
- Bend to fit below hairline and under jaw; temporarily secure with tape.
- Add a thinner wire at the top to mirror the head and the bridge of the nose — this will guide eye placement.
- Wrap the form with aluminum foil to bulk out the cheekbone and nose volumes:
- Press foil to match desired mask silhouette; test fit on head and adjust before proceeding.
2) Finalize armature shape
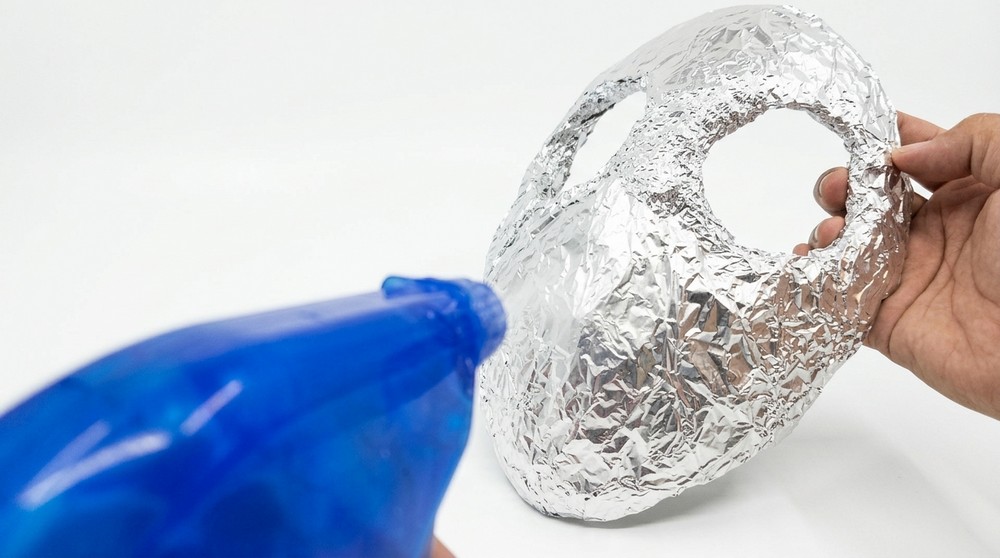
- Add thinner wire loops where eyes will be; reinforce areas that will bear weight.
- Seal the foil layer with a final smooth foil wrapping; poke breathing holes where needed using an awl.
3) Apply first layer of foam clay
- Lightly mist the foil armature with water — do not saturate.
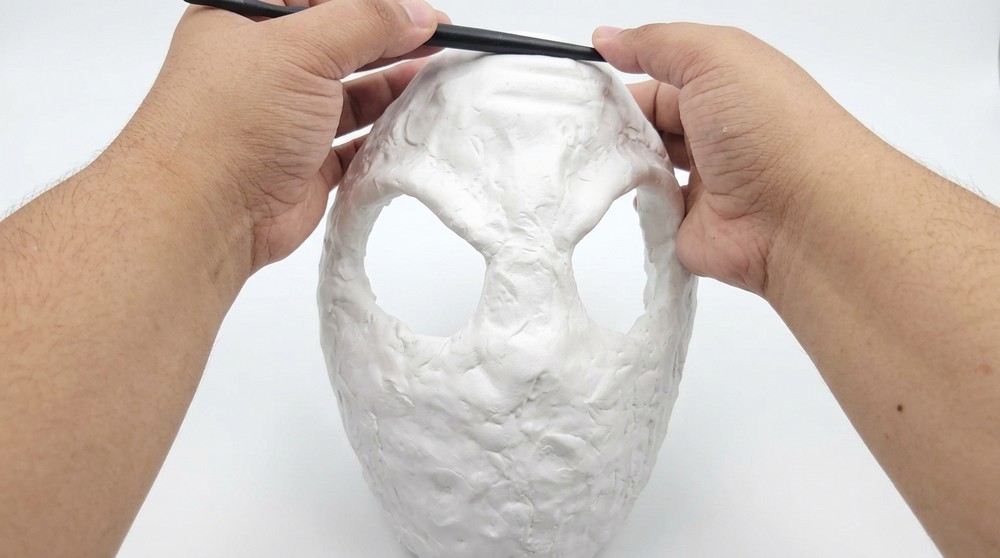
- Spread a thin, even layer of foam clay across the form, smoothing as you go:
- Avoid large bulks on the initial coat to reduce cracking risk.
- Work quickly but deliberately — foam clay cures faster than polymer clay.
4) Add structure and features
- Build up the nose, brows, and primary contours using thin additional clay layers:
- Use toothpicks/sculpting tools to texture surfaces.
- For large protrusions (e.g., bulky nose), use foil core + thin clay skin to save weight.
5) Detail work
- After first layer sets slightly, add buttons near the mouth using small clay mounds; press varied sizes and poke holes for realism.
- Carve fine lines with a toothpick for nostrils and subtle wrinkles.
- Pre‑form any twig or branch inserts: drill small pilot holes, apply glue, and insert artificial twigs for creep factor.
6) Backing & repair
- Once the front is dry, apply clay to the back of the mask for full coverage and to reinforce weak areas.
- If hairline cracks appear after drying:
- Spray the crack with water, rub to rehydrate, press in thin clay patches, wait ~2 hours to set.
7) Stitching the lips
- Drill a series of small, evenly spaced holes across the lips area.
- Use a sculpting tool to thread jute cord through holes, crossing as desired to create stitched look:
- Tighten and trim ends; secure inside with a small drop of glue.

8) Sealing with Plasti‑Dip
- In a ventilated area with respirator:
- Spray two even coats of Plasti‑Dip across the entire mask exterior (avoid spraying interior).
- Let dry at least 1 hour between coats; add more coats for durability but allow full dry time.
9) Interior finishing
- Adhere felt or nylon lining to the inside for comfort and to darken eye openings.
- Attach elastic strap: glue a thick elastic band to interior, reinforce with thinner elastic strips and allow full cure.
Finishing Instructions
- Spray base color (tinted gray with slight blue) in light mists to keep recessed areas darker.
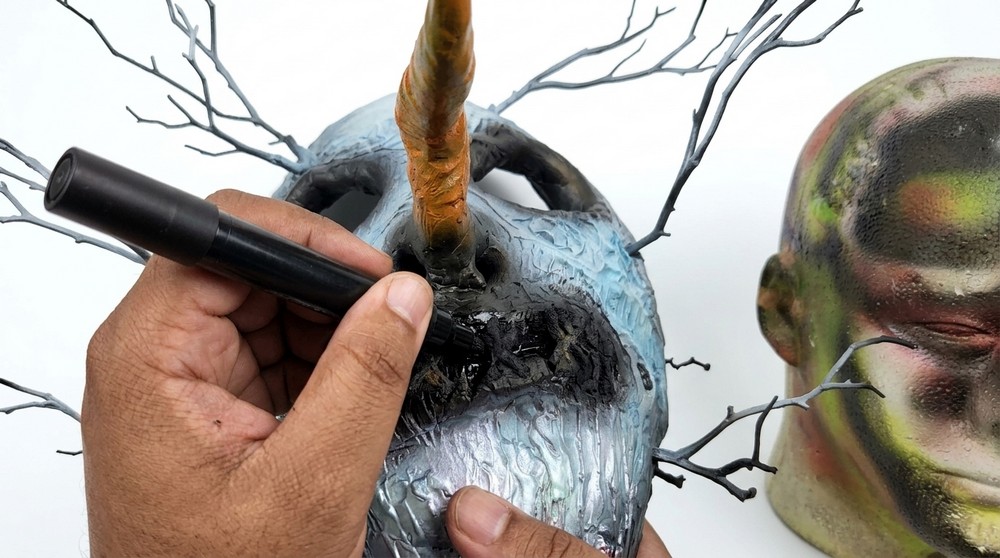
- Darken lips and outer rims with black spray/paint, avoiding stitched area as much as possible.
- Add highlights: dab titanium white on raised areas and branch tips; add flame orange to nose tips if desired.
- Touch details with a chrome marker (buttons, stitching highlights).
- Seal painted surface with a suitable flexible clear coat if desired.
Tips & Techniques
- Work in thin layers with foam clay to prevent shrinkage cracks.
- Use foil cores under large features to reduce clay volume.
- Pre‑drill holes for stitching and twig inserts to avoid tearing the clay.
- Keep a water spray handy to rehydrate small cracks for easy repair.
Common Problems & Solutions
- Hairline/back cracks:
- Rehydrate with water, press thin clay patches, wait 2 hours, then reseal.
- Clay drying too fast during application:
- Work smaller areas at a time; keep clay covered when not in use.
- Plasti‑Dip odor or poor adhesion:
- Use respirator and ventilate; ensure surface is dry and free of silicone oils before spraying.
Creative Ideas & Variations
- Replace jute stitching with colored thread or wire for different aesthetics.
- Add LED micro‑lights behind eye sockets for glowing eyes.
- Use EVA foam or thermoplastic for a more flexible, cosplay‑durable mask.
Final Result
A wearable, lightweight foam‑clay mask
- The completed mask is a durable, sealed, and wearable piece with stitched lips, textured details, twig accents, and a comfortable lining and elastic strap. Follow drying and sealing steps carefully for longevity and always use proper ventilation and respiratory protection when spraying Plasti‑Dip or paints.