Bring sweet creativity to life by making a DIY Polymer Clay Ice Cream with this easy tutorial, ideal for charming keychains or accessories.
Want to craft something sweet and fun today? You are in for a real treat with this amazing DIY Polymer Clay Ice Cream project. It is a fantastic way to turn small blocks of colorful clay into adorable miniature desserts that look super yummy. If you want a creative afternoon activity, this is the perfect guide to read. Before diving into the fun details, we must give huge thanks and full credit to the original YouTube channel Drawings In Action for this wonderful tutorial and design. Their brilliant ideas will help you make the cutest tiny treats you have ever seen.
Quick DIY Polymer Clay Ice Cream Tutorial To Try This Summer
You will truly enjoy reading about this activity because it easily brings out your inner child. Working with the soft material is deeply relaxing, letting you quickly roll and shape tiny scoops of your favorite flavors. Once a little base is ready, gently making lines on a tiny waffle cone or adding small, colorful sprinkles on top feels completely magical. You do not need any hard tools or special skills to play along. The lovely instructions are incredibly clear, showing you exactly how to mix bright colors and add wonderful textures to your art.
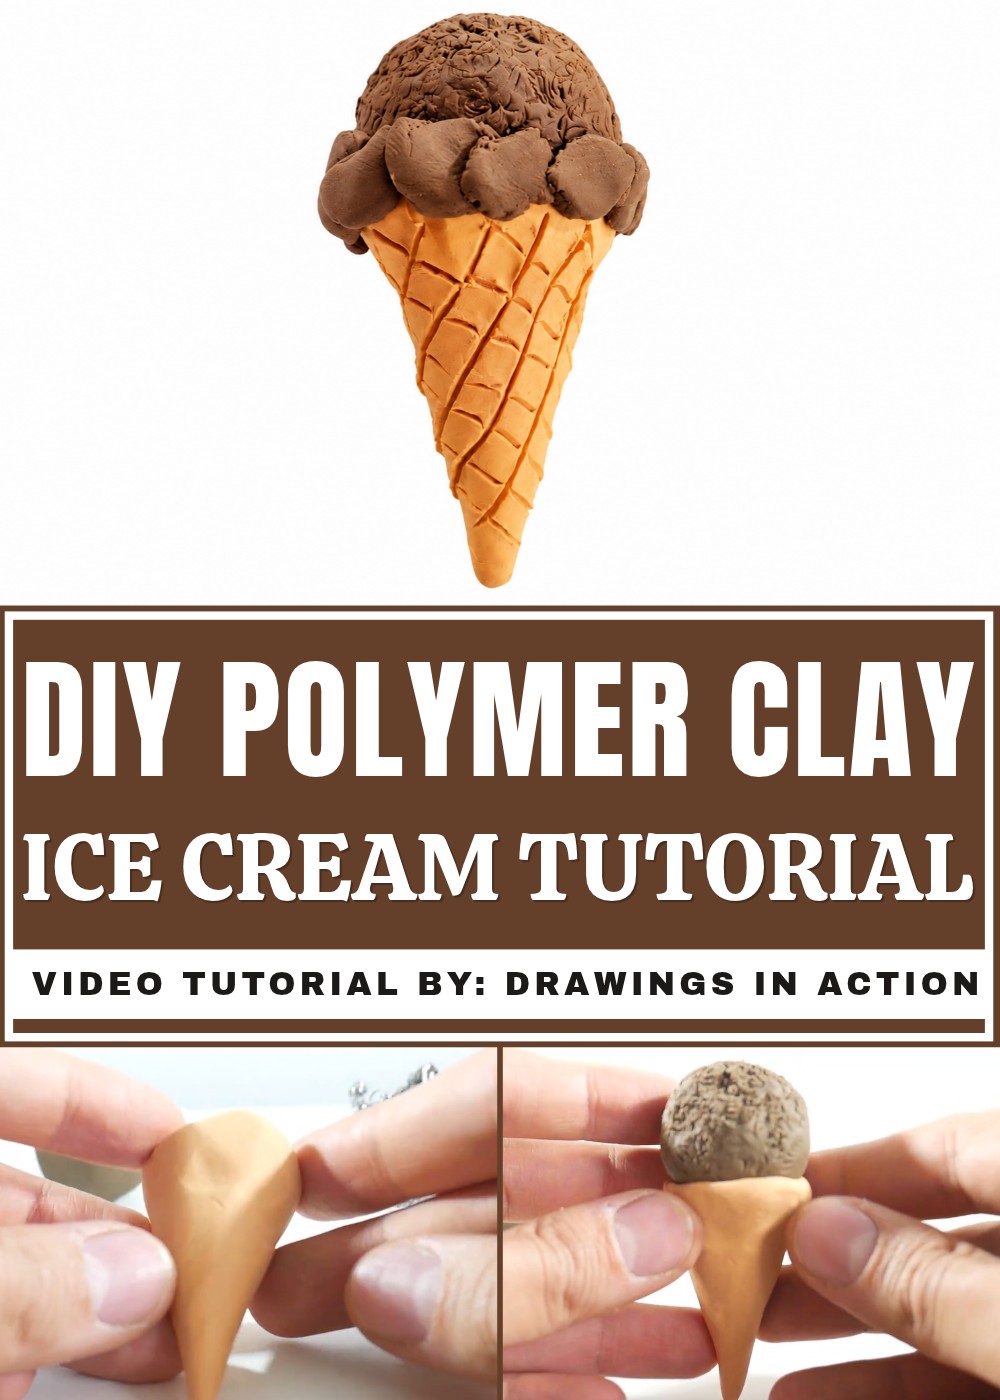
When you finally bake your sweet creations, watching them harden into solid mini art is deeply rewarding. You can easily turn these tiny pieces into cute keychains, charming fridge magnets, or beautiful handmade gifts for your dearest friends. Even if you are a total beginner, enjoying this useful guide will leave you feeling so proud of your new skills. Everyone always loves a tiny dessert, and seeing your colorful art come to life right in your hands will surely put a big smile on your face. Get ready to enjoy a wonderful and happy shaping adventure!
Step-by-Step Tutorial: How To Make DIY Polymer Clay Ice Cream
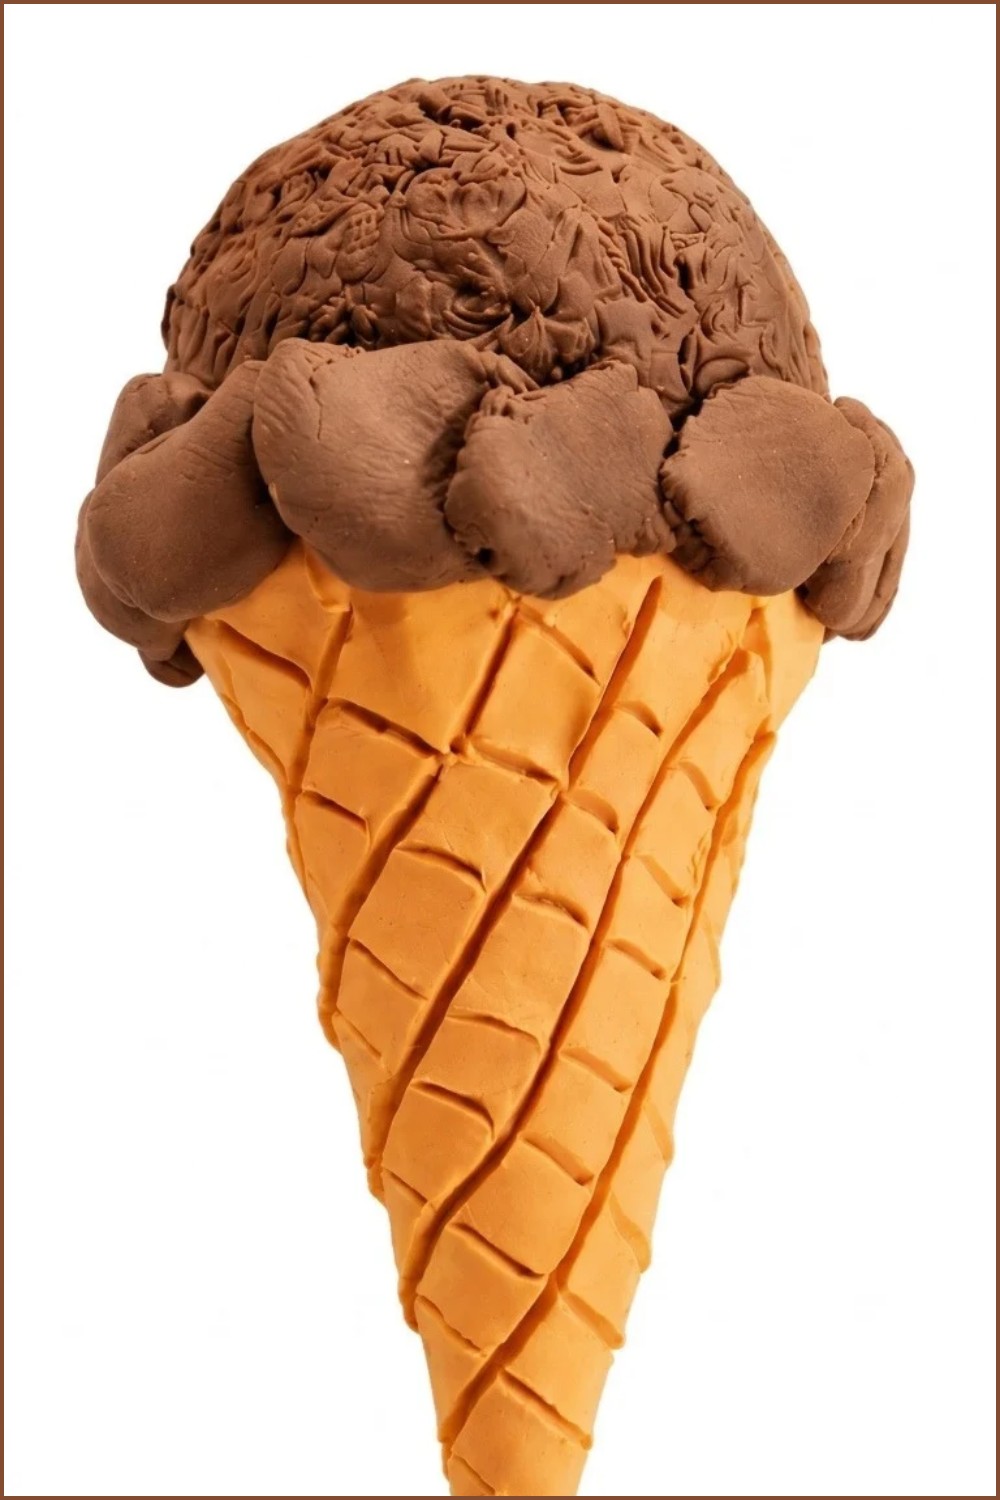
This tutorial provides detailed instructions for sculpting a visually appealing clay ice cream. Using only light orange and brown clay, along with simple tools like a pencil or cutter, this activity is beginner-friendly and enjoyable for all ages. The project will guide you through shaping the cone, adding texture, and assembling ice cream layers with precise steps. Whether using the suggested colors or your own favorites, you’ll have a final product that looks delightful and can be displayed as a fun decoration or gifted to someone. Follow the instructions below to confidently achieve an attractive clay ice cream model.

Materials and Tools
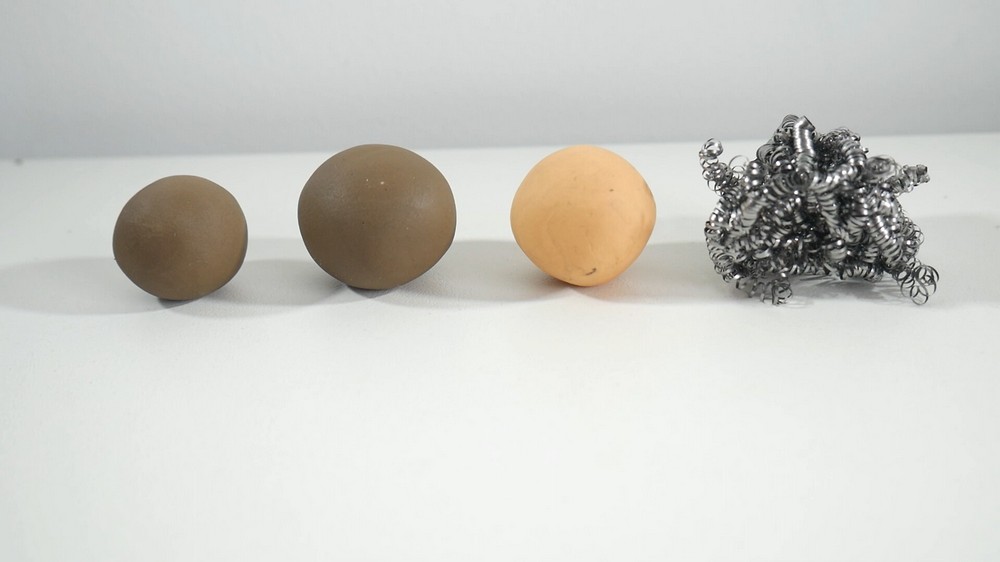
Materials
- Light Orange clay: To create the ice cream cone.
- Brown clay: For the chocolate ice cream. Feel free to use other colors for different flavors (e.g., pink for strawberry, white for vanilla).
- Metallic kitchen sponge: To create realistic ice cream texture.
Tools
- Pencil or homemade cutter: To etch texture into the cone and add realistic details.
- Clean work surface: A clean, flat table for rolling and shaping clay.
- Hands: You’ll shape most parts of the ice cream using your fingers.
Crafting the Ice Cream Cone
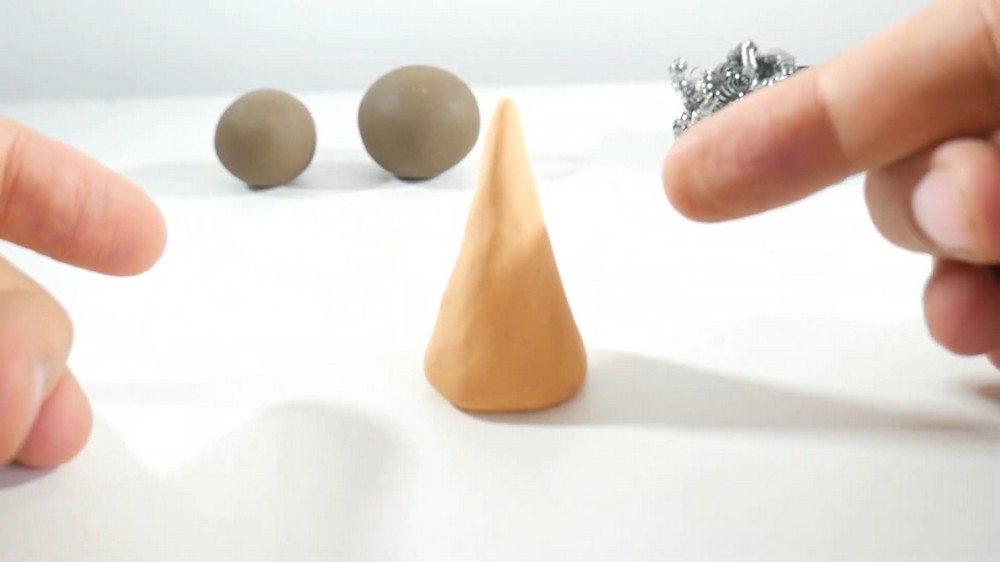
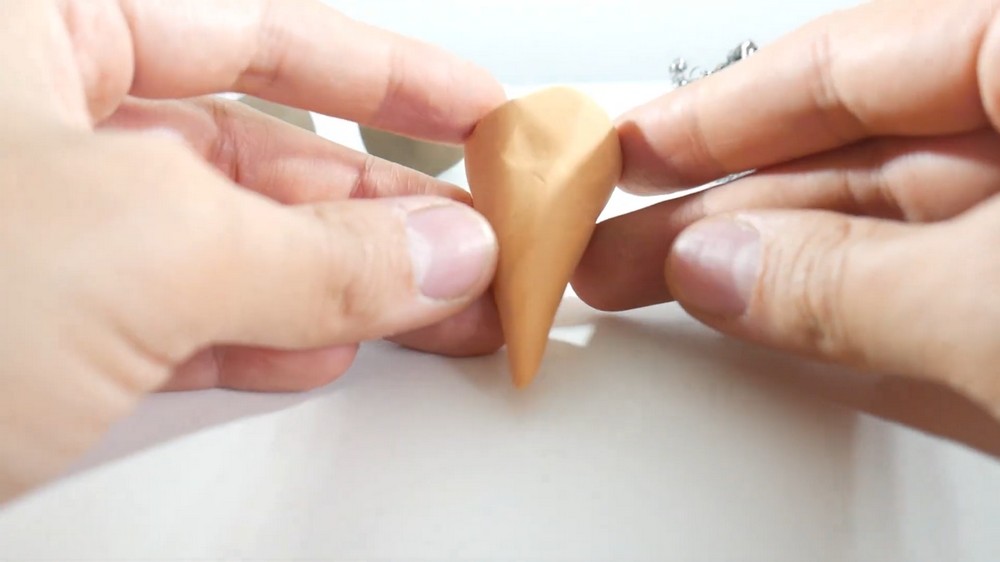
Shape the Cone
- Start with the light orange clay ball (medium in size).
- Place the ball on your work surface and use your thumb and index finger to form a cone shape:
- Pinch one end of the clay ball to gradually taper it while leaving the opposite end rounded.
- Roll the clay gently to smooth it and refine the cone shape.
Create the Hole at the Top
- Using your thumb and index finger, slightly press the rounded top of the cone inward to form a small hole.
- This hole will hold the ice cream ball later.
- If the cone shape distorts while creating the hole, roll it against the table again to restore the smooth and symmetrical cone form.
Add Texture to the Cone
- Once the basic cone shape is ready:
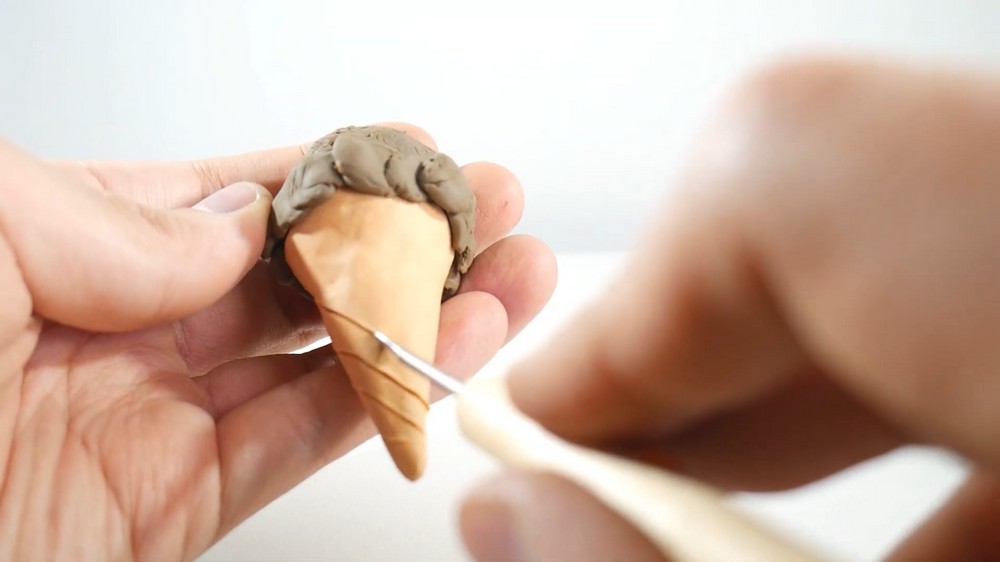
- Use a pencil or homemade cutter to draw diagonal parallel lines on the surface of the cone.
- Rotate the cone slightly and draw diagonal lines in the opposite direction to form a diamond pattern.
- These etched details will represent the waffle-like texture of the ice cream cone.
Shaping the Ice Cream
Form the Ice Cream Ball
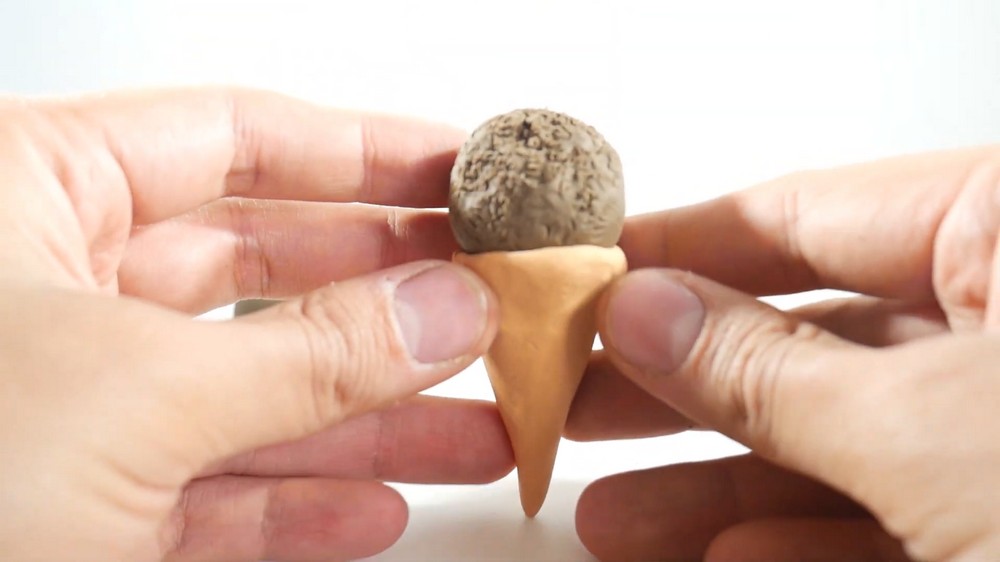
- Take the largest brown clay ball and roll it into a smooth sphere to represent the scoop of chocolate ice cream.
- Use a metallic kitchen sponge to give the clay ball texture:
- Press the sponge firmly against the ball’s surface to form indentations and patterns. These will mimic the look of machine-served ice cream swirls.
Attach the Ice Cream to the Cone
- Place the textured brown clay ball onto the top of the cone, settling it into the hole you created earlier.
- Make sure the scoop sits securely without tipping off the cone.
Adding Realistic Overflow
Create Chunky Bits of Overflow
- Take another small brown clay ball and use your fingers to break off uneven, rough chunks from it.
- These chunky pieces will give the illusion of ice cream slightly overflowing from the edges of the cone.
Attach Overflow Pieces
- Add the rough pieces of brown clay around the base of the ice cream ball, filling the area between the ice cream and cone.
- Arrange the chunks randomly to create a natural, overflowing effect.
- Press them gently but firmly to ensure they stick to the ice cream ball and cone.
Add Texture to the Cone
- Once the basic cone shape is ready:
- Use a pencil or homemade cutter to draw diagonal parallel lines on the surface of the cone.
- Rotate the cone slightly and draw diagonal lines in the opposite direction to form a diamond pattern.
- These etched details will represent the waffle-like texture of the ice cream cone.
Display Your Ice Cream
Add Your Personal Style
- While the tutorial uses brown clay for chocolate ice cream, you can customize your design:
- Use pink clay for strawberry, white clay for vanilla, or vibrant colors like blue or green for a unique take.
- Add additional textured details or colorful sprinkles for a playful touch.
Showcase Your Finished Ice Cream
- Your clay ice cream cone is now complete and ready to be displayed.
- Place it on a shelf, desk, or give it as a handmade gift to a friend.
- To keep it intact, ensure it’s stored in a cool, dry place.
Final Thoughts
By following simple steps, you’ve created a delightful piece complete with a textured waffle cone, realistic ice cream texture, and fun overflow details. This project is excellent for both beginners and experienced crafters, as it uses accessible materials and basic shaping techniques while allowing room for personalization. What makes this clay ice cream special is its versatility. You can try experimenting with different clay colors to simulate different ice cream flavors or even create a multi-scoop cone by stacking more layers on top. The textured appearance of the cone and ice cream ensures your finished piece looks both playful and realistic.
This crafty clay project is perfect for enjoying some relaxing, creative time. Not only have you made something charming, but you’ve also learned techniques that you can apply to future clay creations, like crafting cupcakes, popsicles, or other treats.Enjoy your cute ice cream cone and show off your craftsmanship! Your handmade ice cream is a fun addition to any collection.