Open your creativity with this step-by-step guide to crafting a DIY Polymer Clay Mini Wolf, a perfect project for animal lovers and craft enthusiasts.
Designing a tiny wolf out of polymer clay is an exciting and creative project that brings a bit of the wilderness right to your hands. A wolf is a symbol of strength, mystery, and freedom, and turning this majestic animal into a miniature figurine can be a rewarding and fun experience. Its adorable features, like pointed ears, a fluffy tail, and a proud stance, make it a charming addition to your collection or décor.
DIY Polymer Clay Mini Wolf for Cute Handmade Gifts
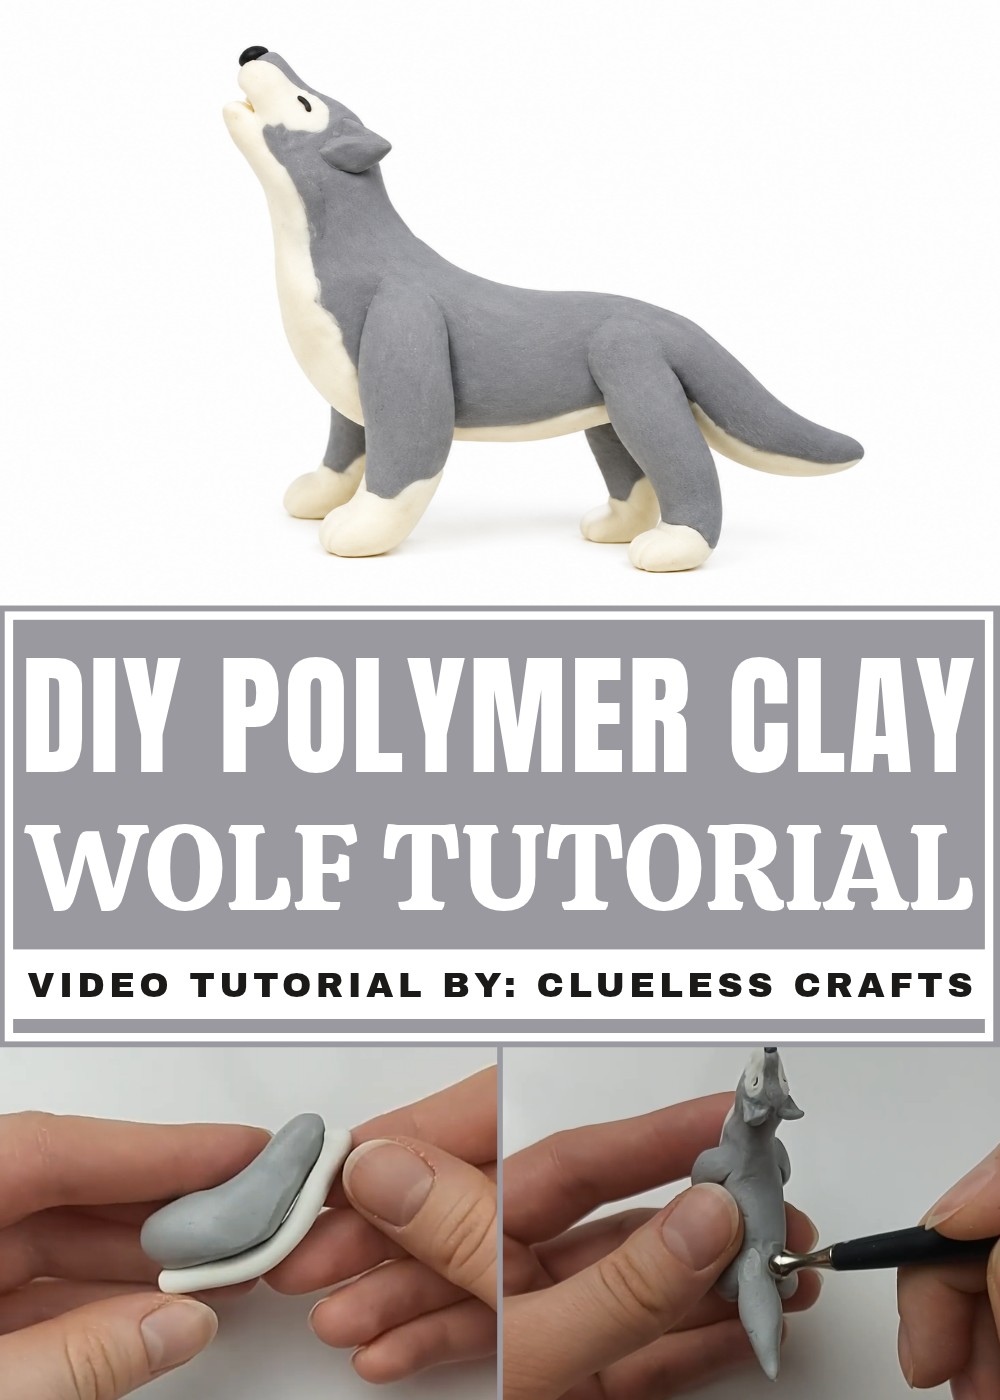
A mini wolf can be as unique as you want it to be. You can experiment with shades of gray, white, or even add creative patterns to make it stand out. From a howling pose to a sitting or playful one, the design can show off the character and personality you imagine for it. Its intricate yet simple details make it an ideal project for anyone who enjoys crafting. Adding small details, like expressive eyes or a bushy tail, brings the little figure to life, giving it a special touch.
This miniature creation is perfect as a small keepsake that symbolizes the beauty of the wild. It can sit proudly on a shelf, act as a cute gift for a nature-loving friend, or inspire you to create a whole pack of different little wolves. Every time you glance at it, you’ll be reminded of your creativity and the fun you had bringing this tiny, fascinating creature to life.
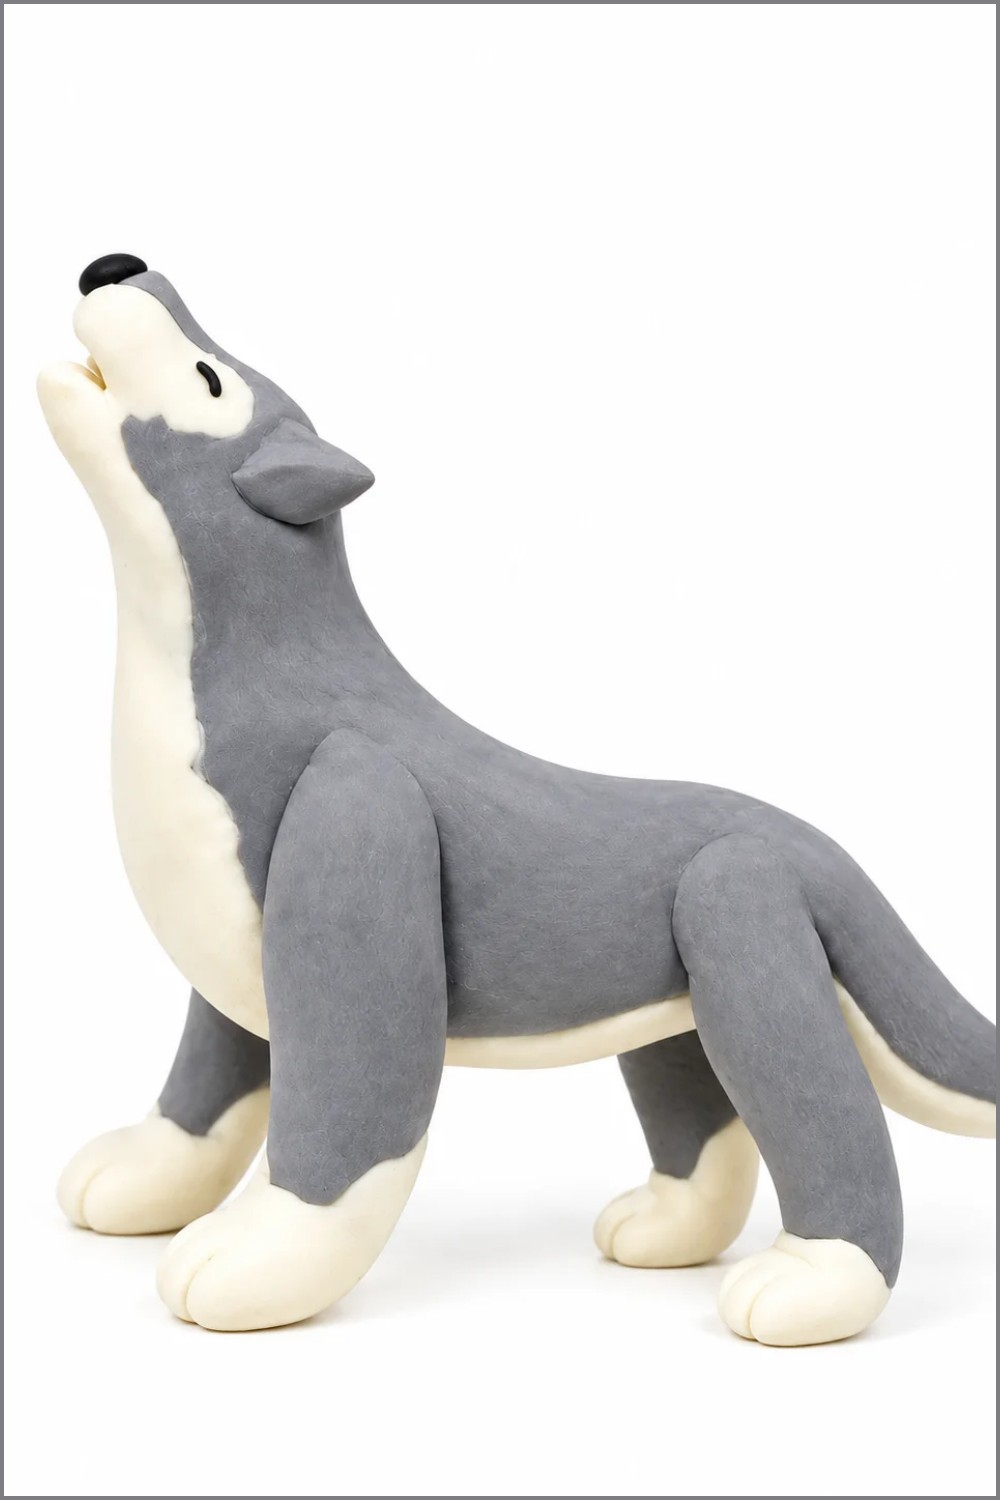
DIY Polymer Clay Mini Wolf
Make an expressive mini clay wolf using simple shapes and blending techniques. This tutorial walks you through shaping a curved body, adding a white belly, sculpting a howling mouth, defining fur transitions, creating ears, legs, a tail, and assembling everything into a cohesive figure ready to bake.
Materials & Supplies
- Polymer clay: gray (main), white (belly and accents), black (nose/mouth/eyes)
- Work surface (clean mat or paper)
- Optional: small amounts of other accent colors
Tools & Equipment
- Sculpting tools: ball‑point tools (small/medium/large), flat tool
- Sculpey or craft blade for cutting and mouth carving
- Roller or table edge for blending
- Oven (follow polymer clay manufacturer instructions)
- Toothpicks/fingers for fine manipulation
Project Details
- Skill level: Beginner–Intermediate (requires patience for facial shaping)
- Time: ~1–2 hours sculpting (plus bake + cool time)
- Result: small, posed wolf ideal for display or dioramas
Preparation
- Condition your clay by kneading until soft and uniform.
- Pre‑measure balls of gray, white and black so assembly is quick.
- Keep tools, blade and workspace clean and lint‑free.
Step-by-Step Detailed
(The steps below follow the full sequence from the source; read each bullet and follow in order.)
Shape the Body
- Roll a large gray ball and elongate it into a rough cone.
- Find a point about ⅔ up the cone; press and roll that section with your finger to narrow it slightly and create a slight curve.
- At the bottom end, pinch and round the clay all the way around so the rear is smooth and rounded — the silhouette should resemble a bent finger.
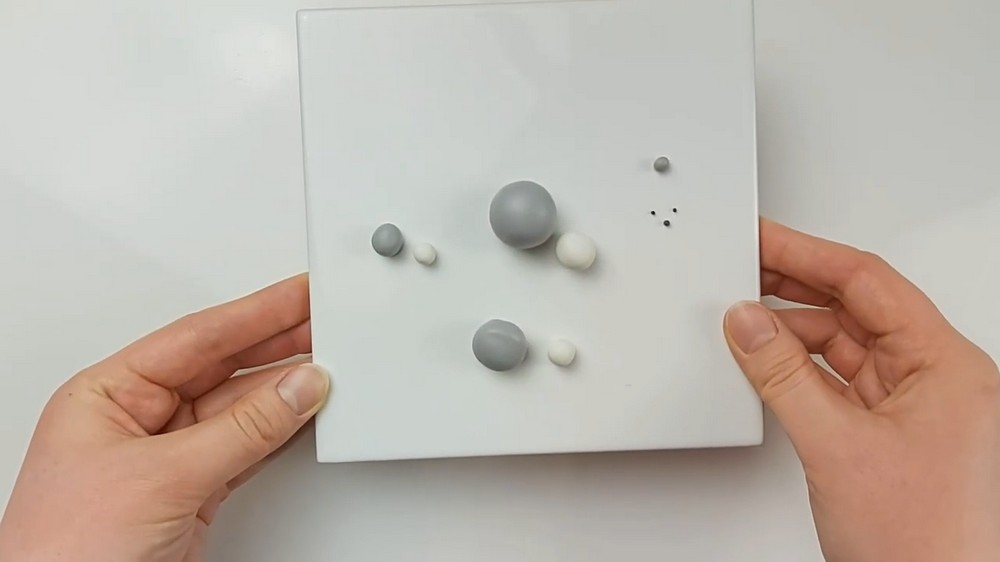
Add the White Belly
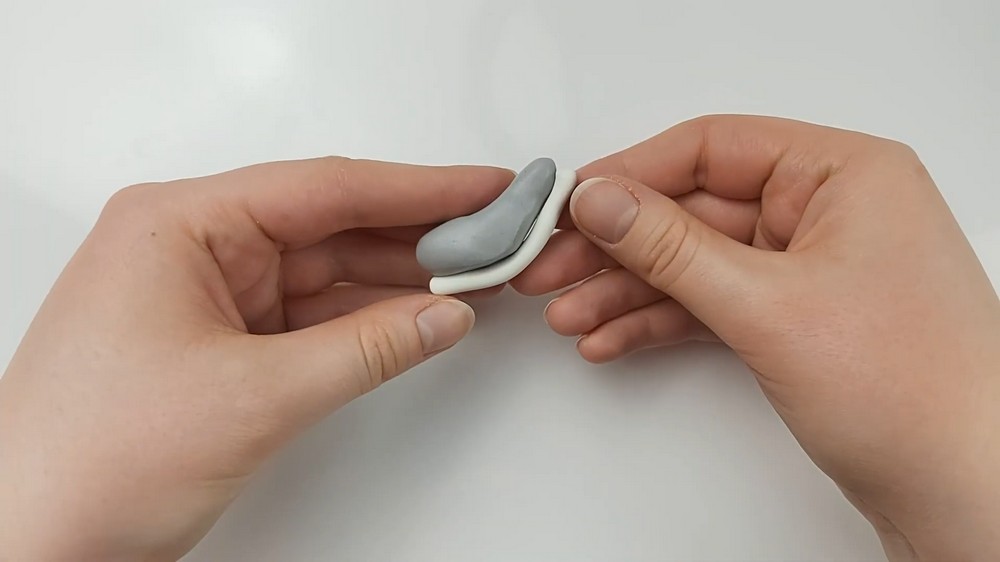
- Roll a white ball into a log sized to the underside of the body.
- If flattened incorrectly, fold the log in half and press it flat on the table for an even strip.
- Pinch one end to a point and attach it to the underside of the gray body, wrapping the pointed tip up toward the head area.
- Pat down loose edges and roll the body on the table to blend the belly into the gray, then use a medium ball‑point tool to re‑define the neck if rolling removed the separation.
Shape the Head & Neck
- Pinch the narrow end into a triangular head and bend the neck back so the head faces upward.
- Use two index fingers pressing opposite sides of the neck and rotate as needed to form a smooth, rounded neck shape.
- If the head looks like it has a receding hairline, press a tiny gray triangle on top of the head and blend it in to balance the forehead.
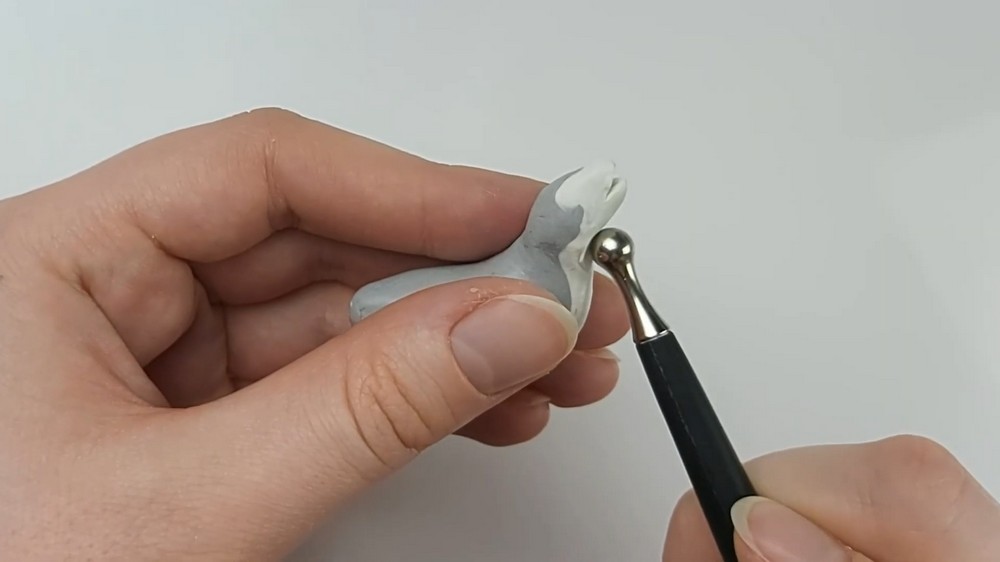
Adjust Body Proportions
- If the rear or overall proportions look off, remove a chunk from the rear and blend smooth so the head‑to‑body ratio feels balanced.
Carve the Mouth (Howling Pose)
- Use a blade to cut a line for the mouth.
- Pry the mouth open, insert a small ball‑point tool and pinch the mouth sides with thumb and index finger to round the opening, creating a howling gape.
- Press the ball‑point tool inside again to point the lips outward from the interior.
- If the mouth looks too exaggerated, add a bit of extra clay to the nose area to restore balance.
- Continue blending with a small ball‑point tool and fingers — this step requires patience to achieve a believable wolf muzzle.
Blend Belly & Fur
- Use a large ball‑point tool to smooth the neck area and gently push white clay into the gray along the belly sides, mimicking fur transition.
- Smooth out seams to create a natural fur flow.
Make & Attach Ears
- Squish a small gray ball into a diamond, cut in half to form two ear triangles.
- Flatten the bottom corners slightly to create curved bases for easier attachment.
- Smooth the ear edges on the head and indent the inner ear center with a small ball‑point tool.
- Blend each ear securely.
Face Details: Nose, Eyes, Mouth Depth
- Shape a small black ball into a triangle for the nose and attach at the muzzle tip.
- Make eye indents where you want them; use a tiny curved black log or dots to create a closed eye look (curved downward ends).
- Place a tiny black piece inside the mouth for depth if desired.
Sculpt the Legs
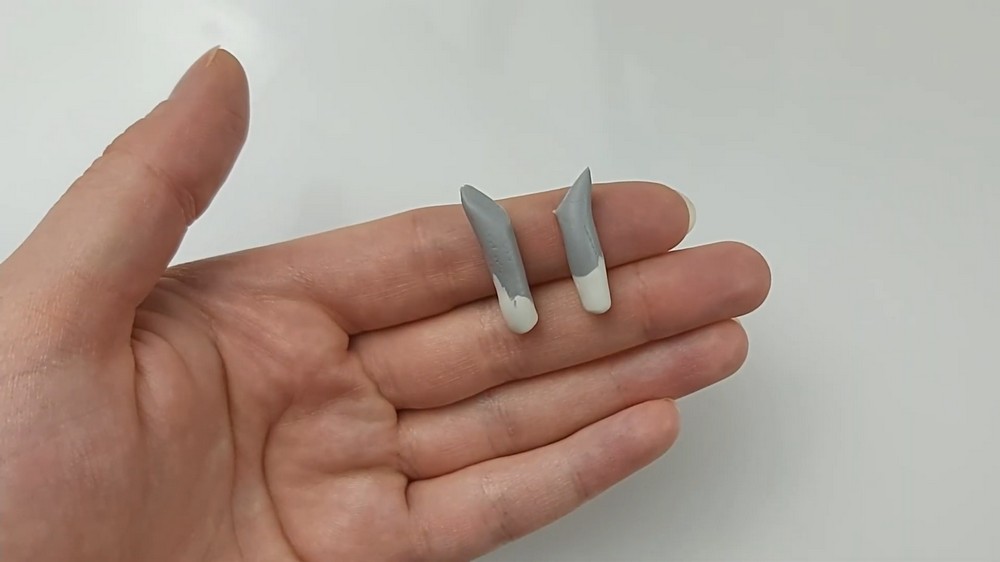
- Roll a medium gray ball into a log and cut into four equal sections.
- Roll each piece to tidy up cut ends. Select two for back legs and two for front legs.
- Compress each leg slightly to create a subtle curve, then cut the top at an angle for easier blending.
- For front legs: roll a small white log, cut in half and attach as lower leg/forepaws; blend by rolling against the table and dragging gray into white with a ball‑point tool to mimic fur blending.
- Repeat for the other front leg.
Attach Legs to Body
- Place front legs beneath the base of the neck; press both legs together with thumb and index finger to apply even pressure for a stable bond.
- Position back legs near the tail base and attach the same way.
- Use a medium ball‑point tool or finger to blend the leg tops smoothly into the body.
Make & Attach Tail
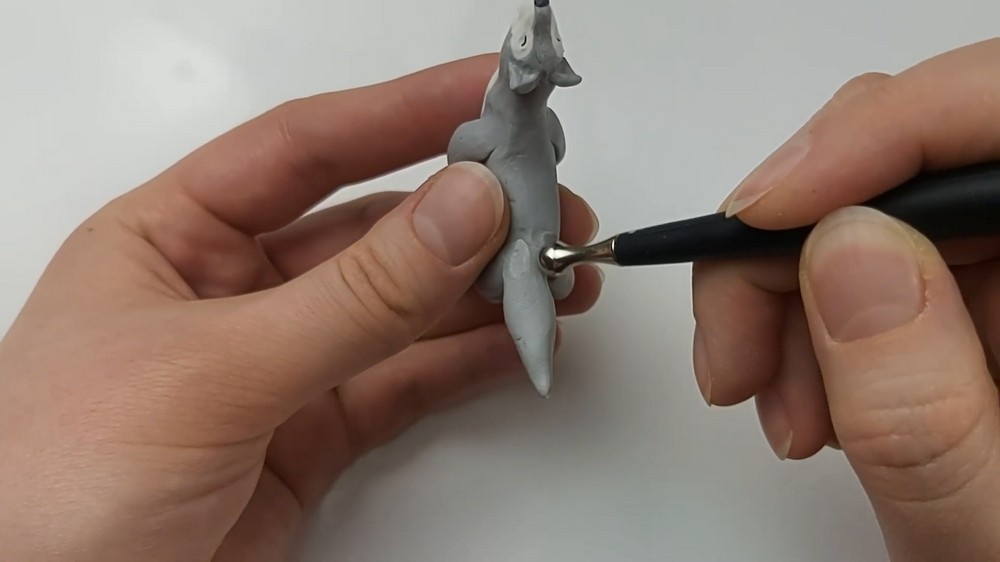
- Roll a gray ball into a diamond shape and roll a thinner white diamond.
- Flatten the white between fingers and attach to the bottom half of the gray diamond tail piece.
- Drag gray into white on both sides and roll against the table to blend and recreate the diamond profile.
- Attach tail to the body from the top blending down; hold steady while pressing into position.
Final Shaping & Pre‑Bake Check
- Re‑define any lost details — facial lines, ear edges, leg seams.
- Ensure all joints are well blended and the wolf sits or balances as intended.
Finishing Instructions
- Bake according to your polymer clay manufacturer's instructions (refer to product packaging or video description for specific times/temps).
- Allow the wolf to cool completely before handling.
- Optionally sand minor imperfections and apply a suitable sealer if desired.
Tips & Techniques
- Use fingers and tools alternately — fingers for broad shaping, ball‑point tools for precise smoothing.
- If the mouth or other details get messy, add small amounts of clay to rebuild rather than overworking thin areas.
- Work slowly on the muzzle; small gradual adjustments yield the most natural results.
Common Problems & Solutions
- Legs squish while attaching the head:
- Hold legs steady and reshape after head attachment; re‑blend before baking.
- Mouth becomes beak‑like:
- Add clay to the nose area and re‑blend; use small tools to push lips outward gently.
- Seams visible after baking:
- Sand lightly and use a thin polish or varnish to conceal; for structural issues, reattach with appropriate adhesive.
Creative Ideas & Variations
- Make a pack by varying sizes and poses (sitting, howling, prowling).
- Add painted highlights or fur texture after baking for realism.
- Create seasonal versions (snow dusting, colored accents) for dioramas.
Final Result
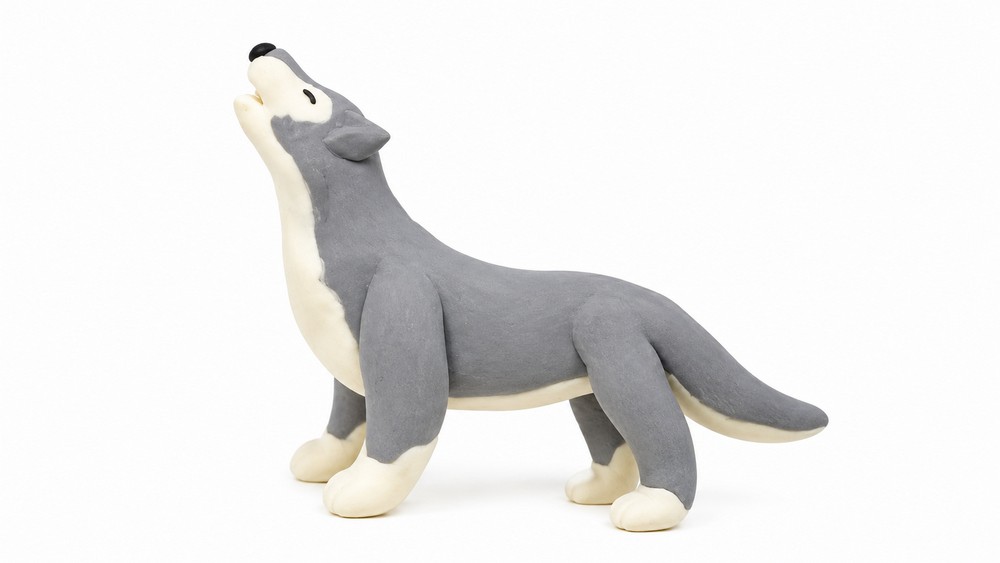
You’ll end up with a stylized, howling mini wolf featuring a curved silhouette, blended white belly, articulated muzzle and mouth, expressive ears, integrated legs and tail—an attractive small sculpture ready for display or incorporation into a scene.