Shape your own DIY Polymer Clay Pumpkin Patch for lovely autumn decor, thoughtful gifts, or a cheerful fall touch in any cozy room at home.
Small fall decorations can give any room a warm and cheerful feeling without taking up much space. DIY Polymer Clay Pumpkin Patch is a lovely little project featuring tiny pumpkins arranged together in a cute autumn scene. Full credit for the original tutorial and design goes to the YouTube channel Clueless Crafts. Each pumpkin has a round body, gentle lines, a short stem, and beautiful orange shades that give it a natural appearance. Different sizes help the little patch look more playful and full of life. It is a sweet way to celebrate autumn with colorful clay and simple handmade details.
DIY Polymer Clay Pumpkin Patch: Autumn Craft Tutorial
Polymer clay is soft and easy to shape, so forming these little pumpkins can be a peaceful and enjoyable activity. Small pieces of orange clay are rolled into balls, while simple tools help form lines around their sides. Green or brown clay can form tiny stems and leaves for a lovely finishing touch. After shaping and baking according to the clay instructions, the pumpkins become firm little decorations. Their smooth surfaces, rounded bodies, and small details give the finished pieces a neat and realistic appearance.
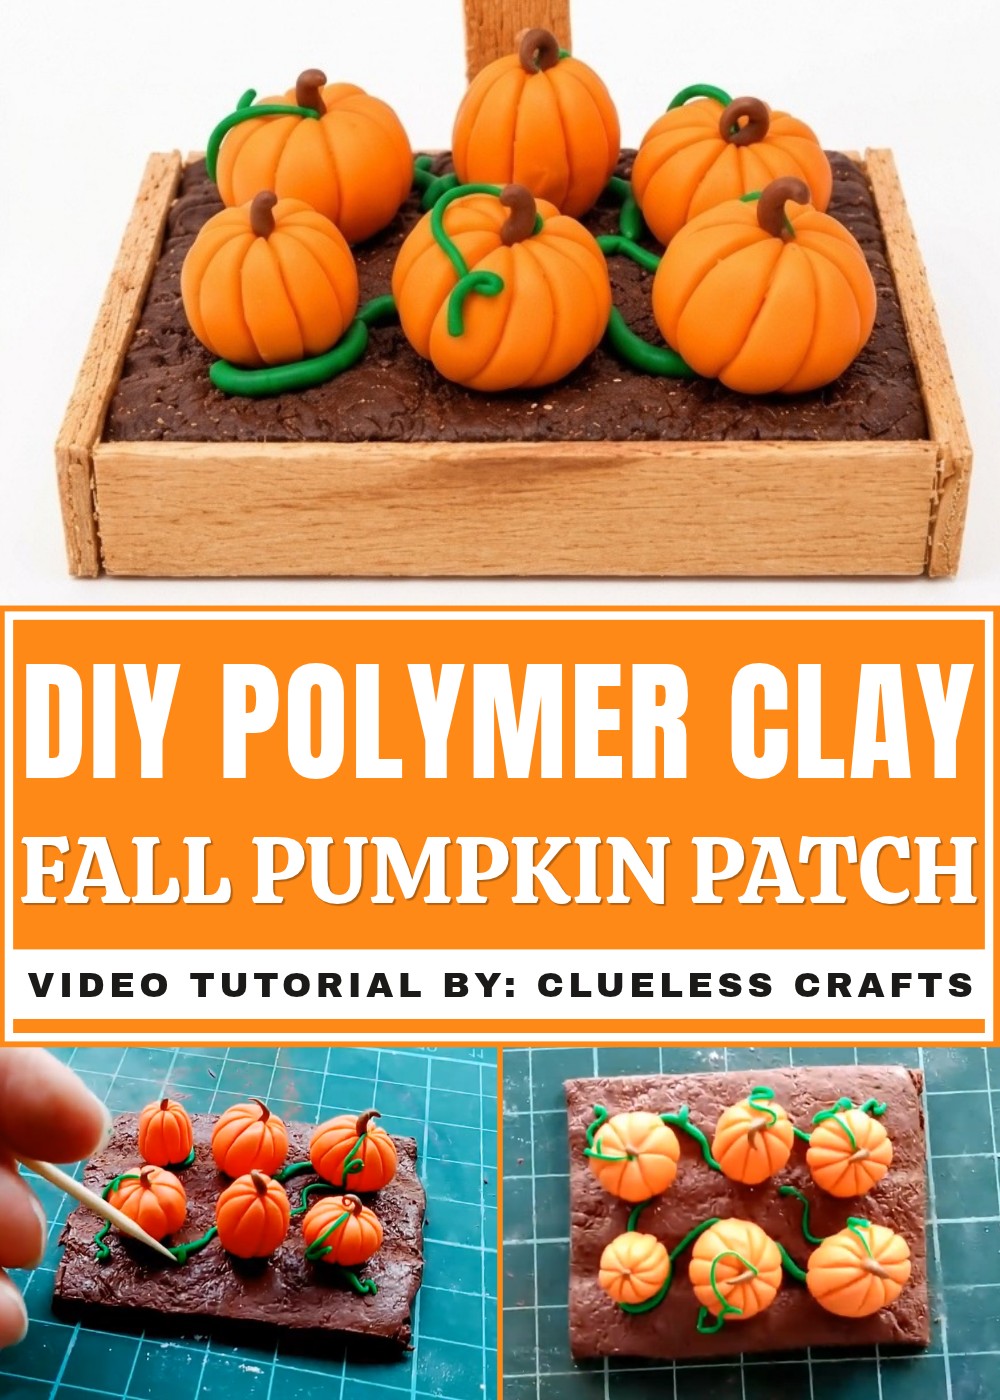
These miniature pumpkins look beautiful on shelves, desks, windowsills, or small tables during the fall season. Several pumpkins placed together can form a charming Halloween display or a thoughtful handmade gift for someone special. Their cheerful colors and cute appearance give any small corner of the home a cozy seasonal feeling.
DIY Polymer Clay Fall Pumpkin Patch
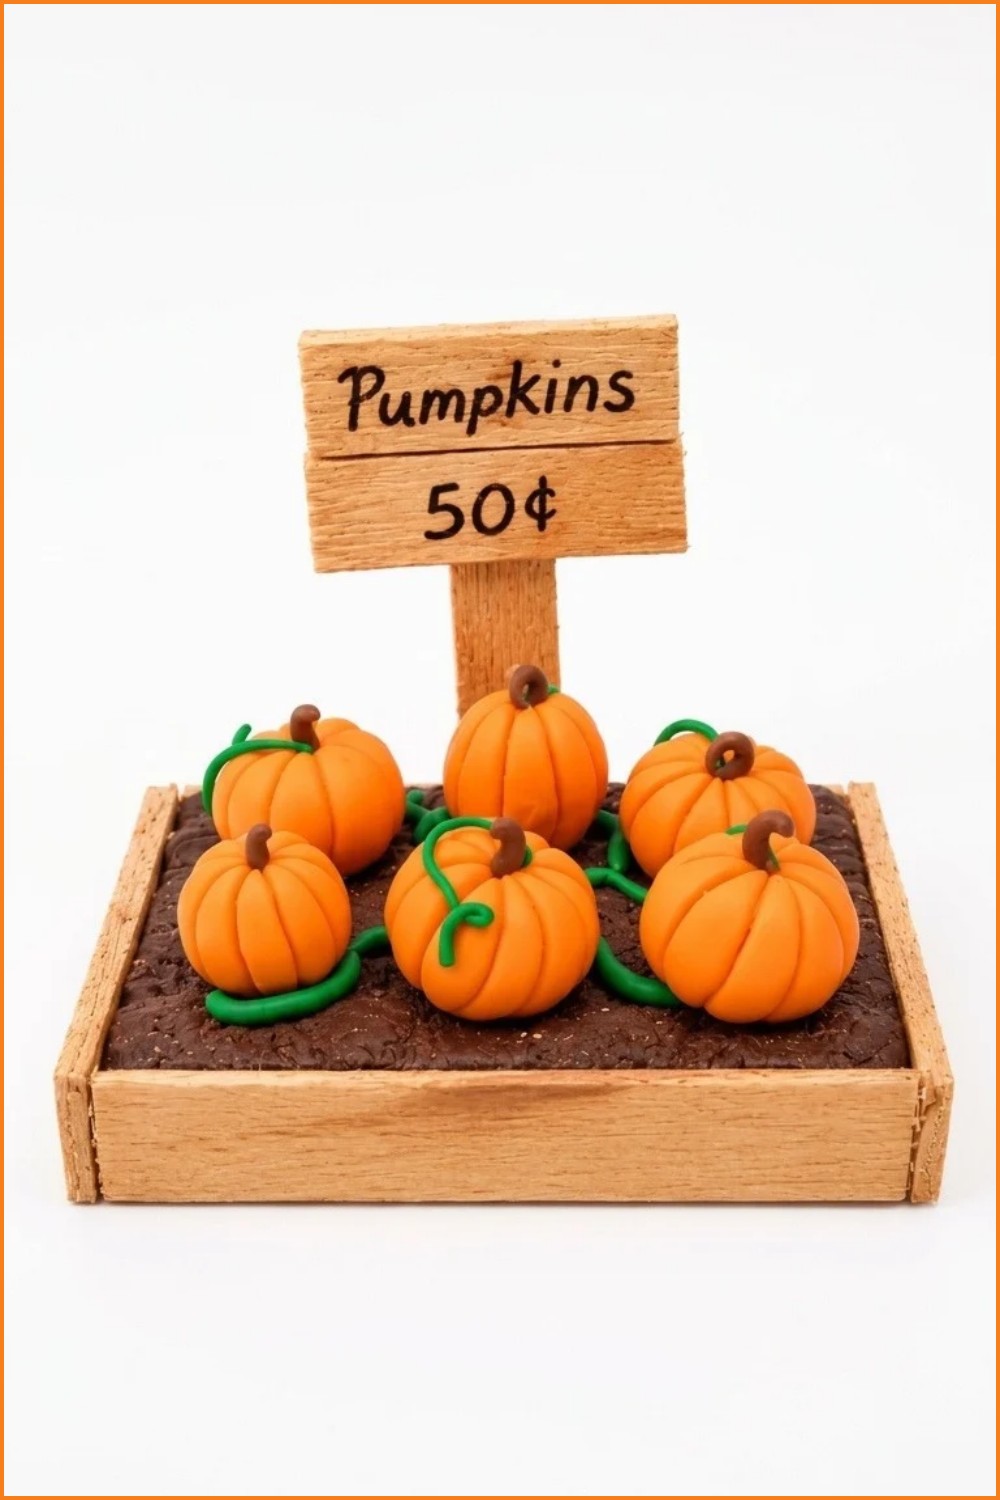
Celebrate the magic of autumn with a charming miniature clay pumpkin patch you can craft at home. This easy, beginner-friendly project is perfect for adding a touch of seasonal warmth to your décor or gifting to a friend who loves fall. Using simple materials like polymer clay, popsicle sticks, and basic tools, you will create lifelike pumpkins, twisting vines, and a rustic wooden fence—bringing a tiny slice of fall right to your table or shelf. Follow this straightforward, step-by-step tutorial to enjoy a relaxing, creative activity and end up with a delightful decoration for the harvest season.
Materials & Tools
Clay & Adhesives
- Orange clay (polymer or oven-bake type)
- Brown clay
- Dark brown clay
- Green clay
- Liquid Sculpey (or similar clay adhesive)
- Hot glue gun (or strong craft glue)
Paint & Finishing
- Brown acrylic paint
- Water (for thinning paint/stain)
Building Materials
- Popsicle sticks (standard and jumbo sizes recommended)
- White paper
Tools & Accessories
- Flat clay tool or craft knife
- Toothpick
- Toothbrush or crumpled aluminum foil (for texture)
- Clay extruder (optional)
- Scissors or cutting tool
- Oven (for baking clay)
Creating the Clay Elements
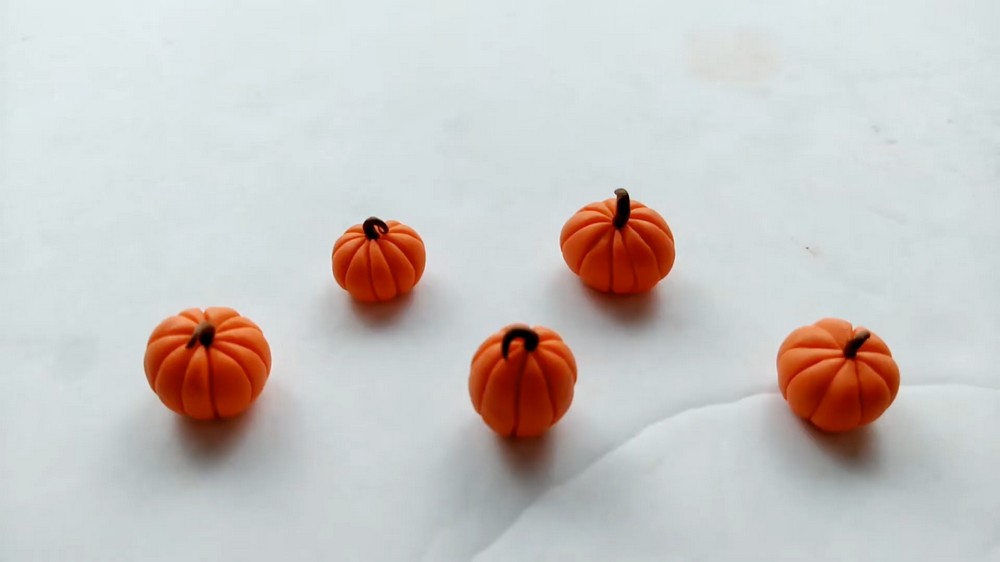
Crafting Mini Pumpkins
- Shape the Pumpkins:
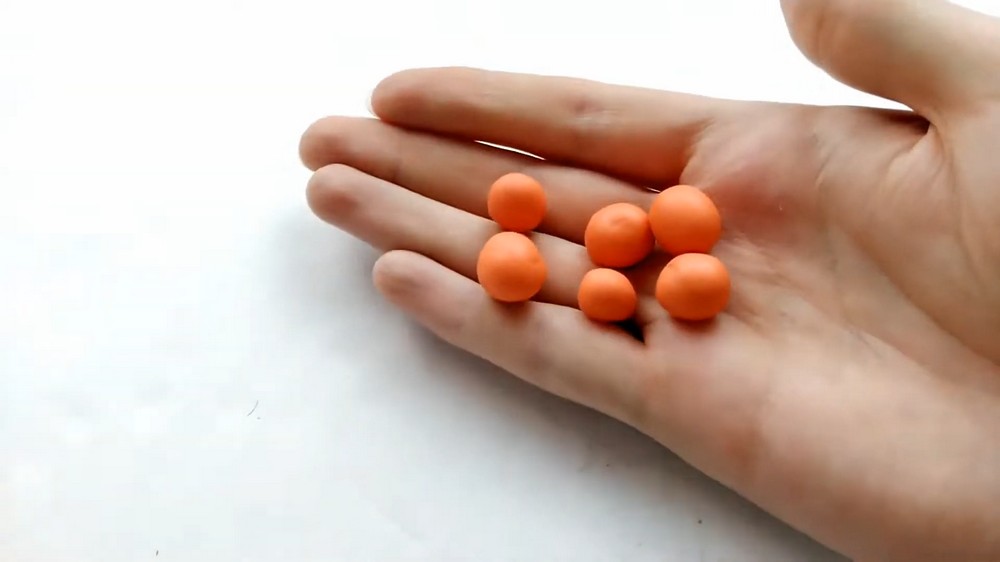
- Pinch off small balls of orange clay in various sizes. For a realistic look, have some small and some a bit larger.
- Roll each ball between your palms until smooth and round.
- Slightly flatten the bottom so each pumpkin can stand upright.
- Form Pumpkin Ridges:
- Using a flat clay tool (or the back of a butter knife), make gentle indents from top to bottom, like pie slices. Press down to make ridges around the pumpkin but don’t cut all the way through.
- Usually, pumpkins have 5 to 8 sections, but it’s fine if they’re not perfectly even.
- Add the Stems:
- Roll tiny cones of brown clay for the pumpkin stems.
- Trim the wide end flat so it will sit neatly atop each pumpkin.
- Attach the stem with a little gentle pressure, then curve the top for a natural, whimsical effect.
- Make More Pumpkins:
- Repeat for each pumpkin you want in your patch—aim for around 6, but feel free to make more or less.
Forming the Dirt Base
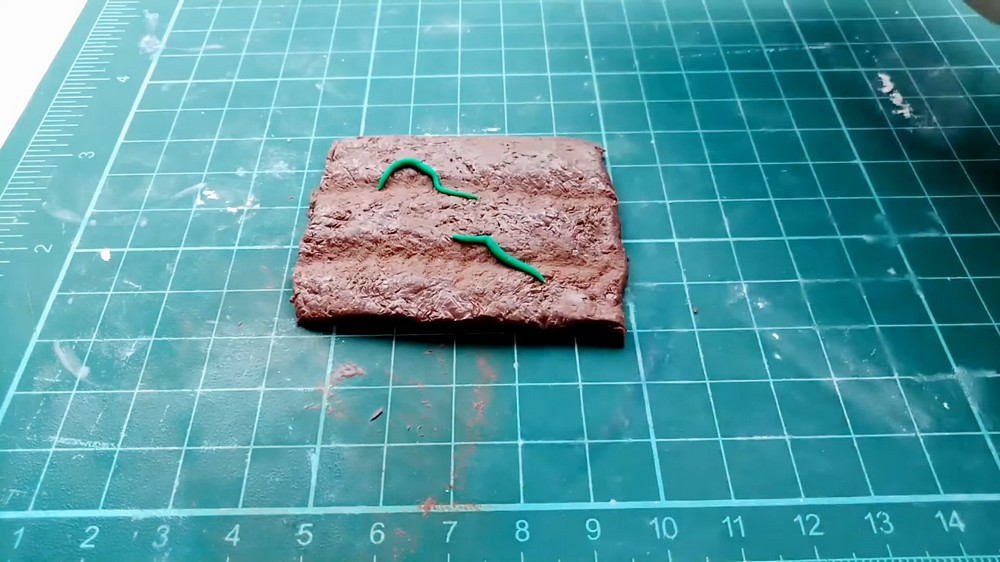
- Roll Out the Dirt:
- Roll out a piece of dark brown clay into a thick, flat rectangle—about ¼ inch thick works well.
- Trim edges cleanly with a craft knife.
- Texture the Ground:
- Roll a clean toothbrush or a wad of crumpled aluminum foil over the surface. This adds bumpy, realistic soil texture.
- (Optional) Use your tool to carve shallow lines or trenches for extra detail.
Creating Pumpkin Vines and Leaves
- Shape the Vines:
- Roll out green clay into very thin logs. If you have a clay extruder, you can use it to make even thinner, longer vines.
- Cut or pinch these logs into short sections. Gently twist or curl some for a natural vine look.
Assembling the Mini Patch
Laying Out Your Pumpkin Scene
- Plan Your Design:
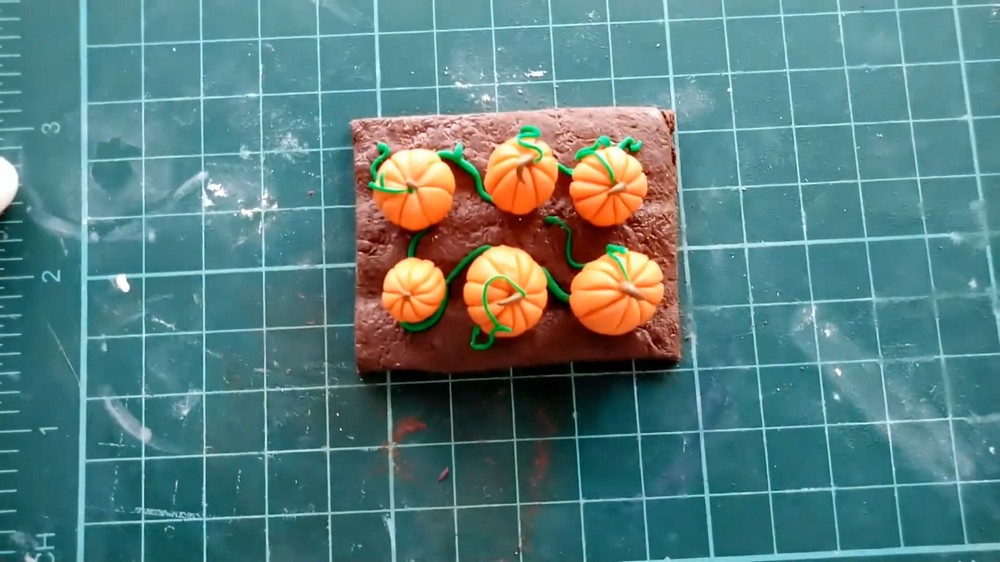
- Arrange pumpkins on the dirt base without glue to find a pleasing composition. Add vines and leaves for extra charm.
- Add Leaves:
- Roll tiny pieces of green clay into balls, then flatten slightly.
- Pinch one end for a leaf shape.
- Use a toothpick to texture veins into each leaf.
- Attach with Adhesive:
- Once happy with the arrangement, dab a bit of Liquid Sculpey (or other polymer clay glue) to the base under each pumpkin. Secure in place.
- Lay green vines across the dirt and pumpkins, tacking ends and curves down with small dots of adhesive.
- Final Touches:
- Place leaves at vine ends or draped over pumpkin stems. Press to adhere gently.
- Clean up the rectangular dirt base, trimming any overhanging clay.
Baking the Clay
- Bake Your Sculpture:
- Carefully transfer the complete clay scene onto a baking sheet.
- Bake according to your brand’s instructions (usually 15–30 minutes at 250–275°F/120–130°C).
- Let cool fully before handling.
Building the Wooden Popsicle Stick Fence
Create a Rustic Wood Look
- Mix the Stain:
- Combine a bit of brown acrylic paint with water (about a 1:2 ratio) to create a thin stain.
- Stain the Popsicle Sticks:
- Paint each stick on all sides with the stain using a brush or sponge.
- Lay sticks on paper to dry completely.
Design Your Fence
- Measure for Fit:
- Place your cooled clay base on a sheet of white paper and trace around it.
- Arrange stained sticks along your traced rectangle—this is the size your fence will need to be.
- Trim to Size:
- Mark and cut popsicle sticks to length, matching each side of the rectangle.
- For a more rustic look, stagger the lengths slightly or leave edges uneven.
- Assemble the Fence:
- Hot glue the sticks at corners to form a box frame.
- For extra stability, glue two cross pieces on the inside, about halfway up, as a ledge for your clay patch to rest on.
Make the Sign
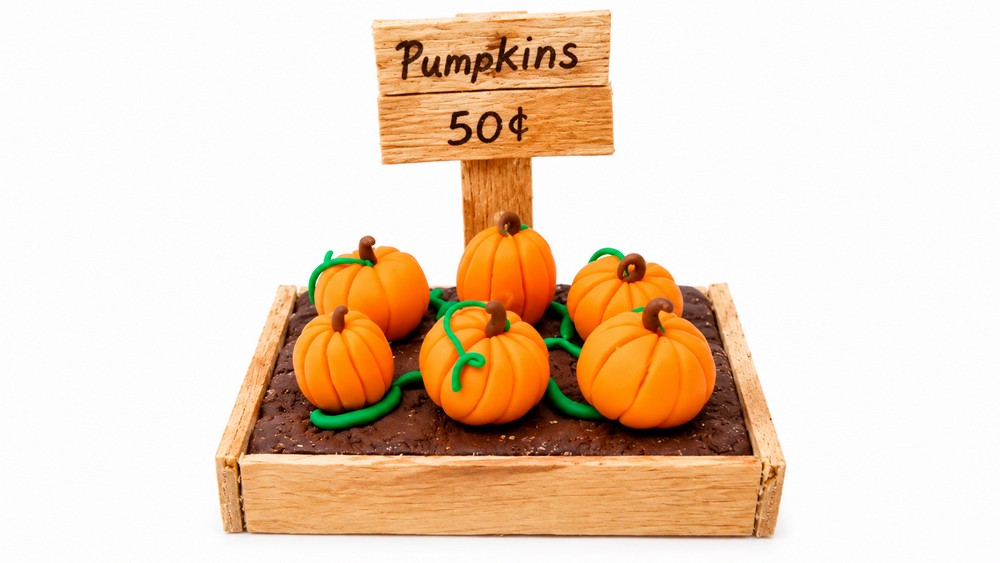
- Create the Patch Sign:
- Write "Pumpkin Patch" or your own title with a fine-tipped pen on a popsicle stick piece.
- Glue this piece (sign) to the top of a longer stick for the post.
- Attach the Sign:
- Secure the signpost to one side of the finished fence box with hot glue.
- Adjust so the sign stands up proudly above the patch.
Final Assembly
- Insert the Patch:
- Place your baked clay scene gently into the wooden fence frame; it should rest on the ledge you glued earlier.
- Admire Your Work:
- Your miniature pumpkin patch is finished!
- Set it on a mantel, shelf, or as a cute centerpiece for autumn gatherings.
Tips & Variations
- Add Mini Hay Bales: Shape yellow or tan clay into small blocks for a farm-fresh look.
- Try Different Colors: Make white, yellow, or green pumpkins for variety.
- Use a Realistic Ground: Sprinkle a little dry coffee grounds onto the clay patch before baking for added texture (test on a scrap piece first).
- Embellish the Fence: Wrap twine or add paint details for more rustic charm.