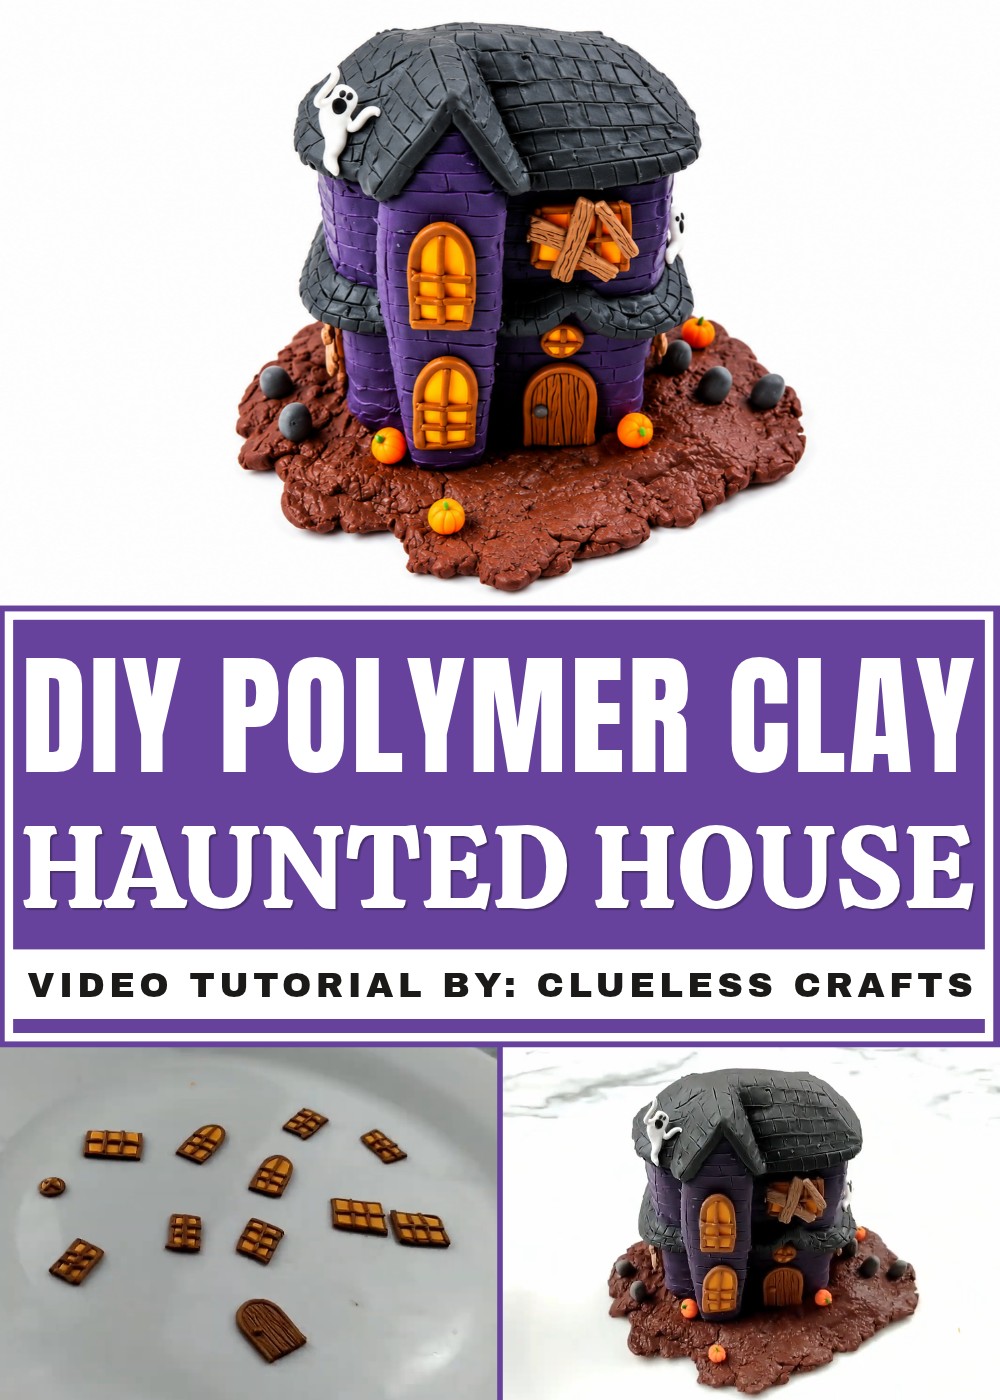
Give your Halloween shelf a playful twist with DIY Polymer Clay Haunted House that is a miniature decoration full of spooky charm and tiny details.
Halloween DIY projects become more interesting when you can build something that looks like it belongs in an old ghost story. The Clay Haunted House design by Clueless Crafts is a fun miniature art project that lets you shape a mysterious building with your own hands. This handmade decoration has a magical Halloween feeling, with spooky architectural details that turn a small piece of clay into an eye-catching display.
DIY Polymer Clay Haunted House That Looks So Fun
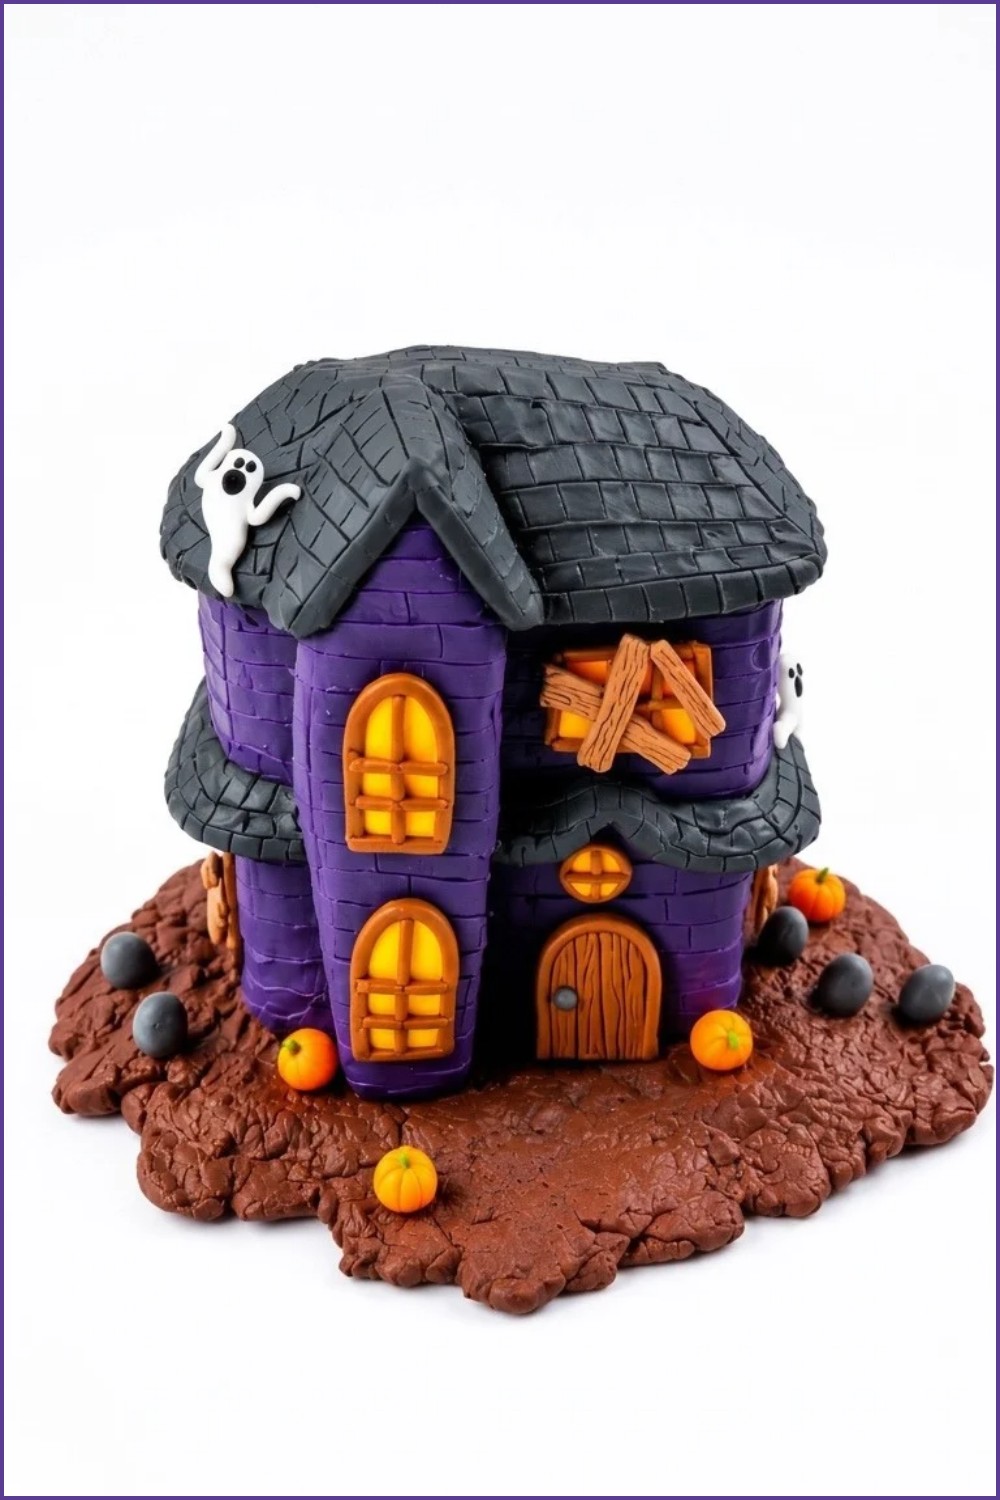
A haunted house doesn't need to look neat or ordinary. A tall entrance, twisted pillars, and an oddly shaped balcony can give it the appearance of a forgotten mansion. Deep blue walls paired with dark green roofing offer an unusual color combination. You can also add a tiny ghost peeking through a window or a miniature fence near the front door for a playful surprise.
For this DIY clay craft, begin by preparing the clay and shaping the main building sections. Use your fingers to form the structure, then gently press small decorative pieces onto the surface. A toothpick can help add wooden plank marks, cracked stone effects, or tiny brick lines. After finishing the design, follow the clay manufacturer's instructions for drying or baking. Paint can add the final touches once the material is fully cured.
This miniature house can be used as a Halloween party table decoration, a prop for stop-motion videos, or part of a handmade storytelling scene. It is also an interesting DIY activity for anyone who likes working with sculpting materials.
The best part is the freedom to experiment with unusual shapes and imaginative details. Each handmade house can have its own spooky character, giving this Halloween clay project a truly individual finish.
About The Clay House
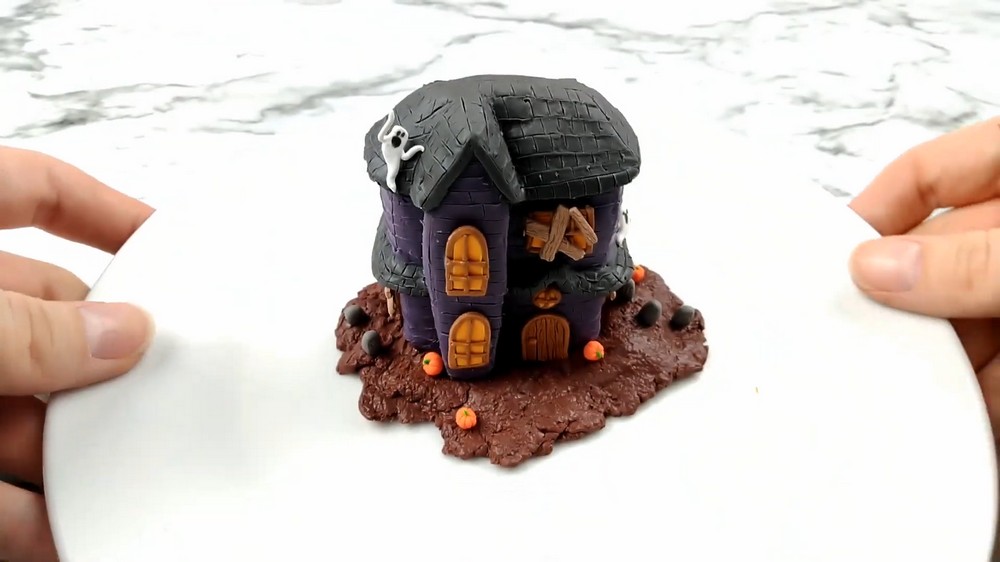
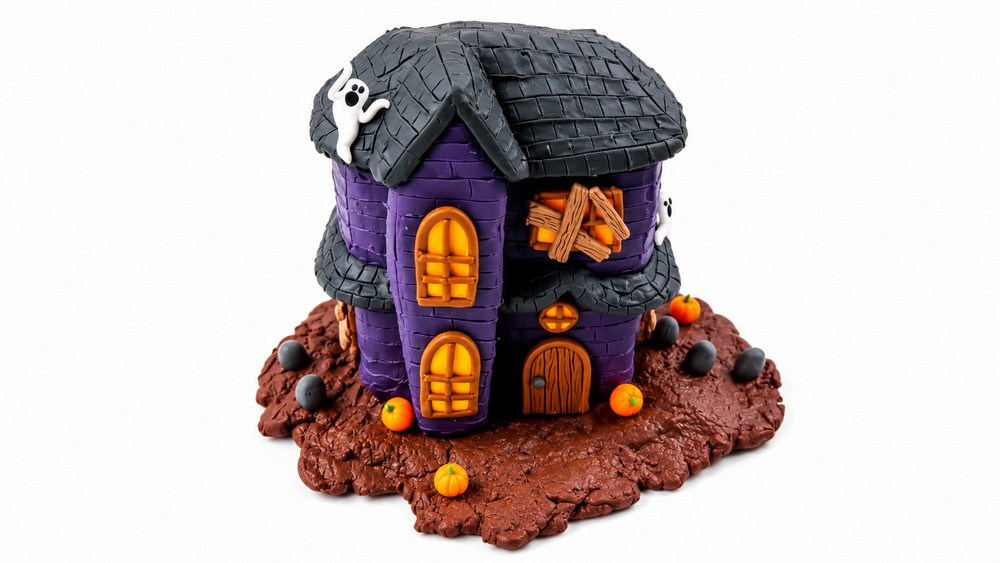
Welcome to this fun, creative, and beginner-friendly DIY clay craft project! Today, we are going to make a highly detailed miniature haunted house perfectly themed for Halloween. By combining basic shaping methods and layering colorful clay, you will build a dimensional and lifelike haunted house from scratch. Your finished project will feature a spooky yard populated with tiny flailing ghosts, miniature indented pumpkins, and personalized tombstones. The exterior of the house itself will showcase textured wood siding, detailed roof tiles, and boarded-up glowing windows. While the initial clay base might look a little messy at first, do not worry—through strategic blending and texturing, everything comes together into a magical holiday display. Follow the comprehensive instructions below to recreate this brilliant miniature property.
Materials and Tools Required
Before leaping into the assembly, gather all the supplies mentioned in the video. Since this guide strictly relies on the provided transcription, be sure to have the following exact items ready at your crafting station.
Materials:
- Aluminum foil: Used to create the structured interior core of the house.
- Scrap clay: Used for completely covering the foil base and building structural shapes.
- White clay: Needed for the spooky flying ghosts and their flailing arms.
- Black clay: Used in tiny increments for the ghosts' eyes and mouths.
- Orange clay: Required for sculpting the pumpkins and mixing the window light.
- Yellow clay: Mixed with orange to produce the warm window glow.
- Green clay: Used to craft the miniature pumpkin stems.
- Gray clay: Essential for shaping the curved yard tombstones.
- Light brown clay: Used for the front door, window trim, and the wood planks.
- Brown clay: Formed into a large flat base to serve as the yard.
- Dark purple clay: Rolled out for the main exterior house siding.
- Dark gray clay: Manipulated to form the textured roof shingles.
- Liquid Sculpey: Utilized heavily as a wet adhesive to bond raw and baked clay.
- Acetone: Applied to clean up and smooth out rough, messy clay patches.
Tools:
- Water bottle: Used for heavy stamping to crush and compact the foil.
- Clay roller: Used to press out perfectly flat, even sheets of colored clay.
- Craft knife: Essential for cutting out clean window shapes and drawing deep textures.
- Toothpick: Used as a pointed detailing instrument for writing on the gravestones.
- Q-tip (cotton swab): Dipped in acetone for precision smoothing.
Building the Main House Base
Creating a sturdy core is the most vital step of this project. The base needs to be completely solid so we can perfectly define the delicate details later in the process.
Shaping the Aluminum Core
- Begin by grabbing a large sheet of aluminum foil and thoroughly crush it up into a square shape.
- Grab your water bottle to compact it down tightly, ensuring the internal foil structure is not too loose or flimsy.
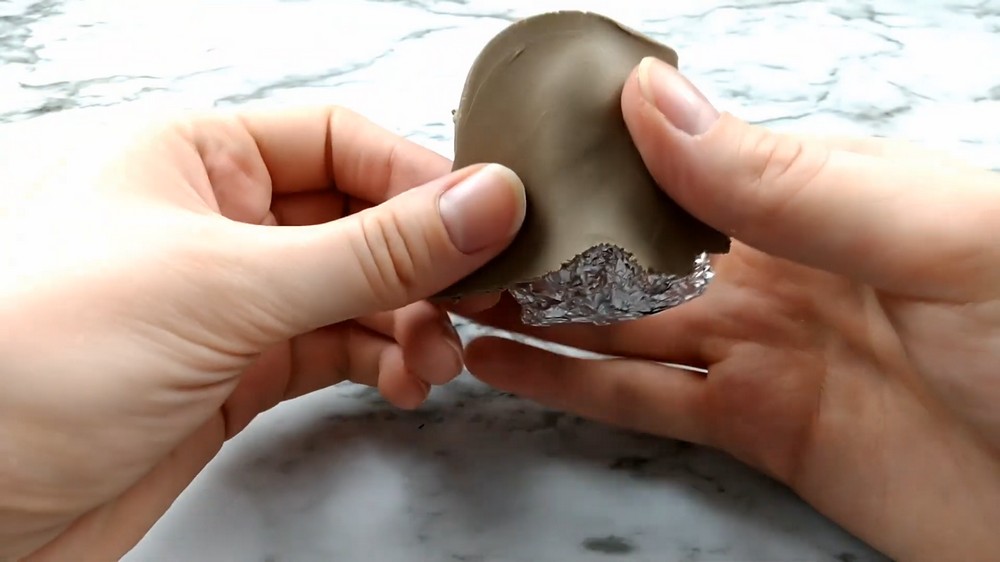
- Pinch the foil near the upper half to create a sort of triangle shape on the top. This triangular peak operates as the natural slope where the upper roof will sit.
Covering the Core in Scrap Clay
- Take your scrap clay, flatten it out broadly, and securely use it for covering the entire aluminum base. This successfully creates a solid foundation before you put on any of the details.
- Grab more scrap clay and tightly roll out a thick log to clearly serve as the tower on the front.
- Restructure this log by flattening each side first with your fingers, and then refining the edges perfectly with a roller.
- Take your craft knife, cut it to the right height you want, place it gently on the front of the house base, and make additional knife cuts to accurately adjust the shape as needed.
- Use an extra piece of scrap clay for heavily filling in the gap at the top so you can safely put a roof on later.
Adding Structural Overhangs
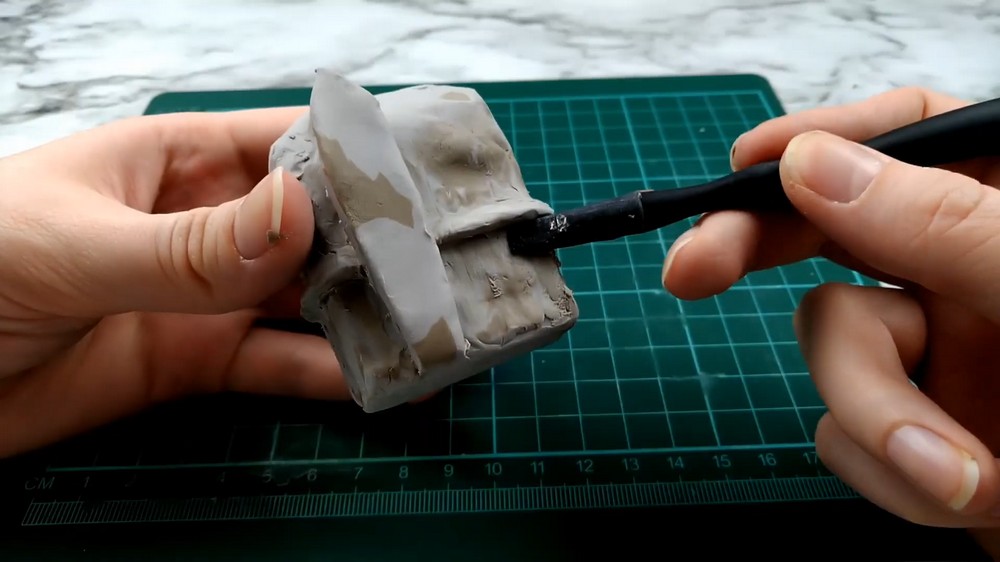
- Take another rolled log of clay, safely flatten one end, and carefully wrap it halfway across the house.
- Once applied, spend time just smoothing out the edges. This piece will successfully serve as one of the roof overhangs on the first floor.
- Create a distinct triangular entryway in the front of the house using additional pieces of flattened scrap clay.
- Take a final log of clay intended for the second floor, confidently place this piece directly on the edge of the roof, and delicately flatten the edges down.
- With the rough geometry shaped, place this structure into the oven and bake the house completely before moving on to decoration.
Sculpting the Spooky Details
While the structural base of the house is baking in the oven, you can start independently building the intricate seasonal details that will populate the haunted property.
Creating the Tiny Ghosts
- Grab a little ball of white clay and gently roll it out evenly into a cone.
- Carefully twist the ends to create a squiggly shape representing the ghost's tail.
- Roll out an extremely thin tube of white clay for the arms, attaching them loosely so they dynamically look like they are flailing about.
- Grab very tiny pieces of black clay for the eyes and mouth, pressing them softly into the face.
Making the Miniature Pumpkins
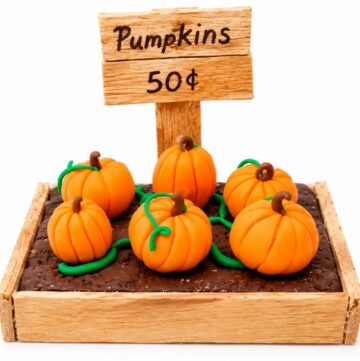
- Evenly roll out a few tiny balls of orange clay.
- Using your craft knife or toothpick, start from the top and press a bunch of indents, like you are slicing a pie.
- Carefully follow those lines all the way to the bottom of the pumpkin to create authentic ridges.
- Complete every individual pumpkin by deciding to neatly add a little green stem on top using a tiny rolled piece of green clay.
Crafting the RIP Tombstones
- Take your gray clay and roll it into short, fat logs explicitly featuring softly rounded ends.
- Use your craft knife to cleanly cut them in half, creating a flat back and rounded curved front.
- Take a sharp toothpick and write "RIP" on some of them to inject some extra haunted detail.
Pre-Baking the Windows and Doors
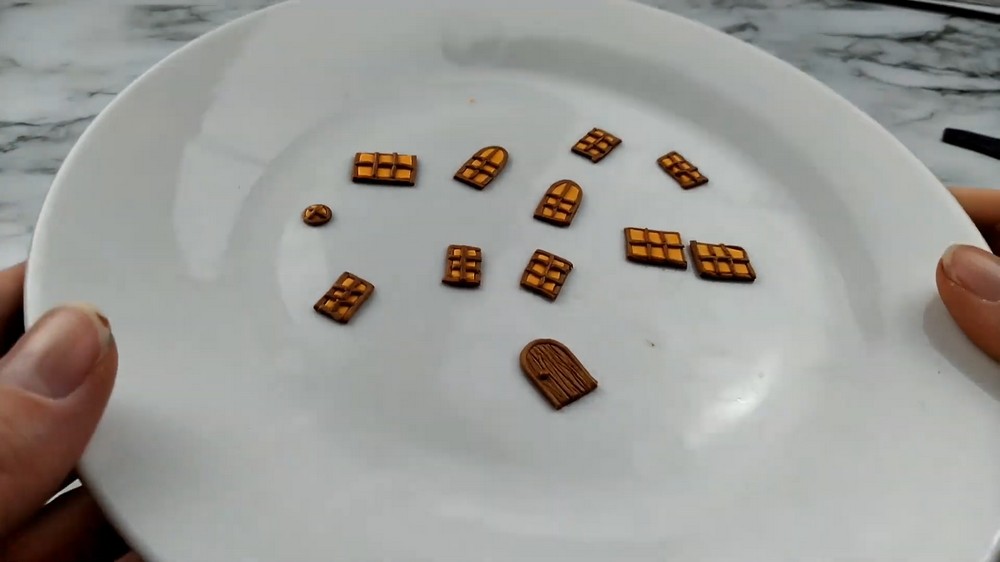
- Thoroughly mix your orange and yellow clay together, flatten it out, and precisely cut out a variety of window shapes (including a challenging round window).
- Using newly flattened light brown clay, cautiously cut out a large rounded door.
- Cut incredibly thin, straight lines of light brown clay strictly for the trim to go around the edges of the windows. Also use thinly rolled logs for the inside trim intersecting the glass.
- For a boarded-up, abandoned look, take more light brown clay, firmly draw some wood texture in it with a craft knife, neatly cut them out, and manually place them diagonally across the windows.
- Put all of these customized glowing pieces directly into the oven to meticulously pre-bake, which makes the final application much easier.
Siding, Roofing, and Texturing
With the house base finished baking, it is extremely important to seamlessly establish the siding and roof shingles to cover up the messy scrap clay foundation.
Prepping the Yard Space
- Flatten out a large portion of brown clay to functionally serve as the yard.
- Take your completely baked house base and securely place it on the brown clay to visually see definitively where you want to place it in the yard later.
- Gently press to leave an imprint, and then remove the house to work on the exterior siding.
Adding the Purple Siding
- Mix up a spooky, murky dark purple color and flawlessly flatten it out.
- Before physically applying the siding, generously begin putting a lot of liquid Sculpey all over the house base to act as a lasting adhesive.
- Carefully roll the dark purple clay onto the house face.
- When aggressively wrapping the second level, heavily blend the two purple pieces together in the front and flawlessly smooth it out as much as you can.
- Provide an architectural look by neatly adding siding texture to the sides of the house. Do this by meticulously drawing lines all the way around, constantly adding little horizontal breaks in it to cleverly mimic individual wooden boards.
Detailing the Roofs
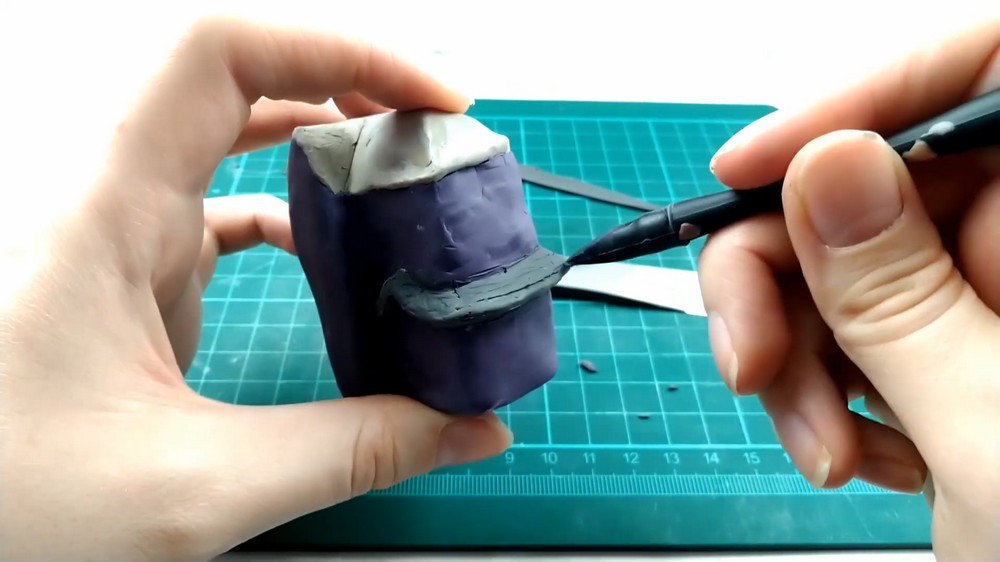
- Cut out a beautifully long strip of dark gray clay and carefully place that on the first level roof overhang.
- Softly ensure you are smoothing it out on the top and bottom, and begin rapidly adding in a tile texture.
- For the complex second-level roof, roughly and randomly place a bunch of dark gray scrap pieces straight onto the upper overhang.
- The raw patches will admittedly look really bad at first, so use your fingers to do a lot of blending to organically merge the clay.
- Dip a Q-tip end into acetone and swiftly rub it over the dark gray roof; this will magically tidy it up even more and dissolve imperfections.
- Finish the roof perfectly by precisely adding the tile texture to it once the surface is smooth.
Final Assembly and Baking
You are now in the magical home stretch! It is time to elegantly connect all these amazing spooky details to complete the final eerie diorama.
Securing House to the Yard
- Return to your flat brown yard and firmly begin adding a bunch of liquid Sculpey to the imprint you consciously made earlier.
- Permanently secure the project by safely plopping your house down right on top of the wet liquid Sculpey. Make sure it firmly grips the brown clay.
Attaching the Pre-Baked Elements
- To place the home fixtures, deliberately squeeze some liquid Sculpey on the house where you want to put the door and the windows.
- Pick up your hardened, cooled pre-baked pieces and carefully try placing those on rather messily. Because the windows are beautifully pre-baked, manipulating them into the wet glue is effortless and completely prevents smudging the warm colors.
Arranging the Property Details
- Begin artistically adding in all of the little details: the tombstones, the pumpkins, and the ghosts.
- Firmly position these raw items straight onto the brown clay yard. Do not pre-bake these pieces, as the raw clay easily adheres on its own into the soft yard base.
- Delightfully position one little white ghost actively peeking around the side of the house.
The Final Bake
- Do one final visual survey of your spooky environment to excitedly ensure all parts are structurally sound.
- Carefully push the entirely assembled project into the oven for the final bake.
- Once completely baked and properly cooled, this fantastic haunted house is officially finished and perfectly ready for your Halloween table display!