Learn how to craft an adorable DIY Polymer Baby Seal Jar with simple steps, perfect for adding charm to your decor or gifting in a creative way.
Cute and creative projects are always fun to try, and adding a baby seal design to a jar is a perfect example of that. This DIY project involves using polymer clay to create an adorable baby seal and attaching it to a jar, transforming something simple into something unique and full of character. It's a great activity for anyone who loves animals or wants to make a useful item with a personal touch. This little seal-topped jar can be used to store small items, like candies, trinkets, or craft supplies, and it’s guaranteed to bring a smile every time you see it.
DIY Polymer Baby Seal Jar with Simple Crafting Steps
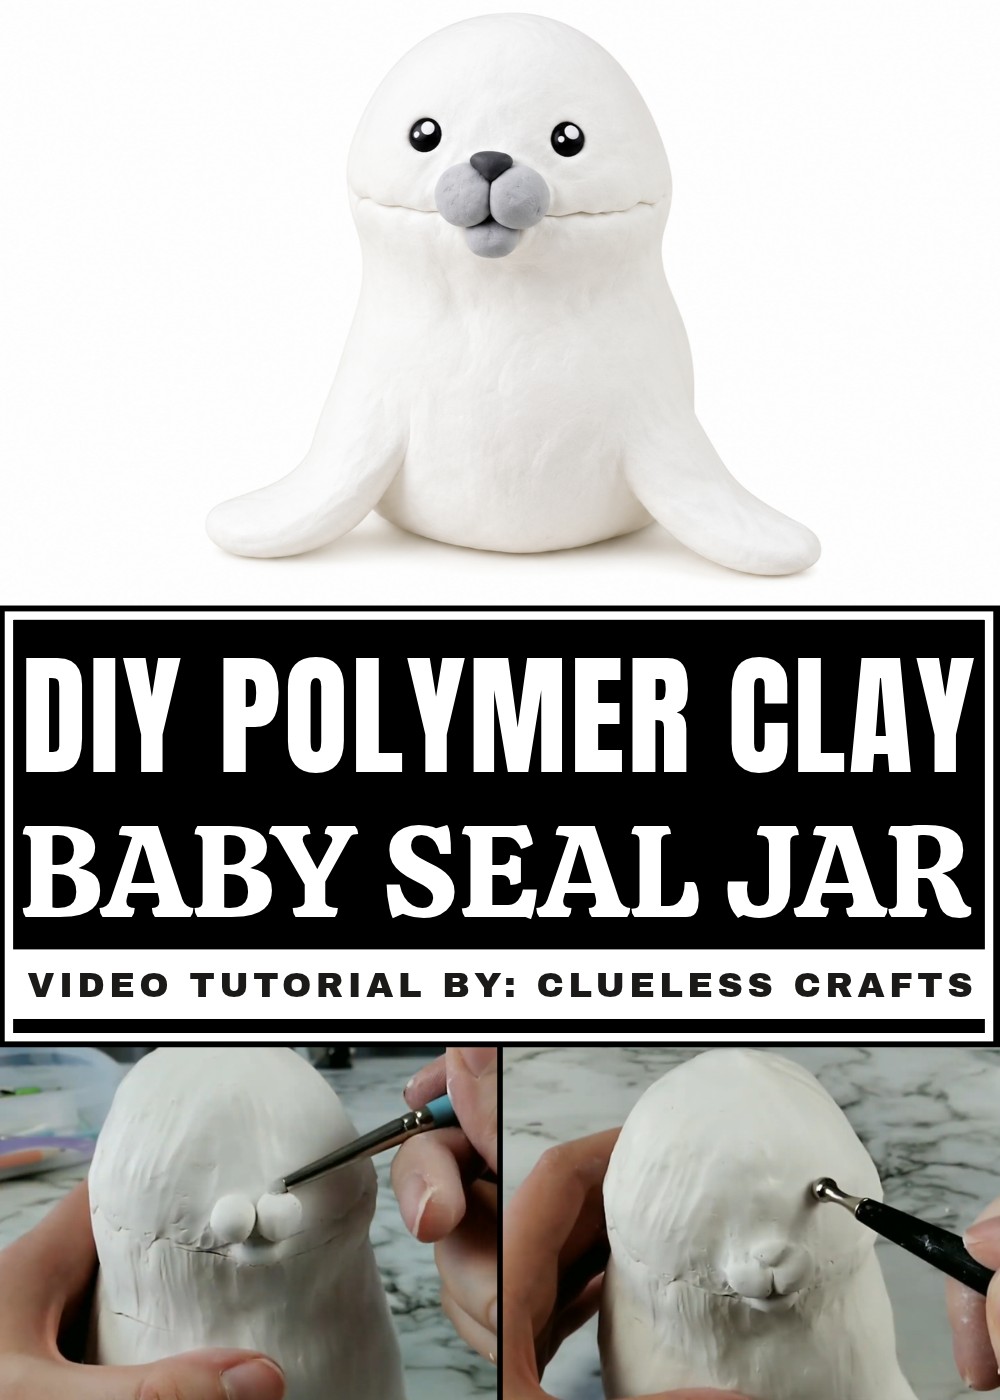
This idea is as charming as it is simple. You can shape a round, playful baby seal, complete with big eyes, a round belly, and tiny flippers. The jar adds a practical element to the design, making it a cute and functional addition to any space. Whether you choose soft neutral tones for your seal or go for a fun, colorful style, it’s entirely up to you. It’s a project that's simple enough for beginners while still being creative and satisfying for more experienced crafters.
Using polymer clay makes this project easy and enjoyable. The clay is versatile and lets you shape smooth and detailed features, so you get a polished, professional-looking design. In the end, you'll have a handy jar that stands out, decorated with an adorable homemade seal that’s both practical and decorative.
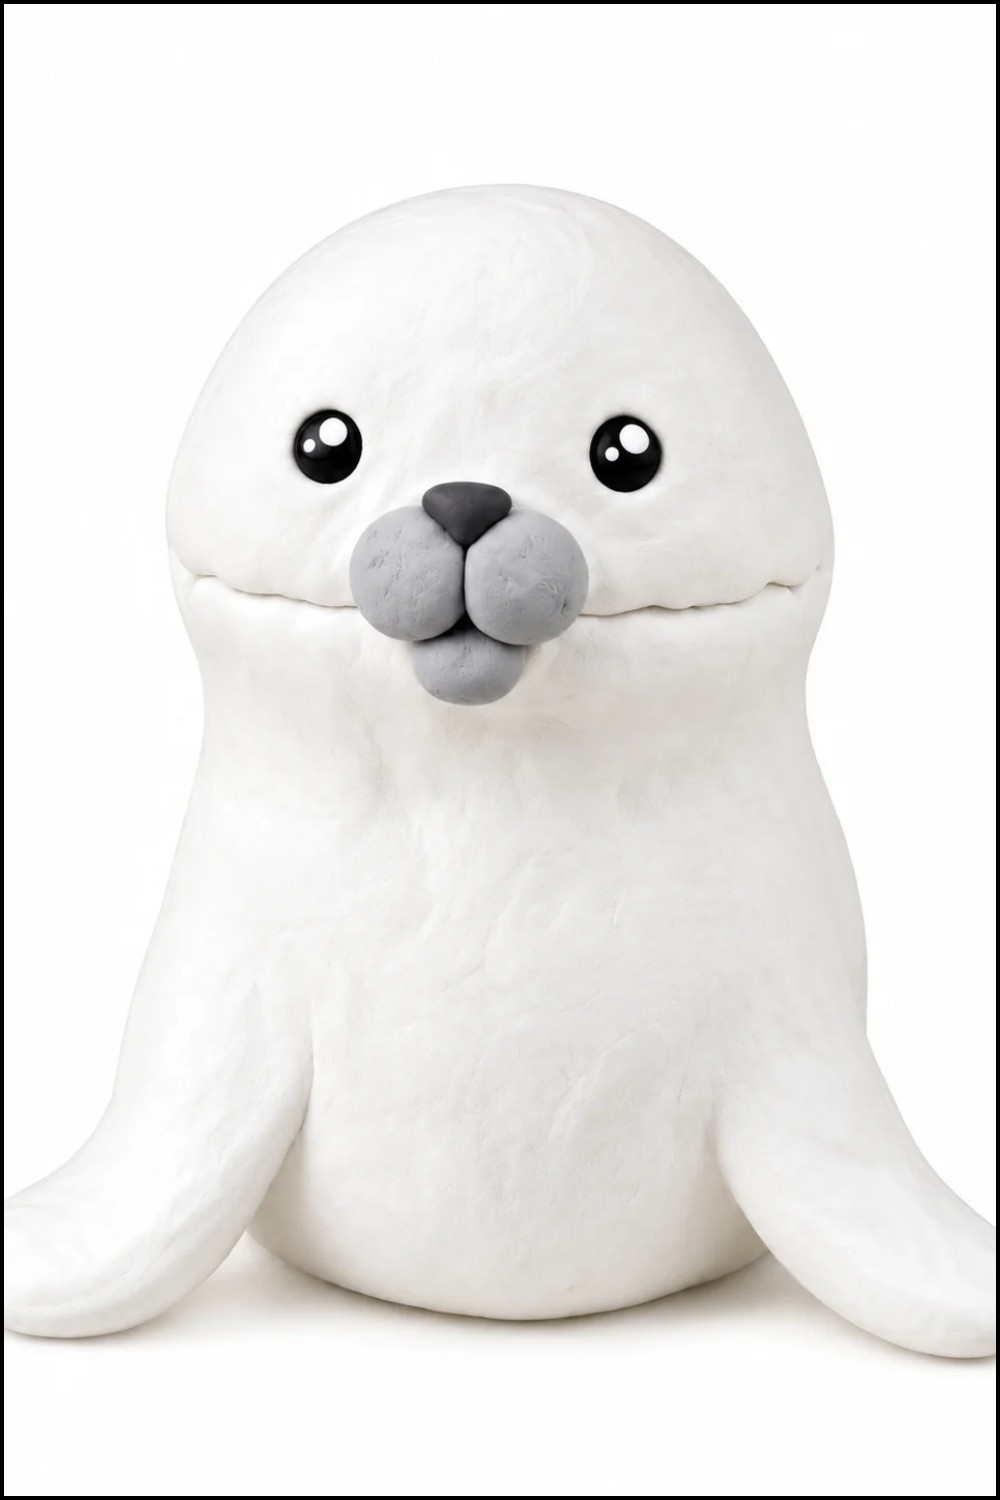
DIY Polymer Baby Seal Jar
Make a sealed polymer-clay jar shaped like a seal (or other animal jars). This project covers prepping a store-bought glass jar, building up a clay exterior, sculpting a 3D lid/head, adding fins, tail and face details, baking the piece on glass safely, repairing common cracks, and finishing with paint. The guide follows the full procedure from the original tutorial.
Materials & Supplies
- Glass jar (the tutorial used a dollar-store jar ~ $0.25) — remove sticker and handle first
- Sculpey III white polymer clay (large block was used) — additional scraps in other whites/colors as needed
- Liquid Sculpey (acts as adhesive and thin clay-bonding medium)
- Aluminum foil (for tail core and head armature)
- Popsicle stick (for applying liquid Sculpey)
- Parchment paper (to separate lid/head during bake)
- Acrylic paints (white, gray, darker gray, small black/white for eye highlights)
Tools & Equipment
- Ball-point sculpting tool (medium and large recommended)
- Flat-edge tool / blade for cutting and shaping
- Fingers and small smoothing tools for blending
- Work tile or smooth surface for rolling/peeling
- Oven (use clay brand instructions; tutorial used 275°F)
- Water bottle or similar (to compact foil armature)
Project Details
- Finished object: sealed jar with sculpted seal lid and textured clay body
- Complexity: intermediate (requires a lot of blending, armature use, and crack repair)
- Bake method: place jar in a cold oven, heat to baking temp with jar inside, and remove only when oven has cooled
Preparation
- Remove any stickers and the handle from the jar. Clean and dry the jar thoroughly.
- Condition the clay by kneading until soft and workable. Break off a large chunk to begin and keep extra clay nearby — the project can use more clay than you expect.
- Set tools and materials within reach: liquid Sculpey, popsicle stick, foil, sculpting tools, and oven instructions.
Step-by-Step Detailed
(Each bullet corresponds to an action in the transcription — follow in order.)
Covering the Jar
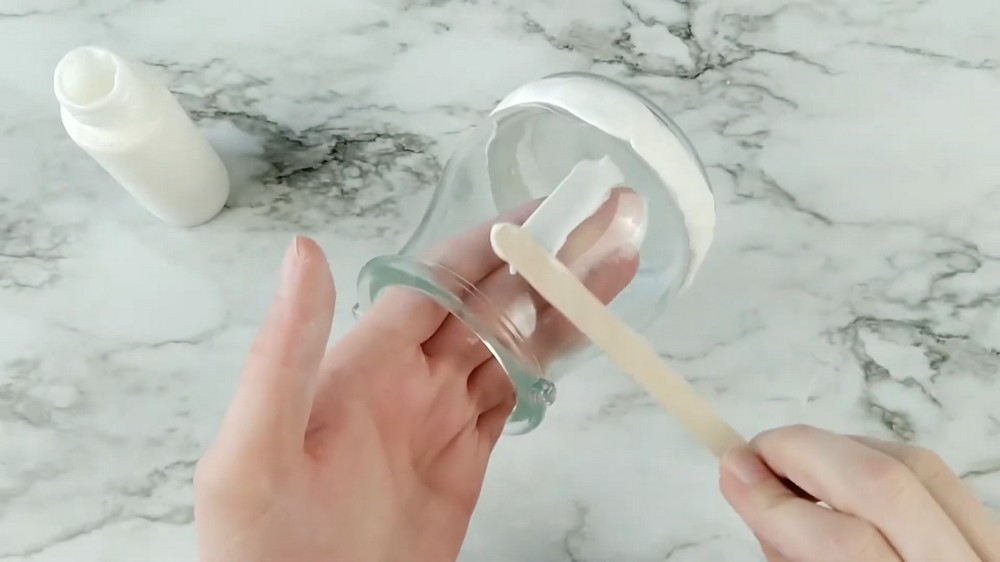
- Roll a tube of clay and use liquid Sculpey to fill the dip at the jar base.
- Apply liquid Sculpey to the sides of the jar using a popsicle stick to adhere clay pieces.
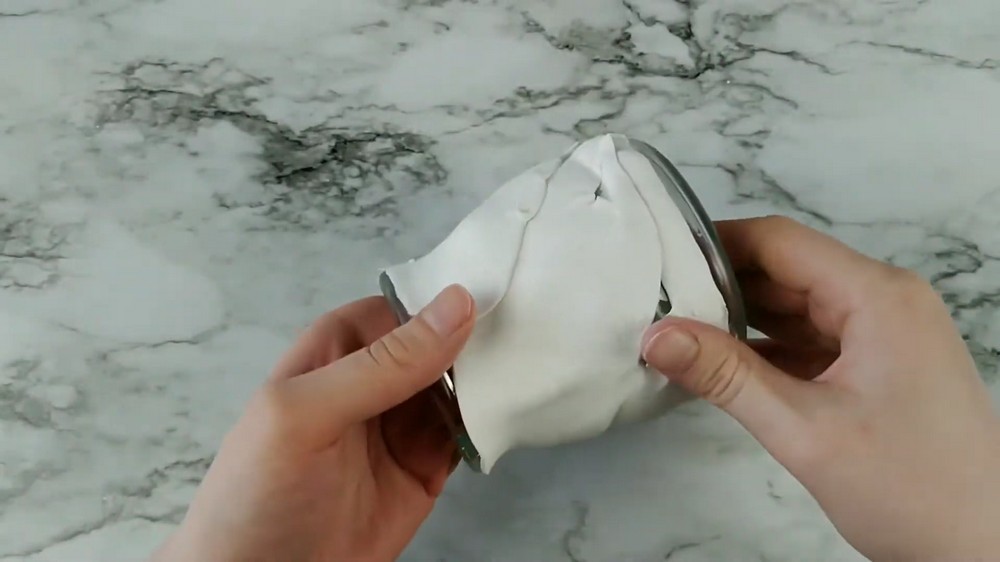
- Place many small rolled pieces of clay around the jar and roughly blend them with your fingers. It doesn’t need to be perfect because you will texture later.
- Wrap the top rim with rolled clay and liquid Sculpey; blend and trim excess so the rim looks cohesive.
- Optionally cover the jar bottom if you prefer a fully enclosed base — the tutorial author prefers a solid bottom.
- Use a big ball-point tool to refine blending across the surface.
- Add extra clay around glass nubs or imperfections to hide them — choose a front side and disguise any glass parts as part of the seal’s form.
- Add a larger clay mass to the back of the seal where the tail will connect; this will help the tail look like part of the fur.
Tail Armature & Attachment
- Shape aluminum foil into a half-banana/seal-tail form. Trim clay away where the tail will sit and place the tail armature.
- Apply liquid Sculpey to the attachment area and stick the foil tail onto the jar.
- Cover foil with rolled clay sheets — layer and smooth, understanding many seams will need blending.
- Blend extensively (secret to cohesive jar: blend, blend, blend). Use fingers and sculpting tools until the body looks like one solid piece.
Front Fins
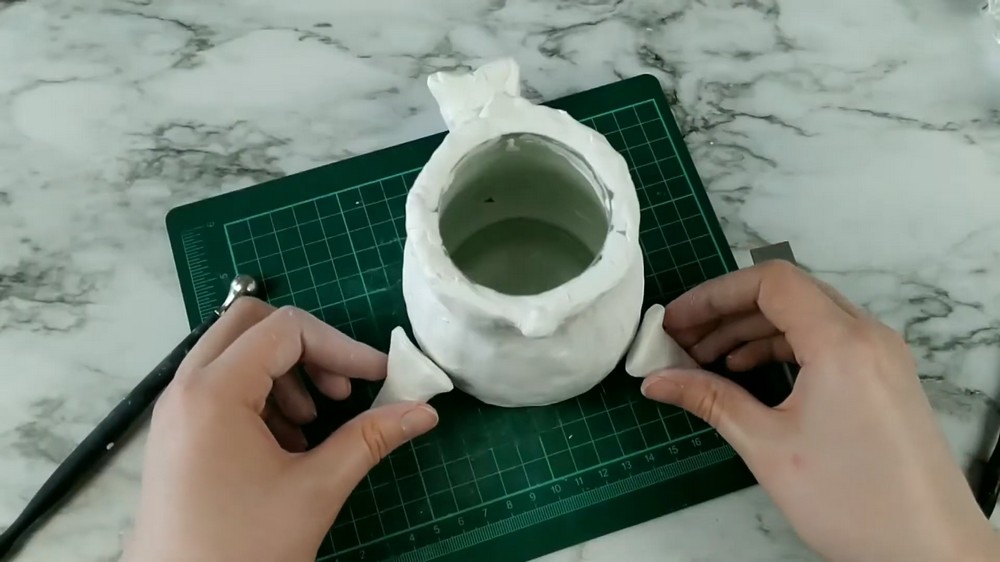
- Roll a tube of clay and cut in half to form two fin shapes.
- Taper each fin’s ends and cut the thicker side at a slight angle so it fits flush against the rounded body.
- Blend fins into the body on top and bottom; ensure natural-looking joins.
Texture
- Use a large ball-point tool to give texture to the entire clay surface (fur-like impressions or pelt texture).
First Bake
- Bake the clay-covered jar in a cold oven and bring to temperature (tutorial used 275°F for 20 minutes). Important safety note: always follow your clay manufacturer’s recommended temperature/time.
- Cool-down method: put jar in a cold oven, heat to bake temp, and remove only after the oven has cooled down to room temperature to avoid thermal shock with glass.
Crack Repair (if cracks appear)
- If cracks appear after the first bake (common when glass expands or strong liquid Sculpey bond restricts movement):
- Do not panic. Use liquid Sculpey and extra clay to fill and blend cracks.
- Apply liquid Sculpey with a popsicle stick along the crack edges; then press a little fresh clay into the crack and use the liquid to smooth and blend.
- Blend from above the crack downward and upward on larger cracks to feather the repair into surrounding clay.
- Repeat for all visible cracks before the re-bake.
Head / Lid Construction
- Form a foil ball armature slightly smaller than the jar opening (compress with a water bottle).
- Coat the armature with liquid Sculpey and cover with rolled clay layers; blend by rolling between hands until smooth.
- Place the head on the jar to check fit, then add a rim of clay around the lid to indicate the outer edge for the finished lid.
- If you run out of clay, supplement with other white clay scraps (be aware colors and brands can vary; blending and paint later can unify the finish).
- Blend the head’s edge to the jar by adding clay to the jar edge and smoothing so the head and body read as a cohesive piece.
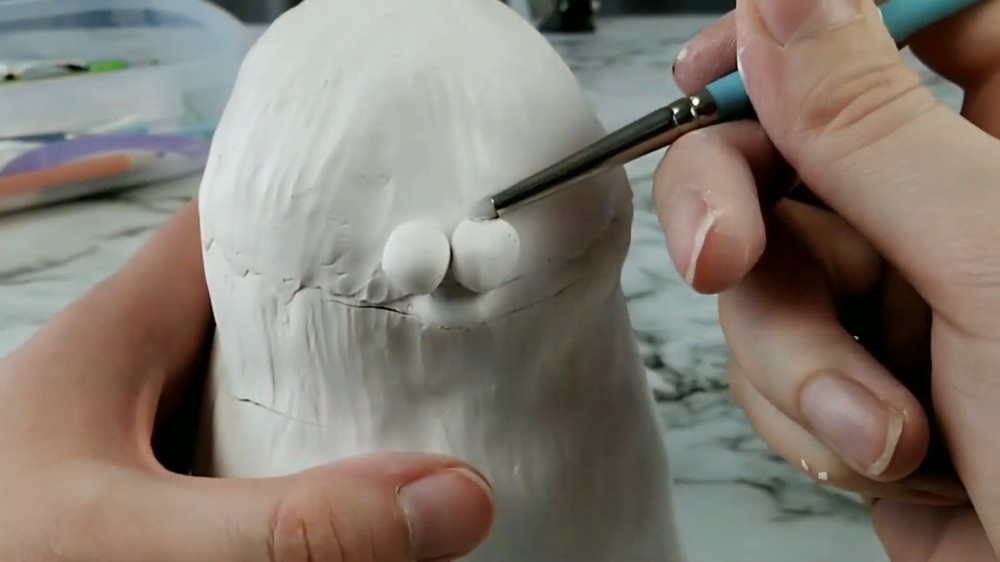
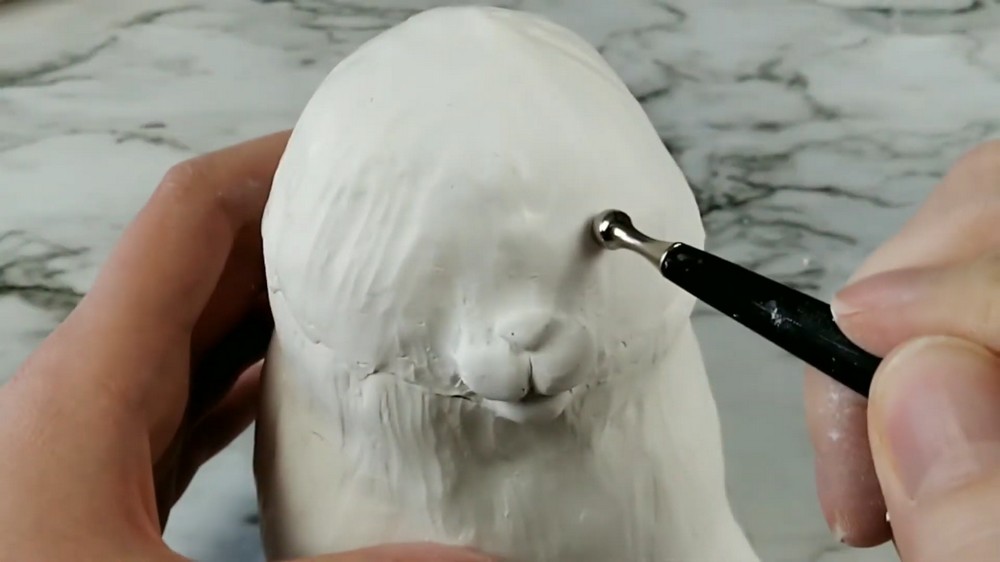
- Sculpt snout: form two white balls into a snout shape and blend into face. Use a small triangle of clay for the nose.
- Carve eye sockets lightly with a medium ball-point tool; add small black clay balls for eyes.
Second Bake
- Place a sheet of parchment under the head (between head and body) so the lid won’t melt into the body and so it can be removed after bake.
- Bake again (tutorial used 20 minutes at 275°F) using the same cool-oven method.
- Allow to fully cool in the oven before removing.
Finishing Instructions
- Inspect repairs after cooling. Any remaining small imperfections can be covered with paint.
- Apply a coat of white acrylic paint over the head and body to even out color and remove dark spots/dirt.
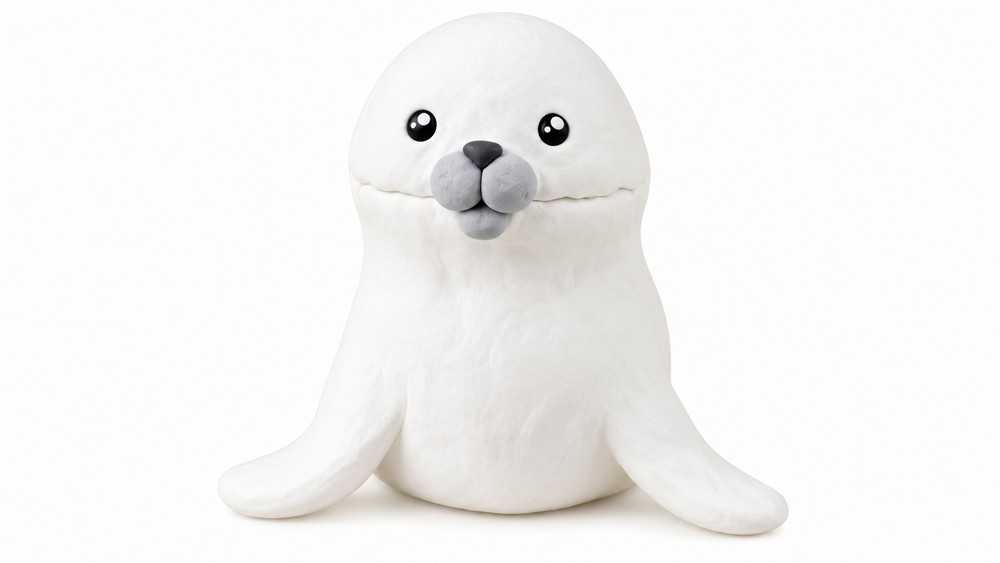
- Paint snout and bottom lip with light and darker gray to add dimension.
- Add eye highlights with tiny white dots for life-like eyes. Optionally varnish eyes for gloss.
Tips & Techniques
- Blend relentlessly — clay jars look best when seams are hidden by thorough blending.
- Use foil armatures to reduce clay bulk and make stable appendages (tail and head).
- Bake glass items using the cold-oven method to reduce thermal shock.
- Keep extra clay on hand — projects require more clay than initially expected.
Common Problems & Solutions
- Cracks after baking:
- Likely from glass expansion and rigid glue layer (liquid Sculpey). Fix by filling with clay and liquid Sculpey and rebaking.
- Running out of clay:
- Solution: supplement with scraps from other kits and unify with paint after baking.
- Lid sticking to body after final bake:
- Prevention: place parchment between lid and body during baking to keep them separable.
Creative Ideas & Variations
- Make other animal jars (bear, fox) and use glass nibs as part of the sculpt (hide nubs in fur or incorporate into snout).
- Add glazed or painted patterns, small accessories (mini scarves), or different fur textures using varied tools.
Final Result
A sealed clay jar shaped and textured as a cute seal, with a removable head-lid, blended fur texture, fins and tail, repaired cracks smoothed and painted for a clean finish. The finished piece is both decorative and functional as a sealed jar/display item.