Bring festive charm to your home with a DIY Polymer Clay Christmas Tree, a simple creative project for adding handmade warmth to your holiday decor.
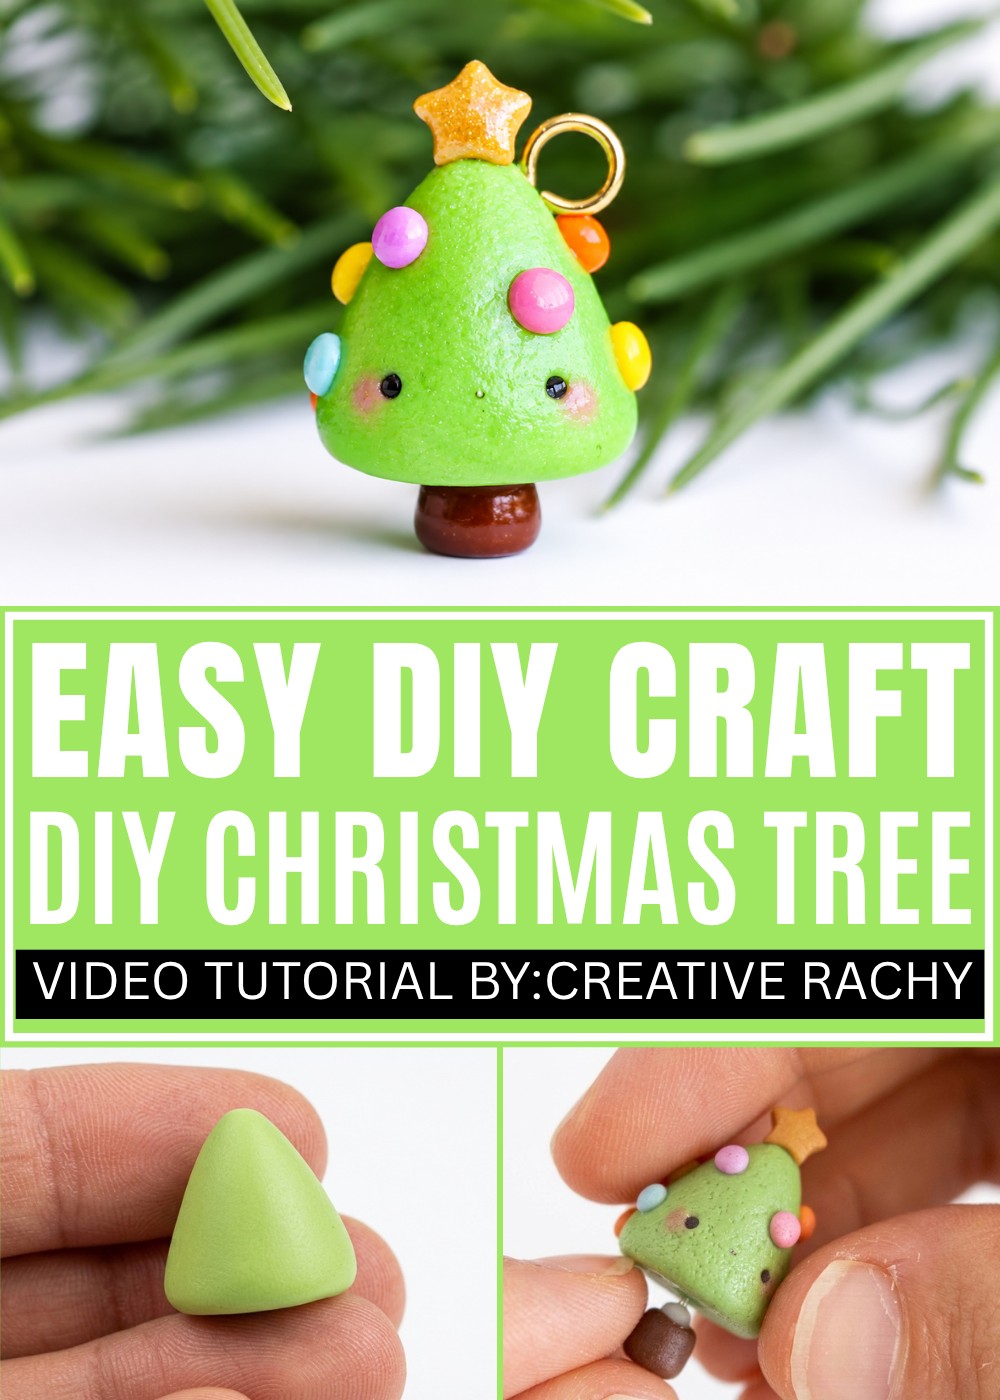
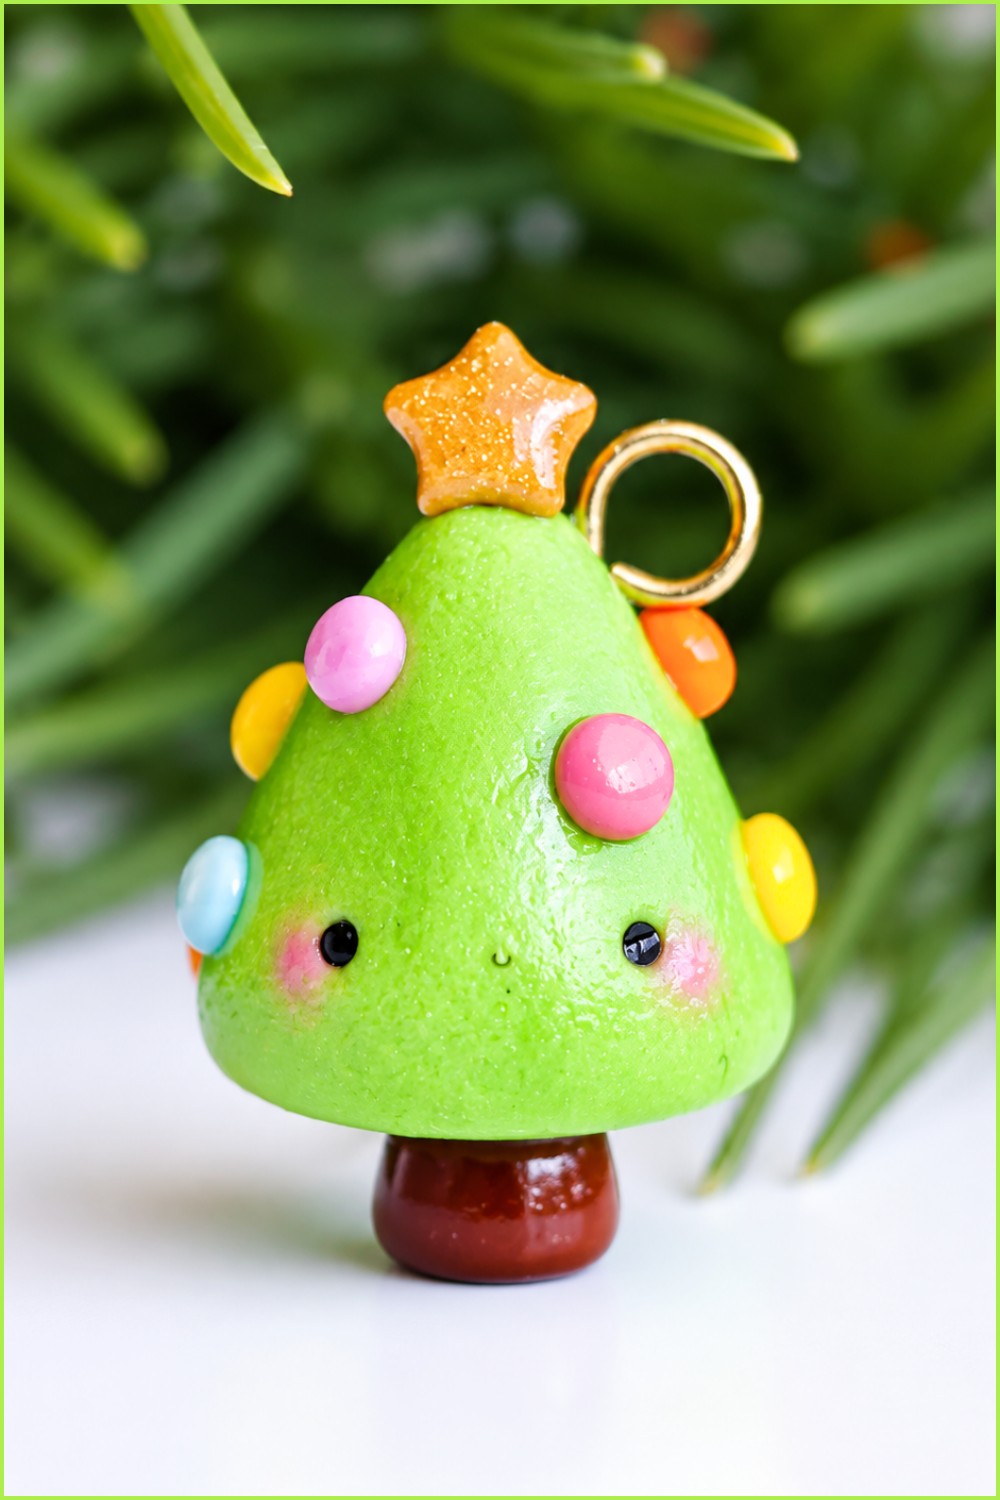
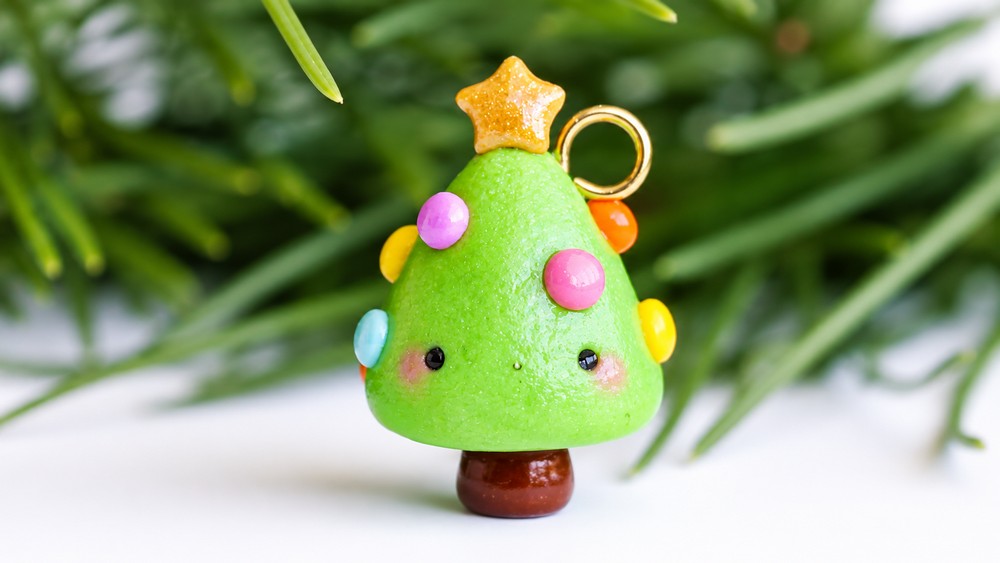
Tiny, expressive, and full of holiday personality, this kawaii-style charm is one of the most delightful handmade creations you will come across this Christmas season. This DIY Polymer Clay Christmas Tree features a cone-shaped green pearlescent body with a beautifully textured leafy surface that gives it a realistic yet whimsical look. What makes it truly stand out is its adorable kawaii face complete with wide black eyes, a sweet little smile, and soft rosy cheeks that instantly bring it to life.
Cute DIY Polymer Clay Christmas Tree Ideas for Beginners
This tutorial is brought to you by Creative Rachy, a talented creator known for her cute and creative clay designs. Head over to her channel at Creative Rachy for more fun and inspiring tutorials just like this one.
Colorful little baubles in a variety of shades are dotted all around the tree adding a festive and playful touch while a tiny gold star perched right at the top gives it that classic Christmas charm. A small rustic stump base grounds the whole design beautifully making it look complete and polished. The finished piece also features an eye pin making it perfect as a wearable charm, a gift tag, or a miniature tree ornament that adds a handmade touch to any holiday decoration.
How to Make a Kawaii Christmas Tree Charm Using Polymer Clay
A Christmas tree is one of the most recognizable symbols of the holiday season, and making a miniature kawaii version out of polymer clay is one of those projects that feels both festive and incredibly fun to create. This little charm features a textured green tree cone mixed with a pearlescent finish, tiny colorful baubles pressed all around the branches, a golden star sitting right at the top, a cute kawaii face complete with rosy cheeks, and a little tree stump base to ground the whole figure. An eye pin can be added before baking to turn the finished tree into a charm you can wear or hang as a decoration. Every step in this project is gentle and beginner friendly, and the result is a tiny piece of holiday magic you made entirely with your own hands. Find your green clay and let us get this tree growing.
What You Will Need
Materials List
- Green polymer clay (for the tree body)
- Pearl polymer clay (to mix with the green for a shimmery finish)
- Black polymer clay (for the eyes and mouth)
- Gold polymer clay (for the star topper)
- Assorted colored polymer clay (for the baubles in various colors of your choice)
- Brown polymer clay (for the tree stump base)
- Pink chalk pastel (shaved into powder for the rosy cheeks)
- A soft brush (for applying the chalk pastel blush)
- An old toothbrush or texturing tool (for adding leafy tree texture)
- A clay blade (for trimming and cutting)
- A needle tool (for creating indents)
- A dotting tool (for making bauble placement indents)
- Liquid polymer clay (optional, for helping attach the stump)
- An eye pin (if making it into a charm)
- Super glue (for securing the eye pin after baking)
- Polymer clay glaze (for a protective shiny finish)
- An oven (for baking)
- Parchment paper (for lining your baking tray)
Step by Step Instructions
Step 1 - Mixing the Clay for the Tree
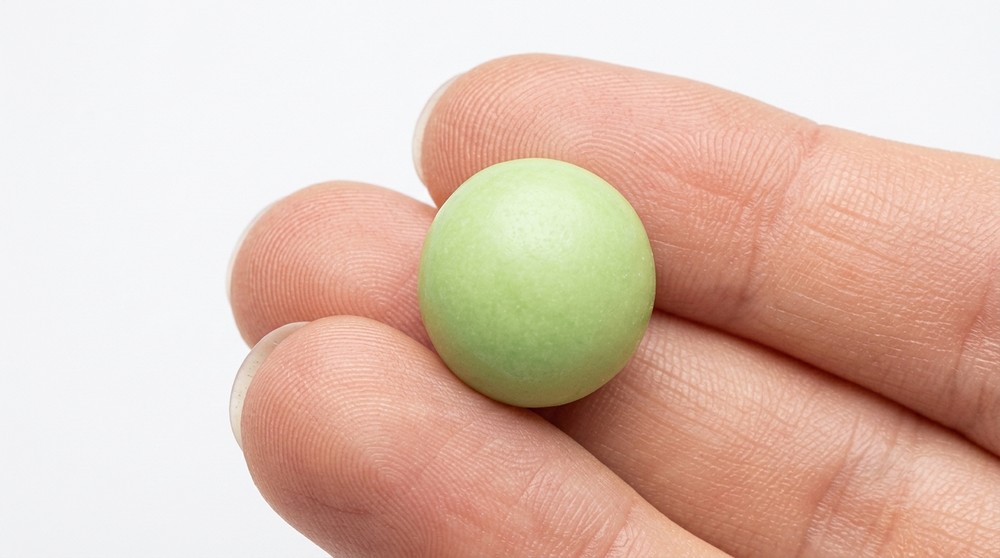
- Take your green polymer clay and a smaller amount of pearl polymer clay
- Knead the two together thoroughly until they are fully blended into one uniform color
- The pearl clay mixed into the green creates a subtle shimmer across the surface of the tree that catches the light beautifully
- Keep kneading until there are no streaks or patches of unmixed clay visible
- Once blended, the clay should feel smooth and consistent throughout
Step 2 - Shaping the Tree Cone
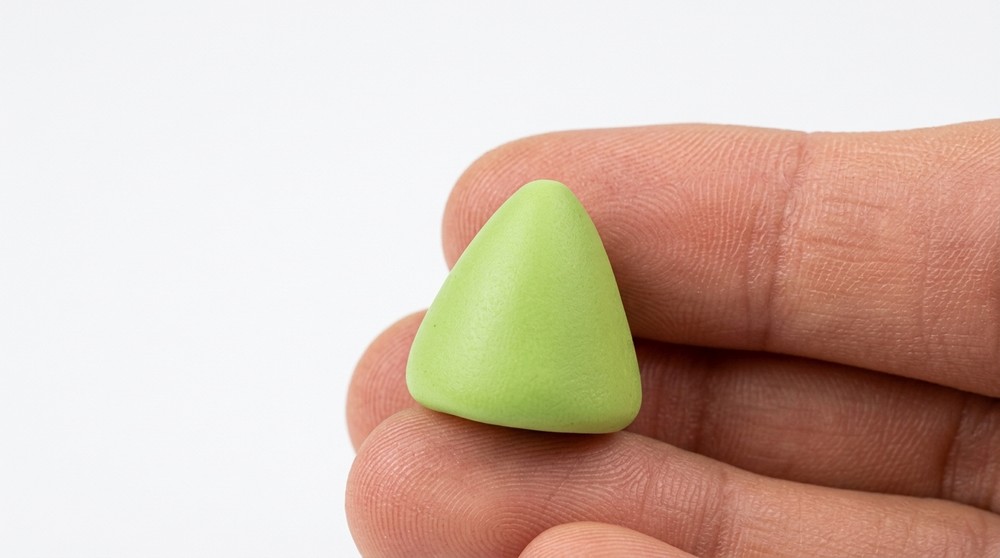
- Take your blended green and pearl clay and begin shaping it into a cone
- Start by rolling the clay into a rough ball and then begin pinching and rolling the top to bring it to a point
- Work the clay between your fingers and palm, narrowing the top and keeping the base wider and rounder
- Keep rotating the cone as you work so that all sides are even and symmetrical
- The finished cone should have a nicely pointed top, gently sloping sides, and a flat stable base
- Spend time refining the shape because a clean well formed cone is the foundation of the whole project
Step 3 - Adding Leafy Texture to the Tree
- Take your old toothbrush or texturing tool
- Press the bristles all over the surface of the green cone in a dabbing or stippling motion
- Work your way from the bottom of the cone up to the top covering every part of the surface
- This dabbing motion creates tiny indentations and rough patches across the clay that mimic the look of pine needles and leafy branches
- Do not press too hard or you will distort the cone shape, use a light and consistent dabbing pressure throughout
- Step back and check that the texture is even across all sides of the tree before moving on
Step 4 - Creating the Eye Indents
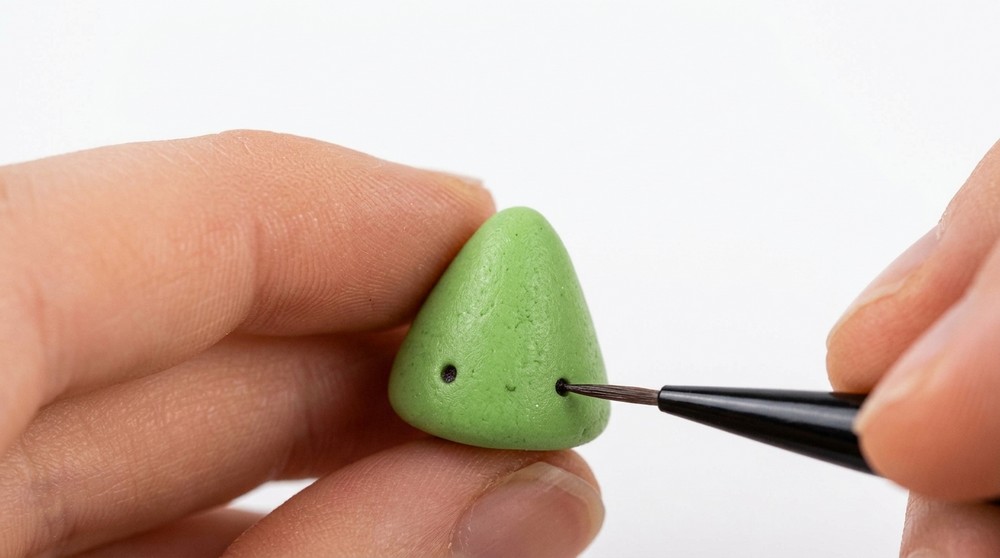
- Look at the front face area of your tree cone and decide where you want the eyes to sit
- Use your needle tool or dotting tool to press two small round indents into the surface of the cone where the eyes will go
- Make the indents even in size and evenly spaced from each other so the face looks balanced
Step 5 - Adding the Eyes
- Roll two tiny balls of black polymer clay
- Press one black ball firmly into each eye indent so they sit snugly in place
- Make sure both eyes are the same size and that they are sitting at the same level on the face
- Press them gently so they are flat against the surface and fully secured
Step 6 - Adding the Mouth
- Take a small piece of black polymer clay
- Roll it into a very thin snake shape
- Curve this thin snake into a small smile shape
- Press the curved snake onto the face below the eyes to form the mouth
- Adjust the curve until the smile looks natural and sweet
- Press it gently but firmly so it sticks securely onto the tree surface
Step 7 - Adding the Rosy Cheeks
- Take your pink chalk pastel and carefully shave a small amount of powder from it using your blade or a craft knife
- Dip a soft brush into the pink powder
- Gently brush a small amount of pink onto the surface of the tree on each side of the face just below the eyes
- Use a light circular motion to build up a soft rosy blush on each cheek
- Start with a very small amount and build up gradually so the cheeks look soft and natural rather than overpowering
Step 8 - Making Indents for the Baubles
- Using your dotting tool, press small round indents all around the surface of the tree cone
- Scatter these indents at different heights and positions all the way around the tree so the baubles will look randomly and naturally placed
- Make sure some indents are on the sides and back of the tree as well as the front for a fully decorated look
- The indents should be just deep enough to hold a small ball of clay in place
Step 9 - Making and Attaching the Baubles
- Take your assorted colored polymer clay and roll tiny balls in a variety of different colors
- Make the balls as small and consistent in size as possible
- Press one small colored ball into each indent you created around the tree
- Work your way all around the tree filling each indent with a colorful bauble
- Press each ball gently but firmly so it sits securely in its indent and will not fall off
- Stand back and check that the baubles are spread evenly around the whole tree with no large empty patches
Step 10 - Making the Star Topper
- Take a small piece of gold polymer clay
- Begin shaping it into a tiny star form using your fingers and sculpting tool
- Pinch out five small points evenly spaced around the center
- Flatten the star slightly so it has a flat back that will sit neatly against the top of the tree
- Refine each point so the star looks neat and even from the front
- Once you are happy with the shape, press the star firmly onto the very tip of the tree cone so it sits at the top like a traditional Christmas star
- Make sure it is centered and secure
Step 11 - Making the Tree Stump Base
- Take a piece of brown polymer clay
- Roll it into a short log or cylinder shape
- As you roll, make one end slightly thinner than the other so the log tapers gently
- Using your blade, trim off the tip of the thinner end so it has a flat cut surface
- This trimmed end will become the top of the stump that connects to the base of the tree
- If you are using liquid polymer clay to help attach the stump, apply a tiny amount to the top flat surface of the stump before pressing it onto the base of the tree cone
- If you are not using liquid clay, simply press the stump firmly onto the flat base of the cone
- Blend the join between the stump and the tree slightly so it looks naturally connected
Step 12 - Adding the Eye Pin for the Charm
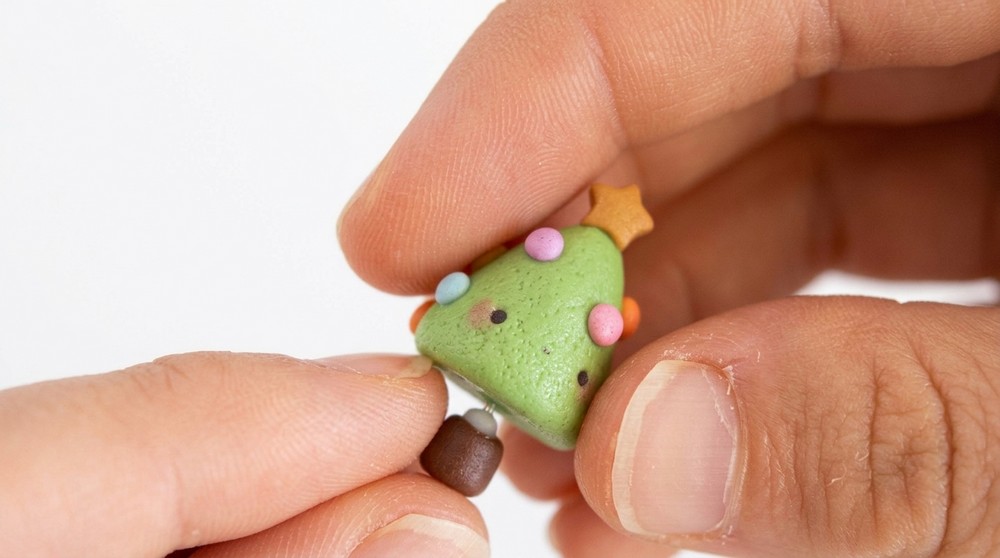
- If you want your tree to be a wearable or hangable charm, now is the time to add the eye pin
- Push the eye pin into the very top of the star or into the tip of the tree cone beneath the star
- Make sure the loop of the eye pin is facing forward so the charm hangs correctly
- Press it in deep enough that it feels firmly embedded and will not pull out easily
Baking and Finishing
Step 13 - Baking Your Christmas Tree
- Place your finished tree charm carefully onto a parchment lined baking tray
- Check that all details including the baubles, star, face details, stump, and eye pin are all securely in place
- Bake in your oven following the specific instructions on your polymer clay packaging as temperature and time can vary between different clay brands
- Once baking is done, leave the tree inside the oven for a few minutes before removing it to allow it to cool gradually
- Remove from the oven and allow it to cool completely on the tray before handling
Step 14 - Securing the Eye Pin
- Once the charm is fully cooled, apply a small drop of super glue around the base of the eye pin where it meets the clay
- This makes the eye pin permanently secure so it will not pull out when the charm is worn or hung
- Allow the super glue to dry completely before moving on
Step 15 - Applying the Glaze
- Apply several thin coats of polymer clay glaze over the entire surface of the tree
- Allow each coat to dry fully before applying the next one
- The glaze gives the tree a beautiful shiny finish, makes the colors look more vibrant, and protects the surface from everyday wear and handling
Helpful Tips for Beginners
- Mix the pearl clay thoroughly into the green before shaping because uneven mixing will create streaky patches on the surface of the finished tree
- Use a light touch with the toothbrush when adding texture because pressing too hard will squash the cone out of shape and undo all your careful shaping work
- Keep your baubles small and consistent in size because oversized or uneven baubles will make the tree look unbalanced
- Build the pink cheeks gradually using light brush strokes because chalk pastel is easier to add more of than it is to remove once it is on the clay
- Check the star is centered before the clay bakes because a lopsided star topper is one of those small details that stands out a lot on the finished piece
- Apply glaze in thin coats rather than one thick application to avoid drips and ensure a smooth even finish across all the textured surfaces
Every tiny bauble pressed into place and every careful stroke of pink blush on those little cheeks adds up to something that feels genuinely handcrafted and full of holiday spirit. This little tree holds the quiet warmth of the season in its smallest details, and it will keep looking just as cheerful and bright long after the holidays have passed.