Try DIY Polymer Clay Dolphin for a fun ocean project with a curved tail and friendly look that suits birthday presents and miniature collections.
Ocean animals have a special beauty, and dolphins are especially loved for their gentle nature and playful movements. Clay Dolphin have curved bodies and friendly faces give them a lovely appearance that looks wonderful in miniature form. Drawings In Action shares a creative idea for turning this beautiful sea animal into a small clay figure.
Mini DIY Polymer Clay Dolphin For Ocean Lovers
DIY Polymer Clay Dolphin features a smooth body, a curved back, and a long, narrow mouth. Its beautiful shape gives the impression of a dolphin swimming through the water. The raised dorsal fin, two side flippers, and split tail help the figure look like a real sea animal. Its small eyes add a sweet expression, while the rounded forehead gives the face a soft appearance.
One attractive detail is the way the body curves naturally from head to tail. Blue or gray clay can give the dolphin a familiar ocean look, while a lighter shade underneath adds a gentle contrast. The fins are kept thin and neatly shaped to match the main body.
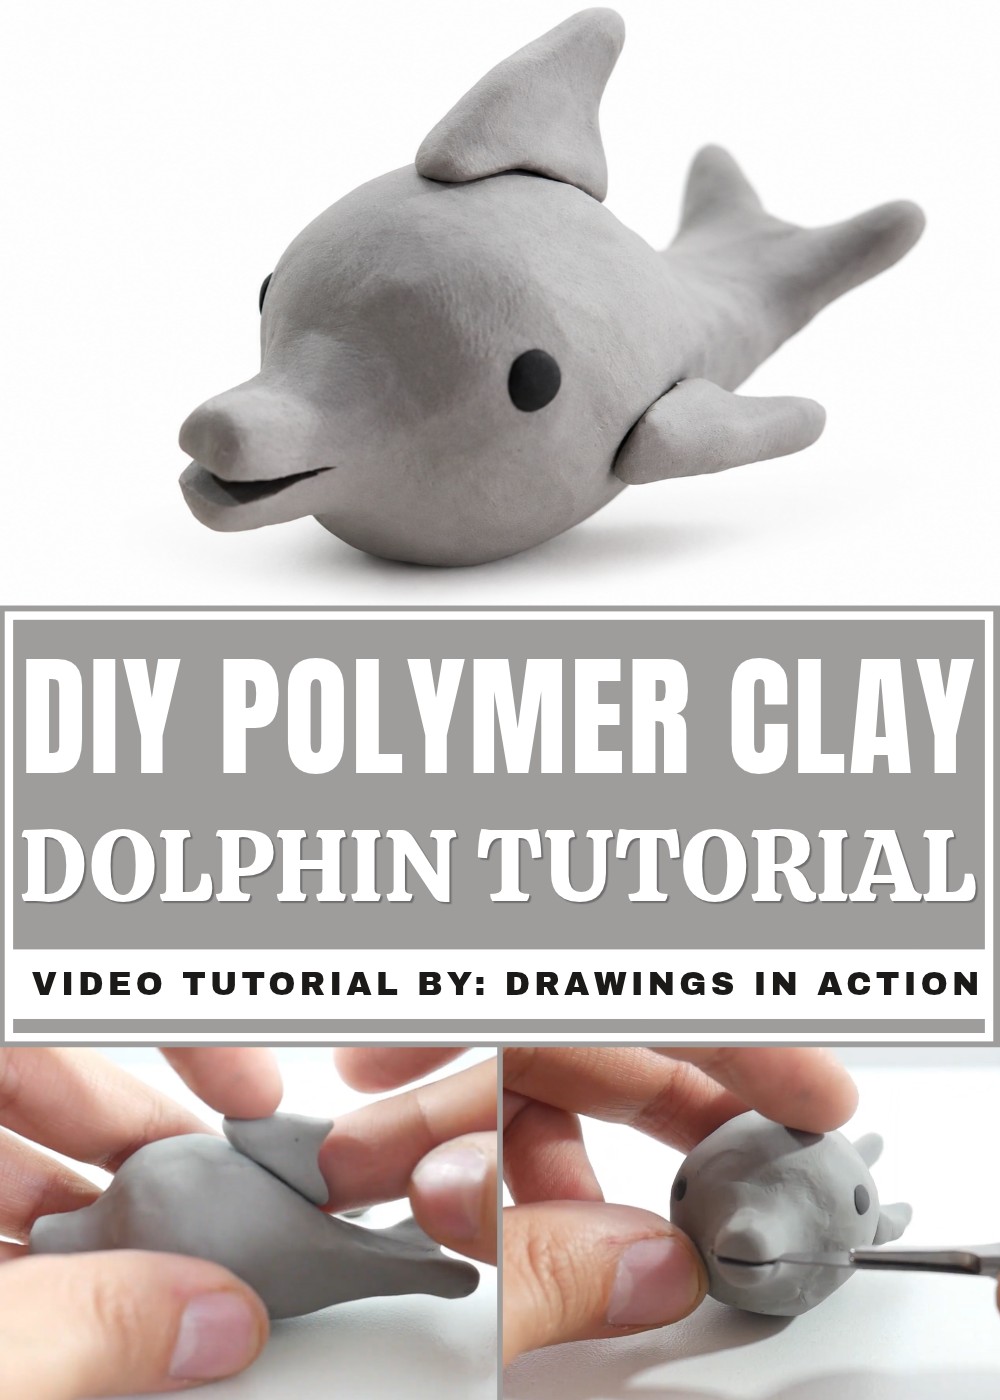
This little dolphin is suitable for decoration, study table, or bookshelf. Children who love sea animals may also like receiving it as a birthday gift.
The finished dolphin is a simple reminder of ocean life. Its flowing shape and peaceful appearance add a lovely touch to any small display at home.
How to Make a Simple Plasticine Dolphin: Beginner-Friendly Tutorial
In this pattern, you will learn how to create a cute dolphin using plasticine clay. The process is easy, quick, and perfect for beginners who want to try their hand at simple clay modeling. Follow the clear and simple steps below, and by the end, you’ll have a lovely plasticine dolphin figure.
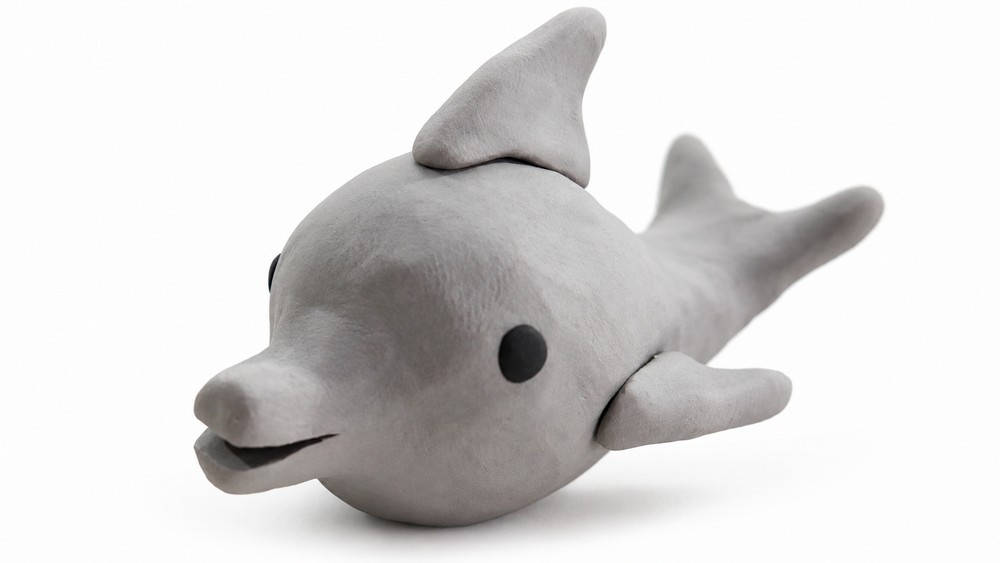
Materials and Tools
- Gray plasticine clay
- Black plasticine clay
- Scalpel or craft cutter (or any small knife for detail cutting)
Step-by-Step Instructions
1. Prepare Your Plasticine Clay
- Start by dividing the gray and black plasticine into small, round pieces.
- The pieces should be different sizes depending on which part of the dolphin you are making. You can pause and refer to the example shapes if needed.
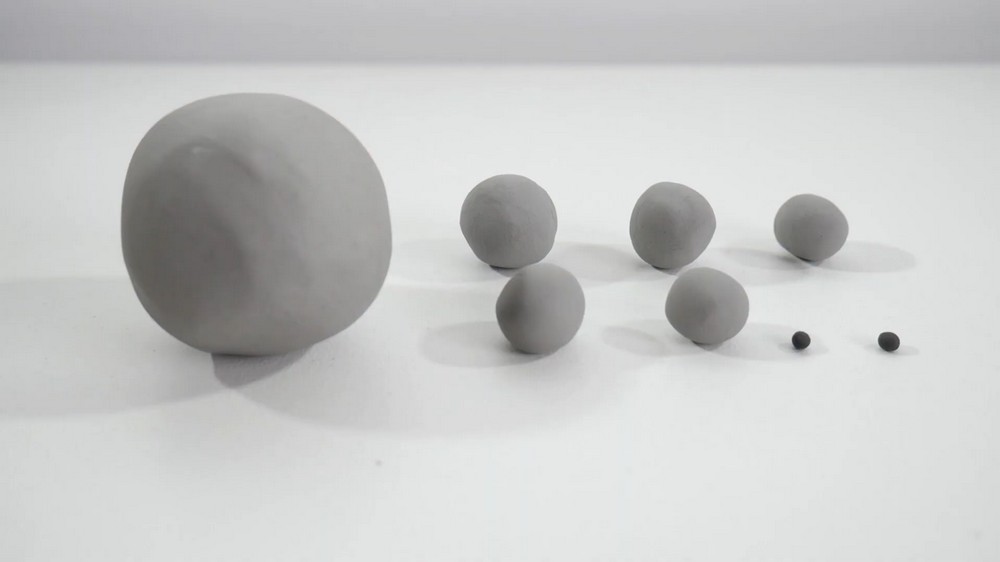
2. Make the Dolphin’s Head and Body
- Take the largest gray plasticine ball.
- Shape it into a rounded cone. This will be the dolphin’s main body and head combined.
- Make sure the cone is smooth and rounded properly to resemble the natural shape of a dolphin’s body.
3. Create the Tail Fin
- Take another gray plasticine ball.
- Shape this ball into a heart shape. This means the tail will have two side flaps coming together in the middle.
- Use your fingers to smooth and refine the edges so the heart shape looks natural.
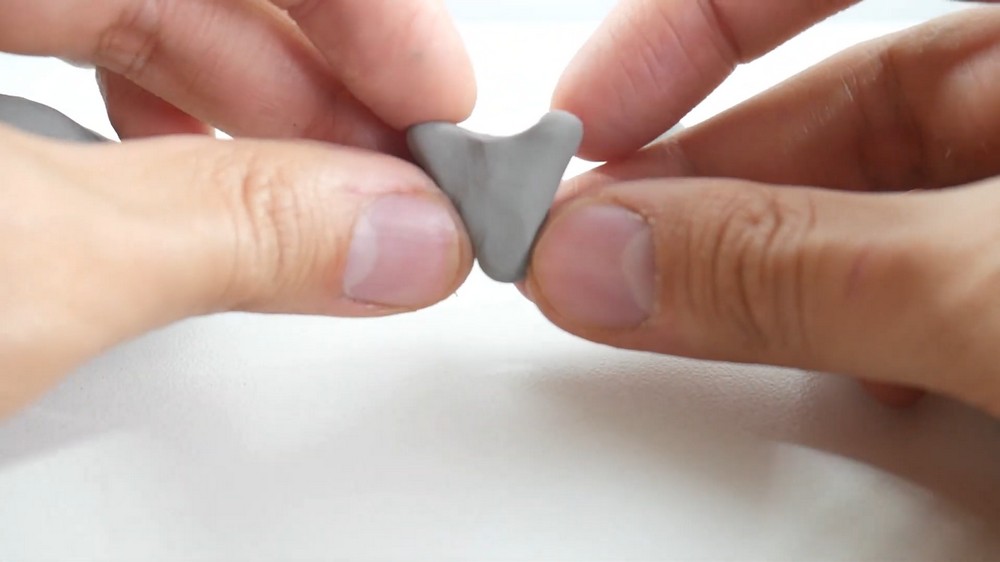
4. Attach the Tail Fin to the Body
- Place the tail fin at the narrower end of the dolphin’s body.
- Start shaping the clay at the junction so the tail and body join seamlessly.
- Make sure it looks like one single piece rather than two separate parts.
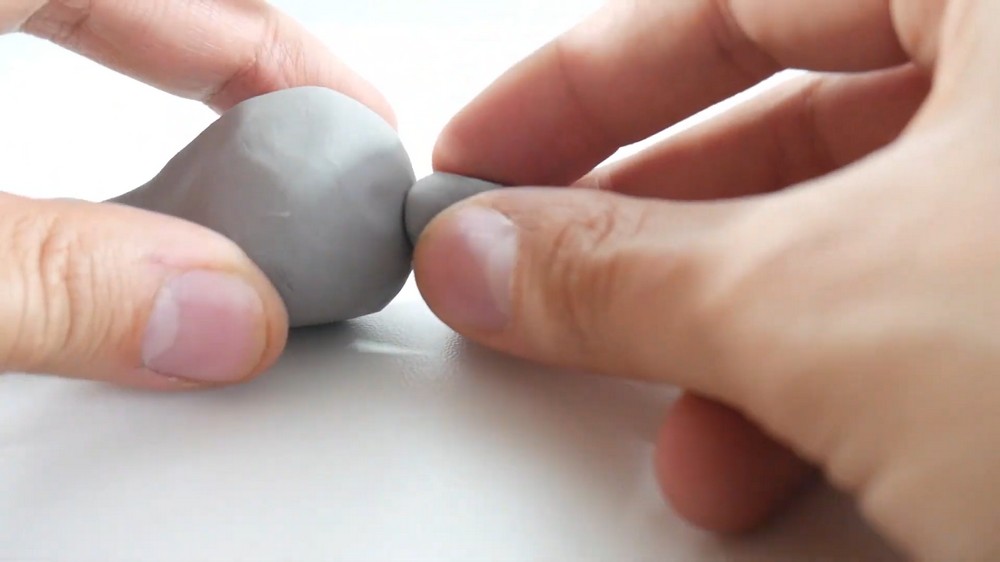
5. Form the Dolphin’s Mouth
- Take another smaller gray plasticine ball.
- Shape this piece into a small cone.
- Attach this cone to the front tip of the dolphin’s head (the narrow end opposite the tail).
- Blend the clay well where the mouth piece meets the head so it appears as one figure.
6. Make the Dorsal Fin
- Use a medium-size gray clay ball.
- Shape it into a triangle.
- Round off one side of the triangle gently by pinching it with your thumb and index finger. This rounded side will be the front edge of the dorsal fin.
- Place the dorsal fin on top of the dolphin’s body, slightly behind the head.
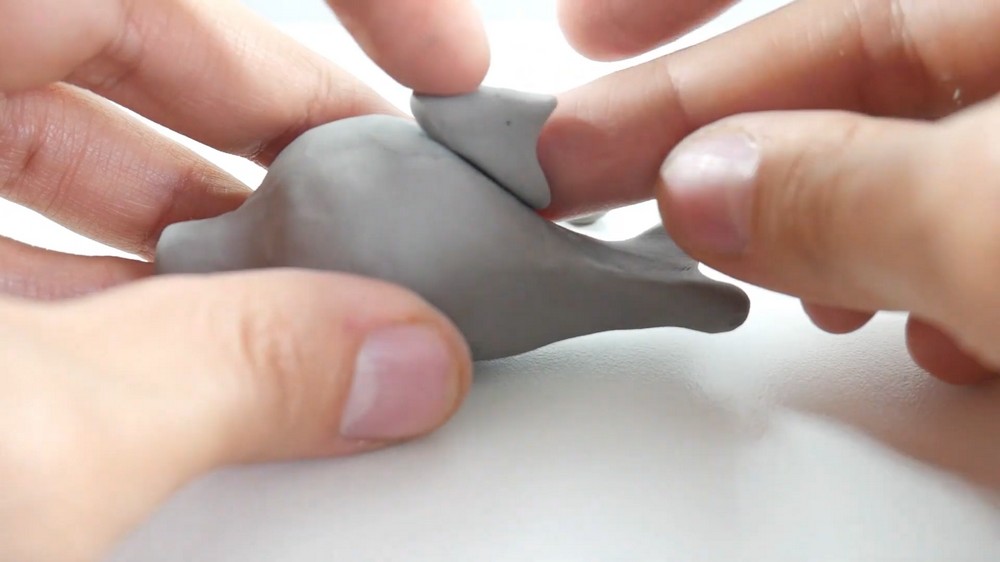
7. Create the Side Fins
- Take the remaining two gray clay balls.
- Shape each into a small triangle with one side longer than the others.
- These are the side fins, so the longer side will attach to the dolphin’s body.
- Smoothen the connecting edges and place each fin on one side of the dolphin’s body.
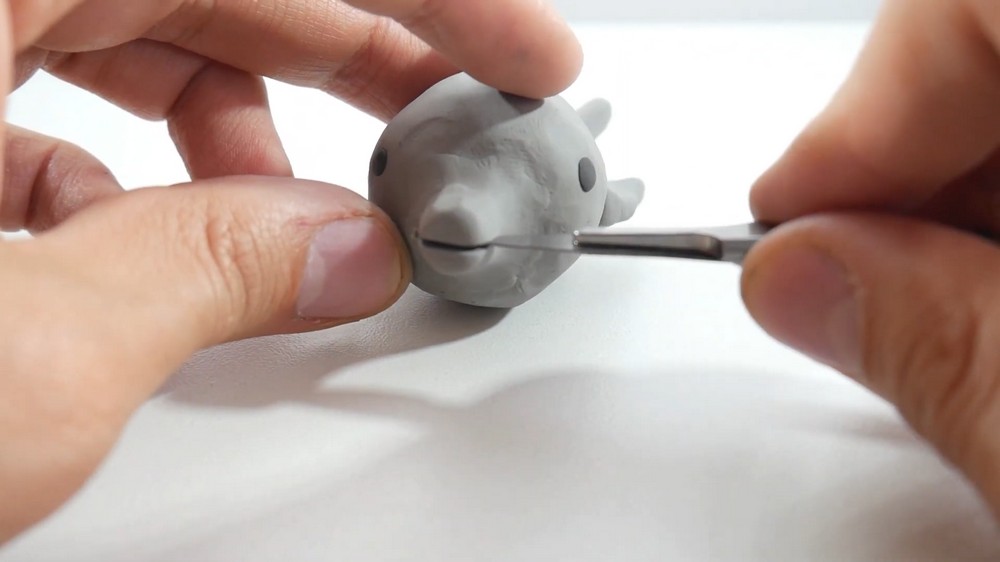
8. Add the Eyes
- Take two small black clay balls.
- Gently place one black ball on each side of the dolphin’s head to serve as eyes.
- Press lightly so they stick but maintain their round shape.
9. Make the Mouth Opening
- Using your scalpel or craft cutter, carefully cut a thin line at the front of the dolphin’s mouth.
- This cut will make the mouth look slightly open and give your dolphin a friendly expression.
Finishing Touches
- Check the model for any rough or uneven parts and smooth them out gently with your fingers.
- Make sure all parts are firmly attached and the clay looks like one continuous figure.
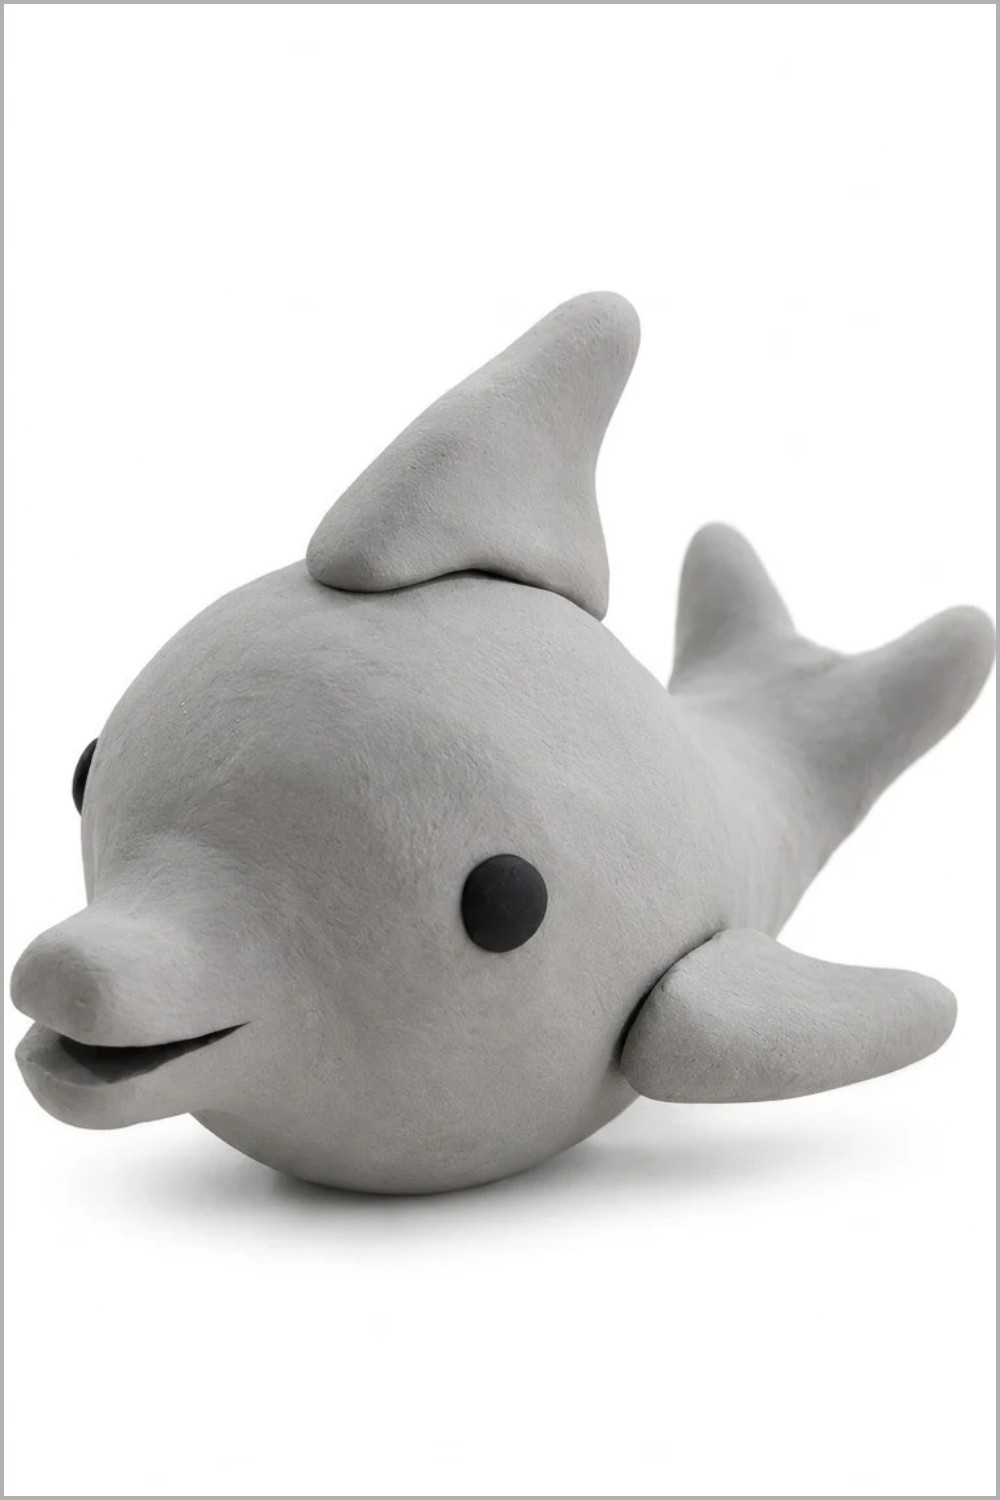
Congratulations! You've made a simple and adorable plasticine dolphin from scratch. With a bit of practice, you can create even more detailed and colorful clay figures.
If you enjoyed this tutorial, consider trying more clay models or drawing lessons to improve your creative skills.