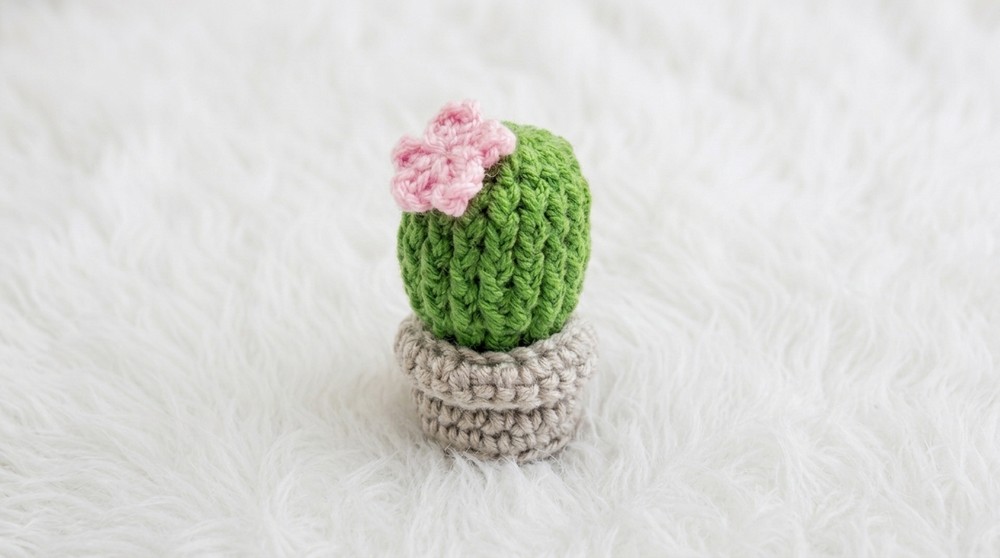
Make your own Free Crochet Mini Cactus Pot Pattern, a fun and beginner-friendly project to craft adorable decor, unique gifts, or charming keychain designs.
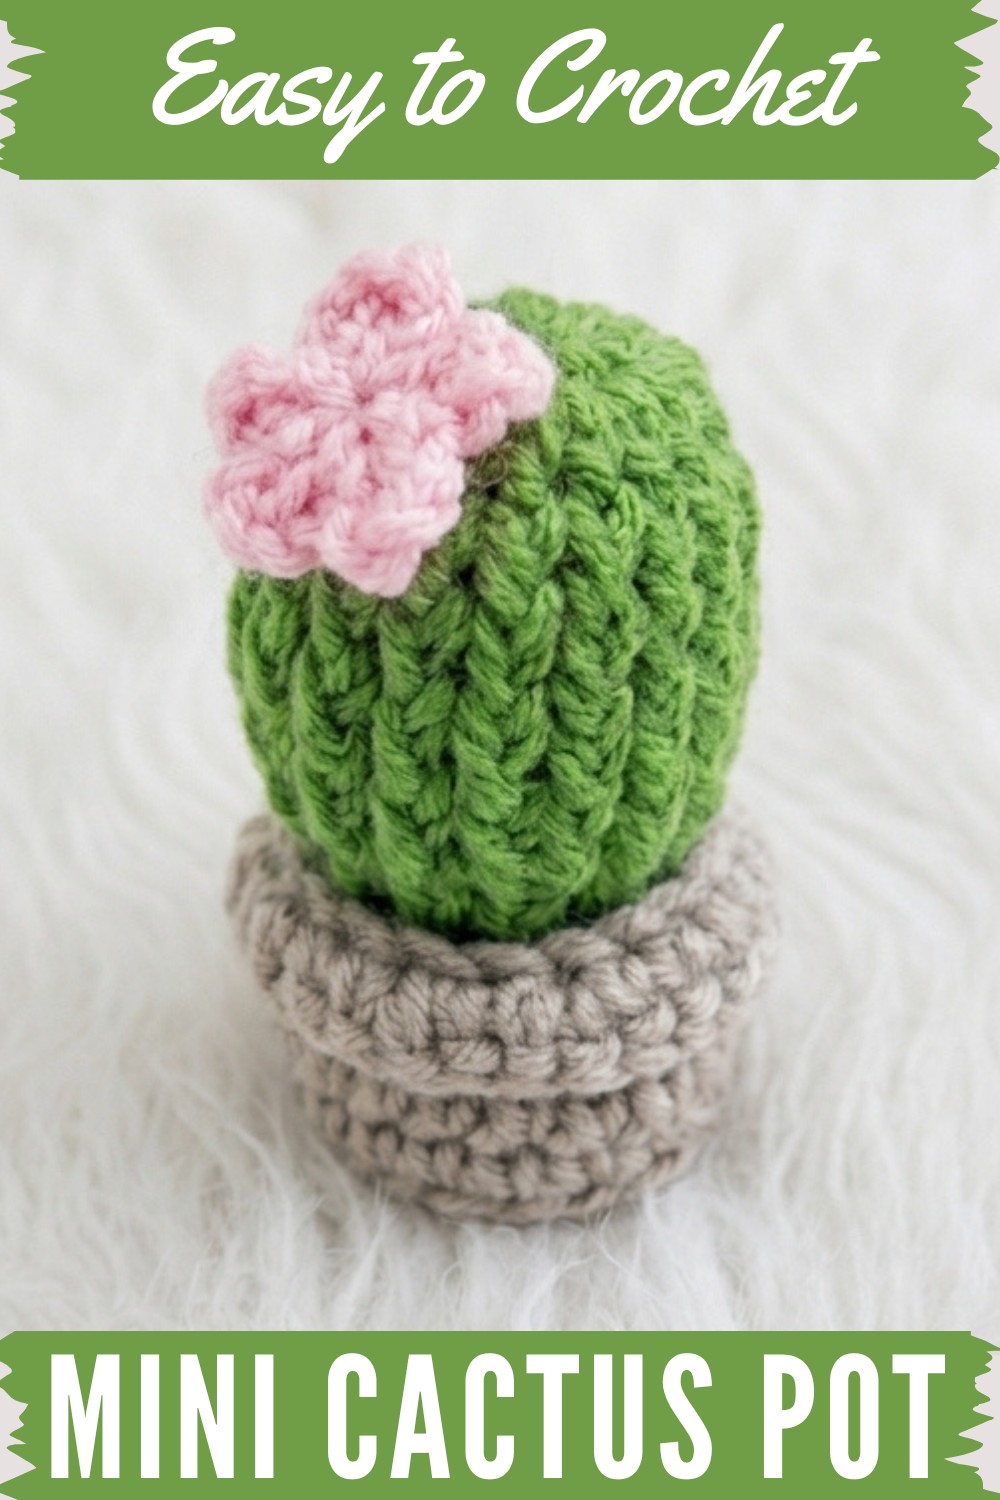
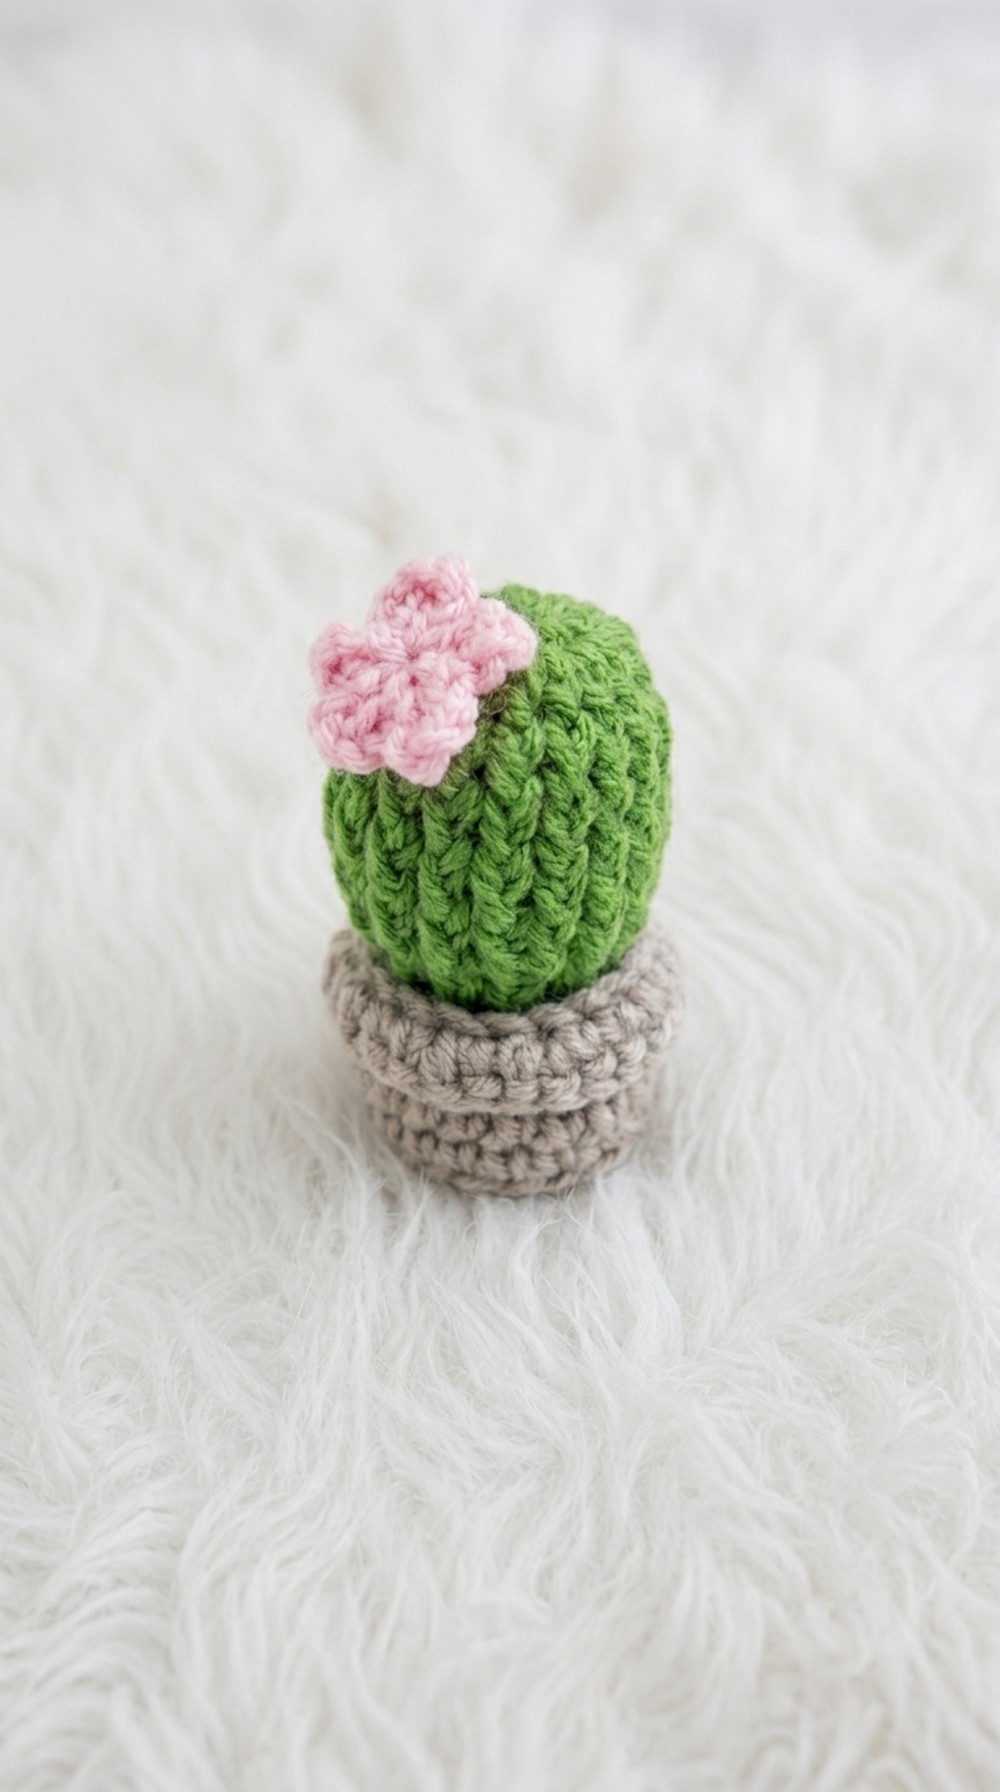
Looking for a cute crochet project? Try making a mini cactus in a small pot. This amigurumi is made with the Free Crochet Mini Cactus Pot Pattern and creates a fun decoration for your desk, shelf, or as a keychain. The finished cactus is round and soft, with a bright flower on top and a textured pot underneath.
The main feature of this mini cactus is its realistic look and 3D shape. The cactus uses front post double crochet stitches to give it raised lines like a real plant, while the pot has a frilly border thanks to simple stitches worked in the front loops. You can use different colors for the pot and flower to make it even more playful. The project is stuffed with soft fiber filling to help it stand up.
Free Crochet Mini Cactus Pot Pattern as Desk Decor
Making the cactus and pot is straightforward, even for beginners. Each piece starts with a magic ring to get a neat, round shape. Then, you use single crochet, half double crochet, and double crochet stitches to build the body and pot. Shaping is easy with increases and decreases, and the flower is made by chaining and slip stitching into the ring. At the end, you sew or glue the pieces together and add stuffing.
This mini cactus is perfect as a quick gift, desk buddy, or collectible. It’s good for people new to crochet, since it teaches basic stitches, working in different loops, and assembling small parts. If you want a fast, adorable project that will help you learn amigurumi basics, the Free Crochet Mini Cactus Pot Pattern is a great choice.
Before You Start
- Familiarize yourself with these crochet stitches: magic ring, single crochet (sc), double crochet (dc), front post double crochet (fpdc), half double crochet (hdc), slip stitch (sl st), and increases/decreases.
- Use a stitch marker to keep track of your rounds.
- Work loosely if you are new; tight stitches are harder to work into.
- You can substitute glue instead of sewing for assembly.
- Adjust the number of rounds to achieve your preferred plant or pot size.
Pattern Notes
- All pieces are worked in joined rounds unless otherwise indicated.
- The cactus uses special post stitches for a ribbed look.
- Increasing: work two stitches in the same space.
- Decreasing: use the described front post half double crochet decrease.
- For the "back loop only" or "front loop only," insert your hook under just one loop.
- The pattern is highly customizable; feel free to modify rounds.
How I made the Crochet Pattern
- Developed the cactus using a classic amigurumi start (magic ring) with rounds of increases, textural stitches, and gentle shaping by decreasing near the top.
- Constructed a flat round for the pot base, added height, and included a decorative border at the rim.
- Finished the design with a small flower, added stuffing, and provided assembly tips.
- Ensured all directions are easy for beginners, and provided extra hints for a professional finish.
Skill Level
Beginner to Intermediate
You only need to know basic stitches plus post stitches. Even for a novice, the instructions are described in detail for ease.
Finished Size
Approximately 2 to 3 inches (5 to 7.5 cm) tall. Actual size will vary based on yarn, hook, and tension.
Materials
- Worsted weight (medium or #4) yarn in green (for cactus), brown (for pot), and flower color (yellow, pink, etc.)
- Crochet hook 3.0 mm to 3.5 mm
- Tapestry needle for sewing
- Stitch marker (or contrasting yarn strand)
- Scissors
- Fiberfill or scrap yarn for stuffing
- Glue gun (optional, instead of sewing for assembly)
Gauge
Gauge is not essential for this project.
Suggested: ~8 single crochet x 8 rows = 2 inches (5 cm)
Stitch Abbreviations
- MR = Magic Ring
- ch = chain
- sc = single crochet
- dc = double crochet
- hdc = half double crochet
- fpdc = front post double crochet
- sl st = slip stitch
- inc = increase (2 stitches in same stitch)
- dec = decrease (as described)
- st(s) = stitch(es)
- FLO = Front loop only
- BLO = Back loop only
Special Stitches
Magic Ring (MR):
Wrap yarn around fingers to form a small loop. Crochet required stitches into the ring's center. Pull yarn tail tightly to close.
Front Post Double Crochet (fpdc):
Yarn over, insert hook from front to back around the post of the next stitch, yarn over, pull up a loop, [yarn over, pull through 2 loops] twice.
Front Post Half Double Crochet Decrease:
Yarn over, insert hook around two posts from the front (like making two fpdc together), pull up a loop, yarn over, pull through all loops on hook.
The Pattern!
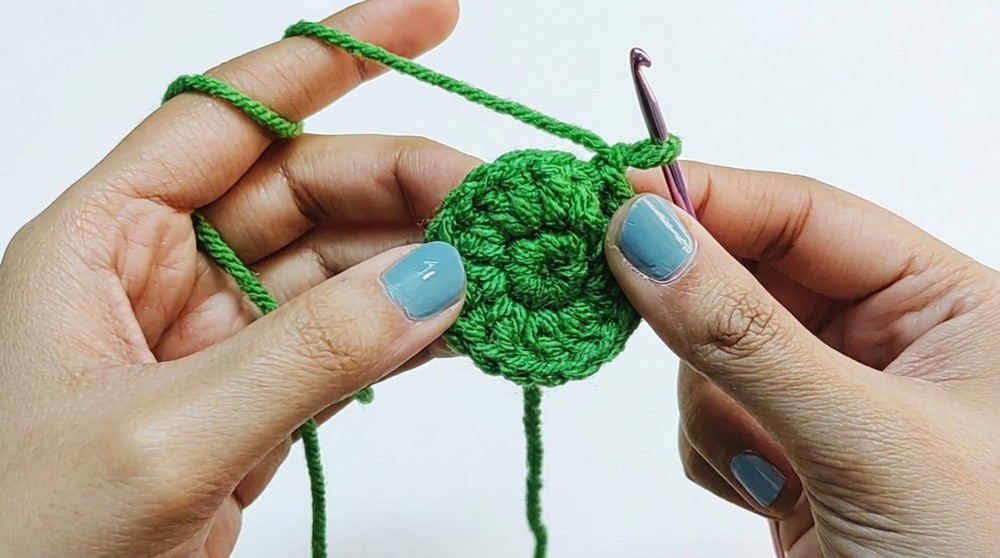
Cactus
- Make a Magic Ring (MR).
- Round 1: 9 sc into MR. (9 stitches)
- Pull ring tight. Sl st into the first sc to join. Ch 1.
- Round 2: 2 dc in each st around. (18 stitches)
- Sl st to first dc, ch 1.
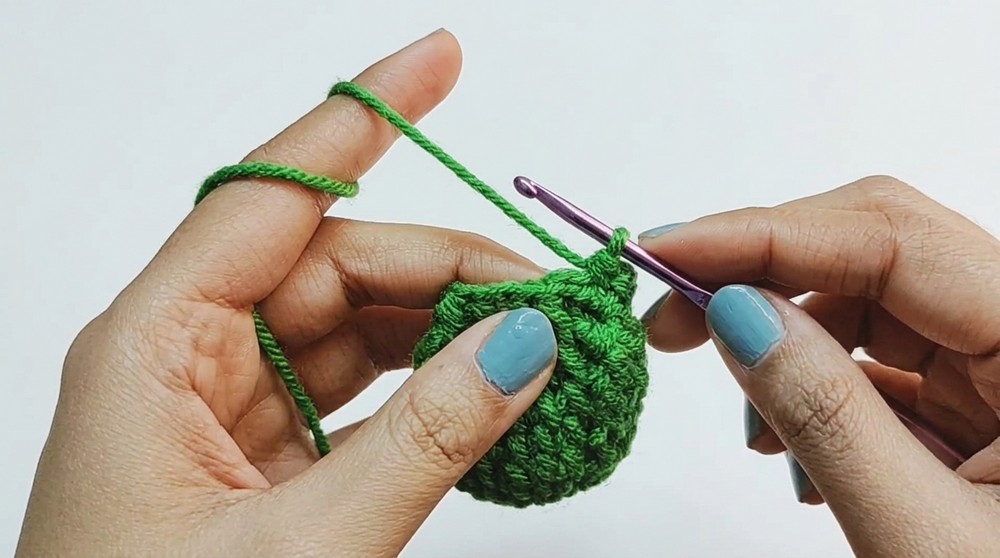
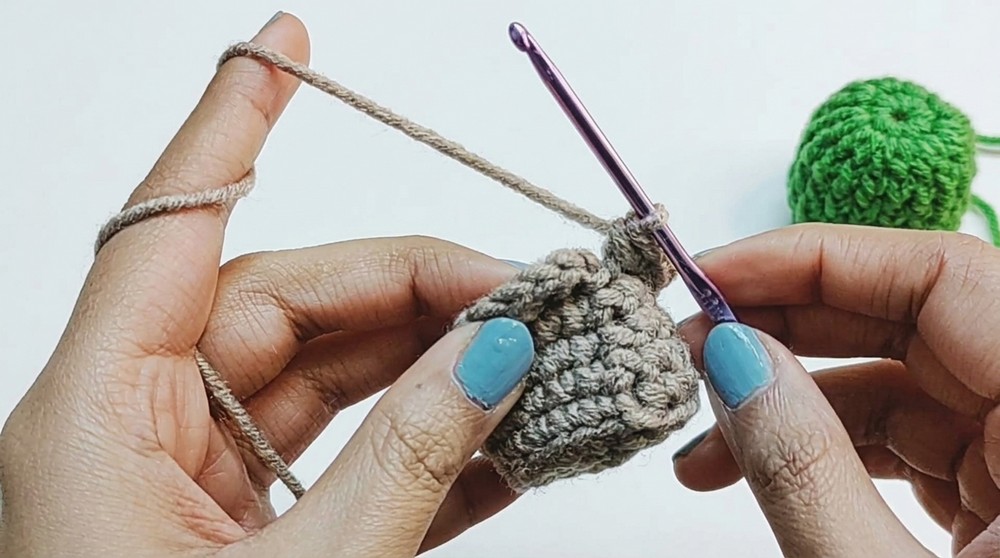
- Round 3: fpdc in each st around. (18 stitches)
- Sl st to first fpdc, ch 1.
- Rounds 4–6: fpdc in each st around. (18 stitches per round, repeat 3 times)
- At end of each round, sl st and ch 1.
- Round 7: fp-hdc in next st, fp-hdc dec over next 2 sts; repeat around. (12 stitches)
- Sl st to first st, ch 1.
- Round 8: fp-hdc in each st around. (12 stitches)
- Sl st, ch 1, fasten off leaving long tail for sewing.
Summary Paragraph:
You begin the cactus by making a small magic ring and working single crochets into the center. You then work double crochet increases to form the base and switch to post stitches (front post double crochet) for texture. After making the “body” as many rounds as you prefer, shape the top with decrease rounds using half double crochets around the posts. When finished, leave a long yarn end to sew the cactus to the pot.
Pot
- Make a Magic Ring (MR).
- Round 1: 6 sc into MR. (6 stitches)
- Pull ring tight. Sl st into first sc to join, ch 1.
- Round 2: 2 sc in each st around. (12 stitches)
- Sl st, ch 1.
- Round 3: sc in next st, 2 sc in next st; repeat around. (18 stitches)
- Sl st, ch 1.
- Round 4: sc in BLO around. (18 stitches)
- Sl st, ch 1.
- Rounds 5–7: sc in both loops in each st around. (18 stitches per round, repeat 3 times)
- Sl st, ch 1 at end of each round.
- Round 8 (pot rim): sc in FLO of next st, 2 sc in FLO of next st; repeat around for ruffled edge.
- Fasten off, leaving a tail to sew or weave in.
Summary Paragraph:
For the pot, create a magic ring, then work three rounds of increases to make a flat base. Transition to working in only the back loop for a defined edge, then continue with standard single crochet to build height. Finish with a final round in the front loops to create a frilled rim detail. Leave a yarn tail if you want to sew the pot to the cactus.
Mini Flower (Optional)
- Make a Magic Ring (MR).
- Ch 5, sl st in MR; repeat 5 times for 5 petals.
- Pull MR tight.
- Fasten off, leaving a short tail for sewing.
- Attach to cactus as desired.
Summary Paragraph:
To add a dainty flower, create a magic ring and make five chain loops that anchor back to the center for petals. Secure and sew or glue it to the top or side of your cactus.
Assembly & Finishing
- Lightly stuff the cactus body.
- Sew or glue the cactus to the pot, catching a loop just beneath the top rim for neatness.
- Stop sewing halfway, stuff the pot, then finish sewing.
- Weave in all loose yarn ends, hiding them within the stuffing.
- Attach the flower using the tail or glue.
- Optionally, secure a keychain ring to the top for a keychain.
Solution of Problem
Problem: “It's difficult to see where to sew the cactus to the pot if you fill the pot before sewing.”
Solution: Only add a little stuffing at first. Sew about halfway around, stuff more, then finish sewing. This allows you to see your stitches clearly and gives a neat finish.
What You Can Make Using These Stitches
- Miniature potted amigurumi plants
- Keychains or charm decorations
- Cactus appliqués for bags, hats, or baskets
- Desk decorations or party favors
- Small gifts for friends and family
For Non-Pattern Readers
Don’t worry if you struggle to follow the stitch-by-stitch pattern. First, crochet a small cylinder to be the cactus: start tiny, then make it fatter, adding ridges for a real cactus effect, and narrow it at the top. Next, crochet a round base for the pot, build up the sides, and finish with a curly edge for the rim. Fill both parts with stuffing, then sew them together neatly. Add a little crocheted flower if you like. You have a cute desk decoration or keychain.