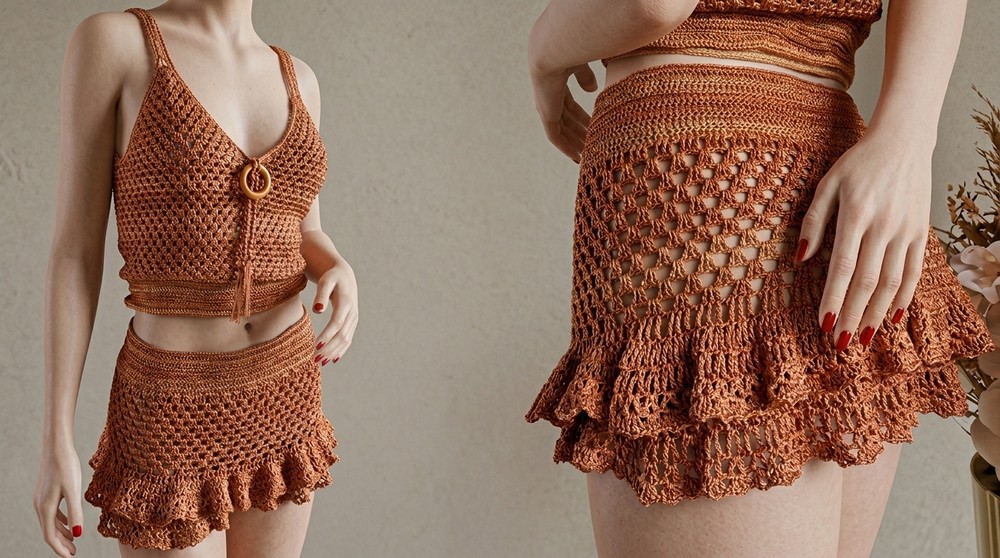
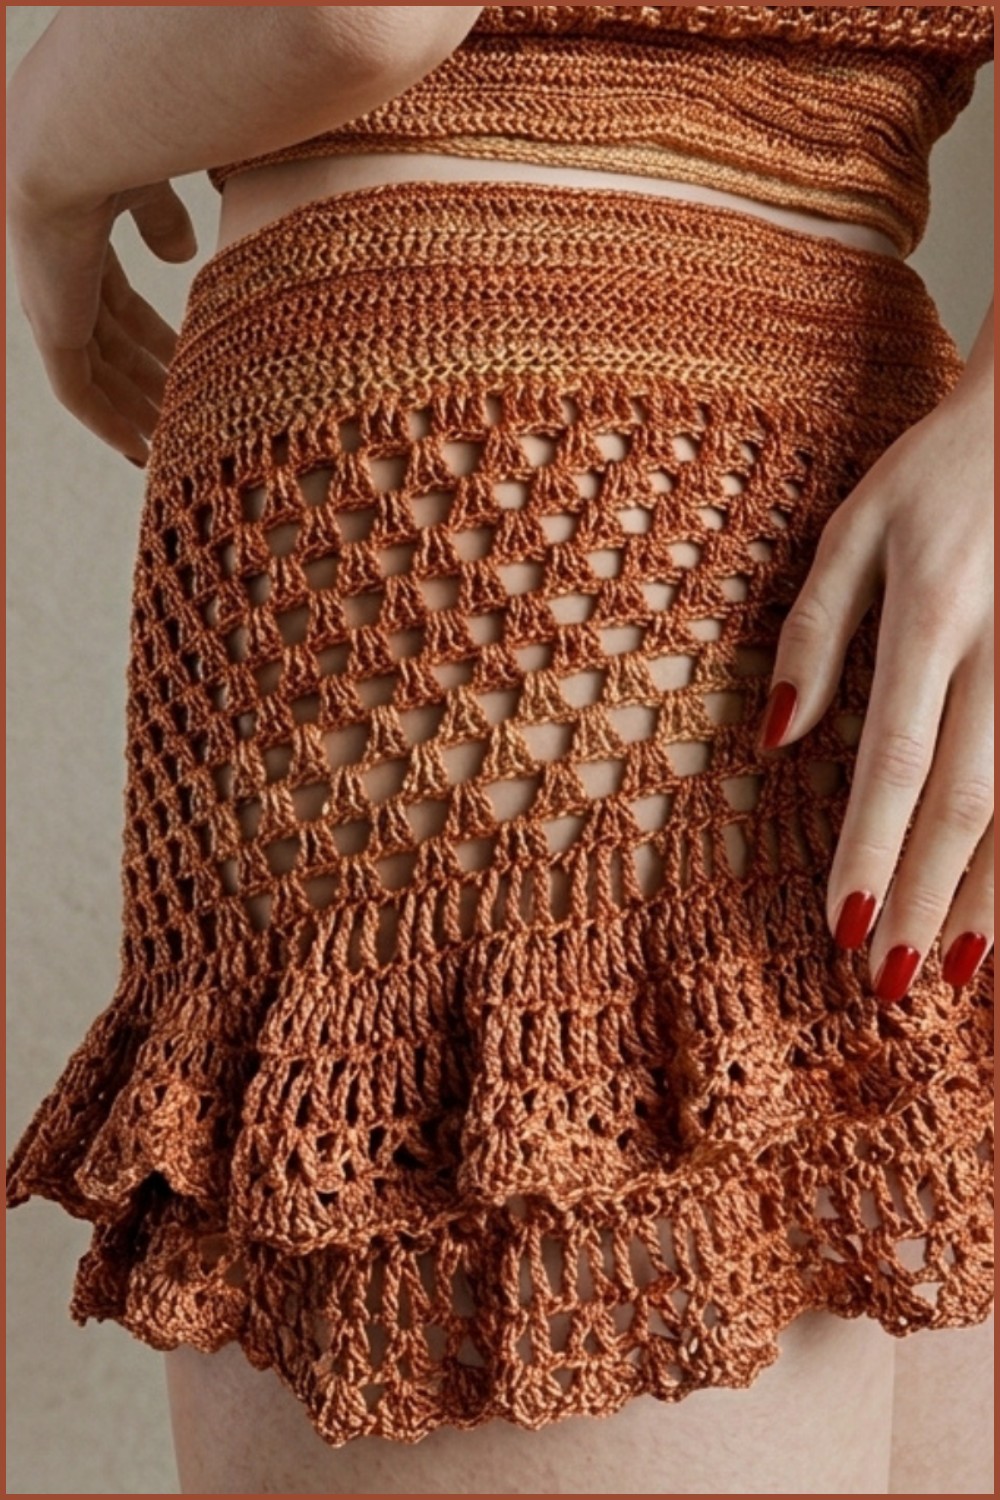
Start stitching a cozy and stylish crochet skirt that’s easy to make, fun to wear, and sure to turn heads wherever you go.
Wearing something beautiful, handmade, and full of charm that sets you apart from the crowd. A crochet skirt is a stylish piece that blends elegance with everyday comfort. With its soft texture and unique patterns, it can be customized to fit any size, making it a perfect choice for all shapes and styles. This type of skirt is not only practical but also versatile—wear it casually during the day or dress it up for special occasions.
Free and Easy Crochet Skirt Pattern Anyone Can Follow
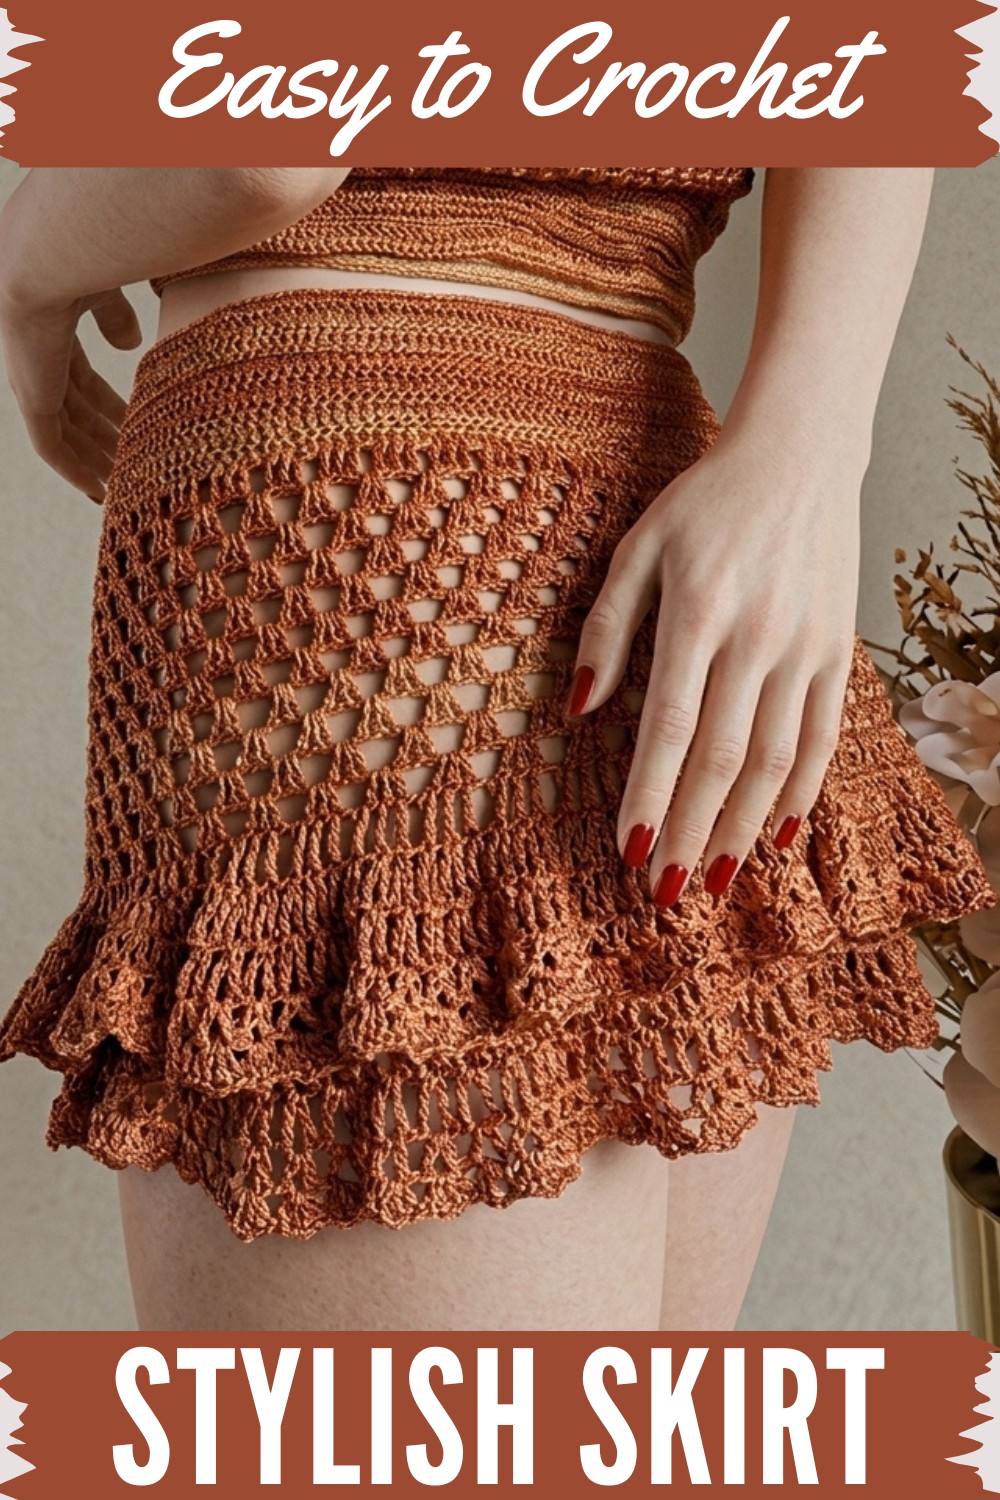
Its lightweight design makes it ideal for warmer weather, while layering it during cooler seasons keeps it cozy and chic. The fine details and intricate stitches make it look artistic and special, giving you a one-of-a-kind piece for your wardrobe. Plus, it gives you the freedom to choose colors and designs that suit your personality, letting you show off your creativity. It’s truly a unique way to stay fashionable while also feeling comfortable.
Crochet Skirt Pattern
Materials Needed
- Yarn:
- Anne Yarn (leftover) used in the tank top. You may use any lightweight cotton yarn or similar.
- Yardage requirement depends on the size modifications and the number of ruffles added, approximately 600–900 yards.
- Optional: Use multiple colors for contrast.
- Crochet Hook:
- Size 3 mm recommended for this pattern.
- Additional Supplies:
- Elastic Band (for a snug waistband; width: 1.5–2 inches based on preference).
- Tapestry Needle (for weaving ends and attaching the elastic).
- Scissors
- Stitch Markers (for marking positions like the waistband and front/back separation).
Skill Level
- Intermediate: Familiarity with basic crochet stitches (chain, single crochet, double crochet, treble crochet), magic ring, working in rounds, high relief stitches, and sewing elastic.
Key Abbreviations
- ch: Chain
- sc: Single Crochet
- dc: Double Crochet
- tr: Treble Crochet
- sl st: Slip Stitch
- yo: Yarn Over
- sp: Space
- sk: Skip
- rep: Repeat
Special Notes
- Gauge: The pattern stretches significantly; making a quick swatch is recommended for sizing.
- Gauge: 12 dc in 4 inches for foundation chain.
- Sizing Adjustments: The pattern is written for size M (hip circumference of 105 cm / 41 in). Modify the number of initial chains for smaller or larger sizes.
- Waffle Effect: Texture comes from picking up the back loops on some rows to achieve a high-relief stitch.
- Customization: Add rows, increase stitches in ruffles, or change yarn coloration to suit your aesthetic preferences.
Step-by-Step Instructions
Step 1: Foundation Chain and Base Circle
- Chain the foundation for your hip circumference. For size M, hip circumference is 105 cm.
- Foundation: 95 chains. (This length can stretch to fit up to 110–115 cm hips. Adjust as needed.)
- Join the chains into a ring: Use a sl st in the first chain to close the circle.
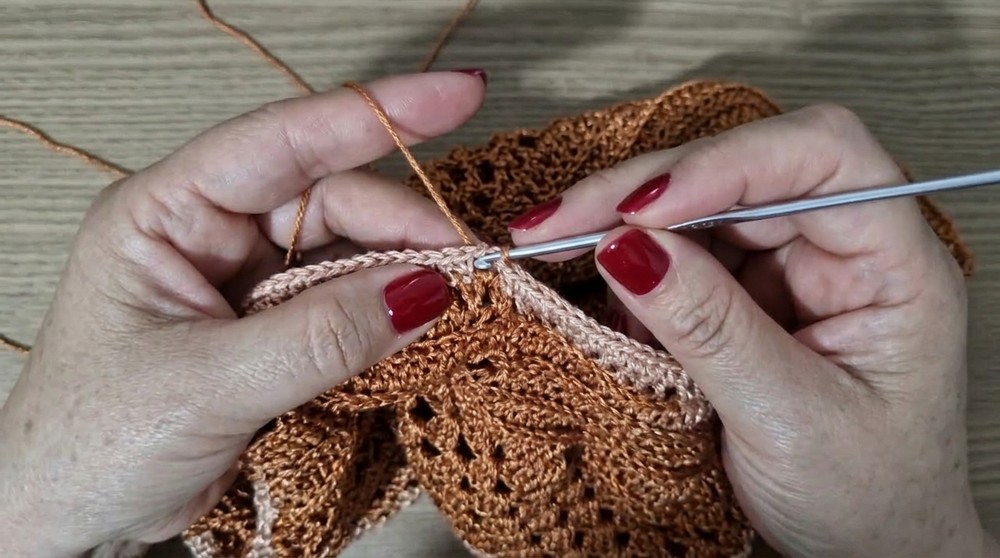
- Begin Pattern:
- Ch 3 (acts as the first dc here and throughout the pattern).
- Dc in next 2 sts (3 dc form a block).
- Ch 1, sk 1 base st, 3 dc in the next 3 sts.
- Rep: Continue this sequence (block of 3 dc, ch 1, sk 1) around the circle.
- Close the round with a sl st to the top of the ch-3.
- Tip: Ensure your foundation chain is not twisted when closing the circle.
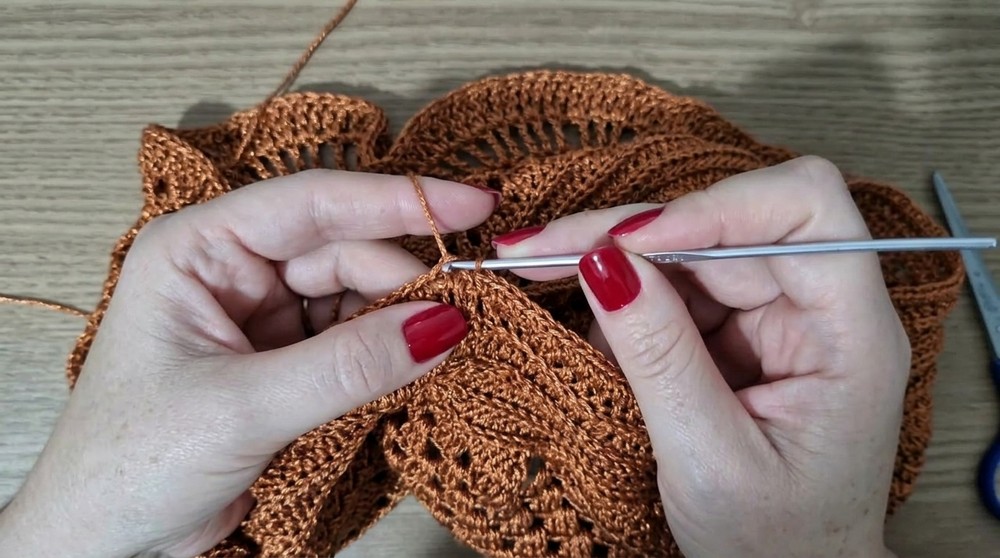
Step 2: Creating the Main Skirt Body
- Round 2:
- Ch 3 (counts as first dc), make 2 dc in the space directly below.
- Ch 1, work block of 3 dc into the sp of the previous round.
- Rep: Continue working 3 dc blocks in the spaces of previous rows, separated by ch 1.
- Close the round with sl st into the top of beginning ch-3.
- Round 3–Desired Length:
- Repeat Round 2 until the skirt reaches the waistband area or your desired length before starting ruffles.
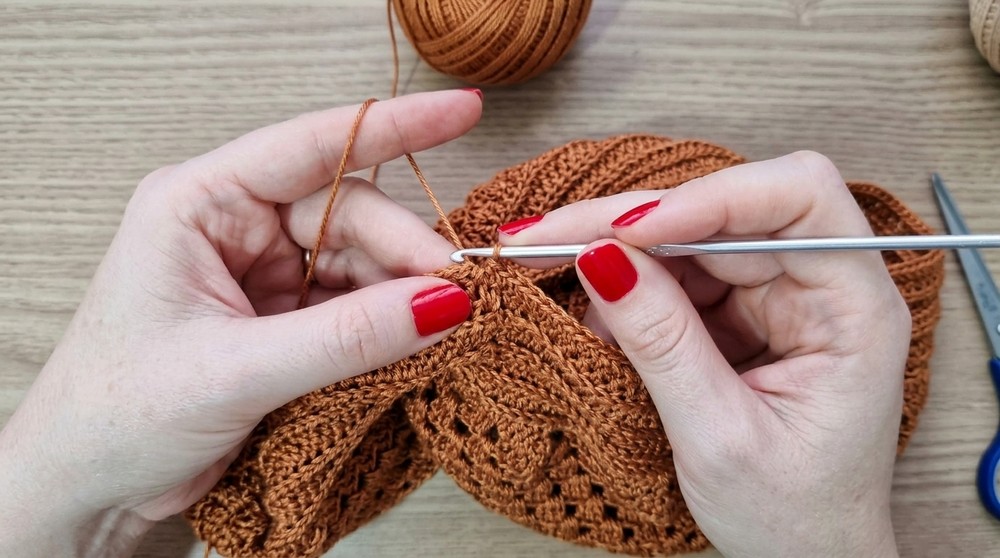
Step 3: Waistband
- Dimensional Waistband:
- Switch to picking up back loops only for added texture:
- Ch 1, sc in each back loop around.
- Repeat rows of sc in back loops for 6 cm.
- Switch to picking up back loops only for added texture:
Step 4: Adding Elastic
- Attach the Elastic Band:
- Cut elastic to fit your waist snugly.
- Attach using sc:
- Work 1 sc into each stitch, alternating with 2 sc into some stitches for stretch adjustment.
- Sew the elastic together securely at the ends, and for added stability, tack the elastic into the crochet stitches.
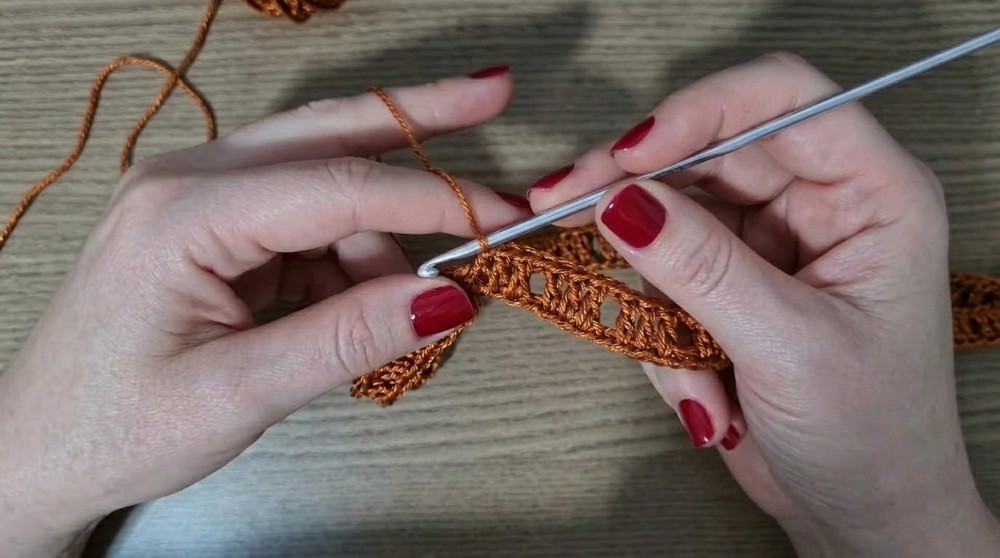
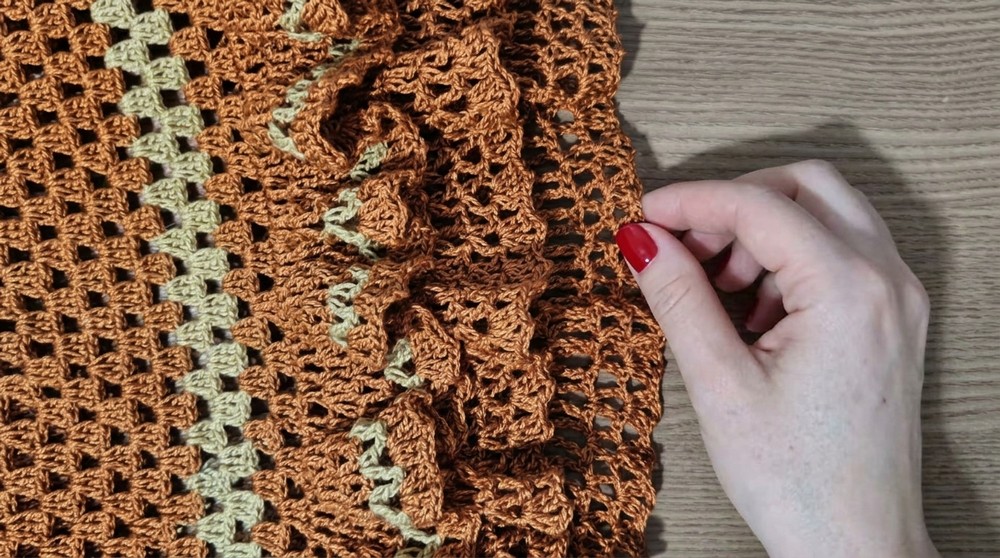
Step 5: Creating Ruffles
Front Section Ruffles
- Mark front/back separation points using stitch markers. The front will have lighter ruffles, and the back will have denser ruffles.
- Front Ruffle Rows:
- Row 1: Ch 5, dc in next base st, ch 1. Rep across the front section.
- Switch to ‘fan stitch’:
- In each ch-sp, 2 dc, 2 ch, 2 dc. Continue this until desired fluffiness is achieved.
Back Section Ruffles
- The back section uses tr stitches for larger and more dramatic ruffles.
- Row 1: Ch 5, tr in next base st, ch 1. Rep across the back section.
- Switch to deeper ‘fan stitch’:
- In each ch-sp, 2 tr, 2 ch, 2 tr. Continue until ruffles match the front or extend further.
Finishing
- Final Row:
- Work sc or slip stitches into every stitch for a clean finish.
- Weaving In Ends:
- Use a tapestry needle to weave in loose ends securely.
- Blocking:
- Steam block or pin the skirt flat to even out ruffle shapes and edges.
Conclusion
Congratulations on completing your crochet skirt! The distinct ruffle sections and textured waistband make this project both elegant and versatile. Feel free to experiment with colors, lengths, or additional details to add a personal touch.
Pattern Correction
- If stitches are uneven, adjust spacing by adding or removing chains/spaces as needed.
- For a snugger fit, decrease the number of foundation chains slightly.
Tips
- Achieving Symmetry: Use stitch markers to ensure ruffle density and transitions between front/back sections remain balanced.
- Elastic Securement: Sew the elastic twice for added durability.
- Creative Embellishments: Add beads or contrasting stitches to enhance design appeal.
- Gauge Awareness: Always check the fit after the first few rows as the skirt stretches naturally.