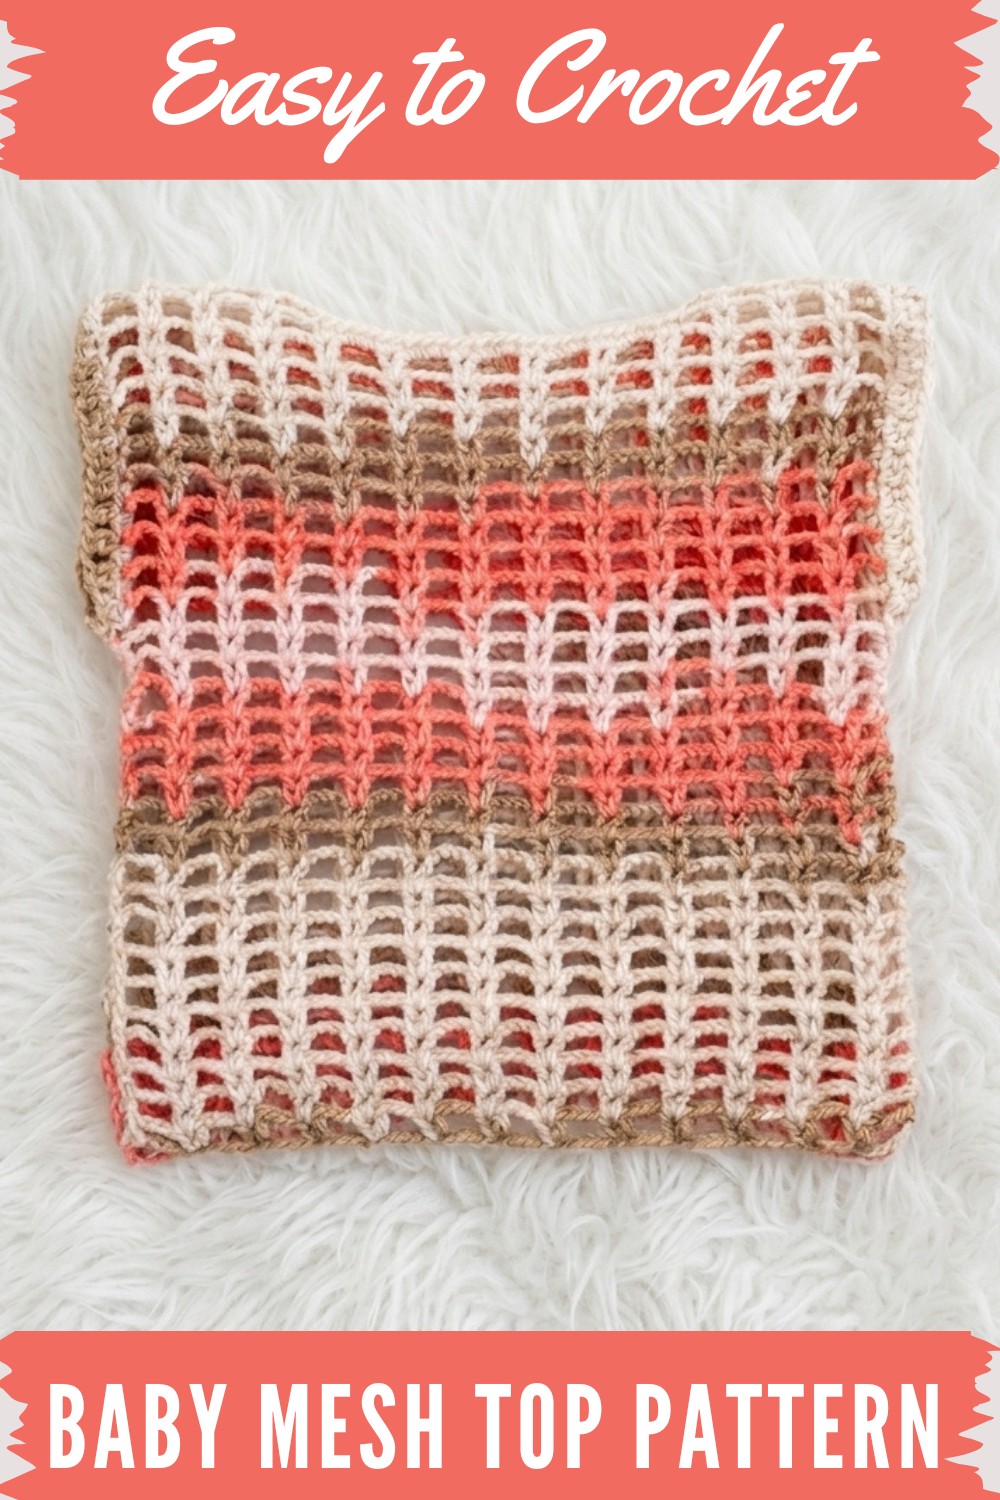
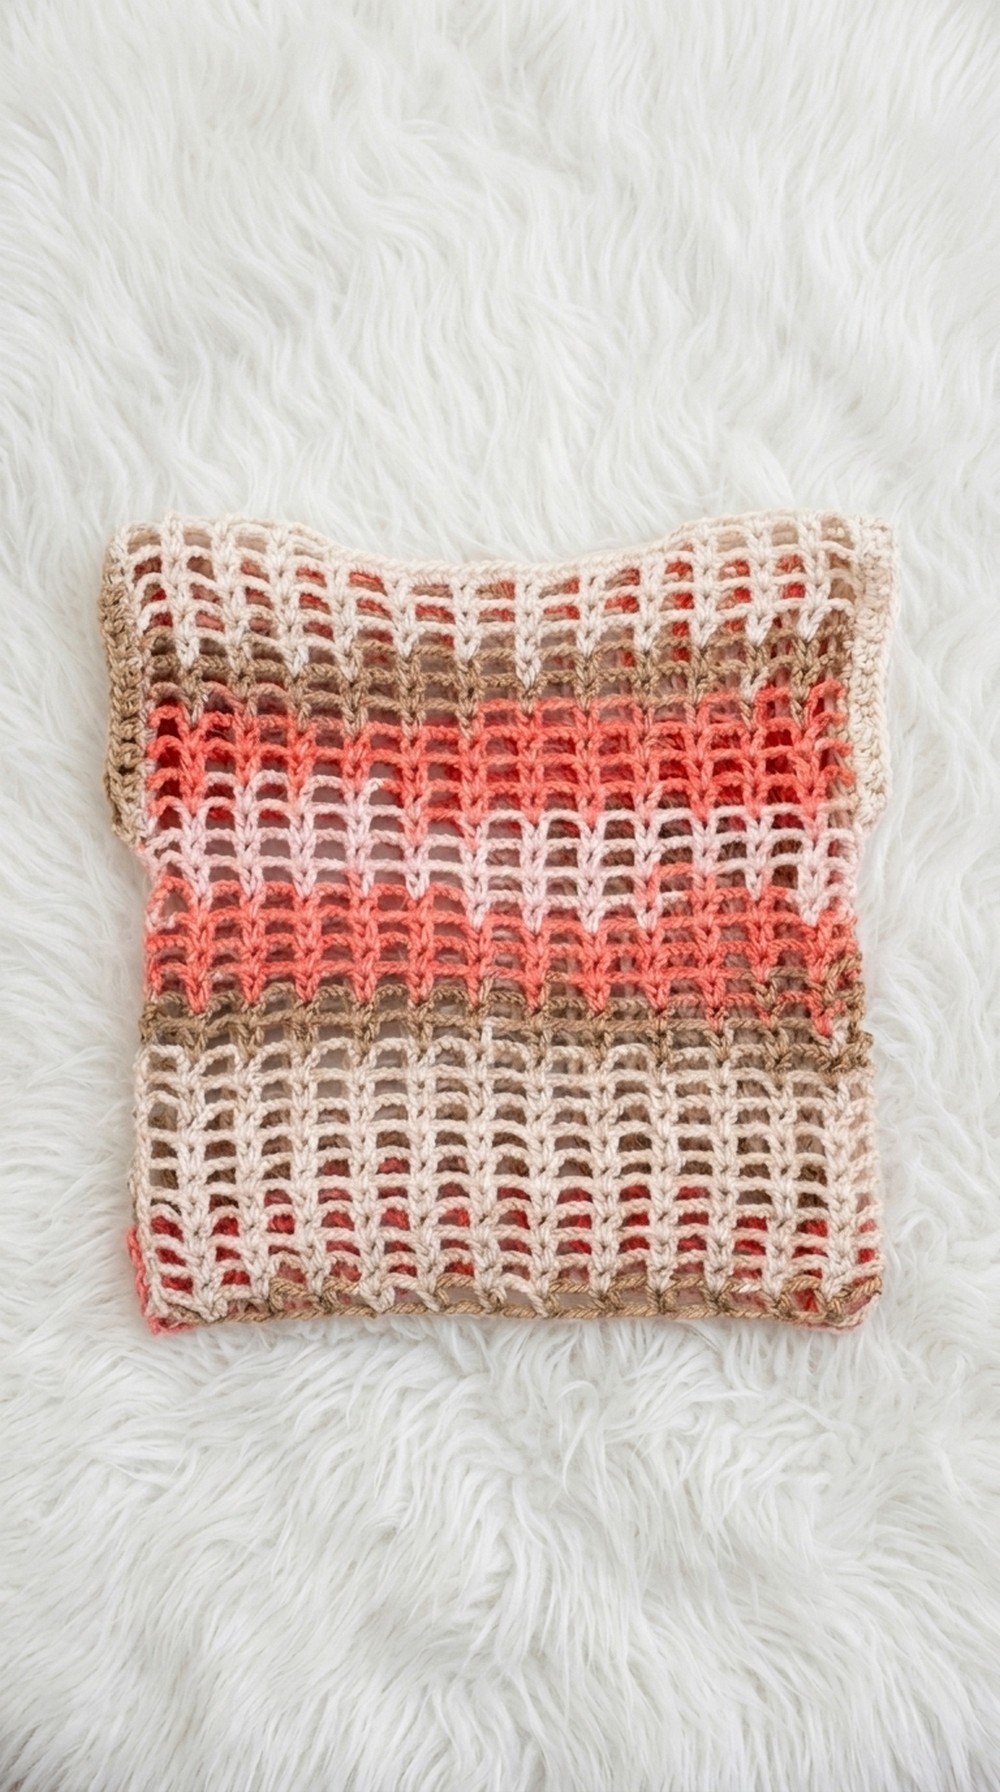
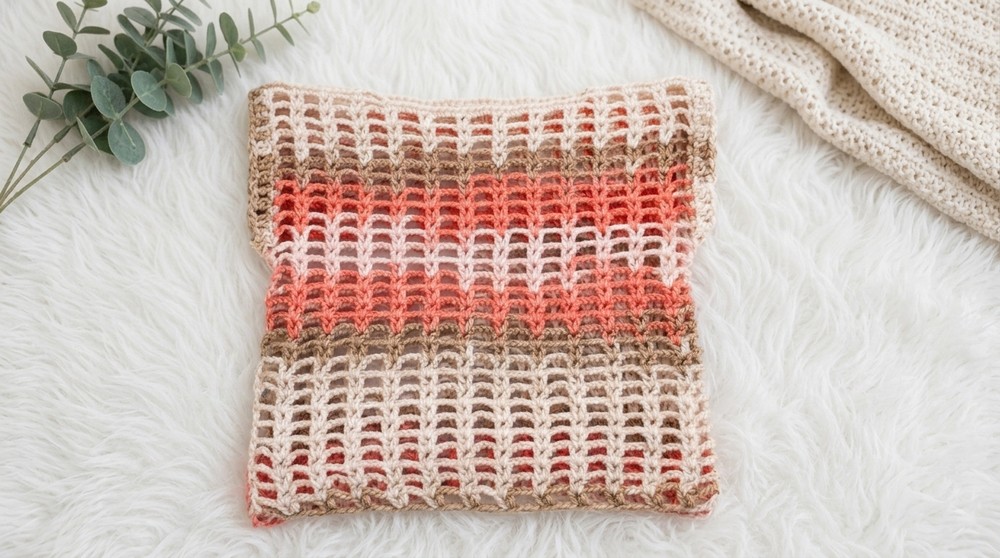
Create an adorable crochet baby mesh top with this easy-to-follow pattern, perfect for lightweight and breathable baby wear.
Perfect for warm days, this airy project is a lightweight top designed with a gentle mesh stitch that lets the fabric breathe. Made for little ones, it features two main panels for the front and back, joined at the shoulders and sides for a neat finish. The openwork texture is created using simple double crochet and chain stitches, making it a straightforward choice for both new and experienced crocheters.
Full sleeves are added directly onto the armholes and finished with a soft, frilly edge that gives the top a playful look. With a foundation chain worked in multiples of four, adjusting the size is easy, you can create the perfect fit for any child. The open mesh shape keeps babies cool and comfortable, making the top especially handy for layering over dresses or t-shirts.
Free Crochet Baby Mesh Top Pattern
This project is enjoyable to make because it grows quickly and uses repeatable rows, so there’s no complicated shaping. The soft, flexible texture is gentle on the skin, while the simple design looks lovely in any color you choose. With minor changes, you can turn it into a dress by making it longer, or make a stylish crop top by keeping it short.
Ideal for daily wear or special outings, the finished piece stands out for its clean lines and sweet ruffle sleeves. It’s not only practical and cute but also simple to personalize, giving you a lovely addition to any little one’s wardrobe.
Mesh Pattern Full Sleeves Dress Crochet Pattern
Welcome to this beautiful tutorial for a full-sleeve mesh-pattern crochet dress! This dress is airy, versatile, and perfect for layering over any outfit. The mesh pattern makes it stylish yet easy, and you’ll learn how to adjust the design for any size—from adults to kids. The fitted bodice with a delicate mesh texture is complemented by frilled mesh sleeves, making this garment a standout handmade addition to your wardrobe.
Skill Level & Terminology
Skill Level: Confident Beginner
Terminology: US Standard Crochet Terms
If you can chain, double crochet, single crochet, slip stitch, and work in rows, you’re ready to make this dress.
Materials & Tools
- Yarn: Alize Cotton Gold (330 m / 100 g, 55% cotton, 45% acrylic) or similar blend
- Hook: 3.5 mm crochet hook
- Notions: Scissors, tapestry/yarn needle, stitch markers
Gauge
Gauge is not critical but affects sizing. Mesh pattern stretches easily.
- Sample Panel: 30 cm wide with 48 chains (including turning chains), for child size.
- Customize: Measure hips/bust, make base chain in multiples of 4 to desired width.
Abbreviations List
| Abbreviation | Meaning |
|---|---|
| ch | Chain |
| dc | Double Crochet |
| sc | Single Crochet |
| sl st | Slip Stitch |
| sp | Space |
| rep | Repeat |
| FO | Fasten Off |
Special Stitch Instructions
- Double Crochet (dc): Yarn over, insert hook, pull up loop, yarn over, pull through 2, yarn over, pull through 2.
- Chain Space: Spaces between stitches made by chaining.
- Mesh Pattern: Two dc in chain space, ch 3, repeat across.
- Frill Sleeve: Work two sc in chain space, skip one space, repeat.
Finished Size
Sample for a child (3 years, 30 cm wide, 28 rows for length).
- Adult Sizing: Use hip/bust measurement, base chain in multiples of 4, and as many mesh pattern rows as needed for desired length.
How to Start & Stitches Used
Start with a foundation chain (multiples of four), turning chains, and mesh row. Main stitch is double crochet; sleeves and neckline use single crochet, slip stitch for joining.
The Pattern
A. Foundation Chain & Back Panel
- Foundation:
- Make a chain in multiples of 4 to desired width (e.g., 48 ch for 30 cm width).
- Add 9 turning chains at the end.
Beginner Note:
Measure your body or desired recipient; start with chains in multiples of 4 to suit the fit.
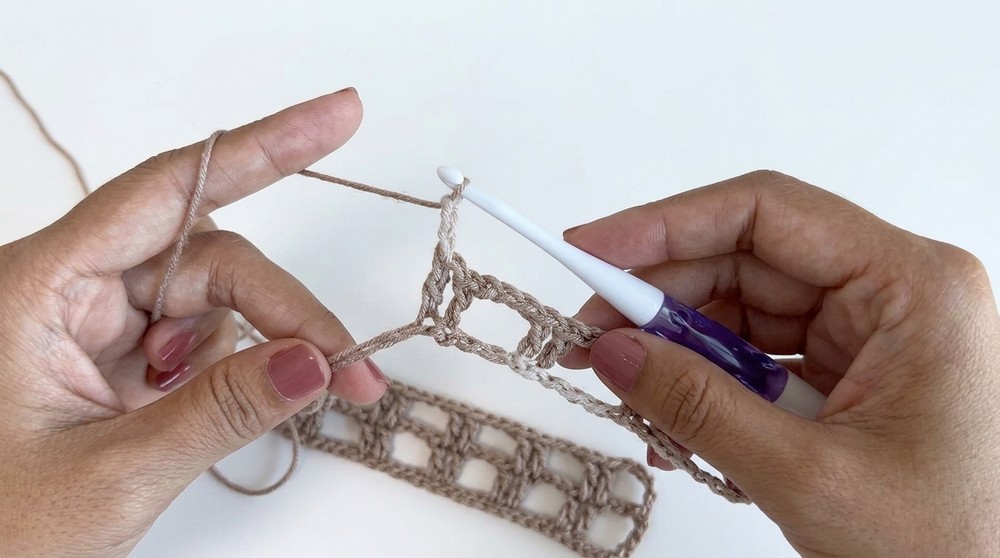
B. Row 1: Mesh Pattern Base
- Turn work, skip first 9 chains, insert hook into 10th chain.
- Work 2 dc into same chain.
- Ch 3, skip next 3 chains, 2 dc into 4th chain.
- Repeat [ch 3, skip 3, 2 dc in next] across.
- At the end, after last ch 3, dc in final chain.
Beginner Note:
This is a mesh design. Two dc stitches form the “mesh block,” creating an airy look.
C. Row 2 and Onwards: Mesh Pattern Repeat
- Ch 6, turn.
- In space between previous 2 dc, work 2 dc.
- Ch 3, work 2 dc in next space between 2 dc.
- Repeat across.
- At the end, ch 3, dc in 4th chain of turning chain of previous row.
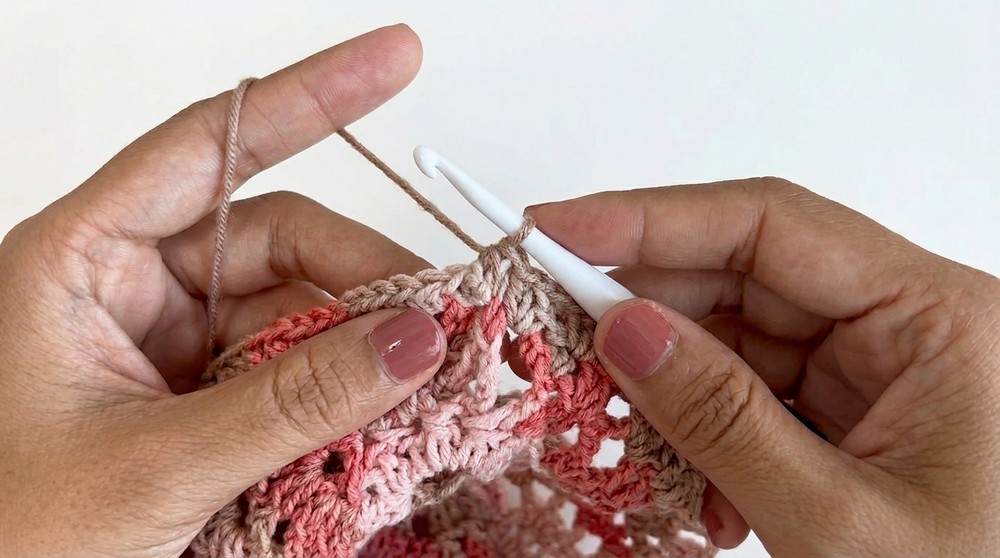
Repeat Row 2 for desired length (dress or top).
Beginner Note:
Every row begins with ch 6, then mesh repeat (2 dc, ch 3) in spaces. Finish with one dc at row end.
D. Shaping & Neckline (Front Panel)
- Divide for Front/Back:
- Fold your panel in half. Mark center.
- For neckline, place stitch markers to reserve center stitches for neck (e.g., middle 6 stitches for neckline, 3 at each edge for shoulders).
- Neck Shaping (Row 29 for child size):
- Work mesh pattern in 3 shoulder spots; stop at neckline marker.
- In neckline, switch to sc in mesh spaces: 2 sc in 2 dc space, 3 sc in ch 3 space, repeat for 6 neckline spaces.
- Resume mesh pattern on opposite shoulder.
Beginner Note:
You’ll leave the center open for a neckline. Work single crochet in neck area for finishing.
E. Finish Shoulder Rows
- Work final mesh rows (dc, ch 3, dc) on shoulders after neckline shaping as per pattern.
- End with 1 dc at end, ch 6, turn, and repeat mesh pattern where needed.
- After equal panels are made (front/back), FO.
F. Connecting Shoulders
- Use stitch markers to match shoulder rows.
- Join using slip stitches or sewing:
- Insert needle or hook at 4th chain on one shoulder, pull through 3rd chain on opposite.
- Continue across marked shoulder rows to join. Secure and weave in ends.
Beginner Note:
Join shoulders neatly to create opening for head.
G. Side Seams & Armholes
- Align panels for sides, leaving ~15 cm armhole opening (adjust to fit).
- Use stitch markers to mark armhole edges.
- Join side seams using yarn needle or hook, sewing or slip stitching in chain spaces and dc blocks down the sides. Secure and weave in ends.
Beginner Note:
Keep armholes roomy for sleeve comfort.
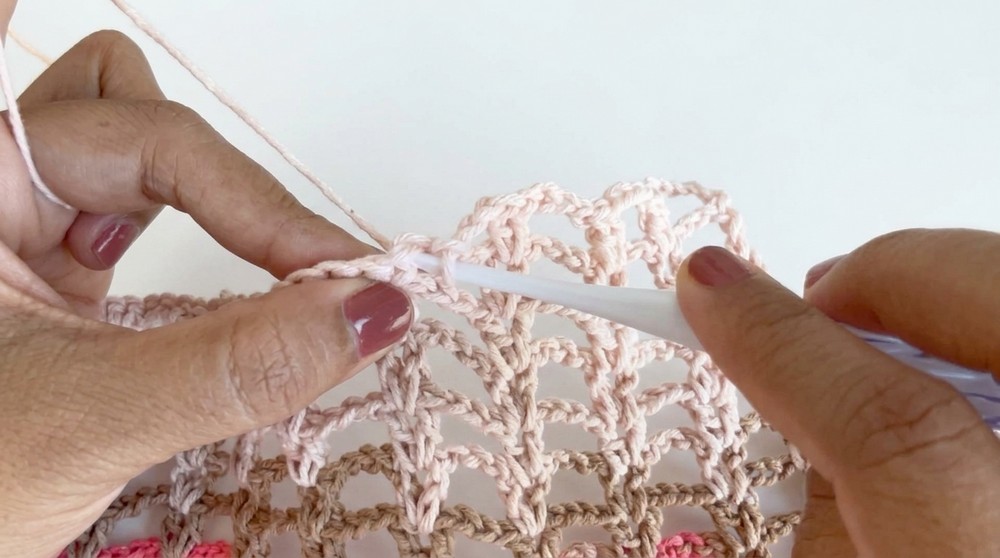
H. Frill Mesh Sleeves
- Attach yarn at armhole corner.
- Row 1:
- Ch 1, sc in first space.
- Work 2 sc in chain space around armhole.
- At shoulder seam, 1 sc in center, then continue 2 sc in spaces.
- Row 2:
- Ch 3, turn.
- Skip 1 sc, 2 dc in next sc.
- Ch 3, skip 1 sc, 2 dc in next; repeat around sleeve.
- Optional: repeat for 2–3 rows for a fuller frill.
End with slip stitch to join, FO, hide any tails.
Beginner Note:
The frill sleeve is created with simple mesh blocks and gives a gentle wave; repeat rows for fuller effect if you like.
I. Finishing
- Weave in all yarn tails neatly around neckline, sleeves, and seams.
- Lightly block garment to shape and soften mesh.
- Dress is reversible; select either panel for front/back as you prefer.
Conclusion
Congratulations! You’ve made a stunning mesh full-sleeve dress using double crochet, single crochet, chains, and slip stitch. Adjust the base chain and rows for any size, and enjoy the airy mesh and pretty frill sleeves. This pattern is adaptable for tops, dresses, or tunics—perfect for layering and easy to personalize with color or length changes.