Celebrate your favorite comic hero with DIY Polymer Clay Chibi Deadpool, a tiny clay model with a bold mask for decorations and fan collections.
Drawings In Action introduces a playful superhero idea that gives a famous comic character a funny, small-sized appearance. This DIY Polymer Clay Chibi Deadpool is a nice choice for people who love action heroes and want something different for their collection.
Funny DIY Polymer Clay Chibi Deadpool With A Big Head
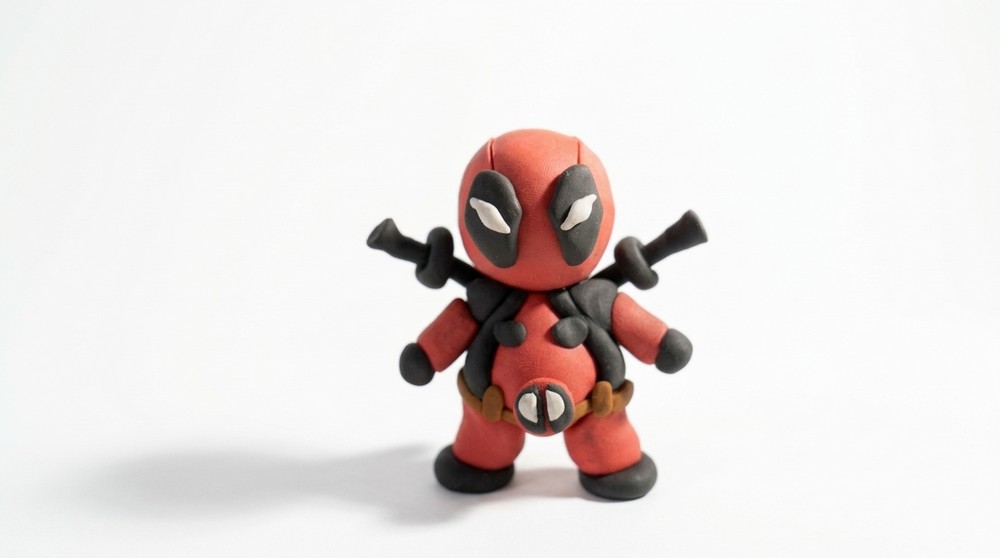
DIY Polymer Clay Chibi Deadpool features a tiny superhero with a large head, short body, and bold red and black costume. His oversized white eyes and covered face give him a funny expression. The chibi style changes his usual serious appearance into a cute figure while keeping his famous superhero identity easy to recognize.
One special feature is the contrast between his large mask and little body. Black markings around the eyes give his face a strong look, while the red suit adds bright color. His small gloves, boots, and costume details complete his outfit. Two miniature swords on his back can give the figure an extra action-style touch.
The model uses red, black, and white polymer clay for its main parts. Small clay pieces form the head, arms, legs, and costume details. The different sections are joined carefully so the character stands properly. Smooth shaping and neat color placement help the figure look attractive.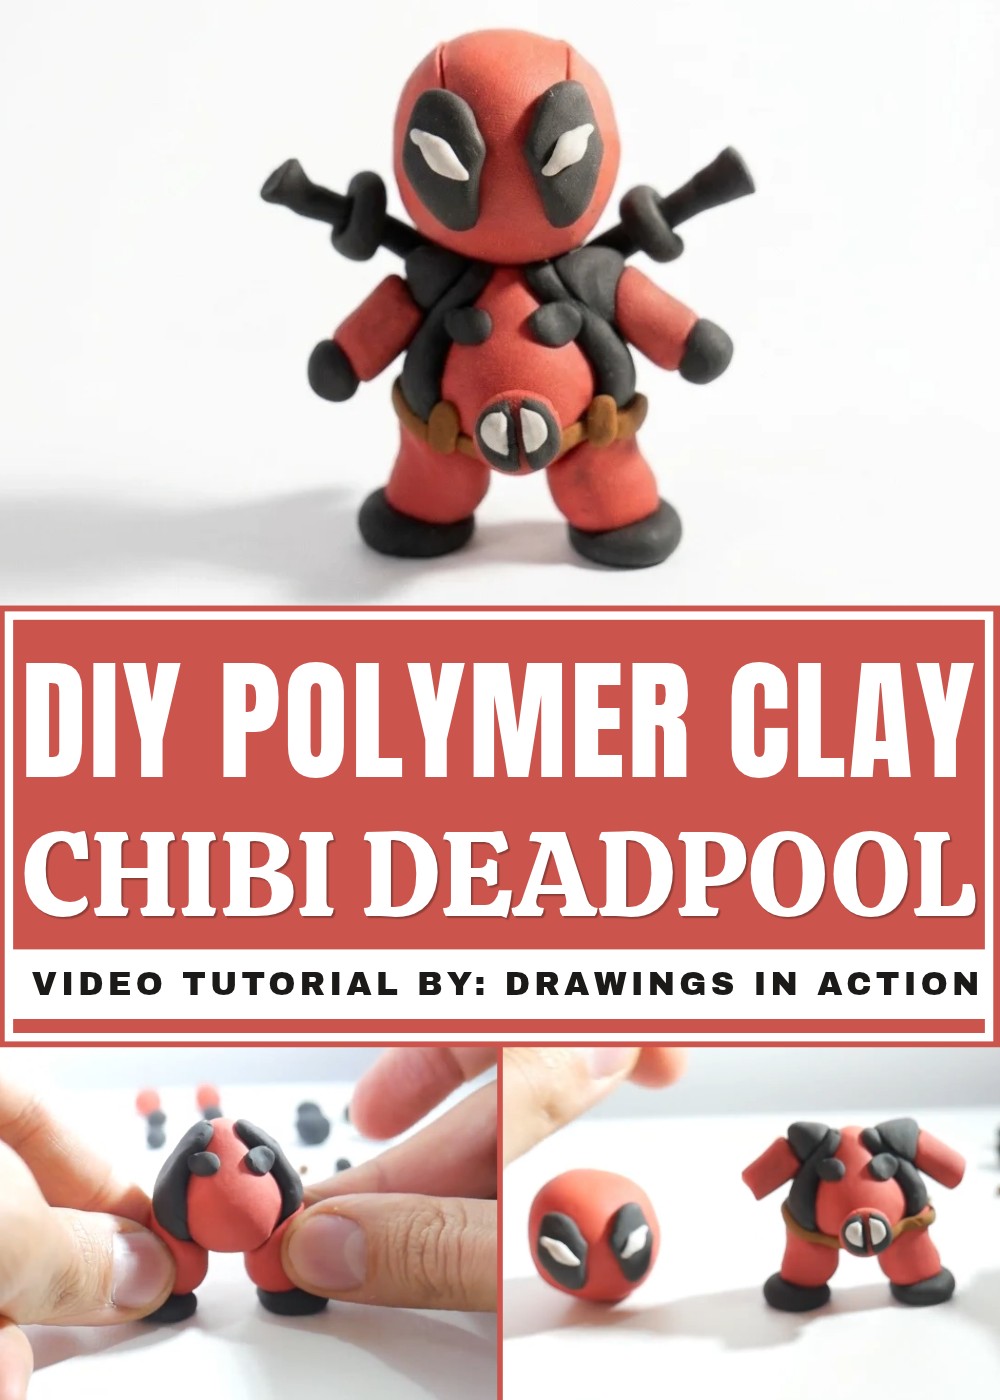
You can use this little superhero as a decoration for your bedroom, study table, or bookshelf. It is also a fun birthday present for a friend who likes Marvel characters. Fans can display it alongside other small superhero toys.
The finished figure has a lovely mix of humor and action. Its big head, tiny body, and famous red costume give it a special personality that superhero fans will appreciate.
DIY Beginner-Friendly Chibi Deadpool Clay Project Tutorial
This chibi Deadpool clay project because it is simple and fun to do, even for beginners. The steps are easy to follow, and working with bright colors like red, black, and white makes it exciting. I enjoy shaping the small details, like the mask and swords, which bring the character to life. Using just a few materials shows how creative you can be without needing many tools. This project is perfect for relaxing and expressing creativity while making a cute, recognizable figure. Seeing the finished Deadpool, full of personality, gives me a real sense of accomplishment and joy.
Materials Needed
- Plasticine clay in colors: red, brown, black, white
- Toothpick
- Tools: table or flat surface to work on
Step-by-Step Instructions
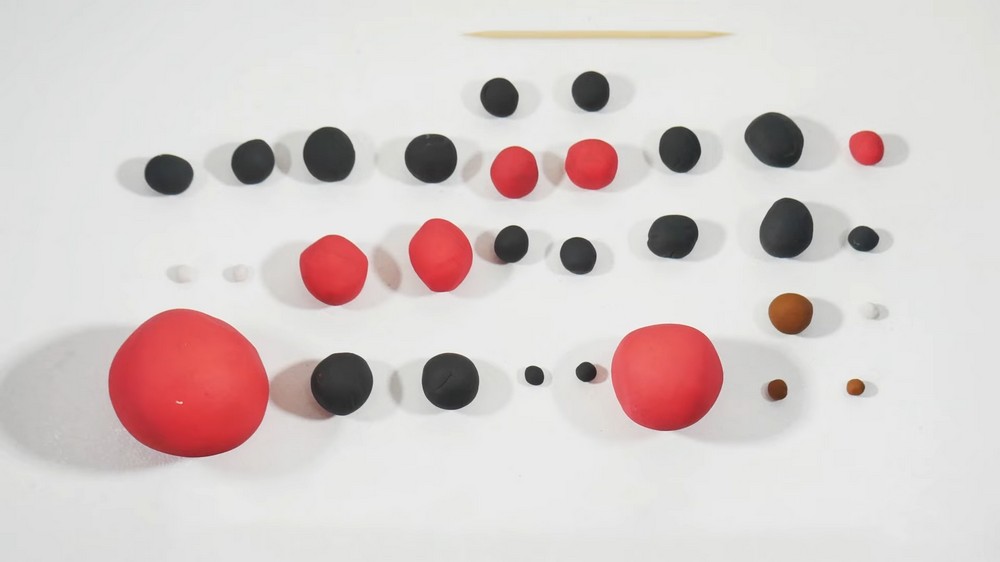
1. Prepare Clay Balls
- Roll balls of red, brown, black, and white plasticine.
- Make different sizes as needed (see next steps).
2. Make Deadpool’s Head
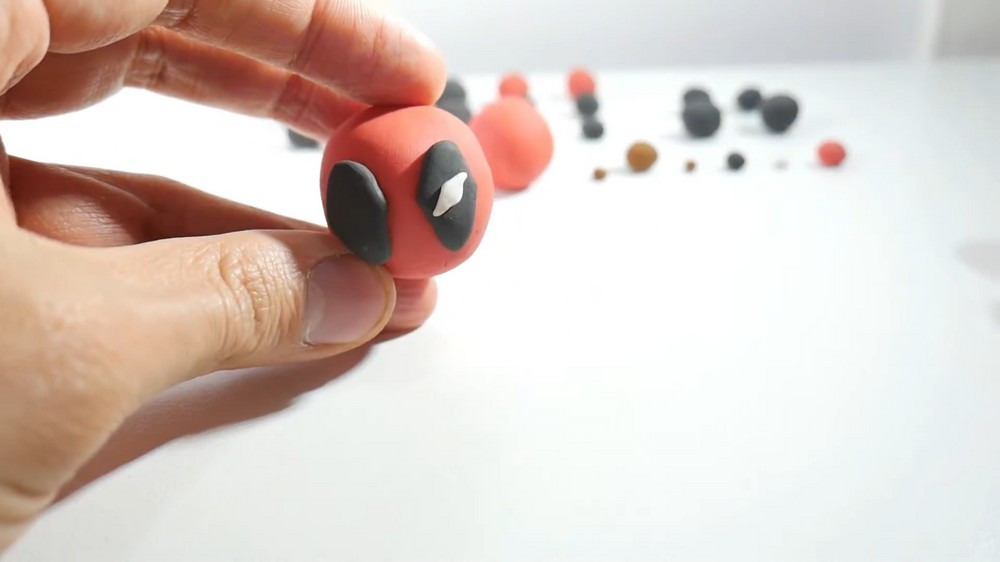
- Take a red ball of plasticine for the head base.
- Take two small black balls, shape each into a diamond, then flatten one side of each diamond.
- Attach the two black diamond shapes to the front of the red ball to form mask details. Press lightly to stick.
- Roll two small white balls, flatten each, and pinch their corners to shape eyes.
- Place the white eyes on top of the black diamonds on the mask.
3. Shape the Back of the Head
- Take a bigger red ball of plasticine, shape it to form the back of Deadpool’s mask.
- Pinch a small point on the red clay for mask detail.
4. Make the Body
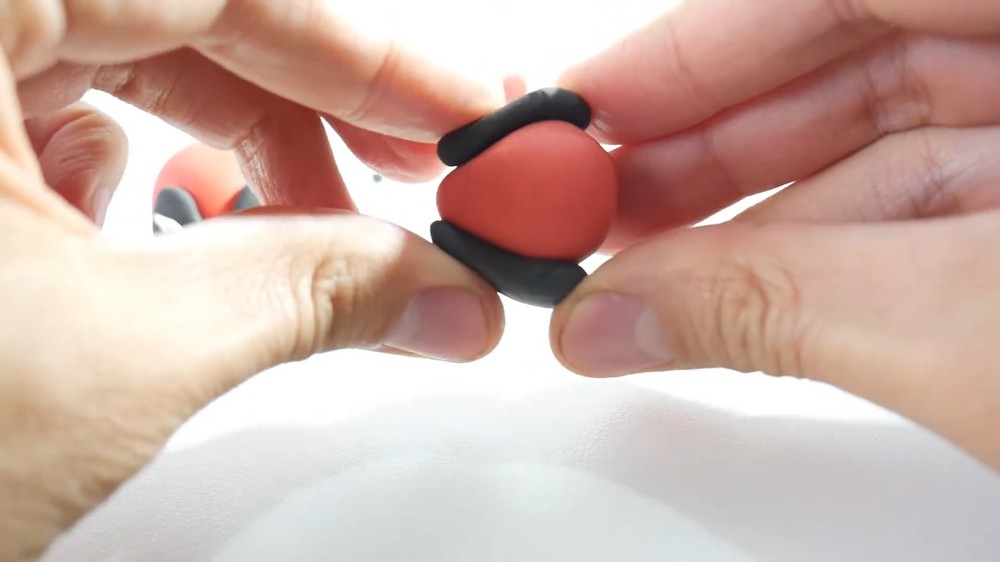
- Use the second largest red plasticine ball and shape it like an egg for the body.
- Roll two small black balls, flatten each into an egg shape.
- Attach these black shapes on each side of the body for outfit details.
- Add two small black rectangles to the front of the body.
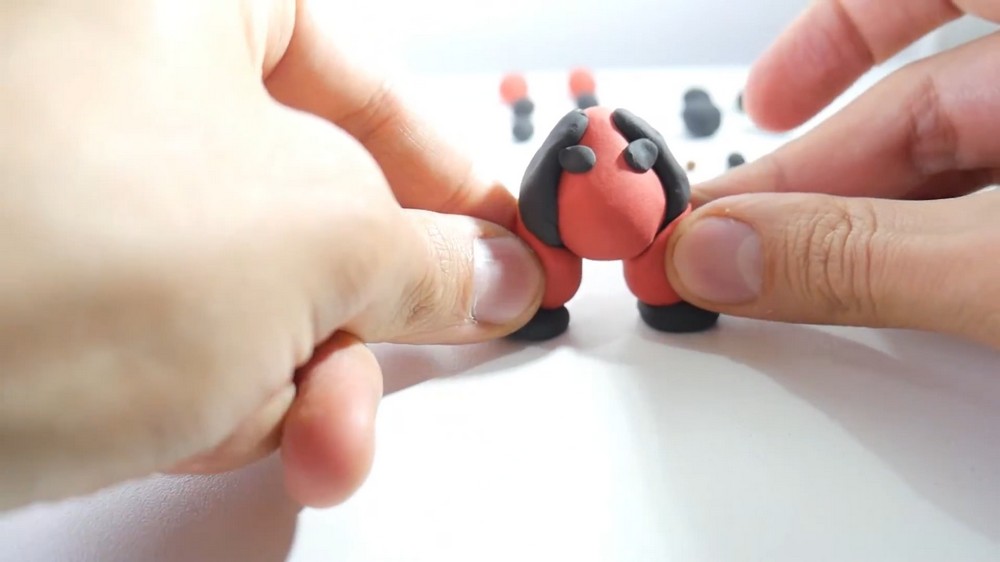
5. Make the Legs and Boots
- Take a red ball, shape into a cylinder for one leg.
- Pinch one side of the cylinder to form the shape, place under the body.
- Repeat for the second leg.
- Take black balls, flatten with fingers for boots.
- Attach the boots under each leg.
6. Make the Belt
- Roll a small brown ball into a long strip.
- Flatten the strip on the table, then wrap it around the body.
- For the belt buckle:
- Flatten a small red ball into a circle.
- Cut a smaller black ball in half, place halves on the red circle.
- Repeat with a smaller white ball on top.
- Attach the buckle to the belt.
- Add small brown rectangles on the belt for compartments.
7. Make the Arms and Hands
- Shape black plasticine into cones for shoulder pads.
- Flatten one side and attach two shoulder pads on each side of the body.
- Take red balls, roll into cylinders for arms.
- Attach each red arm to a shoulder pad.
- Attach small black balls to the arms’ ends for hands.
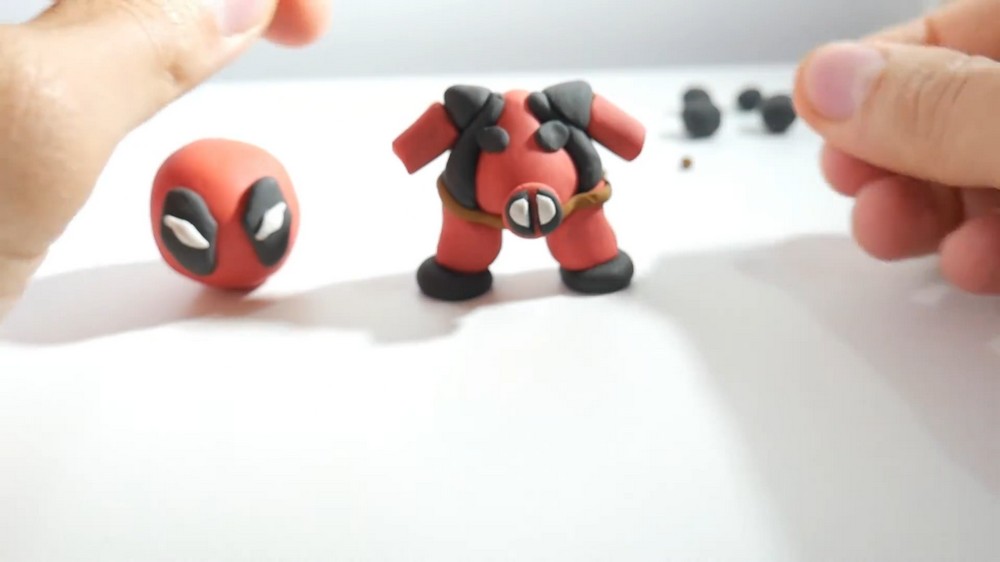
8. Join Head to Body
- Use a toothpick to connect and support the head on top of the body.
9. Make Deadpool’s Swords
- Roll black balls into cylinders for swords.
- Pinch the top of each to make sword handles.
- Wrap a thin strip of black plasticine around the sword to form the cross-guard (scabbard).
- Make two swords and attach them crossed on Deadpool’s back.
10. Add Mask Folds
- Use the remaining half of the toothpick to draw two small lines extending from the black parts on the mask to show folds.
Finishing Details
- Make sure all parts are pressed together firmly.
- Smooth and adjust any areas to create a neat look.
- Small details like folds and compartments give your Deadpool character personality.
Final Result
This chibi Deadpool clay project is a great way to start with clay modeling. It teaches you how to shape, join pieces, and add details step by step. The simple materials and clear instructions make it easy and fun. Taking your time and enjoying the process is key. In the end, you create a cute, colorful figure that you can be proud of. Keep practicing and have fun with your clay art!
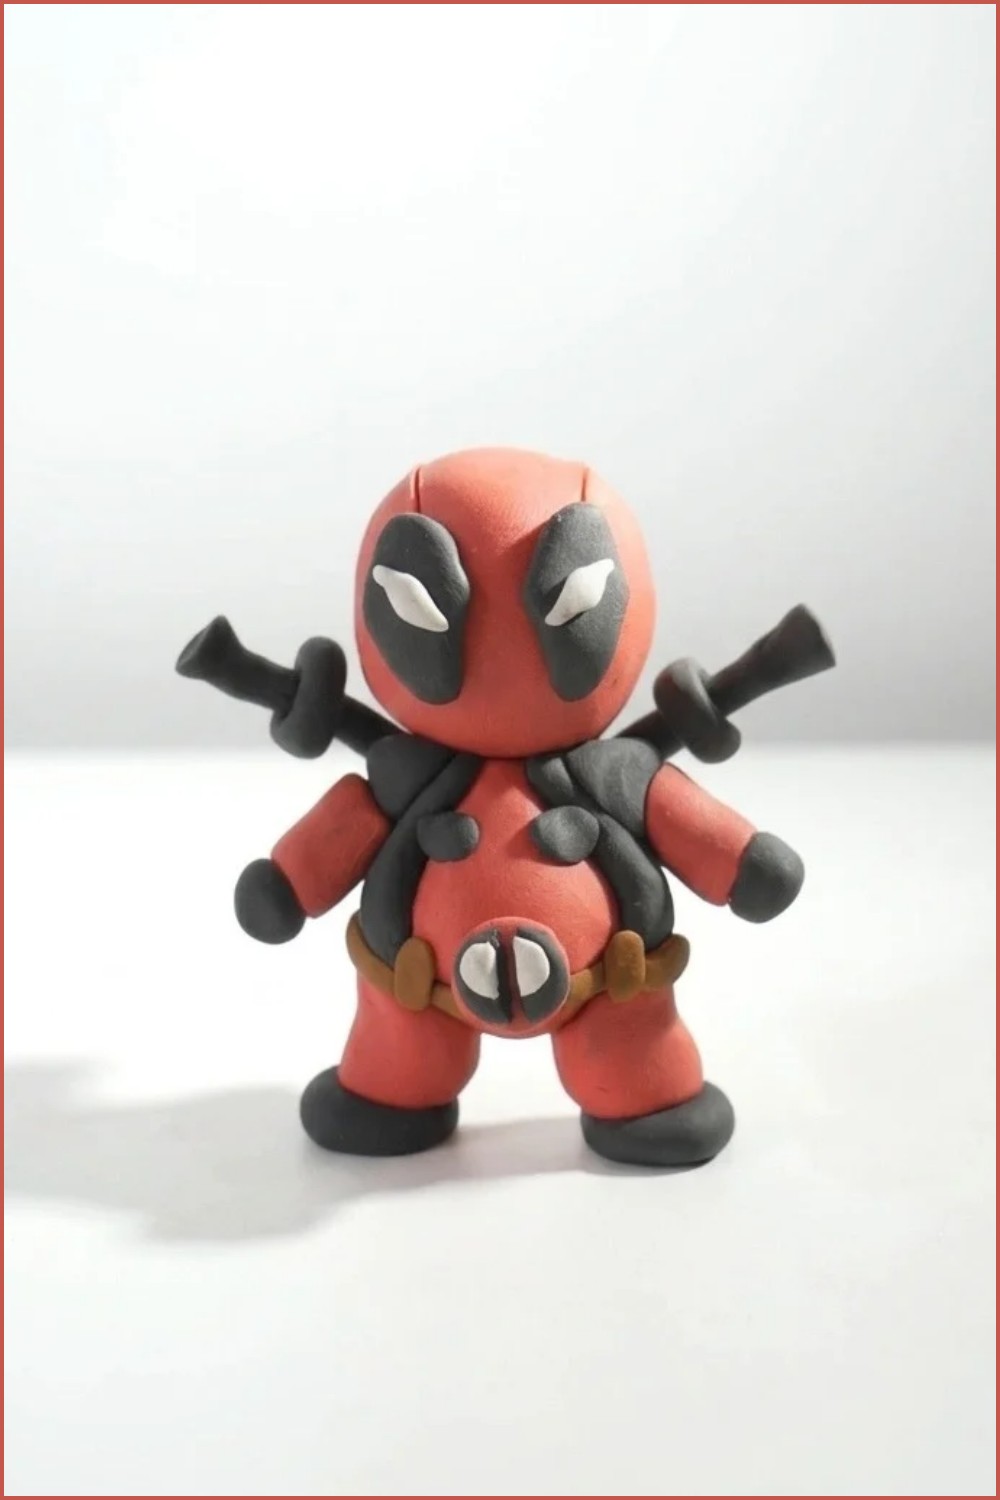
Enjoy your fun and colorful Deadpool clay character!