Brighten your holiday décor with a festive Hello Kitty wreath showcasing cheerful details and vibrant colors that capture seasonal charm perfectly.
A festive charm filled with warmth and holiday cheer, this delicate wreath captures the joy of the season in every detail. Featuring the iconic Hello Kitty wearing a playful Santa hat and her classic pink bow, the design exudes a sense of whimsy and nostalgia that appeals to fans of all ages. The wreath itself is lush with tiny overlapping leaves, accented by bright red berries, a candy cane, and a cheerful yellow star that add pops of vibrant color and festive flair. Perfect for decorating Christmas trees, stockings, or backpacks, this ornament brings a personalized, handmade touch to holiday décor.
Fun and Simple Hello Kitty Christmas Wreath Pattern to Make at Home
Know The Designer!
Crafted with joy and creativity, this delightful design comes from Flying Mio, a talented creator known for charming DIY tutorials and adorable crafts. Check out more inspiring projects on their channel here: Flying Mio.
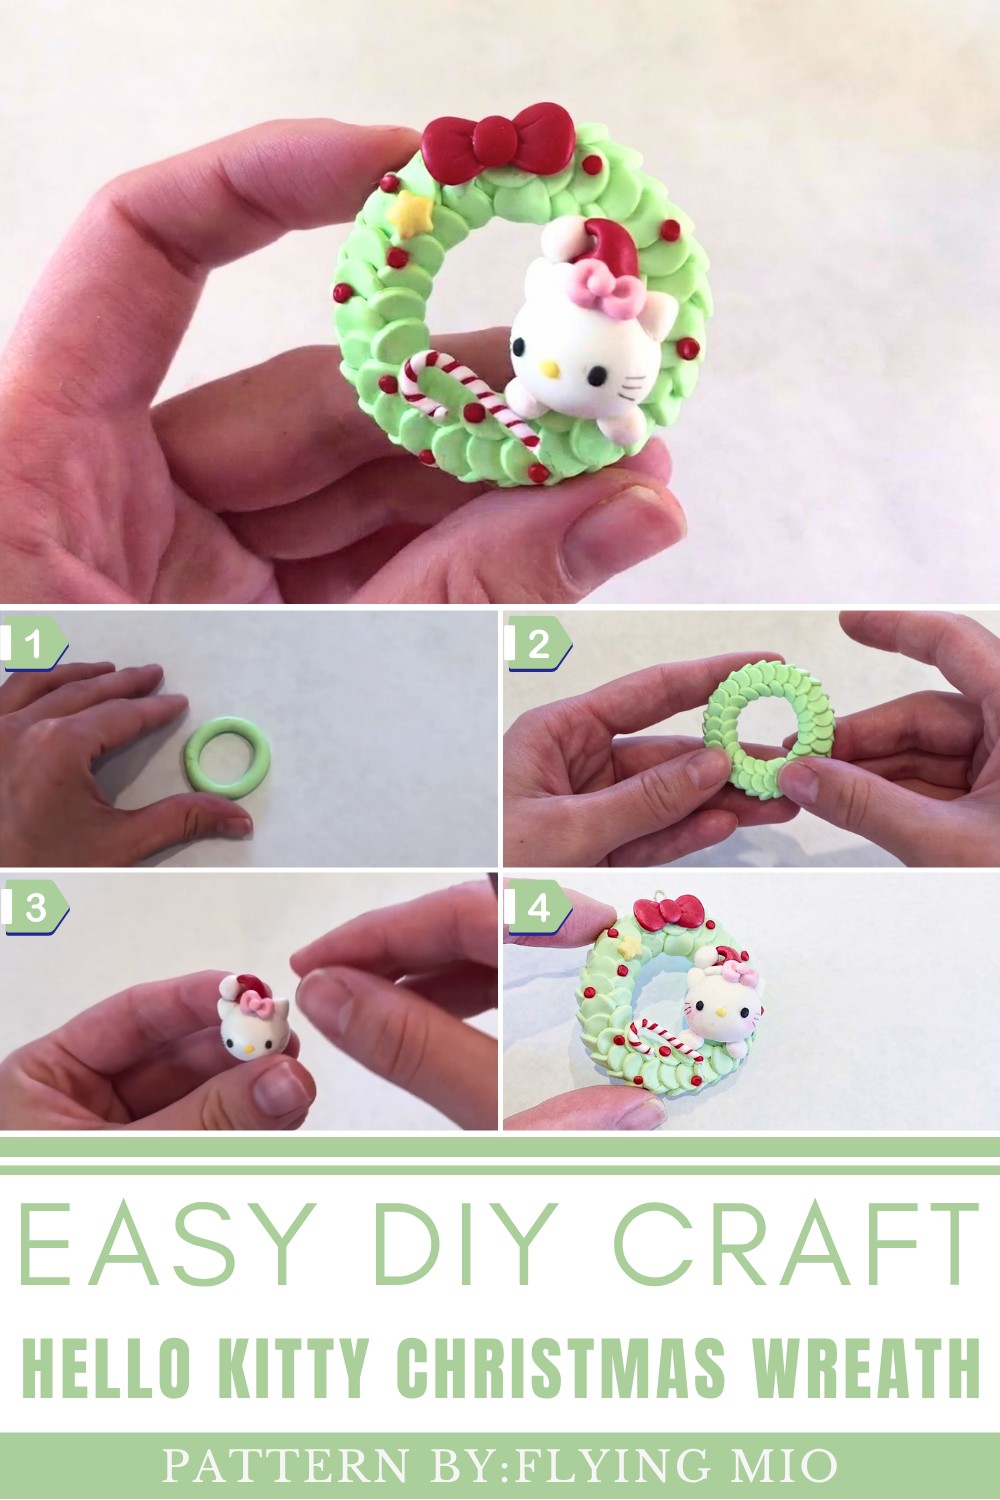
The DIY DIY Hello Kitty Christmas Wreath Pattern stands out with its charming character and approachable style, blending classic holiday motifs with the beloved Hello Kitty figure. Its compact size and layered textures make it visually captivating, inviting closer inspection while maintaining a polished and professional appearance. Whether displayed as a standalone decoration or incorporated into a larger festive arrangement, it promises to enhance any space with joyful spirit and creativity.
Overall, this pattern offers a delightful mix of tradition and cuteness, making it an ideal holiday gift or keepsake. The blend of seasonal elements and the familiar character design adds a unique, heartfelt touch that makes this wreath more than just an ornament – it’s a joyful expression of holiday magic that anyone will appreciate. The DIY DIY Hello Kitty Christmas Wreath Pattern truly celebrates the festive season with charm and cheerful style.
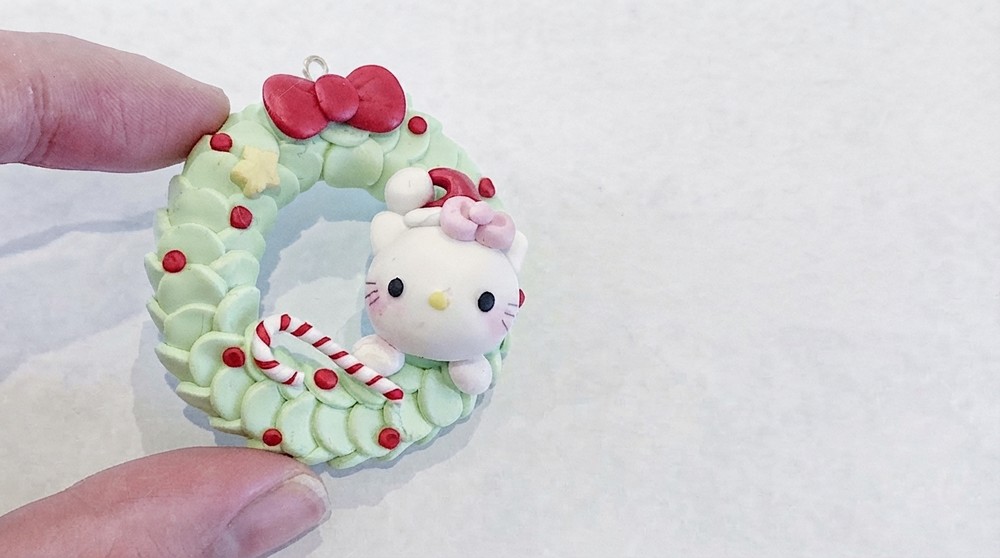
DIY Hello Kitty Christmas Wreath Tutorial: A Festive Polymer Clay Craft
This festive Hello Kitty Christmas wreath charm is a delightful way to celebrate the holiday season with a personalized touch. Made from polymer clay, it features a detailed wreath base filled with layered leaves, festive decorations, and an iconic Hello Kitty centerpiece complete with a Santa hat and her signature bow. This project is perfect for beginners interested in polymer clay crafting and holiday-themed decorations.
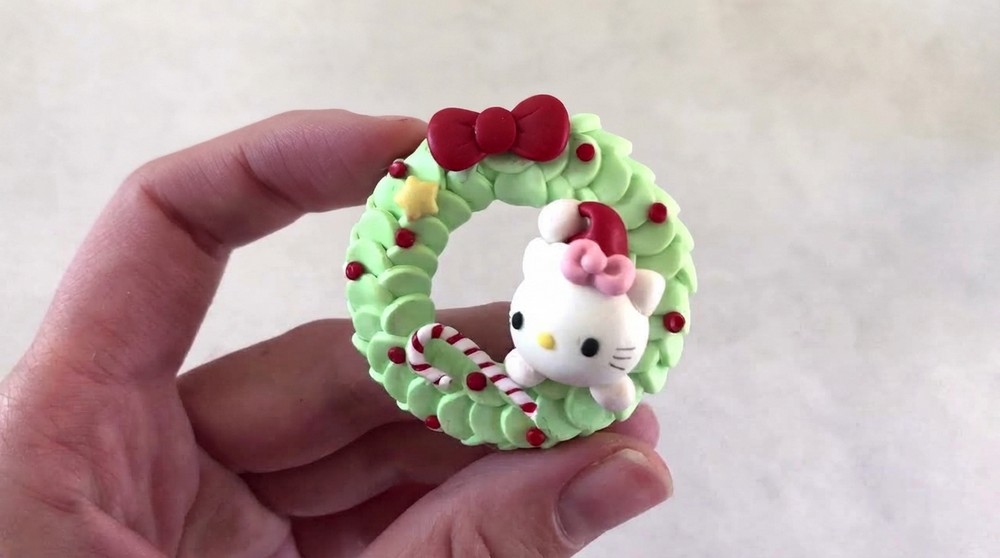
Design Overview
- Christmas Wreath Base: Constructed from connected rings of light green clay, flattened and layered with small circular leaves for a 3D effect
- Hello Kitty Centerpiece: Oval-shaped white clay head with triangular ears, black eyes, whiskers, a pink bow, and a festive Santa hat
- Additional Decorations: Including candy canes, red berries, a yellow star, and a layered bow to enhance the wreath’s holiday charm
- Versatile Use: Can be hung on a Christmas tree, used as an ornament on stockings or backpacks, or kept as a collectible piece
Importance of Gathering Quality Materials
The foundation of any successful polymer clay project lies in quality materials that behave predictably and deliver clean results. Using quality polymer clay ensures smooth sculpting, proper curing, and vibrant colors that last. Specialized tools like clay circle punches create uniform shapes quickly, while brushes aid in soft blush applications that add depth and warmth. Having the right materials also reduces frustration and increases the chance of crafting success.
Materials & Tools Needed
- Polymer clay in light green, white, black, pink, red, yellow, and brown
- Clay roller or smooth surface for flattening
- Circle puncher or alternative for cutting uniform small circles (pen caps can be used)
- Small sculpting tools or needles for imprinting and detailing
- Exacto knife or blade for precise cuts
- Makeup brush or soft brush for blush application
- Oven preheated to 250°F (120°C) for baking clay
- Toothpicks or thin clay “snakes” for fine details like whiskers and bow strings
Important Tips Before Starting
- Condition polymer clay by kneading until soft and pliable to avoid cracks during shaping or baking.
- Work on a clean, dust-free surface to keep your clay and finished pieces pristine.
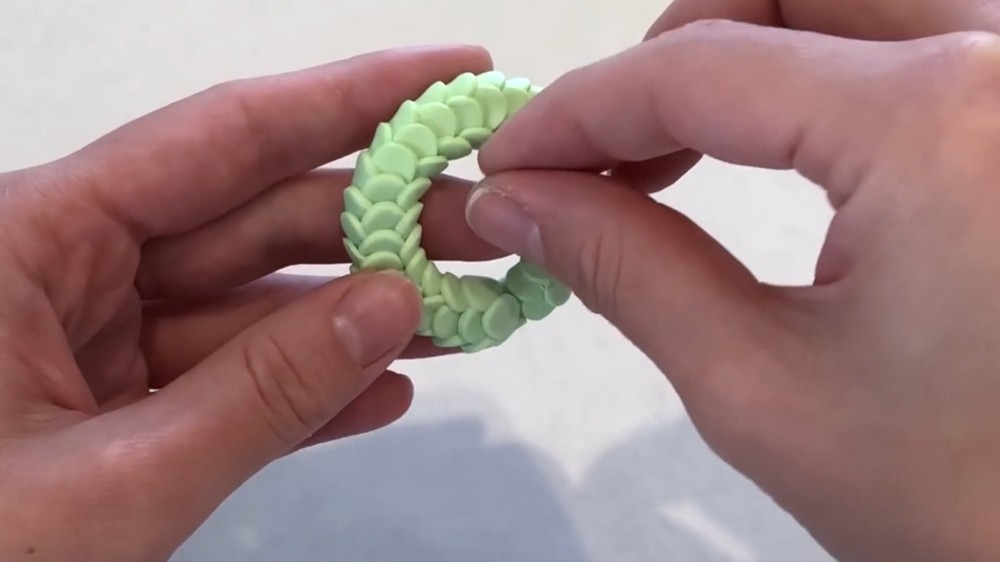
- Cut circles systematically and layer carefully to maintain a natural, overlapping leaf effect for the wreath.
- Use gentle pressure when applying small details like whiskers to avoid displacing other clay parts.
- Apply blush or pastel powders before baking to add warmth and realistic coloring.
- Bake clay at the recommended temperature and time (generally 250°F for 20 minutes) for solid results.
- Be patient when positioning elements on the wreath to achieve harmonious balance and appeal.
Pattern & Step-by-Step Detailed Instructions
1. Creating the Wreath Base
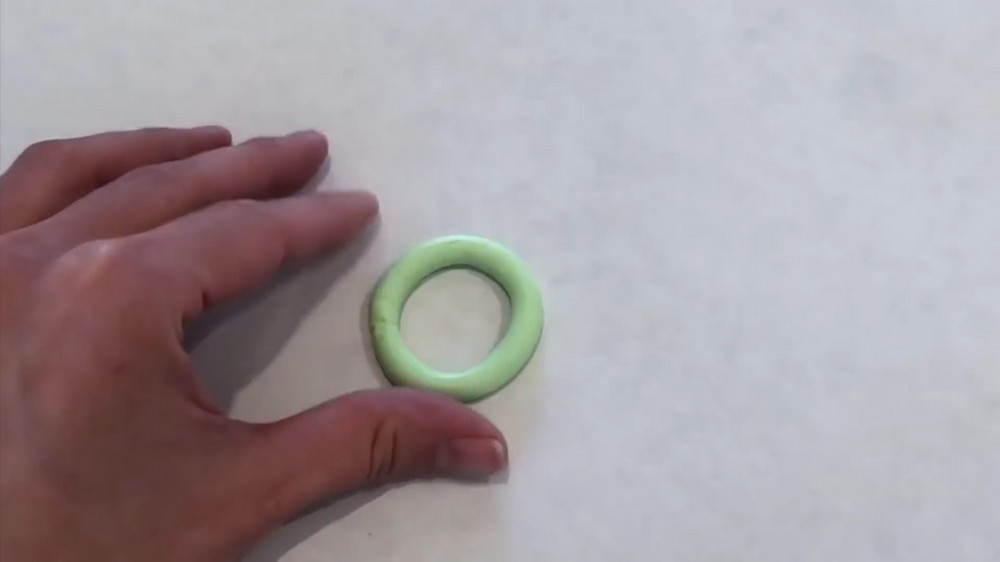
a. Forming the Ring
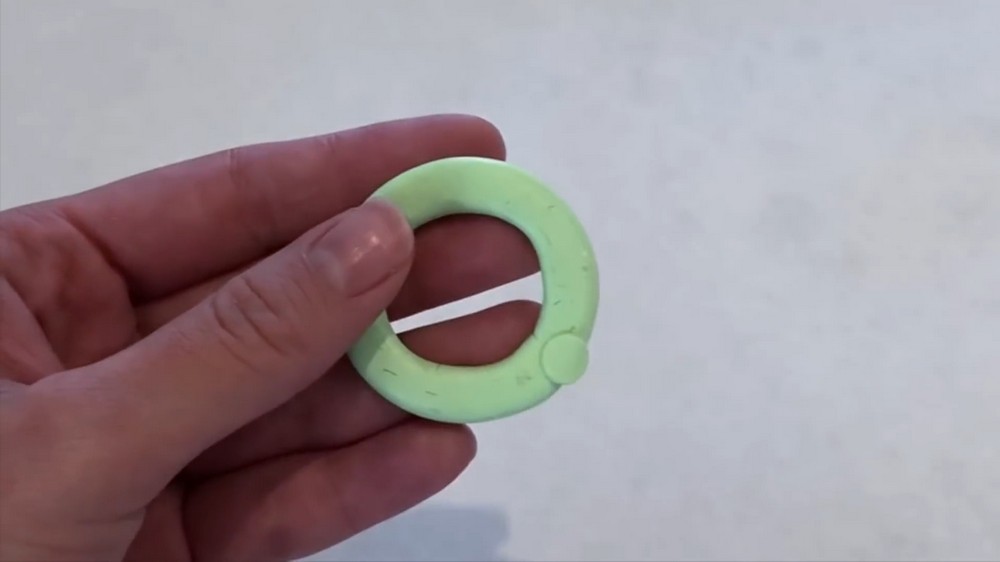
- Roll out light green polymer clay into a long, thin snake shape.
- Connect the two ends carefully to form a ring that will function as the wreath’s base.
- Flatten the ring gently with your fingers or a smooth tool so the back is slightly flat, ensuring it can lay well for hanging or display.
b. Making Leaf Pieces
- Roll out extra light green clay and flatten it into a pancake approximately 2 millimeters thick.
- Use a circular puncher or any small circular object (e.g., pen cap) to punch out many small circles from the flattened clay.
- Make about 50 or more circles depending on the wreath size (approximately 2 inches in diameter for this project).
c. Layering Leaves on the Ring
- Start placing the circles systematically around the wreath ring so that each piece slightly overlaps the previous one, creating a three-dimensional effect.
- Cover the entire wreath base, ensuring the ring itself is not visible.
- Leave room for attaching Hello Kitty and other decorations later where necessary.
2. Sculpting Hello Kitty’s Head and Face
a. Sculpting the Head
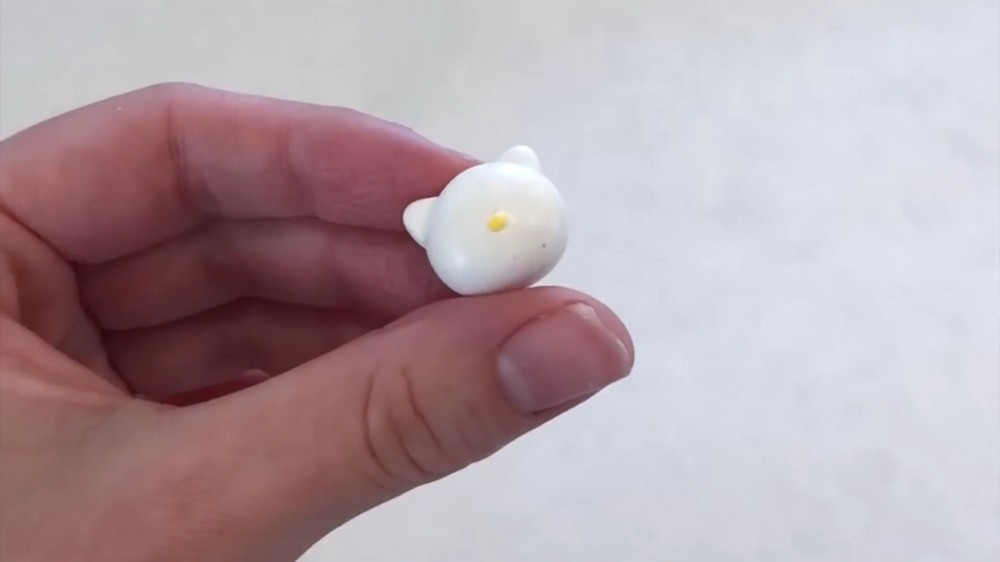
- Take a piece of white polymer clay and roll it into an oval shape.
- Prepare two small triangular pieces as ears and attach them symmetrically on top of the oval.
- Smooth the base of the ears into the head for clean attachment.
b. Adding Facial Features
- Use a small round black clay piece or dot two small black clay circles as eyes, spacing them evenly.
- Roll a very thin black clay snake for whiskers and gently press three strings on each cheek. The whiskers should be placed symmetrically on both sides.
- For the nose, place a tiny yellow or orange circle slightly below the eyes.
c. Creating Hello Kitty’s Bow
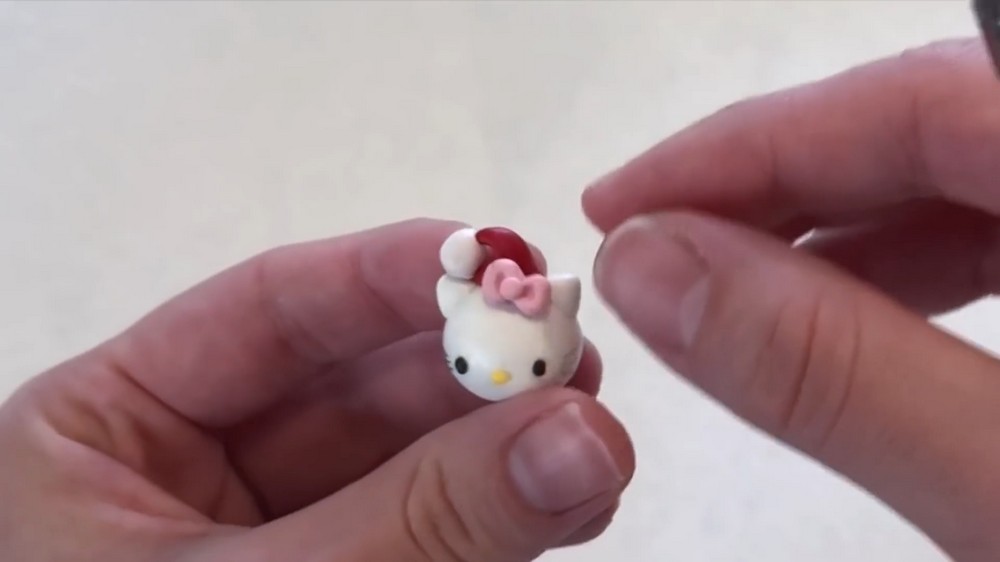
- Use two small pink clay pieces pressed together, then with the back of a paintbrush, form dents on both sides to create a 3D bow shape.
- Roll a small pink ball for the bow center and attach it in the middle of the bow.
- Adjust the bow size to fit proportionally on Hello Kitty’s head.
d. Sculpting a Santa Hat
- Roll a small piece of red clay into a cone shape and bend the pointed end downward to form the Santa hat’s tip.
- Attach a small white ball on top of the hat as the pompom.
- Trim the hat if it is too tall and place it on Hello Kitty’s head, positioning it slightly tilted for a cute festive look.
3. Assembling Hello Kitty on the Wreath
a. Adding Hands
- Roll two small white balls and position them below the head to act as Hello Kitty’s paws.
b. Positioning Hello Kitty
- Decide on where you want Hello Kitty to sit on the wreath (the tutorial places her on the right corner).
- Firmly press Hello Kitty onto the wreath base, ensuring good contact with the layered leaves for stability.
4. Adding Additional Decorations
a. Creating Red Berries
- Roll small red clay balls and strategically place them around the wreath to resemble holly berries.
b. Making a Yellow Star
- Pinch a small yellow clay circle at five equidistant points to form a simple star shape.
- Attach the star on one part of the wreath to add visual interest.
c. Making a Candy Cane
- Roll thin white and red clay snakes.
- Twist the two snakes together gently to create a striped candy cane pattern.
- Curve one edge of the twisted snake to complete the candy cane shape.
- Attach the candy cane to the wreath as a festive embellishment.
d. Adding a Bow to the Wreath
- Using the pink bow technique similar to Hello Kitty’s bow, form a larger bow and place it near the top of the wreath.
5. Finishing Touches and Baking
a. Optional Blush Application
- Lightly brush pink blush or pastel powder on Hello Kitty’s cheeks before baking to add color and warmth.
b. Baking Instructions
- Preheat your oven to 250°F (120°C).
- Place the finished wreath charm on a baking tray.
- Bake for approximately 20 minutes to harden the polymer clay.
- Allow the piece to cool completely before handling or displaying.
Conclusion
This Hello Kitty Christmas wreath combines simple clay shaping with layered details to create a festive and personalized ornament. The process encourages fine motor skills and attention to detail while offering plenty of room for creativity with colors and decorations. The final baked wreath makes a durable keepsake that captures the spirit of the holidays beautifully.