Bring Super Mario to life with this DIY Polymer Clay Piranha Plant idea to follow easy steps to craft a vibrant piece for fans and collectors alike.
Fans of gaming and hands-on activities will enjoy bringing a beloved character from Super Mario to life through crafting. This project lets you create a miniature version of the piranha plant, a well-known figure from the game, using polymer clay. It’s a perfect combination of creativity and nostalgia, a chance to design something unique while paying tribute to a classic game. Whether you’re adding it to your collection or giving it as a gift to a fellow fan, this little creation will truly stand out.
DIY Polymer Clay Piranha Plant from Super Mario Sculpture Craft
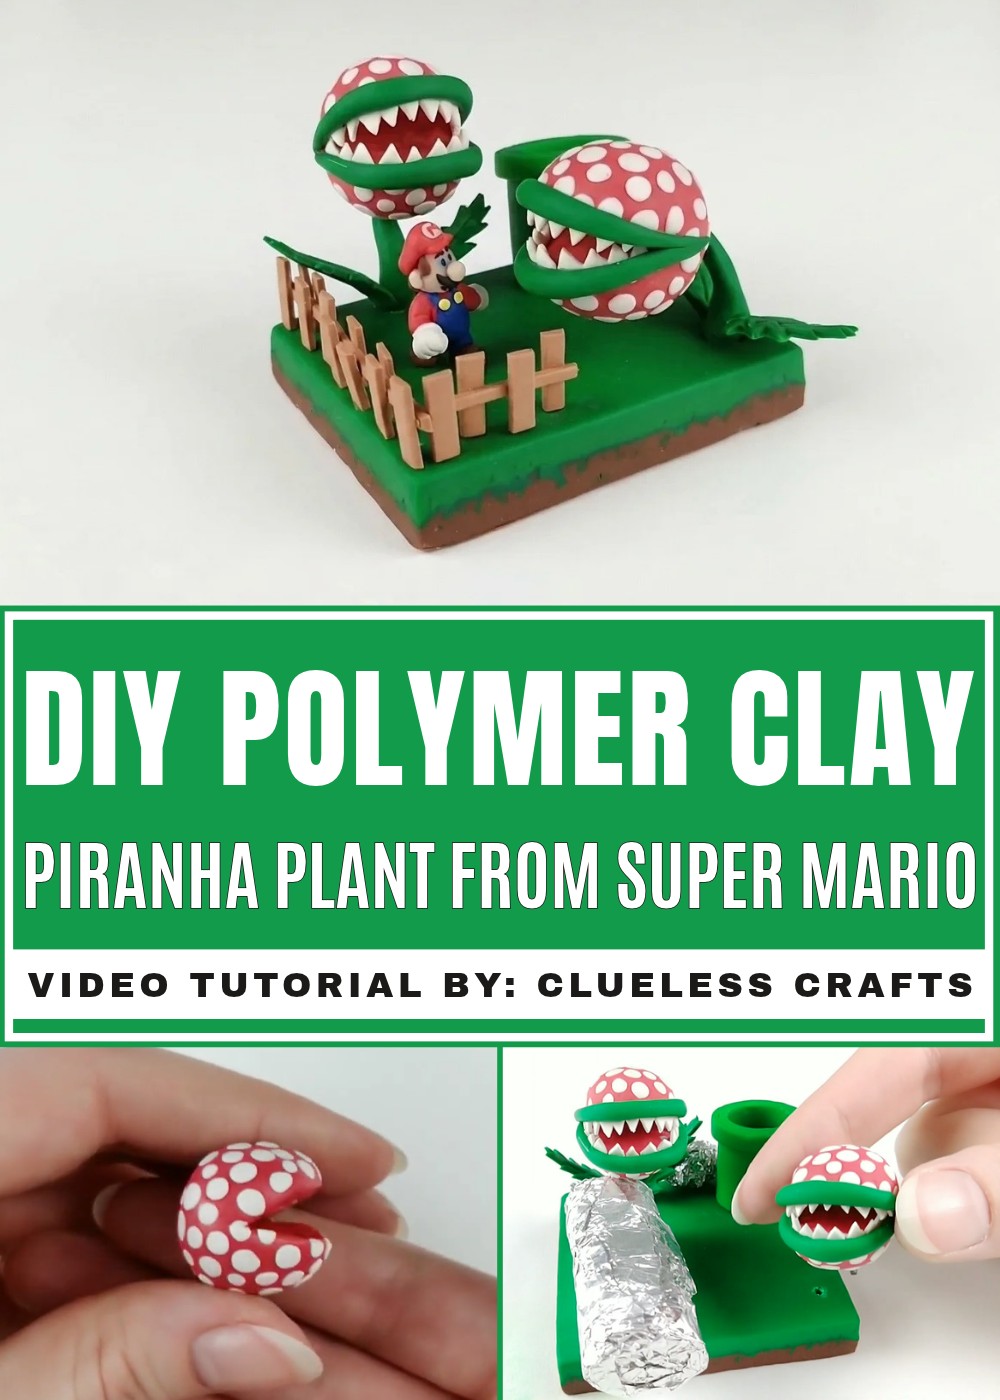
The piranha plant’s signature look—its bold red-and-white head, sharp teeth, and tall green stem—is instantly recognizable and fun to recreate. Along with the classic pipe-shaped base, the completed piece is a striking and playful decoration. From a desk ornament to a shelf centerpiece, this game-inspired creation is a fantastic way to add character and color to your space. It’s a small but unique nod to the gaming world that many will appreciate.
Using polymer clay gives plenty of freedom to shape and customize each part to your liking. From the expressive design of its head to the details on the pipe, you can make it in your own style. The result is a handmade decoration that shows your creative skills and your love for the Mario universe. It’s a joyful and rewarding project that lets you turn a digital character into a real-life treasure.
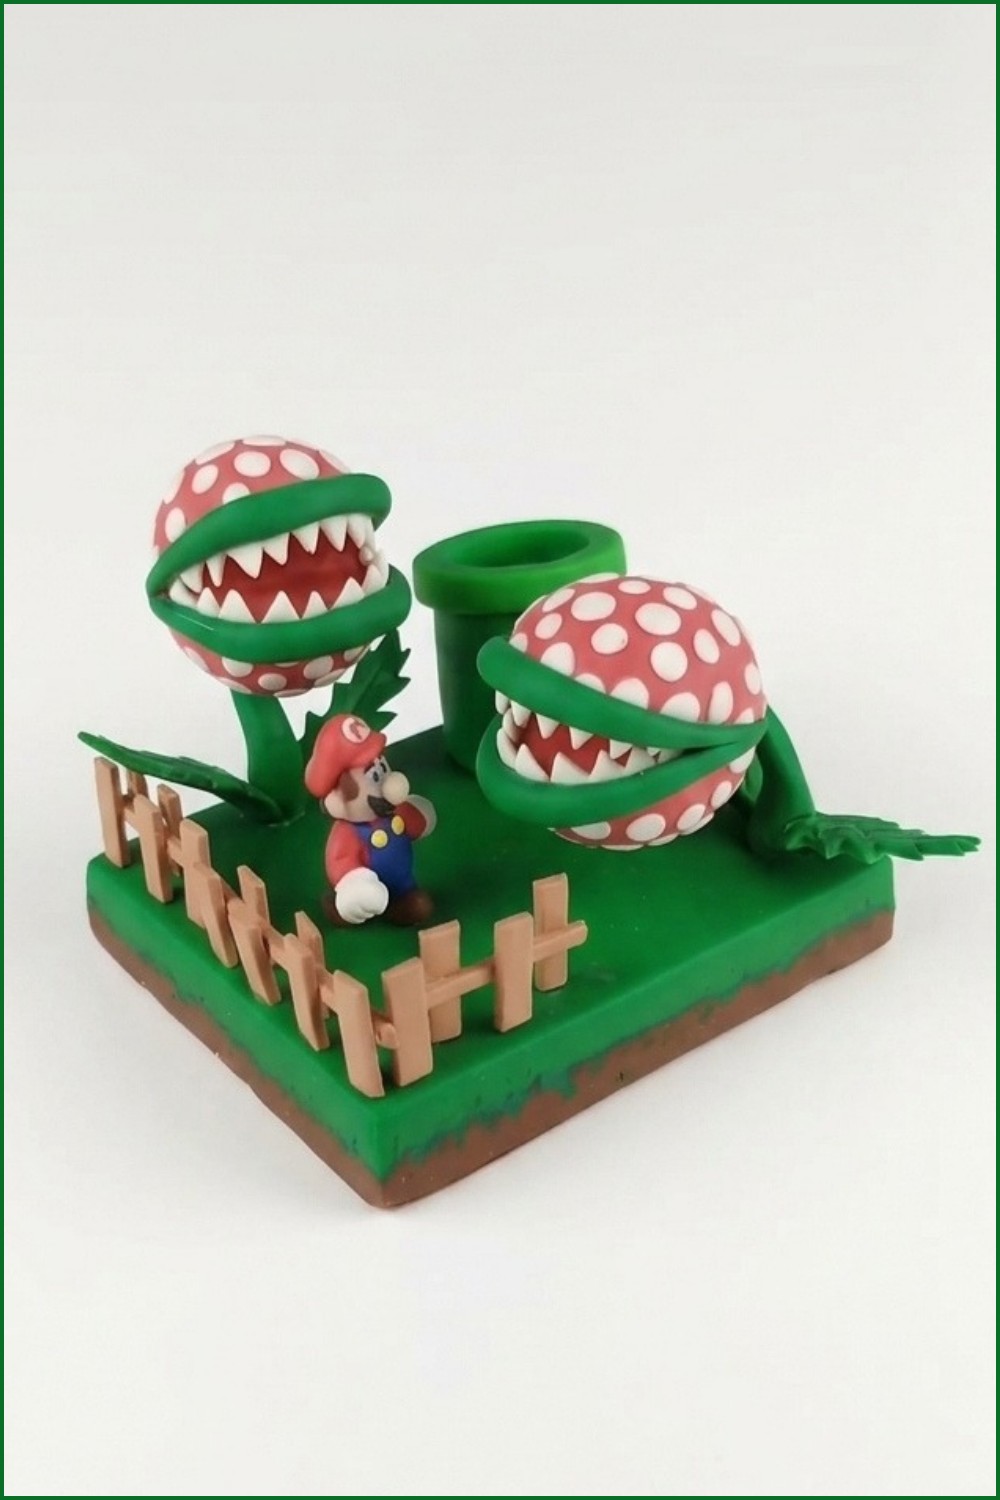
Super Mario 64 — Tiny-Huge Island Clay Scene
What Are We Making?
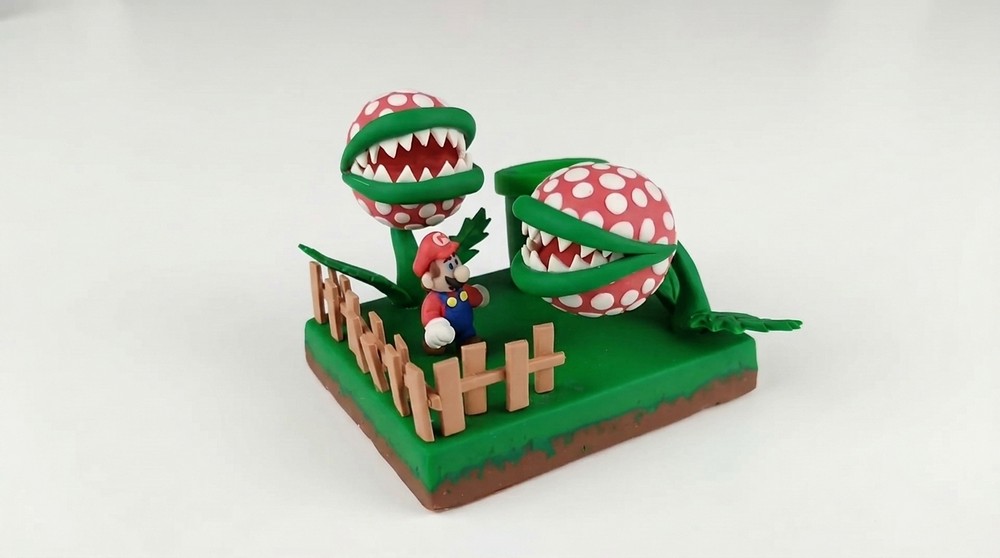
A small diorama of Tiny-Huge Island from Super Mario 64: a textured dirt/grass platform with Mario, a green warp/tube, two piranha plants with leaves and teeth, a wooden fence, and small props. The build follows the steps and details shown in the source video: shaping, texturing, pre-baking pieces, assembling with wire and glue, and final baking.
Materials at a Glance
- Brown polymer clay (for dirt/base)
- Green polymer clay (grass, tube, leaves, vines, lips of piranha)
- Light green polymer clay (outer tube wrap)
- Black polymer clay (inside tube)
- Red polymer clay (piranha heads, Mario hat, spots)
- White polymer clay (teeth, eyes, hat emblem)
- Dark green polymer clay (piranha lips)
- Blue polymer clay (Mario overalls, eye color)
- Yellow polymer clay (Mario buttons)
- Flesh/tan polymer clay (Mario face/hands)
- Small scraps of clay in other colors for details (eyebrows, pupils, etc.)
- Liquid Sculpey (or other liquid polymer clay) for bonding unbaked to baked pieces
- Super glue
- Thin gauge wire (for internal supports)
- Tin foil (for supports/cores)
- Parchment paper (to separate clay from foil)
- Popsicle sticks (for thickness guides)
- Needle tool/pin/awl
- Blade/razor (for cutting)
- Sanding/finishing supplies (acetone for smoothing, file/sandpaper optional)
Tools You'll Need
- Oven (for baking polymer clay) — follow clay manufacturer’s temperature instructions
- Freezer (brief chills used for firmer cutting)
- Rolling pin or smooth roller
- Ball/rounded shaping tools
- Small paintbrush (for liquid Sculpey)
- Pliers/cutters (for wire)
- Small sculpting tools (to create indentations, texture)
- Parchment paper or nonstick surface for baking
- Tin foil to form temporary molds and props
- Tweezers (optional)
- Super glue applicator or small brush
Things to Know Before Starting
- Always follow your polymer clay manufacturer's baking temperature and time recommendations. The video uses short prebakes (5–10 minutes) and final bakes around 20 minutes; those are relative to clay brand and part size.
- Chill clay before cutting large or delicate shapes — cold clay cuts cleaner and resists smushing.
- Use parchment between clay and foil if you plan to remove the foil core later.
- Use liquid Sculpey or other bonding method when attaching unbaked clay onto already-baked clay.
- Be careful with super glue and wires — work in a ventilated area and use gloves if needed.
- Pre-bake small structural elements (shoes, gloves) when needed to retain shape before assembly.
Let's Get Started
Step 1: Get Ready
- Prepare workspace and tools. Lay out all clays, tools, foil, parchment, popsicle sticks and preheat the oven or check oven instructions.
- Tape popsicle sticks together for use as thickness guides (two sets of three taped together were used in the video).
- Make your tin foil cores for tubes and wire supports (roll tin foil into cylinders, tape so they stay).
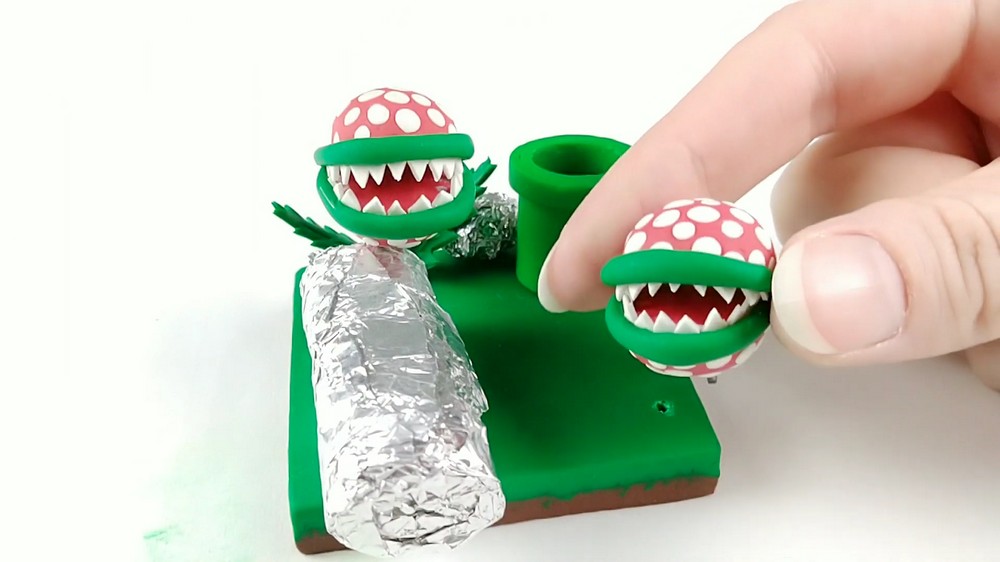
Step 2: Make the Base Platform (Dirt + Grass)
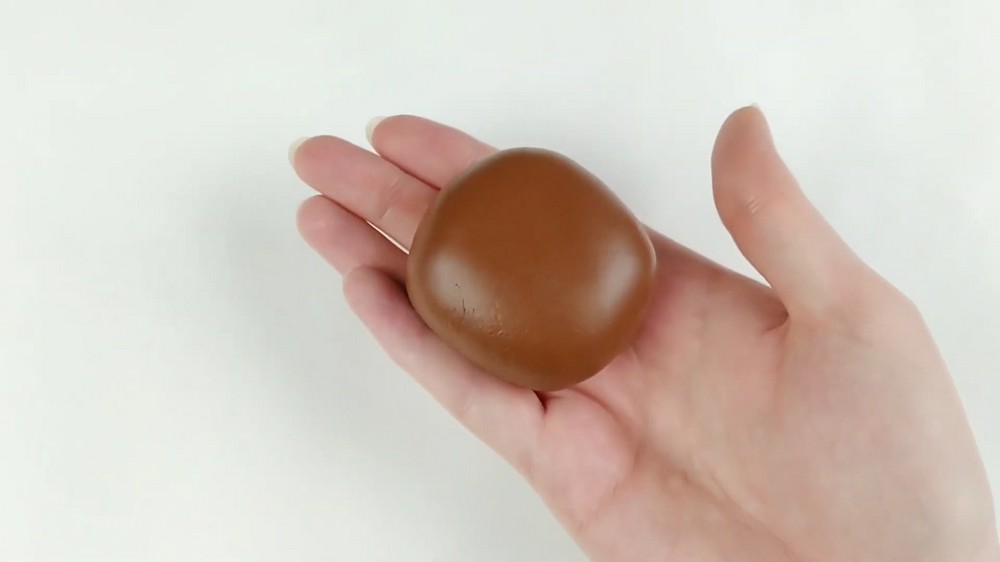
- Roll a big ball of brown clay for the dirt base.
- Create the grass sheet:
- Tape two sets of three popsicles together to act as a thickness guide.
- Roll out grass clay to a thickness equal to two popsicle sticks.
- Combine dirt and grass:
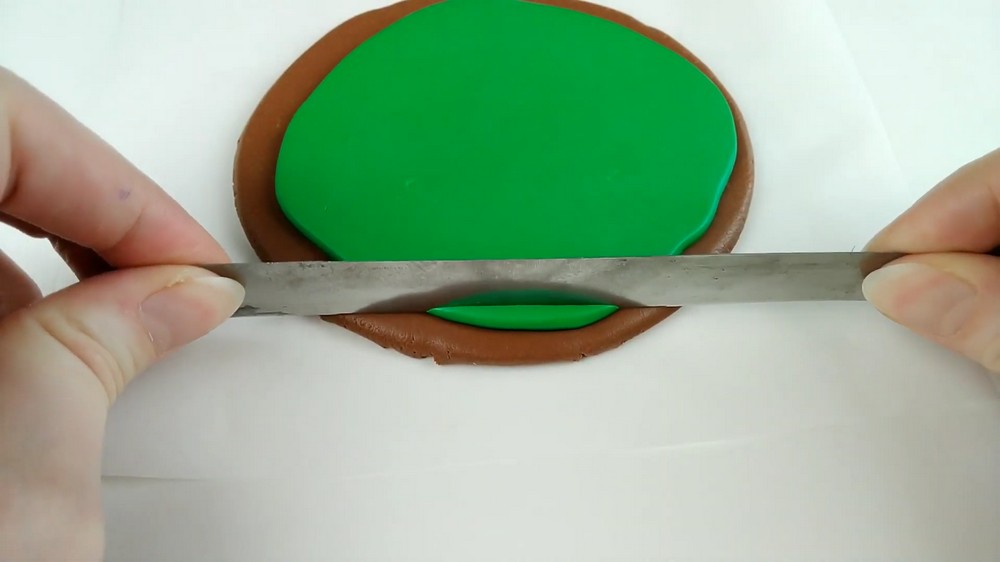
- Wrap or press the grass layer onto the brown clay to form a two-layer slab (grass over dirt).
- Use the popsicle stack as a height guide for any stacked elements you plan to incorporate.
- Chill the slab in the freezer for ~10 minutes. This helps produce clean edges when cutting and prevents rounded/squashed edges.
- Test cut (optional): Do a small test cut to confirm the clay is cold enough and will cut cleanly.
- Cut the final shape of the platform with a blade. The video notes the shape ended up slightly smaller due to an off test-cut location — plan your test cut carefully.
- Texture the sides to blend grass into dirt (use a tool to add texture and smooth edges) to avoid a “blocky” look.
- Poke holes with a needle tool where you plan to insert the piranha plant wires later (this helps guide and anchor them).
Step 3: Make Mario’s Warp Tube
- Cut a rectangle of light green clay.
- Wrap the rectangle around a tin foil cylinder core. Add parchment paper between the clay and tin foil so the tube can be removed later.
- Blend seams carefully so the tube looks continuous.
- Pre-bake the wrapped tube for ~5 minutes. This gives the shape some stability so edges won’t collapse when adding the top rim.
- Add the top edge/trim: use liquid Sculpey where needed and attach a rim of clay; carefully blend.
- Bake again briefly to firm up the tube with its rim.
- Remove the tube from the foil mold carefully once cooled (this will be hollow if you used foil + parchment).
- Place a circle of black clay at the bottom inside the tube to simulate depth/darkness when looking in.
- Set the finished tube onto the platform later after assembly.
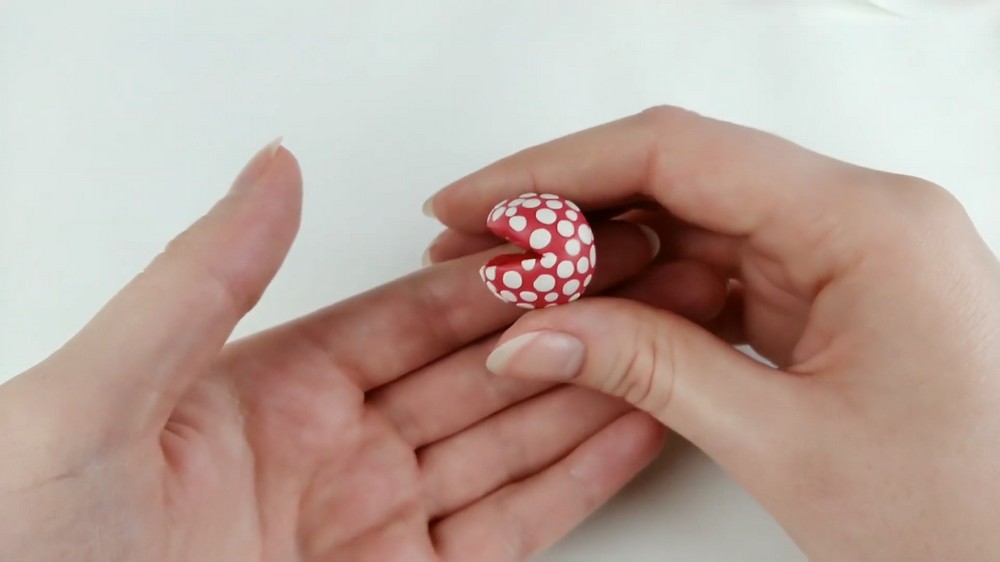
Step 4: Make Piranha Plants (Heads, Teeth, Leaves)
- Form the red piranha head balls — cold clay helps avoid finger dents as you add spots.
- Add spots with small white or light accents (video used many spots — place around but leave space for the mouth).
- Trace the mouth area before adding spots to avoid overcrowding.
- Decide whether to cut the mouth before or after prebake. The video chose to cut the mouth before prebaking (to avoid crumble issues from cutting very baked clay).
- Freeze the heads briefly before cutting the mouth to make the cut cleaner.
- Fine-shape the mouth after cutting; repair any smushed edges by reshaping.
- Poke a hole with the needle where the wire will be inserted later (note: video author later regretted not adding the wire at this exact step).
- Pre-bake the heads after shaping.
- Make teeth:
- Roll out a thin sheet of white clay.
- Cut sharp triangular teeth; the video made four rows across two heads.
- Pre-bake the teeth rows for ~5 minutes.
- Roll dark green clay for the lips and apply a thin layer of liquid Sculpey if you plan to attach baked teeth later.
- Attach teeth rows: attempt individually or as rows. The video tried to add rows after baking but found them too brittle to bend fully and had to attach them carefully; expect breakages and work slowly.
- Make sharp leaves:
- Cut triangular shapes from green clay for prickly leaves.
- Add stems and lighter green vines for extra detail.
- Pre-bake these leaf pieces for ~10 minutes before final assembly.
Step 5: Assemble Piranha Plants into the Platform
- Glue a wire into the base of each plant head with super glue for internal support.
- Apply liquid Sculpey and cover the wire with green clay to form the stem and base.
- Trim any excess clay and add more super glue/liquid Sculpey if needed to secure.
- Stick the plant stems into the holes you poked into the platform earlier.
- Blend the base clay so the plant looks rooted into the ground.
- Attach leaves on either side and use tin foil props if needed to hold leaves while they’re being baked/firmed.
- Place everything for a final bake. The video baked the whole scene (platform with tube and plants) for about 20-ish minutes.
Step 6: Make the Fence
- Shape fence posts and connecting rails from clay and/or repurposed popsicle sticks as needed.
- If posts are too short, make taller posts — the video had to make another set of posts but kept original long connecting posts.
- Line up posts carefully and use a blade to align them precisely.
- Add a small dot of super glue on every other post before sticking posts to the other side to maintain even spacing.
- Attach fence to the platform as part of final assembly after oven-bakes and cooling.
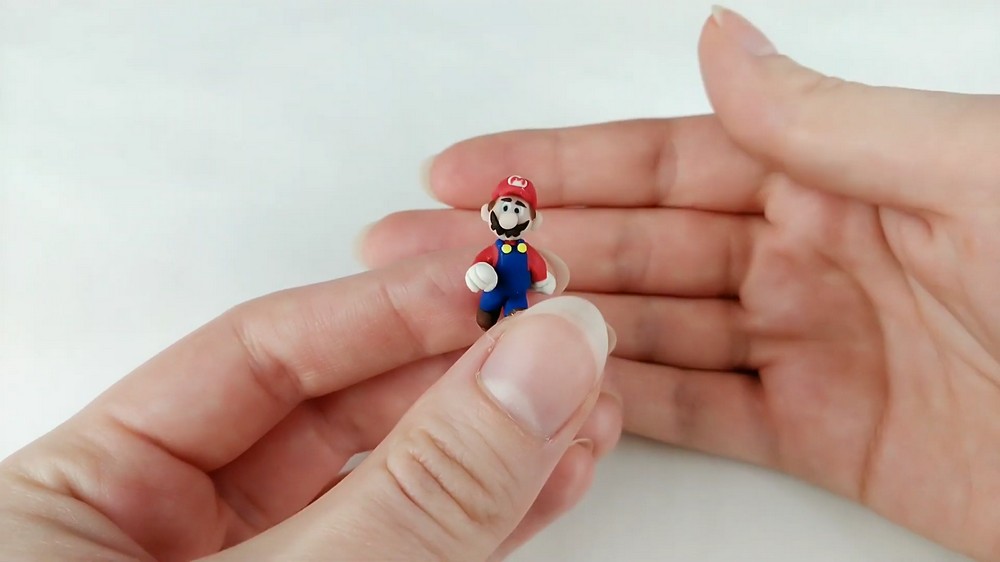
Step 7: Make Mario (Body, Shoes, Gloves, Arms)
- Reference a tutorial if helpful. The video referenced an Artsy Rush tutorial for proportions but adapted for a mini Mario.
- Pre-bake shoes and gloves first so they keep shape when attached to the body later. This prevents small details from flattening.
- Add a wire into the shoe/arm area before baking to strengthen the future connection to the body.
- Roll small blue strips for overall straps and add to body.
- Attach arms and trim to shape; because wires were added earlier it made attachment easier.
- Roll out and make hands carefully. The video author took time to shape hands and was pleased with the result.
- Add yellow buttons to the overalls.
- Use acetone lightly to clean and smooth clay surfaces (be cautious; acetone can affect baked surfaces).
- Insert a piece of wire into the neck area (a short wire peg) so the head can be attached after the head is baked.
- Pre-bake the assembled body (with legs and arms) for ~20 minutes.
Step 8: Make Mario’s Head & Hat
- Indent the head for eyes and nose before adding those elements.
- Fill eye sockets with white clay then add blue and black for iris and pupil respectively.
- Form facial hair and mustache:
- Cut out mustache pieces and adjust size.
- If mustache is too large, trim and reshape.
- Add ears and a thin line for the mouth.
- Poke a hole in the neck area for a peg-wire; pre-bake the head so it’s stable for adding hair/hat.
- Make Mario’s hair/hat:
- Shape hat by forming on a ball/rounded tool the same size as the head for proper curvature.
- Add a white circle and press a red “M” made of red clay (or add by carving after baking).
- Attach a half-circle front visor and blend the edges.
- Place hat on head and press to fit.
- Bake Mario’s head, then connect head to the baked body using the neck peg/wire. If you don’t glue the head down you can keep it slightly movable.
Step 9: Final Baking & Assembly
- After everything is placed and pre-baked as needed, perform a final bake of the scene pieces together for ~20 minutes (as per the video’s final bake length). Again, use manufacturer temperature guidelines.
- Let pieces cool completely before handling—removing tin foil supports after cooling.
- Use super glue to secure any permanent placements (fence, Mario’s body if desired).
- Add final positioning: place the green tube into its hole on the platform, place Mario into position, arrange piranha plants and leaves, and add fence sections.
Easy Finishing Tips
- Smooth small seams with acetone (careful use)! Use a cotton swab with minimal acetone for small smudges.
- Use tiny scraps and a needle tool for eyes and pupils to get clean small dots.
- Prop delicate pieces with tin foil while curing or baking to prevent sagging.
- If teeth or rows break, reattach with liquid Sculpey and rebake carefully in small increments.
- Work cold when shaping tiny details — chilling small parts briefly helps maintain clean edges.
Common Beginner Mistakes
- Not chilling clay before cutting large slabs — leads to rounded/squashed edges.
- Skipping pre-bakes for delicate parts (shoes/hands) that then deform during final assembly.
- Attaching unbaked clay to baked clay without liquid Sculpey — poor adhesion.
- Omitting internal wires for taller/flimsy pieces — increases breakage risk.
- Trying to bend already-baked thin elements (teeth rows) instead of shaping to fit first.
Ways to Personalize It
- Change Mario’s pose or expression.
- Make the platform larger or add more enemies and props from the level (coins, small rocks).
- Paint details after baking for sharper eyes or hat emblem.
- Add varnish or matte sealer to protect and finish surfaces.
- Make “Tiny” and “Huge” variants of the platform to recreate the level gimmick.
Final Reveal
- Remove all tin foil supports once everything is fully baked and cooled.
- Attach the fence and place Mario in his designated spot on the platform.
- Double-check adhesives and wire connections for stability.
- Step back and admire your Super Mario 64 Tiny-Huge Island diorama!