Sculpt a lovely little treat using this DIY Polymer Clay Celeste Cupcake idea, with soft colors, pretty details, and a charming look for your room shelf.
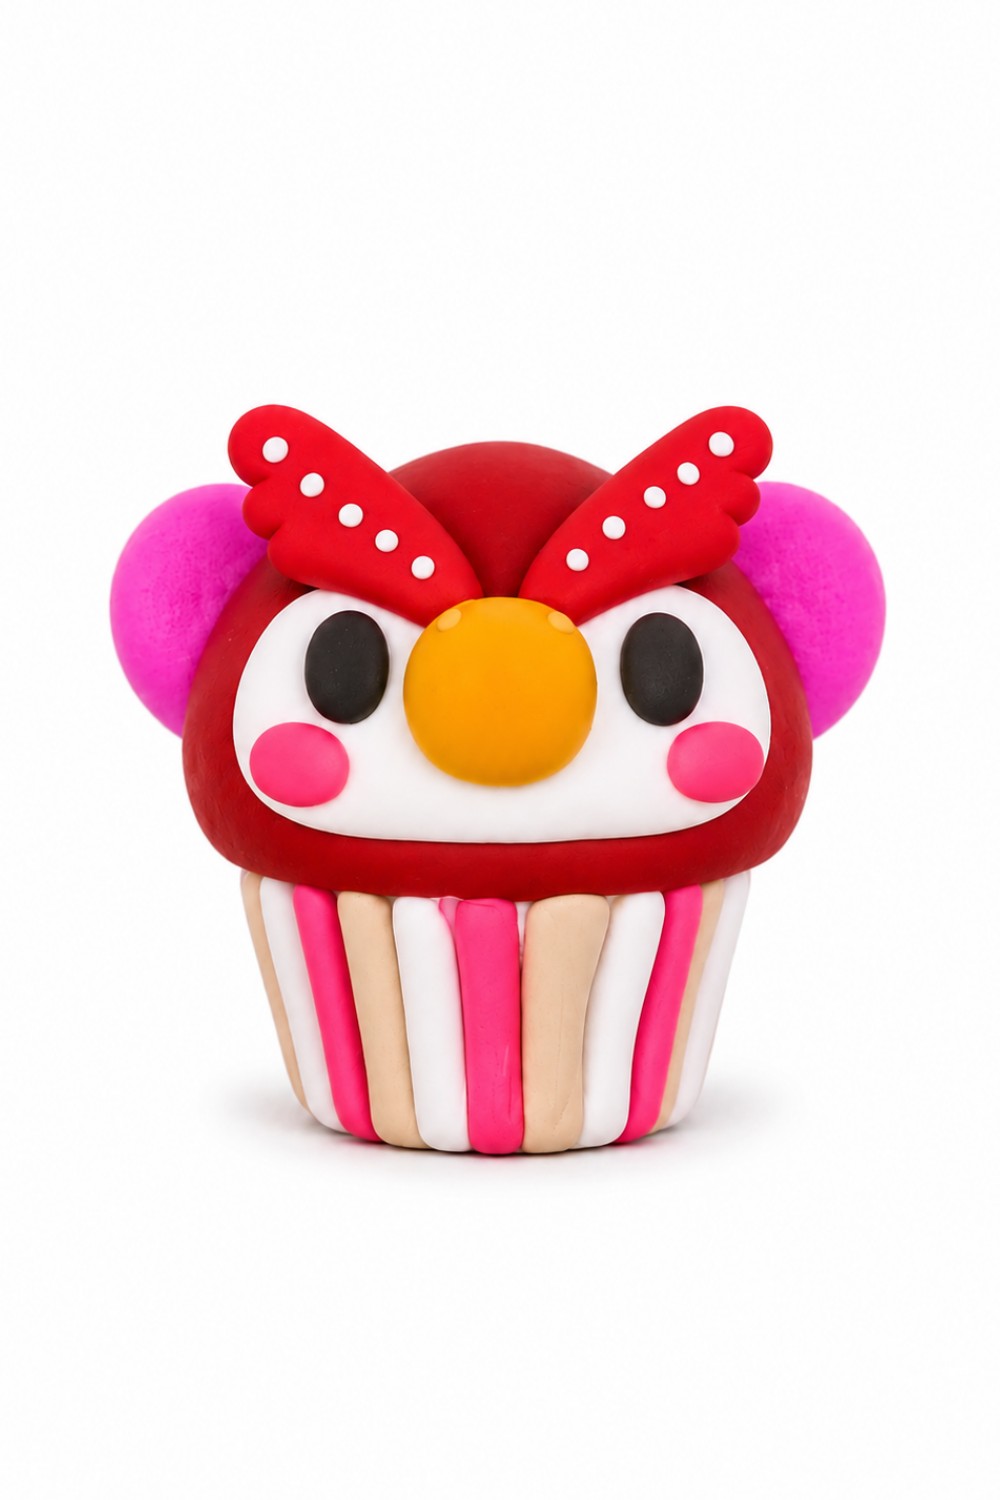
PolymomoTea shares a lovely idea inspired by the beauty of tiny desserts and sweet decorations. DIY Polymer Clay Celeste Cupcake is a cute dessert-inspired model with a soft, rounded appearance and lovely decorative details. Its small size gives it the look of a tiny bakery treat, while the carefully shaped top adds a special touch. The combination of gentle colors and neat finishing makes this miniature attractive without needing too many extra details.
Cute DIY Polymer Clay Celeste Cupcake For Miniature Lovers
One interesting feature is the cupcake's layered appearance. The lower section represents the cake base, while the upper part resembles a generous swirl of frosting. Small decorations can give the top a sweeter look, and gentle lines around the base help show the familiar shape of a cupcake wrapper. These little touches give the model a charming bakery-style finish.
Polymer clay is the main material for this project. Different colors can be shaped into separate sections for the base, frosting, and smaller decorations. The frosting can be formed into soft curves, while the bottom is gently pressed to give it an even shape. Careful placement helps the finished piece look tidy.
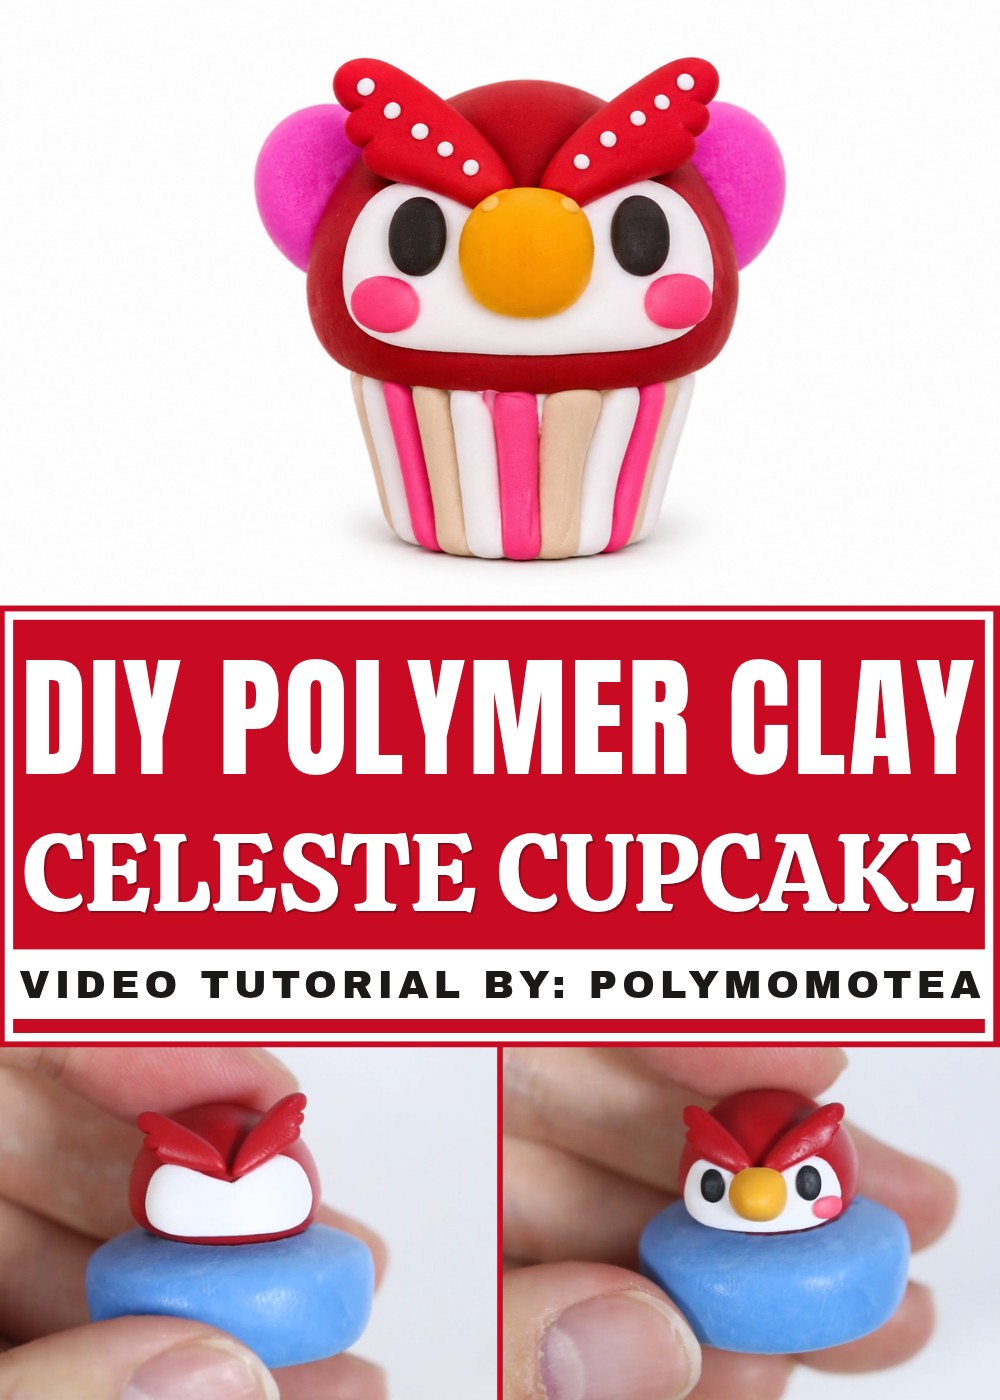
The finished piece has a cheerful appearance that can fit into any small display. Its dessert-inspired shape and delicate details give it a lovely personality, offering a simple way to keep a little bakery-themed decoration at home.
How to Make a Celeste-Inspired Cupcake with Polymer Clay
This tutorial will guide you step-by-step on how to create a Celeste-inspired cupcake using polymer clay. Celeste is a character from the game Animal Crossing and this cute cupcake is perfect for fans who want to craft something fun and starry-themed. This beginner-friendly project covers shaping, detailing, and baking your clay piece.
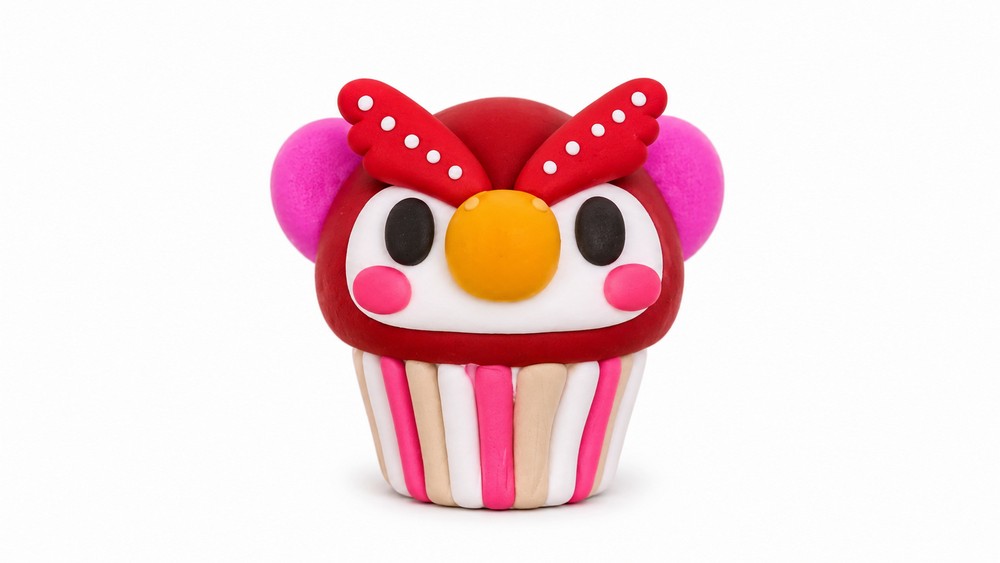
Materials and Tools Needed
- White polymer clay
- Light brown polymer clay
- Pink polymer clay (light pink and darker pink shades)
- Red polymer clay
- Light orange polymer clay
- Black polymer clay
- Polymer clay blade or craft knife
- Wire (small piece, for internal support)
- Cupcake mold (for shaping the cupcake base)
- Baking instructions for your polymer clay brand
- Flat surface for working
Step-by-Step Instructions
1. Prepare the Cupcake Base (Cupcake Liner Effect)
- Take your cupcake mold and set it on your workspace.
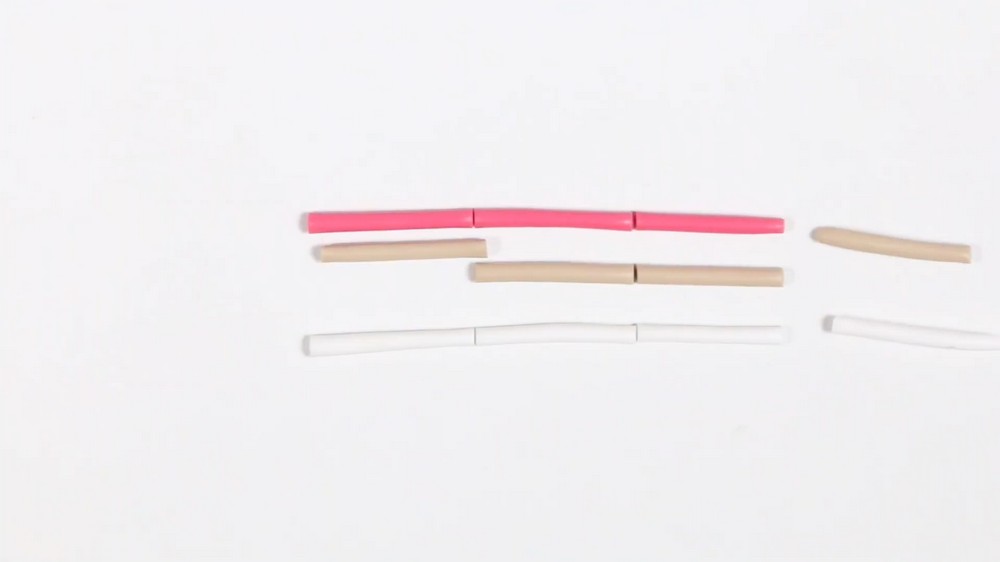
- Roll out white clay into a thin snake shape.
- Cut this white clay snake into small pieces.
- Do the same for light brown and pink clay: roll thin snakes and chop them into small bits.
- Arrange the small pieces in a pattern, alternating between white, light brown, and pink.
- Press these colored pieces around the inside of the cupcake mold to create the look of a cupcake liner. It’s okay if the clay doesn’t exactly fit the mold edges.
- Fill the middle of the mold with plain white clay.
- Flatten the white clay to spread it outward, which will push and spread the liner clay closer to the mold edges.
- Use your blade to carefully cut off any extra clay that goes beyond the cupcake mold.
2. Create the Cupcake Top (Celeste’s Head)
- Take red clay and shape it into a smooth, rounded mound that resembles a cupcake top.
- Insert a small piece of wire into the flattened cupcake base clay; this wire will be used to attach the top part securely.
- Attach the red clay mound on top of the cupcake base using the wire for support.
3. Make Celeste’s Face
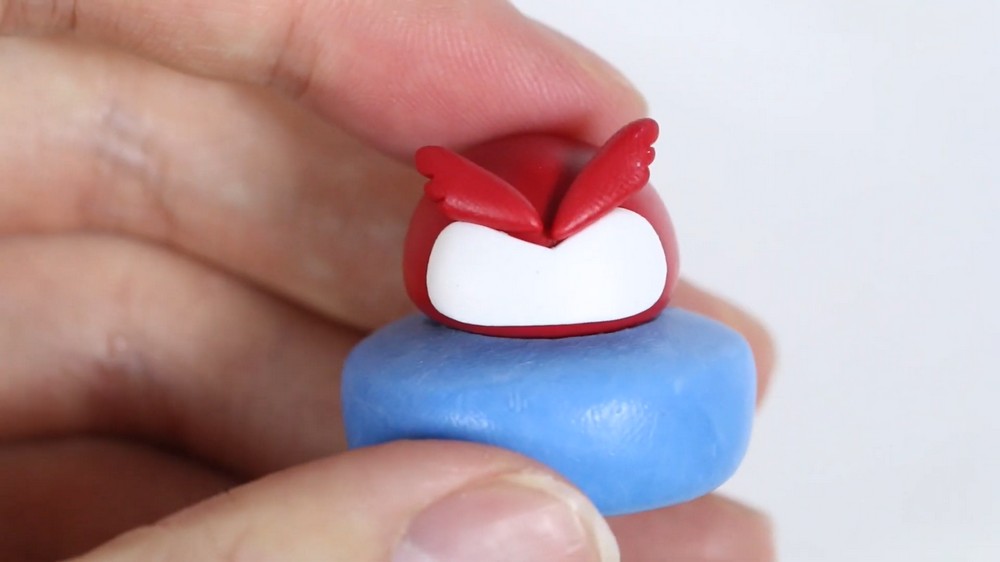
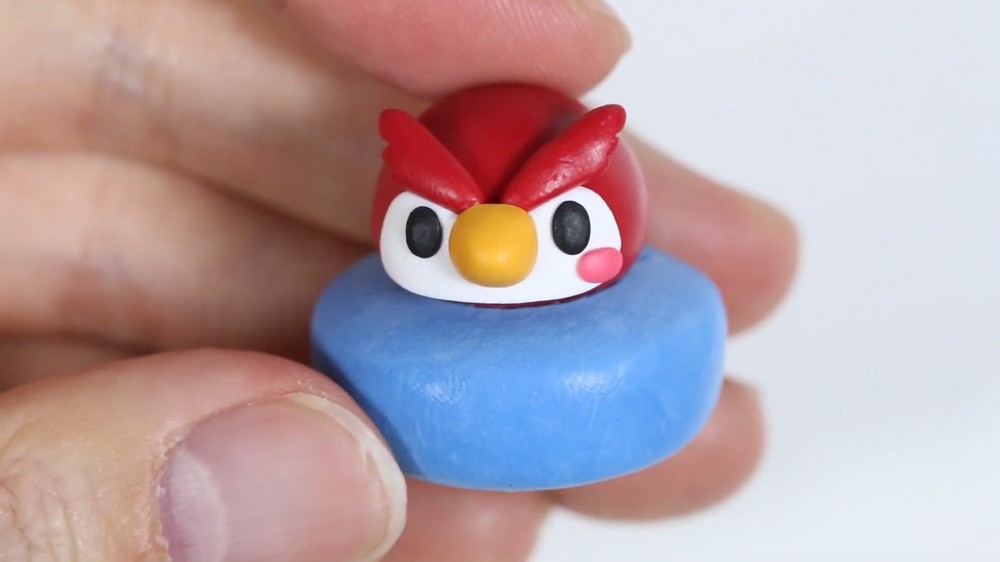
- Flatten a piece of white clay to create Celeste’s mask-like face.
- Using your blade, cut and shape the white clay into a mask shape — a shape that fits the bottom half of the cupcake top.
- Use your fingers to gently round off the edges so it looks smooth and natural.
- Carefully press this face piece onto the bottom half of the red cupcake top.
4. Add Celeste’s Feathery Eyebrows
- Use red clay again, pinch it into a teardrop shape.
- Pinch one end of the teardrop to create a feathery shape.
- To add texture, make three little 'H' marks on the side of each eyebrow using the edge of your blade.
- Attach these eyebrows above the face on the cupcake top.
5. Create the Beak
- Take some light orange clay and shape it into a small cone.
- Trim the tip of the cone to flatten it slightly with your blade.
- Position the beak on the cupcake top where the face and eyebrows meet.
6. Add Facial Details
- Flatten small pieces of black clay into ovals; these will be the eyes.
- Place the black ovals next to the beak.
- Flatten two small oval pieces of pink clay and place them underneath the eyes.
- On each eyebrow, add five tiny white clay dots to enhance the feathery look.
- On the beak, add two small dots of light brown clay for extra detail.
7. Make Celeste’s Iconic Pink Bows
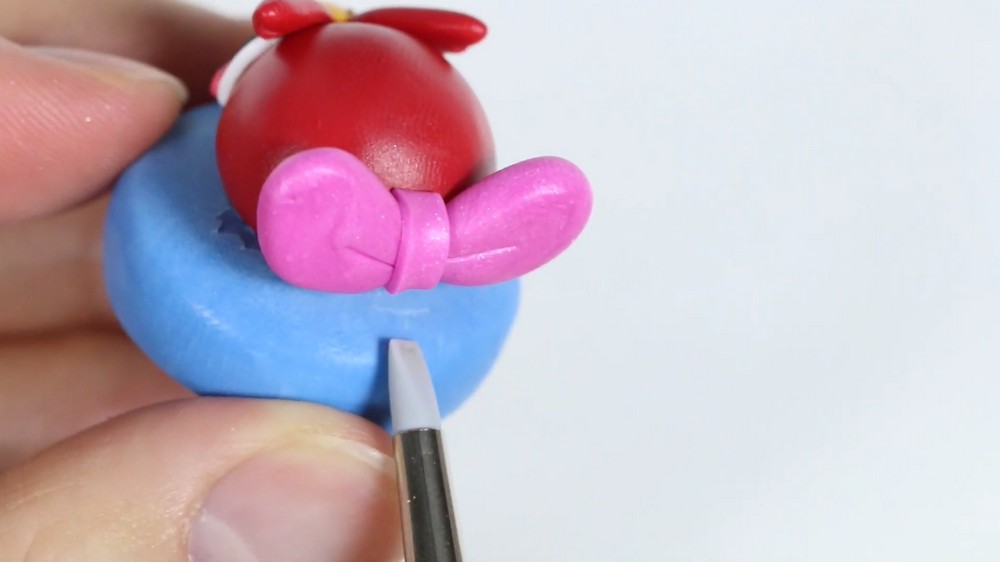
- Use pink clay to create two teardrop shapes that look like butterfly wings.
- Make an indent in the middle of each teardrop shape using the dull side of your blade to add bow texture.
- Cut a rectangular strip from the same pink clay to form the middle knot of the bow.
- Assemble the two bow pieces and wrap the rectangular clay strip around them like a present bow.
- Attach the bows to the cupcake top near the face or wherever desired.
8. Bake Your Clay Creation
- Follow the baking instructions on your polymer clay packaging carefully.
- Place your cupcake in an oven-safe container or baking sheet.
- Bake as directed by the manufacturer to harden your piece.
- After baking, gently remove the cupcake mold from the cupcake base.
Final Notes
- The cupcake liner might not be perfect, but don’t worry — your creation will still look great!
- You now have a lovely Celeste cupcake figurine that can be displayed or given as a gift.
- If you enjoyed this project, consider making more Animal Crossing-themed cupcakes with your favorite characters.