Build a sweet holiday scene using DIY Polymer Clay Reindeer, a tiny animal for gift boxes, mini decorations, and cheerful table settings.
Small holiday decorations can give a home a warm and cheerful feeling, especially when they feature familiar animals with sweet expressions. A little clay figure is a lovely way to decorate a room without needing much space. DIY Polymer Clay Reindeer by PolymomoTea is an adorable Christmas project featuring a small brown body, beautiful antlers, and a friendly face. Its rounded head, tiny legs, and soft cartoon appearance give it a lovely personality. The warm brown color suits the animal's natural look, while the lighter areas around its face and belly provide a gentle contrast.
Cute DIY Polymer Clay Reindeer With Tiny Antlers
The antlers are the most noticeable feature of this little figure. They rise above its head with small branches extending outward. Two pointed ears sit beside them, giving the animal a balanced appearance. Its dark eyes, rounded nose, and little mouth complete the face. A red nose can also give it a fun Rudolph-inspired look.
Brown polymer clay can be used for the main body, with smaller amounts of cream, black, and red clay for the remaining details. The head and body are shaped separately before joining them together. Thin clay pieces form the antlers, while gentle pressing helps attach the ears and facial features.
This little reindeer is suitable for decorating a Christmas table, living room shelf, or bedroom. It can also be placed near a small Christmas tree or given as a sweet holiday present to friends and family.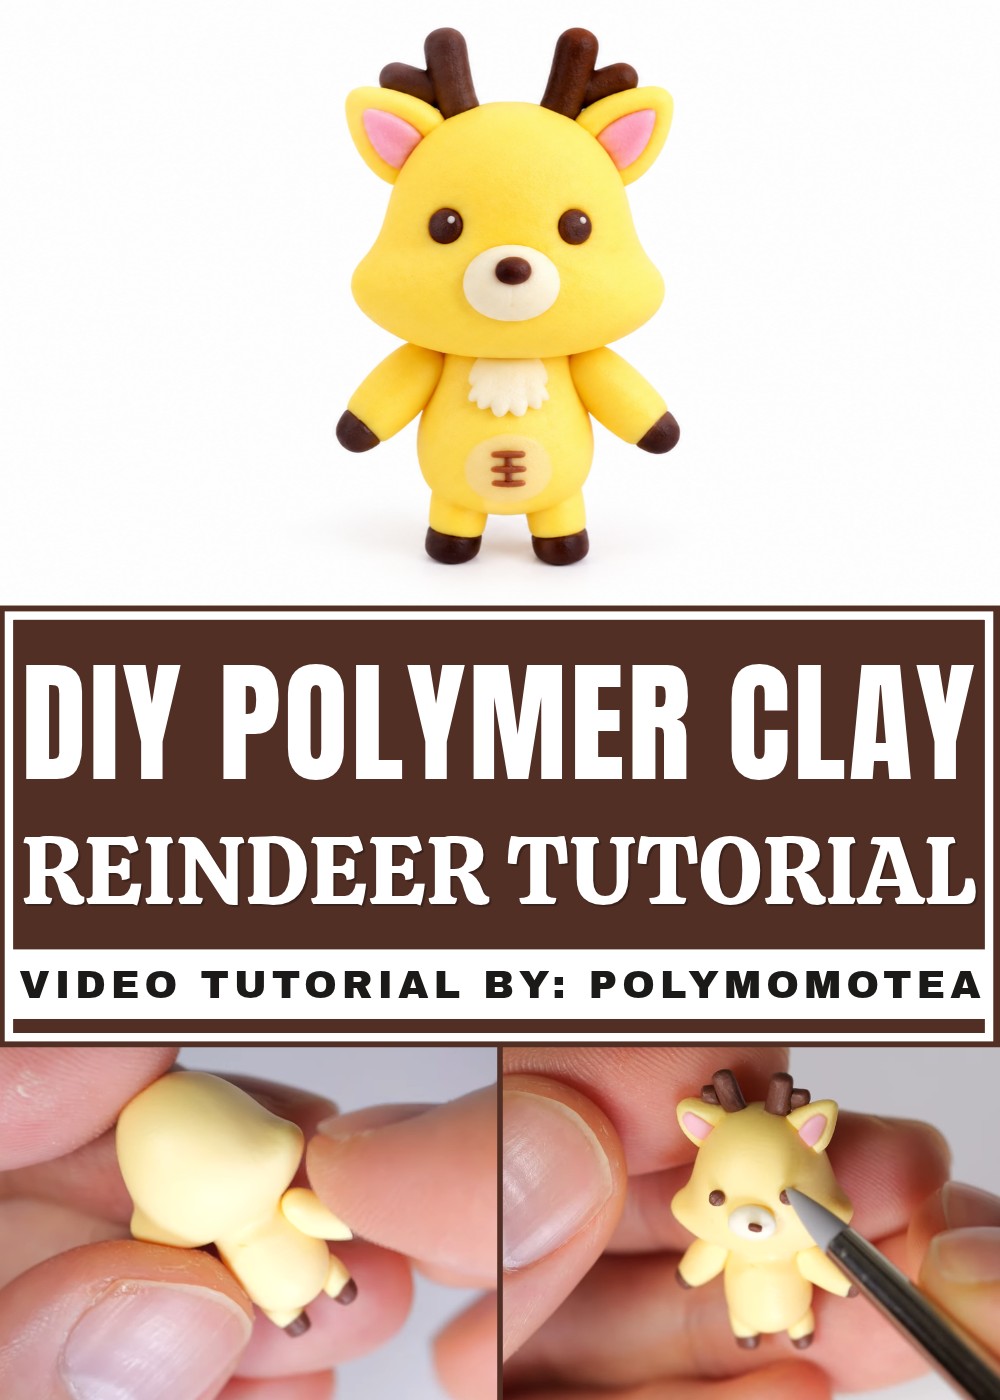
The finished figure has a lovely festive appearance that suits simple home decorations. Its delicate antlers, gentle face, and warm colors give it a special charm. This miniature animal is a nice choice for anyone who loves Christmas decorations and cute clay figures.
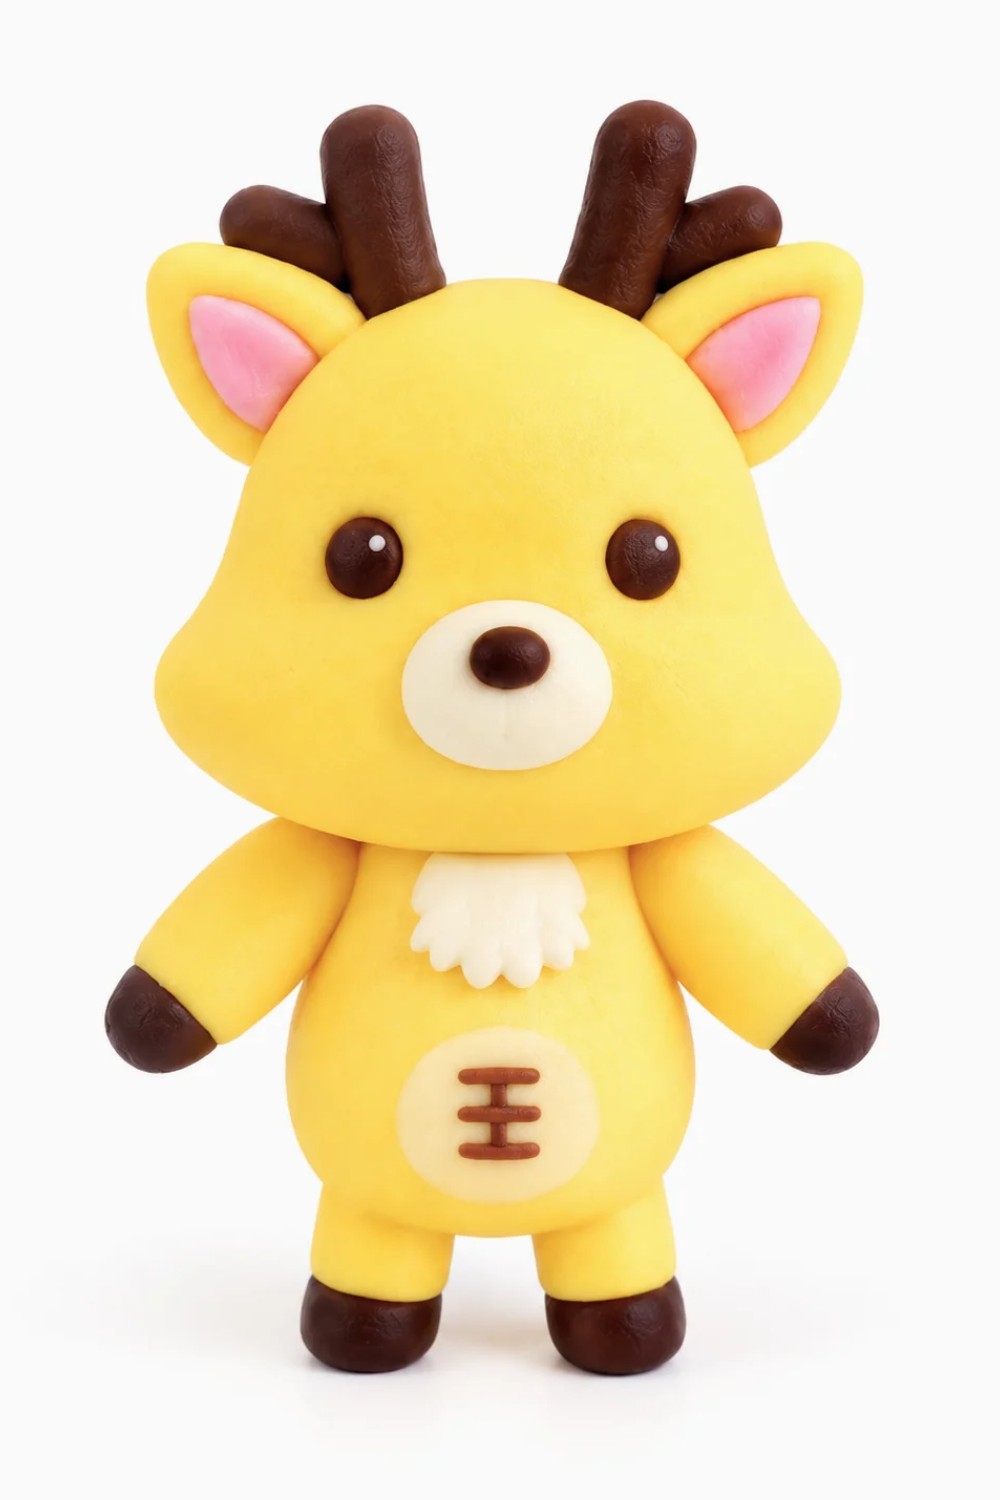
DIY Tutorial: How to Make "Rise's Urak Bomb" Muscular Deer Figurine with Clay
In this simple tutorial, you will learn how to create Rise's Urak Bomb, a charming muscular deer character made with polymer clay. Follow each step carefully using basic clay modeling techniques. This is a great beginner-friendly project!
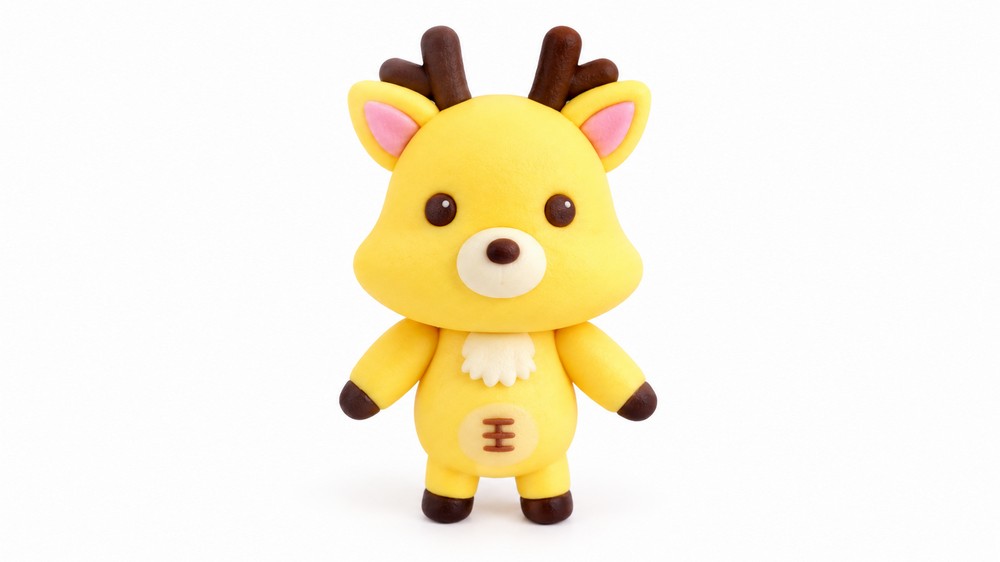
Materials and Tools Needed
- Light yellow polymer clay
- Brown polymer clay
- Pink polymer clay
- White polymer clay
- Needle tool or similar sculpting tool
- Cutting tool or blade for clay
- Workspace mat or surface
Step-by-Step Instructions
1. Creating the Deer’s Face
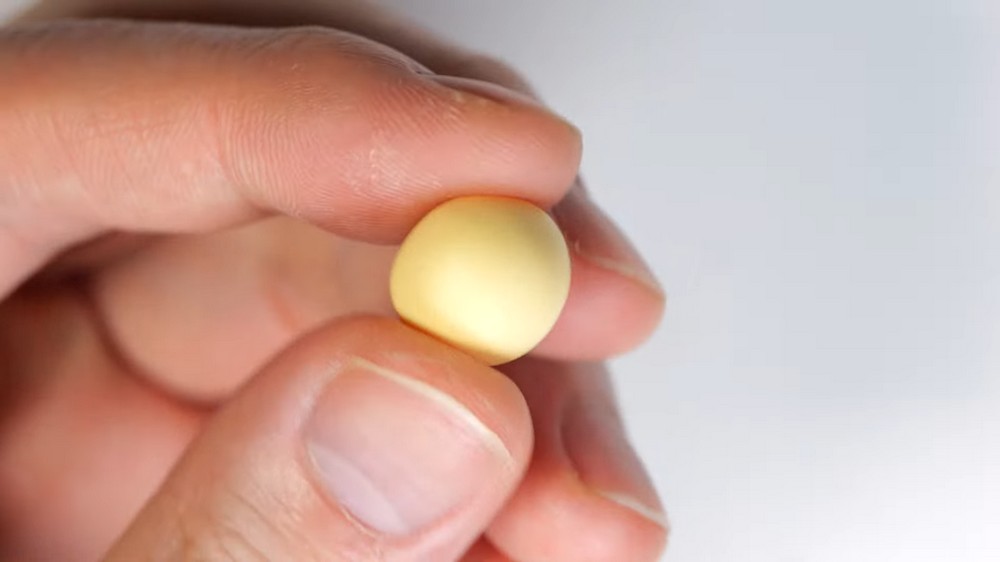
- Take some light yellow clay and flatten it out with your hands or a roller.
- Shape it into a chubby bell shape by gently pinching the ends; this forms the basic shape of the deer’s face.
2. Making the Body
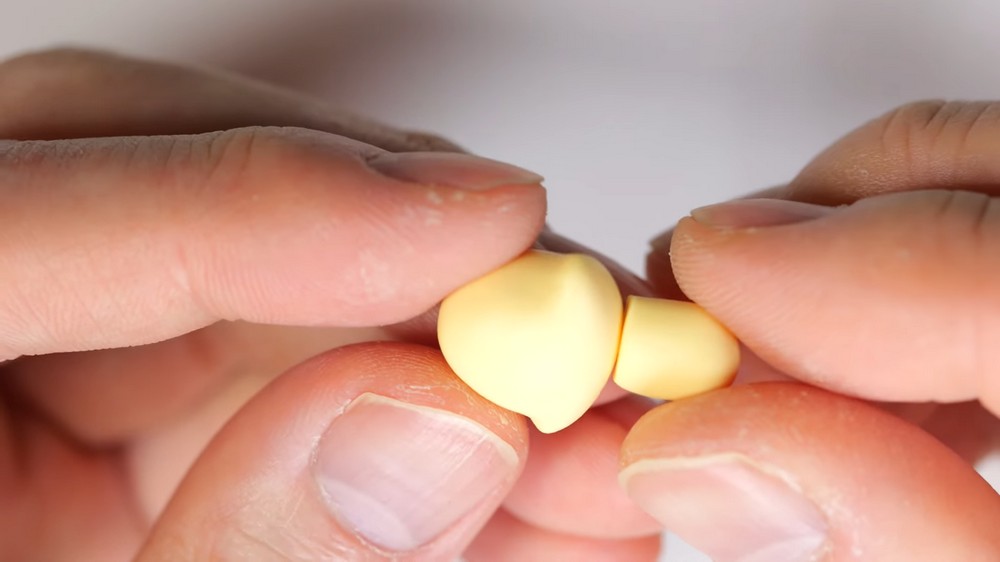
- Roll out more light yellow clay into a cylinder shape.
- Cut off one end of this cylinder to create a clean edge.
- Attach this piece to the bottom of the bell-shaped head to form the body.
- Use your needle tool to blend the pieces together smoothly where they meet.
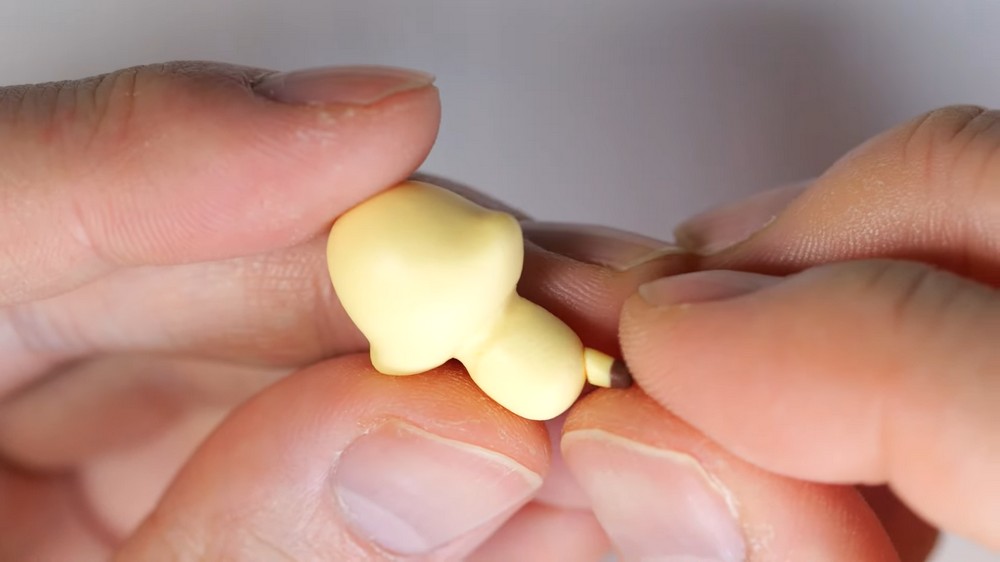
3. Crafting the Feet
- Roll yellow clay into a cylinder shape similar to the body but smaller.
- Cut off the end to make the foot base flat.
- Take brown clay and roll out a smaller cylinder.
- Cut off a small piece from the brown cylinder and attach it to the end of the yellow leg piece.
- Roll both together gently so they blend but keep the two-color distinction visible.
- Cut the end of the leg at a slant, mimicking a hoof shape.
- Make two of these legs and place them at the bottom of the body.
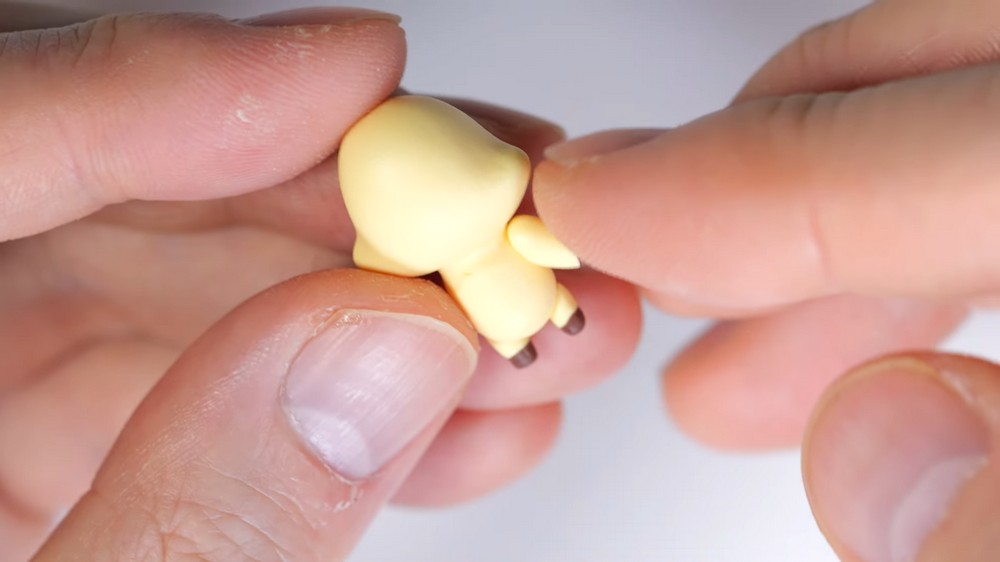
4. Forming the Muscular Arms
- Roll yellow clay into a teardrop shape.
- Cut off the pointed end to flatten slightly.
- Repeat the same with brown clay, rolling it into a small teardrop and cutting the end as well.
- Attach the brown piece to the yellow “arm” piece and roll together to blend edges but keep color distinction.
- Cut the arm piece at a slant to give a more dynamic, muscular look.
- Attach these arms to the sides of the body.
5. Shaping the Ears
- Pinch two pieces of yellow clay into flattened triangle shapes to make ears.
- Roll small pieces of pink clay into even smaller triangles for the inner ear details.
- Cut the ends for a neat edge and attach the pink triangles to the yellow ones.
- Place the completed ears on each side of the head, slightly angled outward.
6. Adding the Antlers
- Roll brown clay into two snake-like pieces: one slightly long, and one shorter.
- Cut the ends of these pieces at a slant for smooth edges.
- Blend each piece where needed to shape the antlers.
- Attach the antlers to the tops of the ears on both sides.
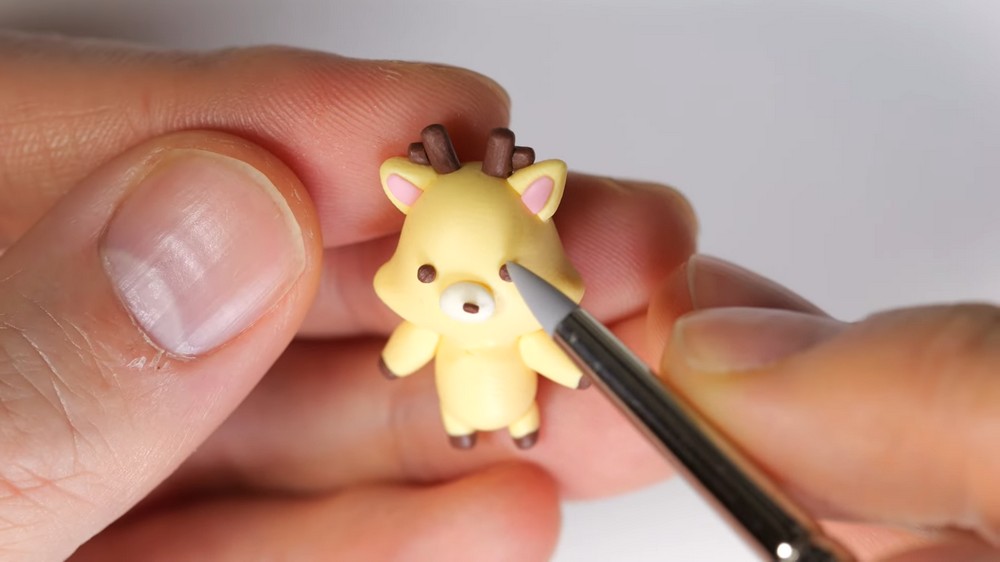
7. Detailing the Face
- Place a white oval shape on the bottom front of the face for the snout.
- On top of this, add a small brown oval for the nose.
- Create two small black dots for the eyes and place them appropriately above the snout.
- Add a small tuft of white clay using a zigzag pattern to represent fur texture near the snout.
8. Creating the Muscular Abs
- Use your needle tool to make a vertical line down the center of the body area.
- Add three small intersecting horizontal lines across this vertical line to depict the deer’s muscular abs.
9. Finishing Touch — The Tail
- Roll out light yellow clay into an oval shape.
- Cut one end of the oval at a slant to soften the form.
- Attach the tail to the back side of the deer’s body.
Final Notes
- Take your time blending and shaping each part to ensure smooth joins and attractive detail.
- This sculpted deer is a unique character and the fifth character made in this series.
- Have fun and enjoy building your own muscular deer figurine!