Try this DIY Polymer Clay Turtle idea for a lovely little animal figure with a round shell, tiny legs, and sweet details for gifts and home decoration.
Drawings In Action presents a delightful animal idea inspired by the slow and peaceful life of turtles. This small clay project shows how a familiar creature can become a lovely decoration with a few colorful details and simple shapes.
Lovely Handmade Gift Ideas With DIY Polymer Clay Turtle
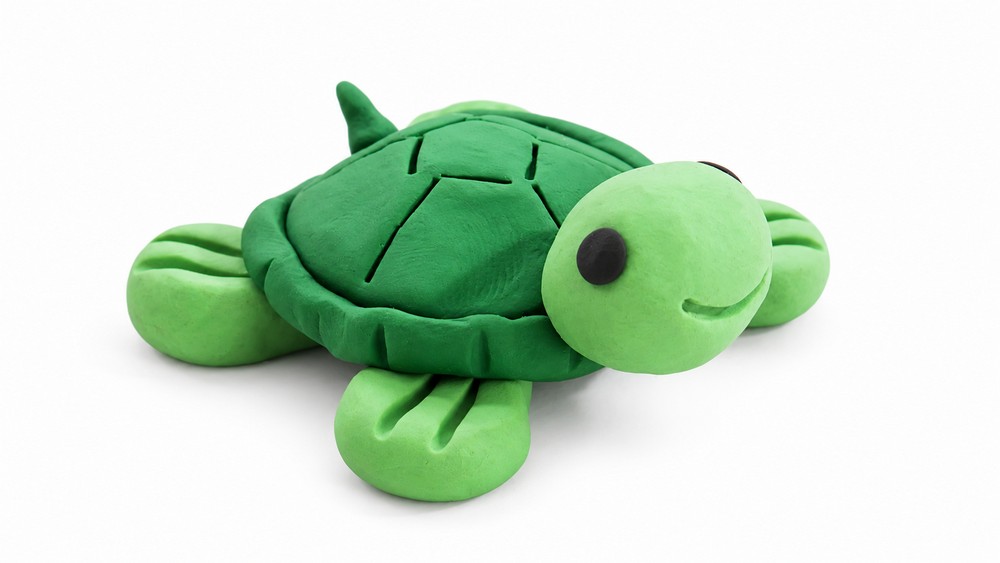
DIY Polymer Clay Turtle features a beautiful rounded shell, a small head, four little legs, and a short tail. Its most attractive feature is the hard-looking shell that covers the upper body. The green skin, wide eyes, and tiny smiling mouth give this miniature animal an innocent and happy expression.
The shell has a slightly raised shape with small sections that resemble natural turtle markings. Different shades of green or brown can help these sections stand out. Its short legs spread gently around the body, while the head extends from the front. These features give the turtle a familiar appearance without needing complicated details.

This turtle is a lovely choice for home decoration, a study table, or a bedroom shelf. You can also give it as a small birthday gift to someone who likes animals.
The finished figure has a calm and friendly look that suits its gentle nature. Its colorful shell and tiny features turn this simple clay project into a sweet animal keepsake.
How to Make a Cute Plasticine Turtle: A Simple Step-by-Step Tutorial
Today we’re going to have fun making a plasticine turtle. This easy and creative project uses just a few colors of plasticine and simple shaping techniques to create a charming little turtle figurine. Follow along step by step, and soon you’ll have your very own turtle!
Materials and Tools Needed
- Plasticine in three colors:
- Light green
- Dark green
- Black
- A table or flat surface for shaping
- A toothpick
- A pencil or any pointed tool (for drawing details)
- Scissors (optional, for trimming)
Step-by-Step Instructions
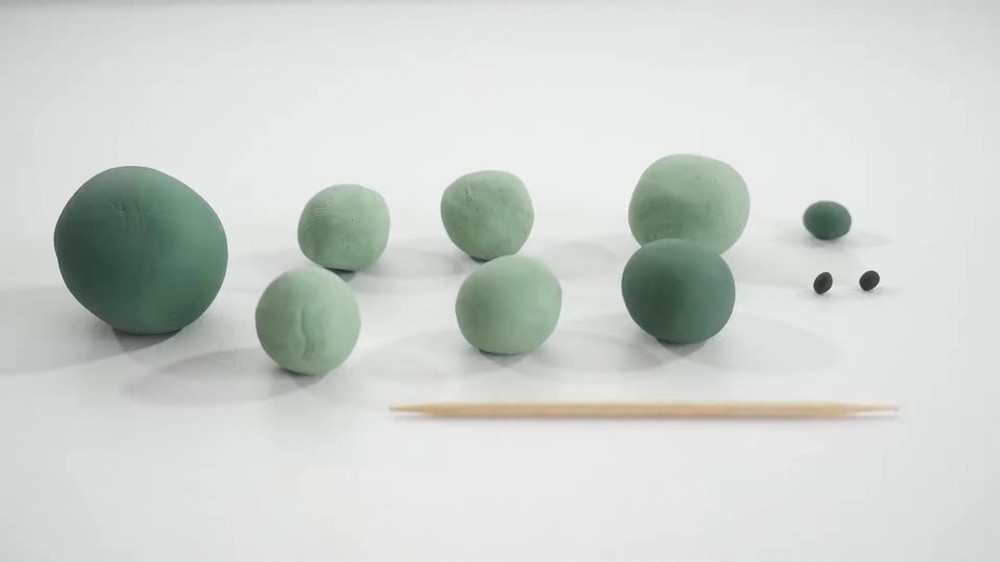
1. Prepare the Plasticine Balls
- Roll the light green, dark green, and black plasticine into small balls.
- Make several balls in different sizes — you will see exactly how big each ball should be on screen (or roughly, make a largest light green ball for the shell, some medium balls for legs, and smaller ones for eyes and decoration).
2. Make the Turtle’s Shell
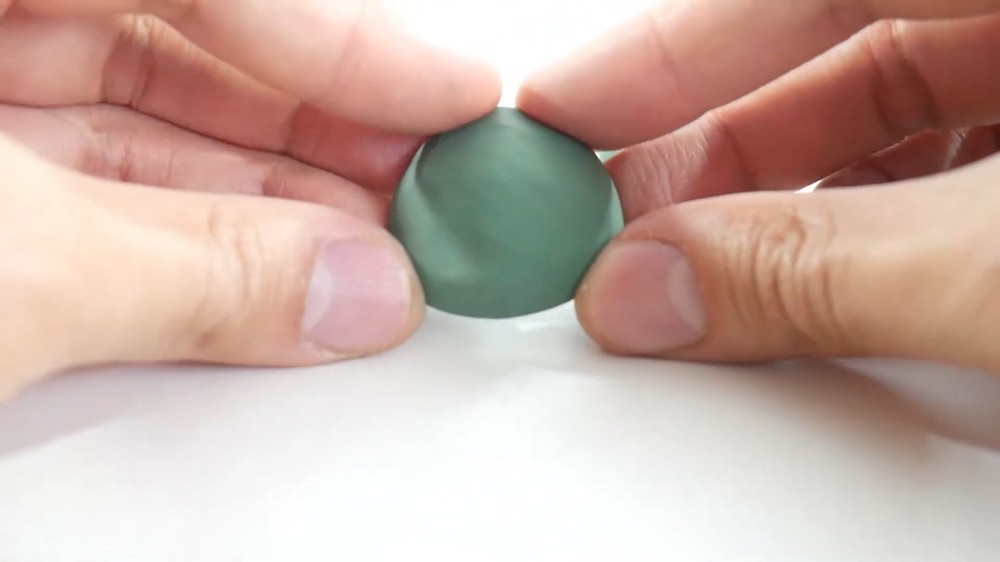
- Take the biggest light green ball.
- Squish one side against the table, forming a dome shape — this will be the turtle’s shell.
- The shape should look like a little green dome resting on its flat side.
3. Create the Border Around the Shell
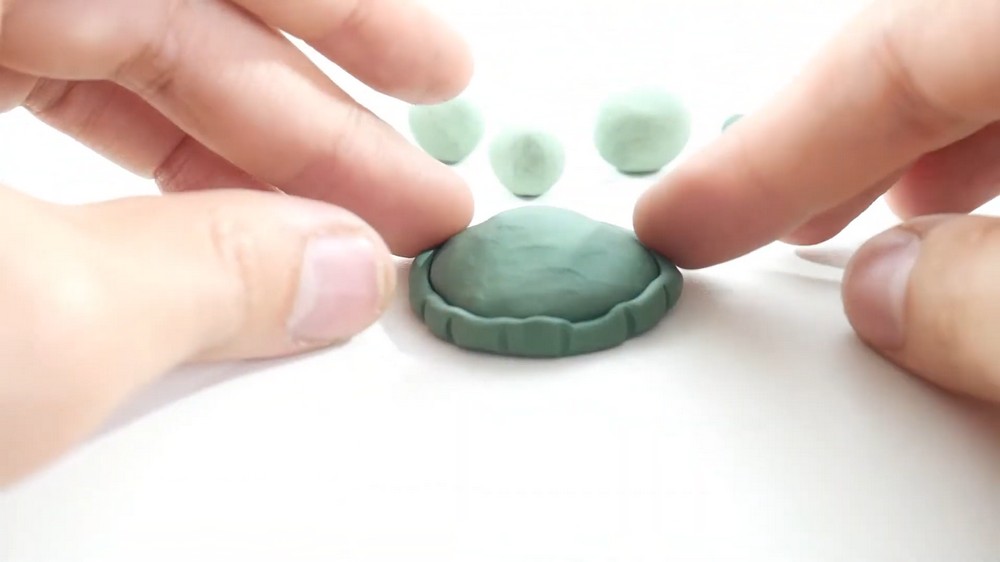
- Take another green ball (same or slightly smaller).
- Roll it on the table until it becomes a long, thin strip.
- This strip will go all around the edge of the turtle’s shell like a rim.
- Wrap it carefully around the dome shape.
- If the strip is too long, trim it with scissors or by pinching off the extra.
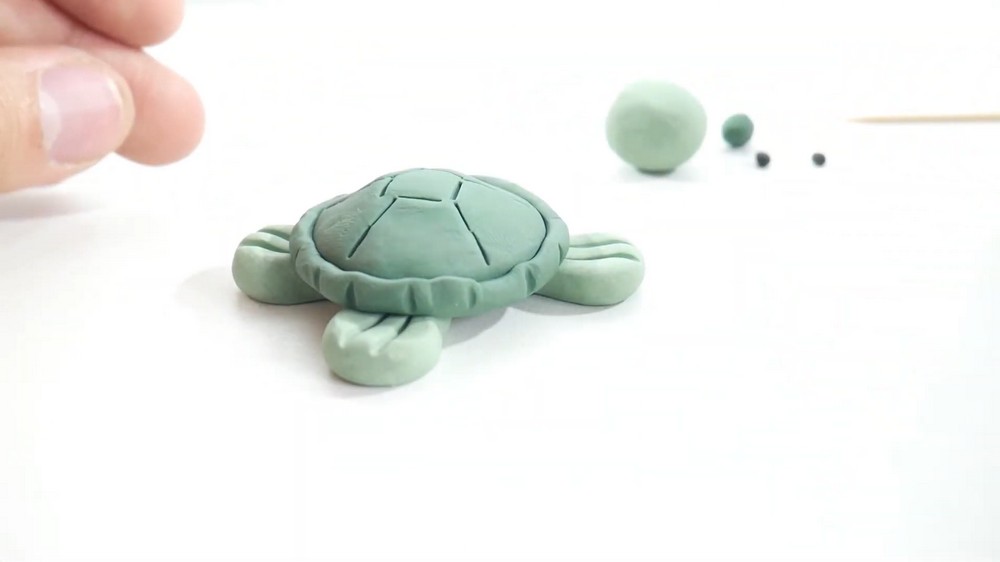
4. Decorate the Shell
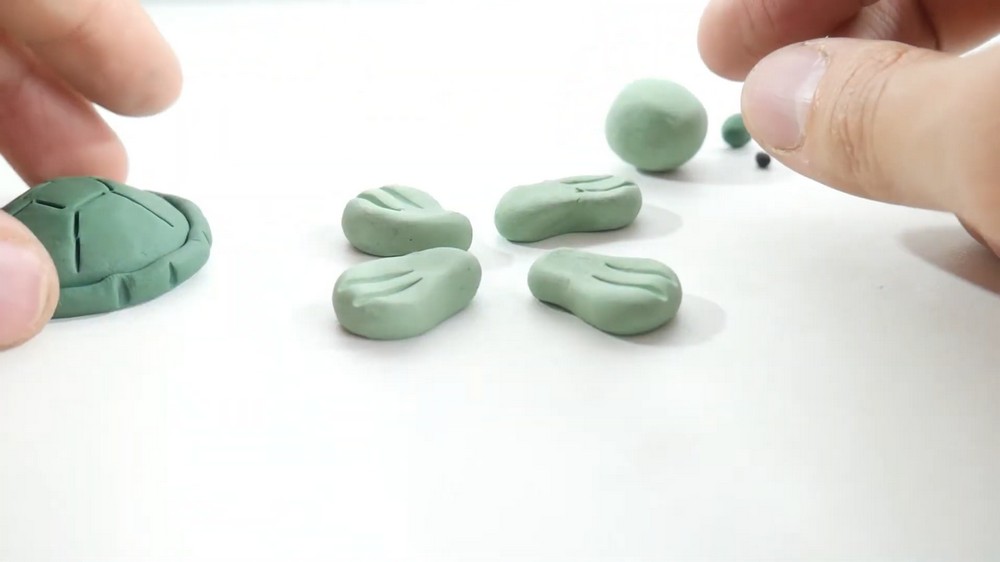
- Use a pencil or any sharp tool to draw lines on the shell:
- First, draw a pentagon shape in the center.
- Then, draw lines from each corner of the pentagon radiating outwards, creating a star-like pattern.
- These details will make the shell look realistic and decorative!
5. Make the Turtle’s Legs
- Take light green plasticine.
- Make four identical shapes that look like flat pears — these will be the turtle’s feet.
- On each leg, use the pencil or tool to add two lines at the top for decoration.
- Position the legs under the shell:
- Two legs at the front
- Two legs at the back
- Press gently to attach the legs to the shell.
6. Craft the Turtle’s Head
- Take the last light green plasticine ball.
- Add two small dark green balls to the head for the eyes.
- Use the pencil or tool to draw a big, happy smile on the head.
- Set the head aside for the moment.
7. Make the Turtle’s Tail
- Take some dark green plasticine.
- Shape it into a tiny cone.
- Attach this cone at the back of the shell — this will be the turtle’s tail.
8. Attach the Head to the Body
- Place the head in front of the shell.
- Use a toothpick to connect the head firmly to the shell. The toothpick acts like an internal support to keep the head from falling off.
- Push gently but firmly to secure.
Final Result
- You now have a cute and easy plasticine turtle with a decorated shell, four legs, a cheerful face, and a tail!
- Your turtle looks happy and ready to explore.
Tips for Best Results
- Keep your workspace clean to avoid dust sticking to the plasticine.
- You can press shapes gently for smoother joins.
- Use the pencil/tool lightly when drawing lines to avoid breaking the plasticine's surface.
- Trim extra plasticine strips or unwanted bits carefully for neatness.

Enjoy your turtle creation! This plasticine project is simple, fun, and perfect for beginners. Keep practicing to improve your shaping and decorating skills. If you like this tutorial, consider exploring more plasticine or drawing projects.